

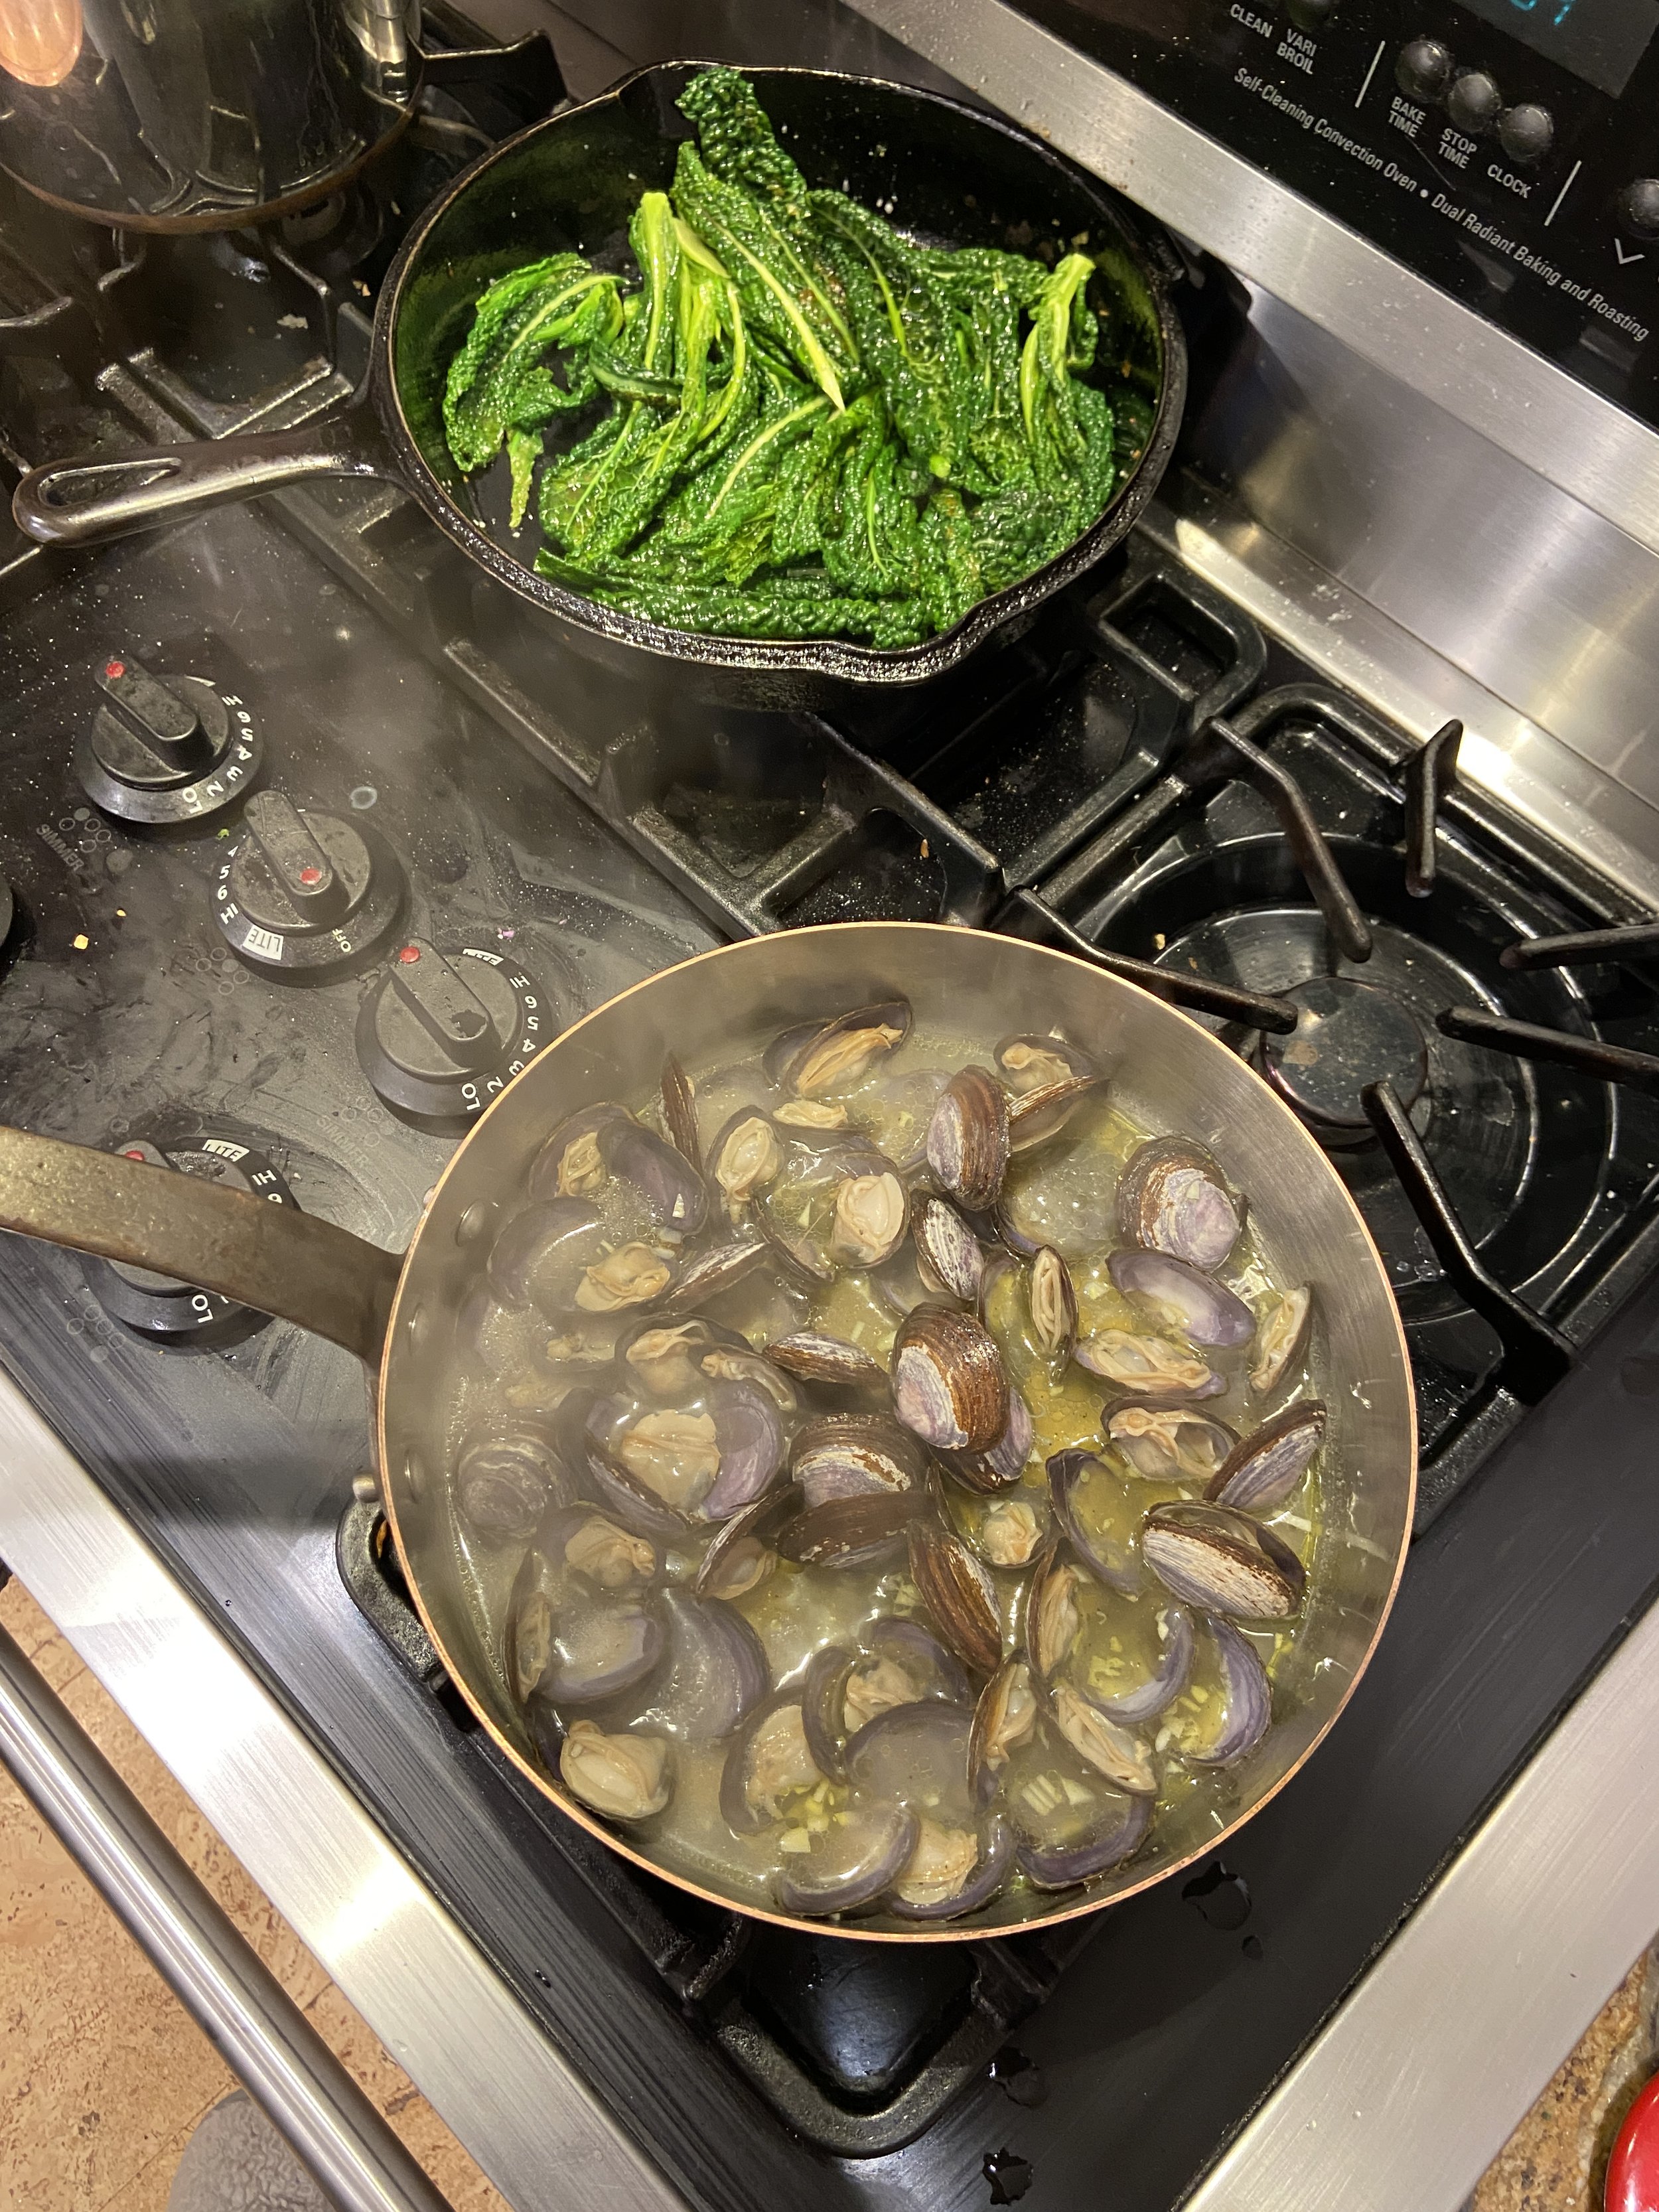
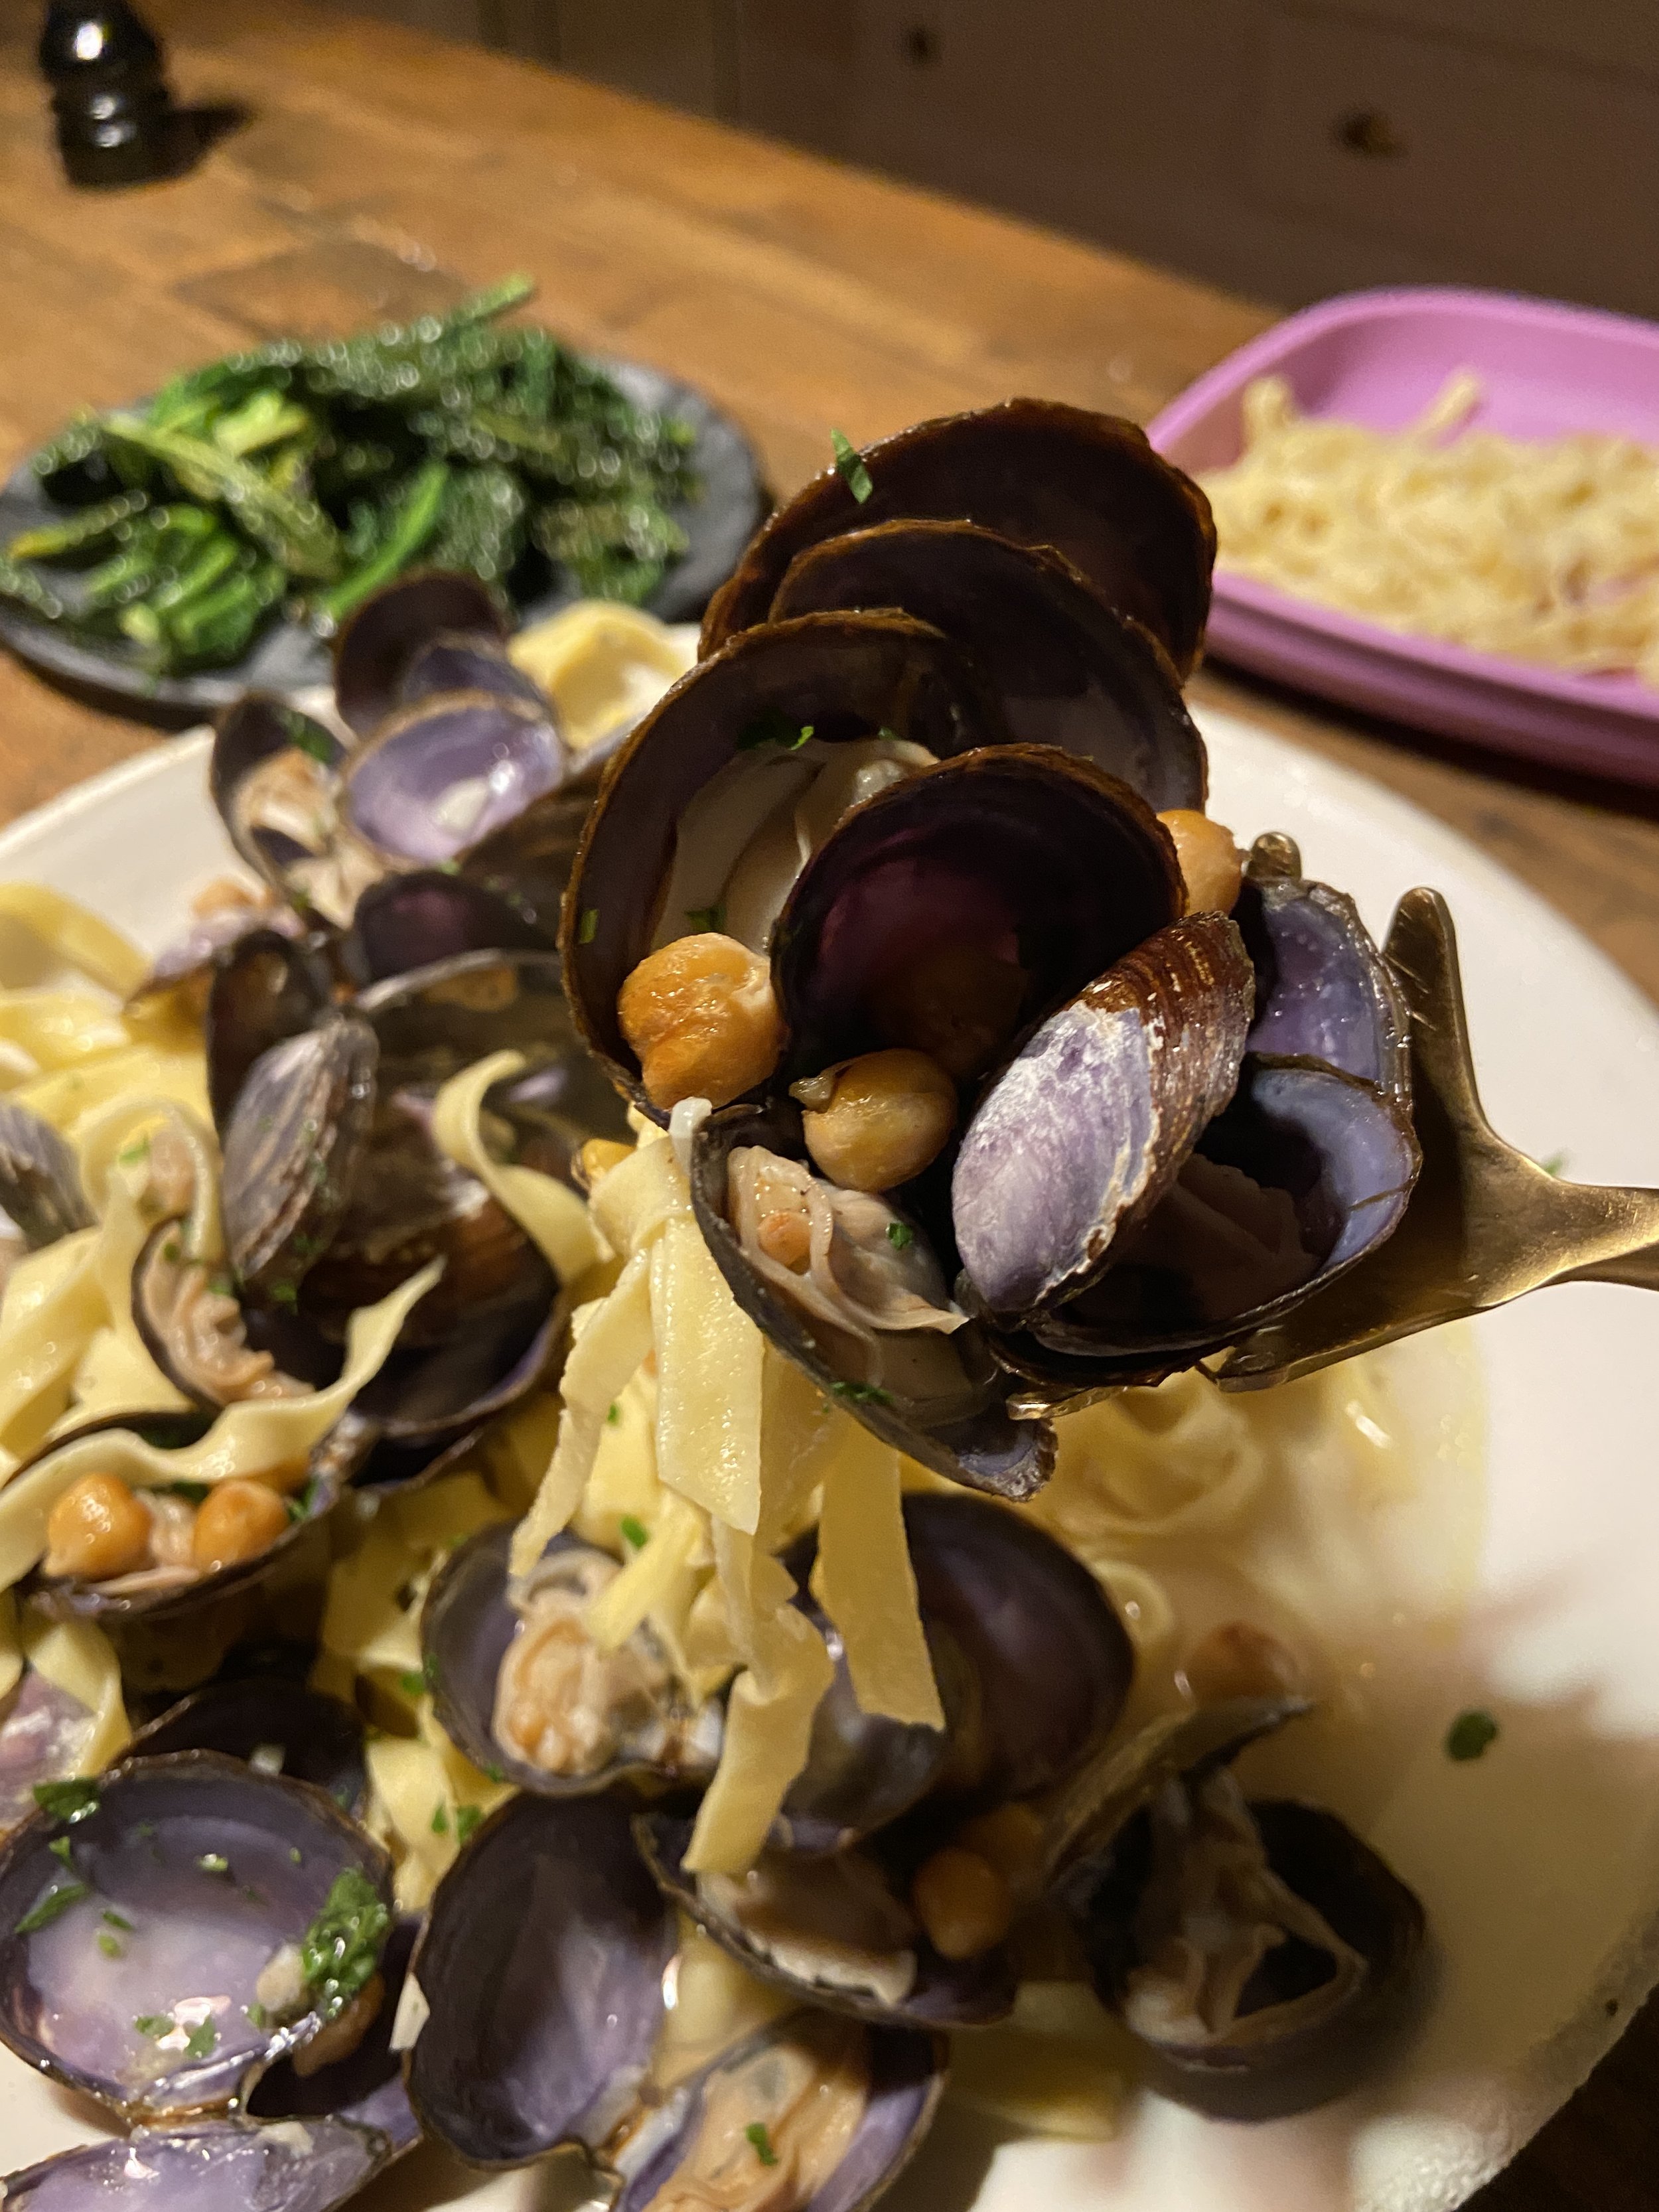
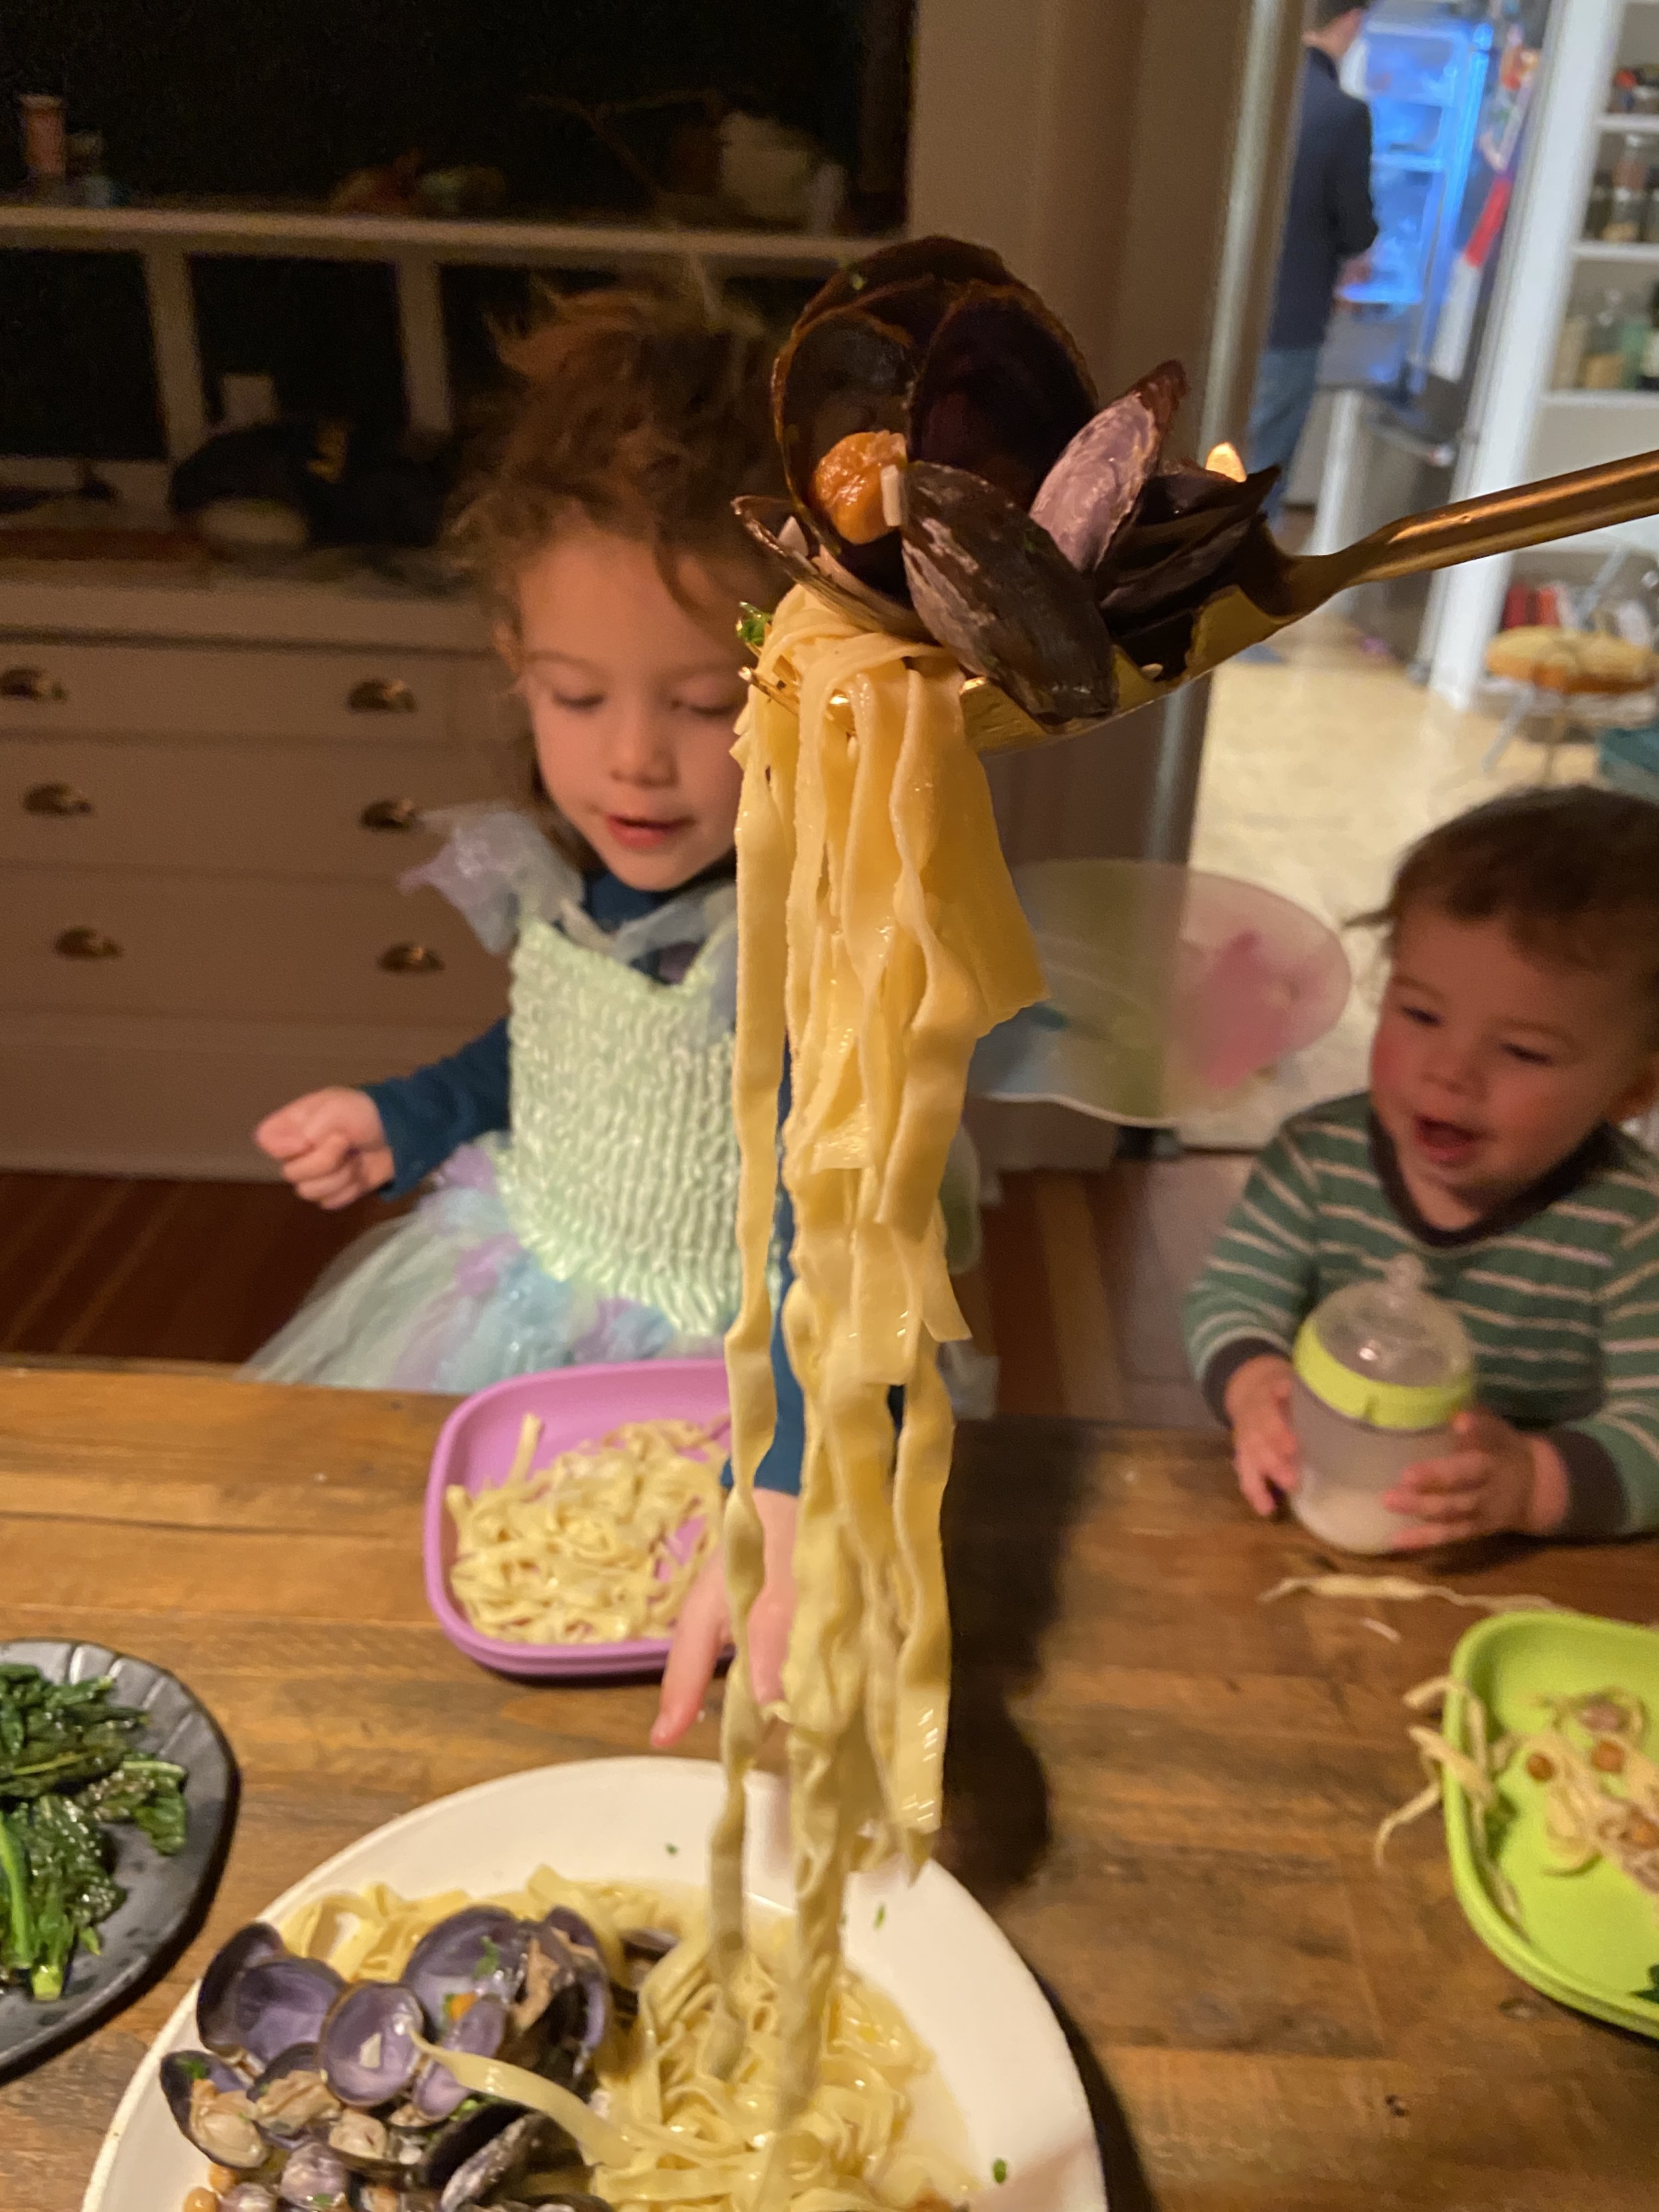
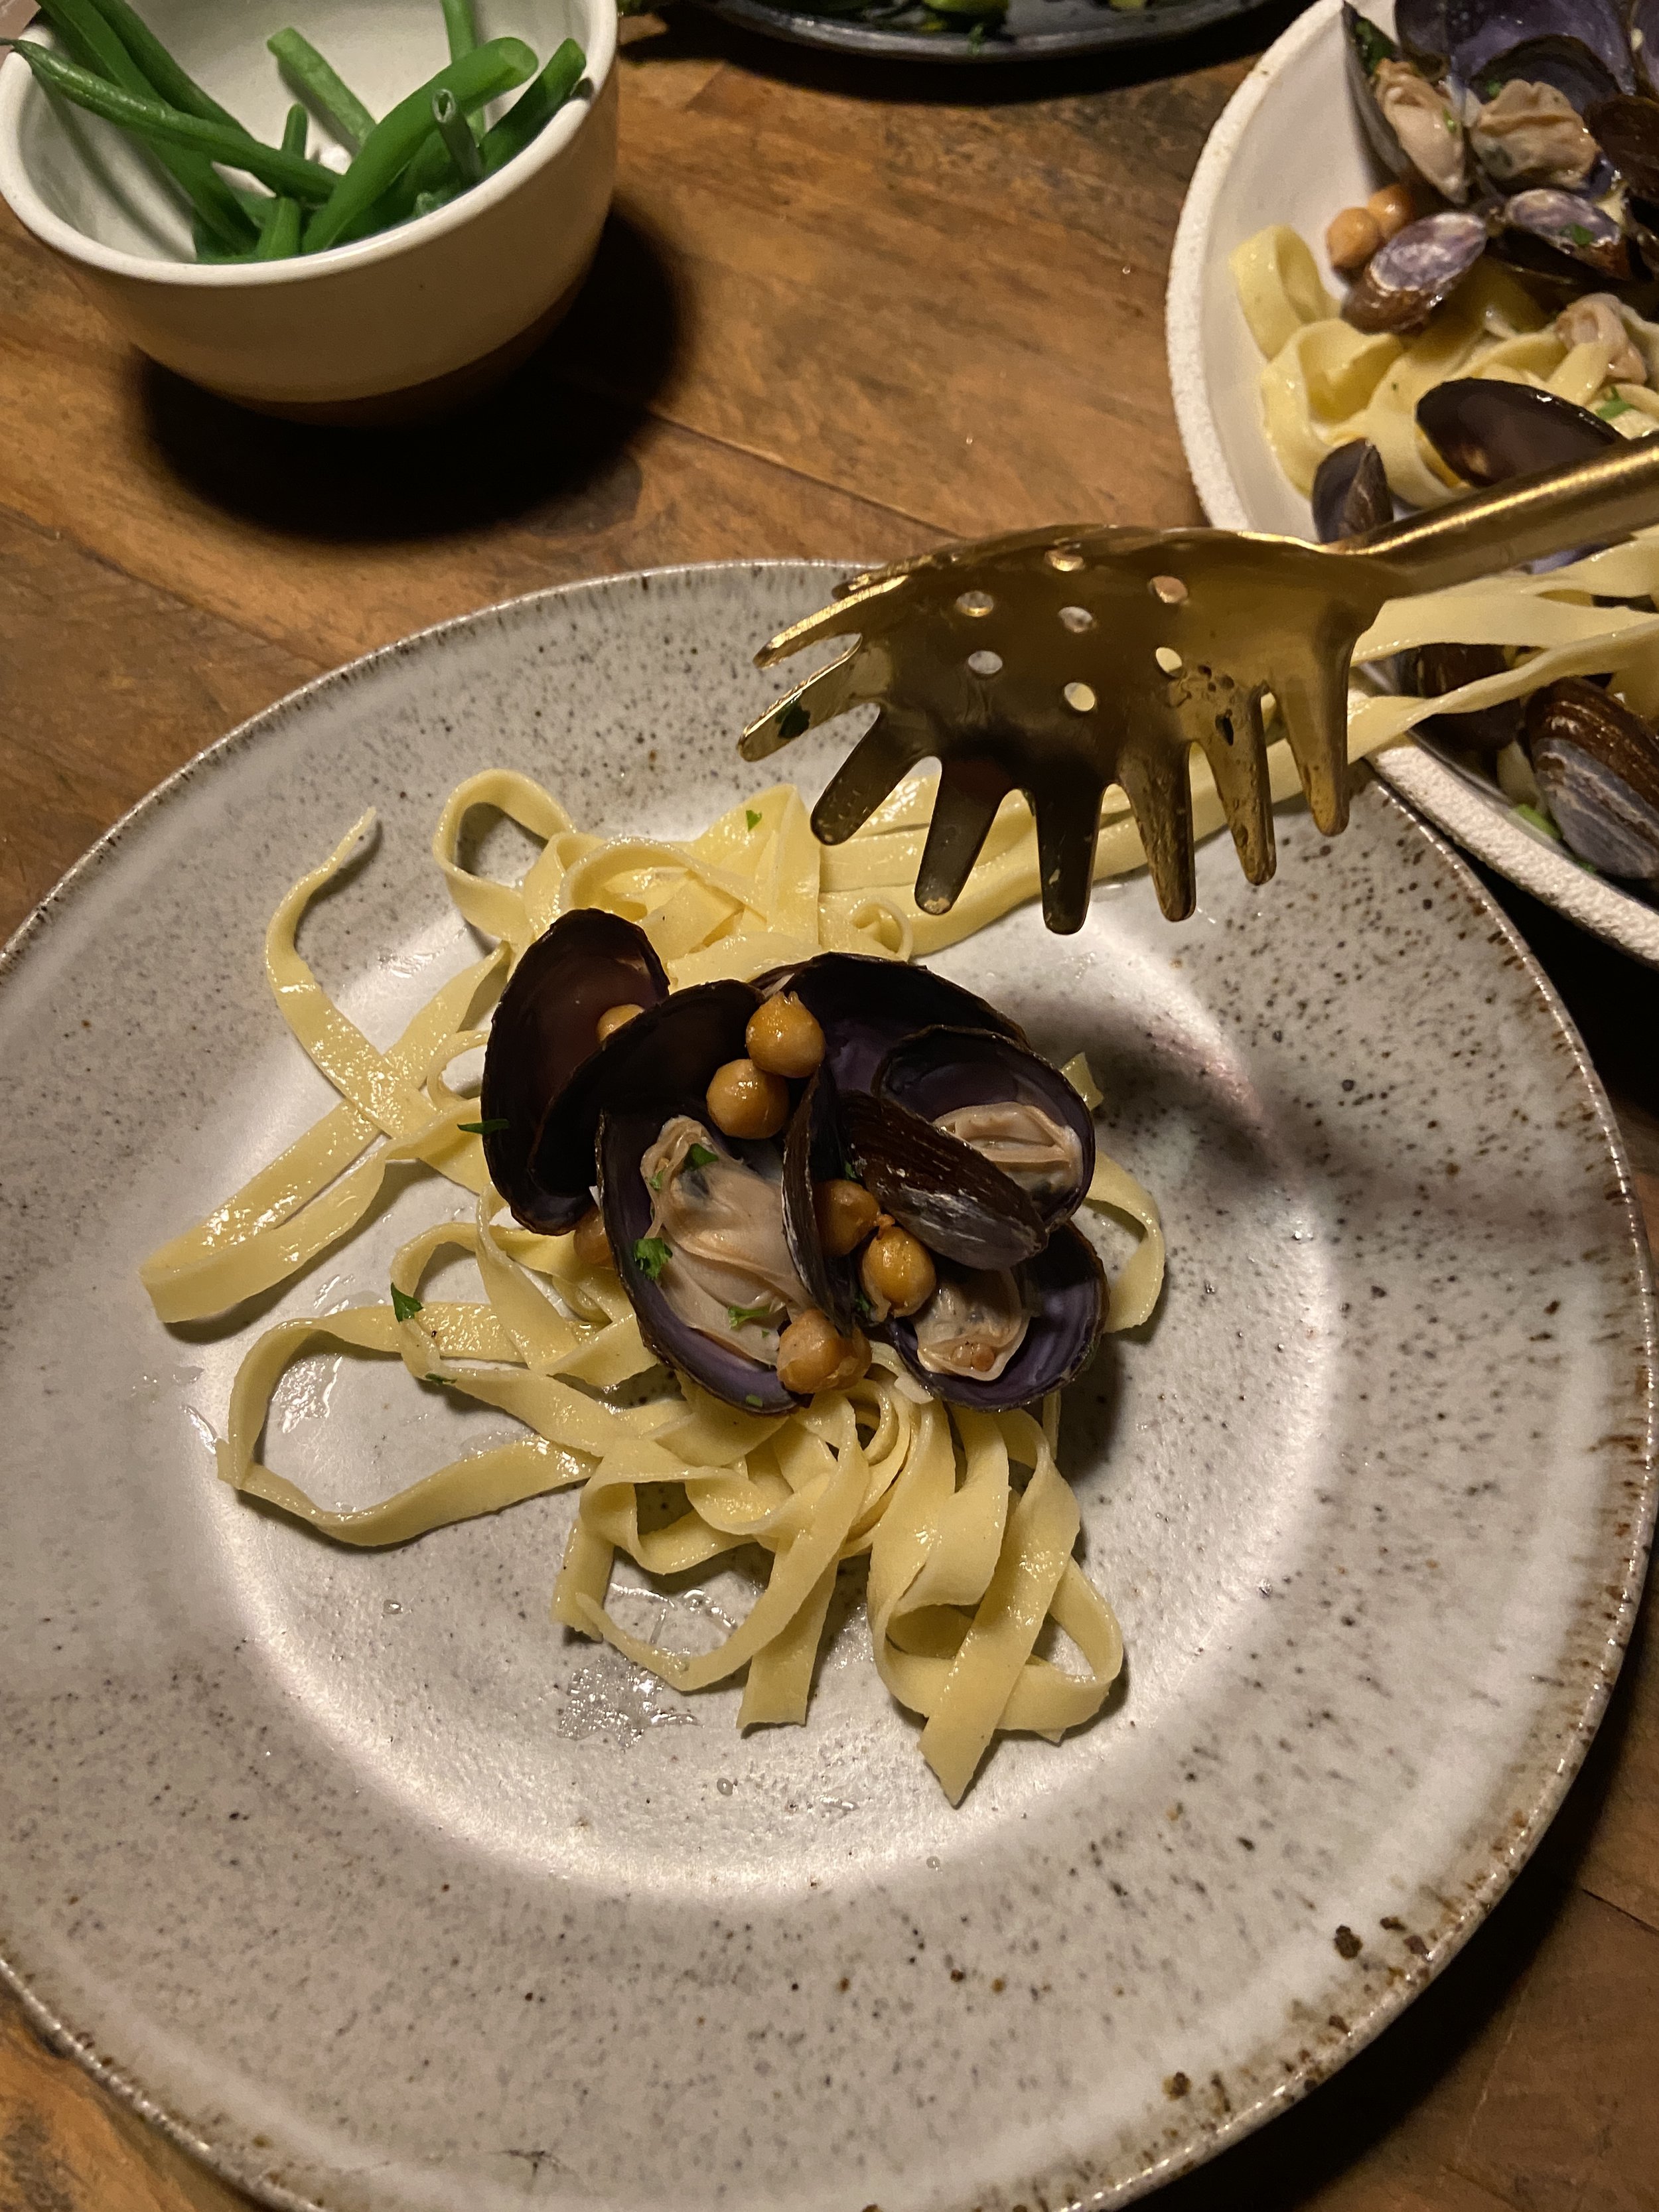
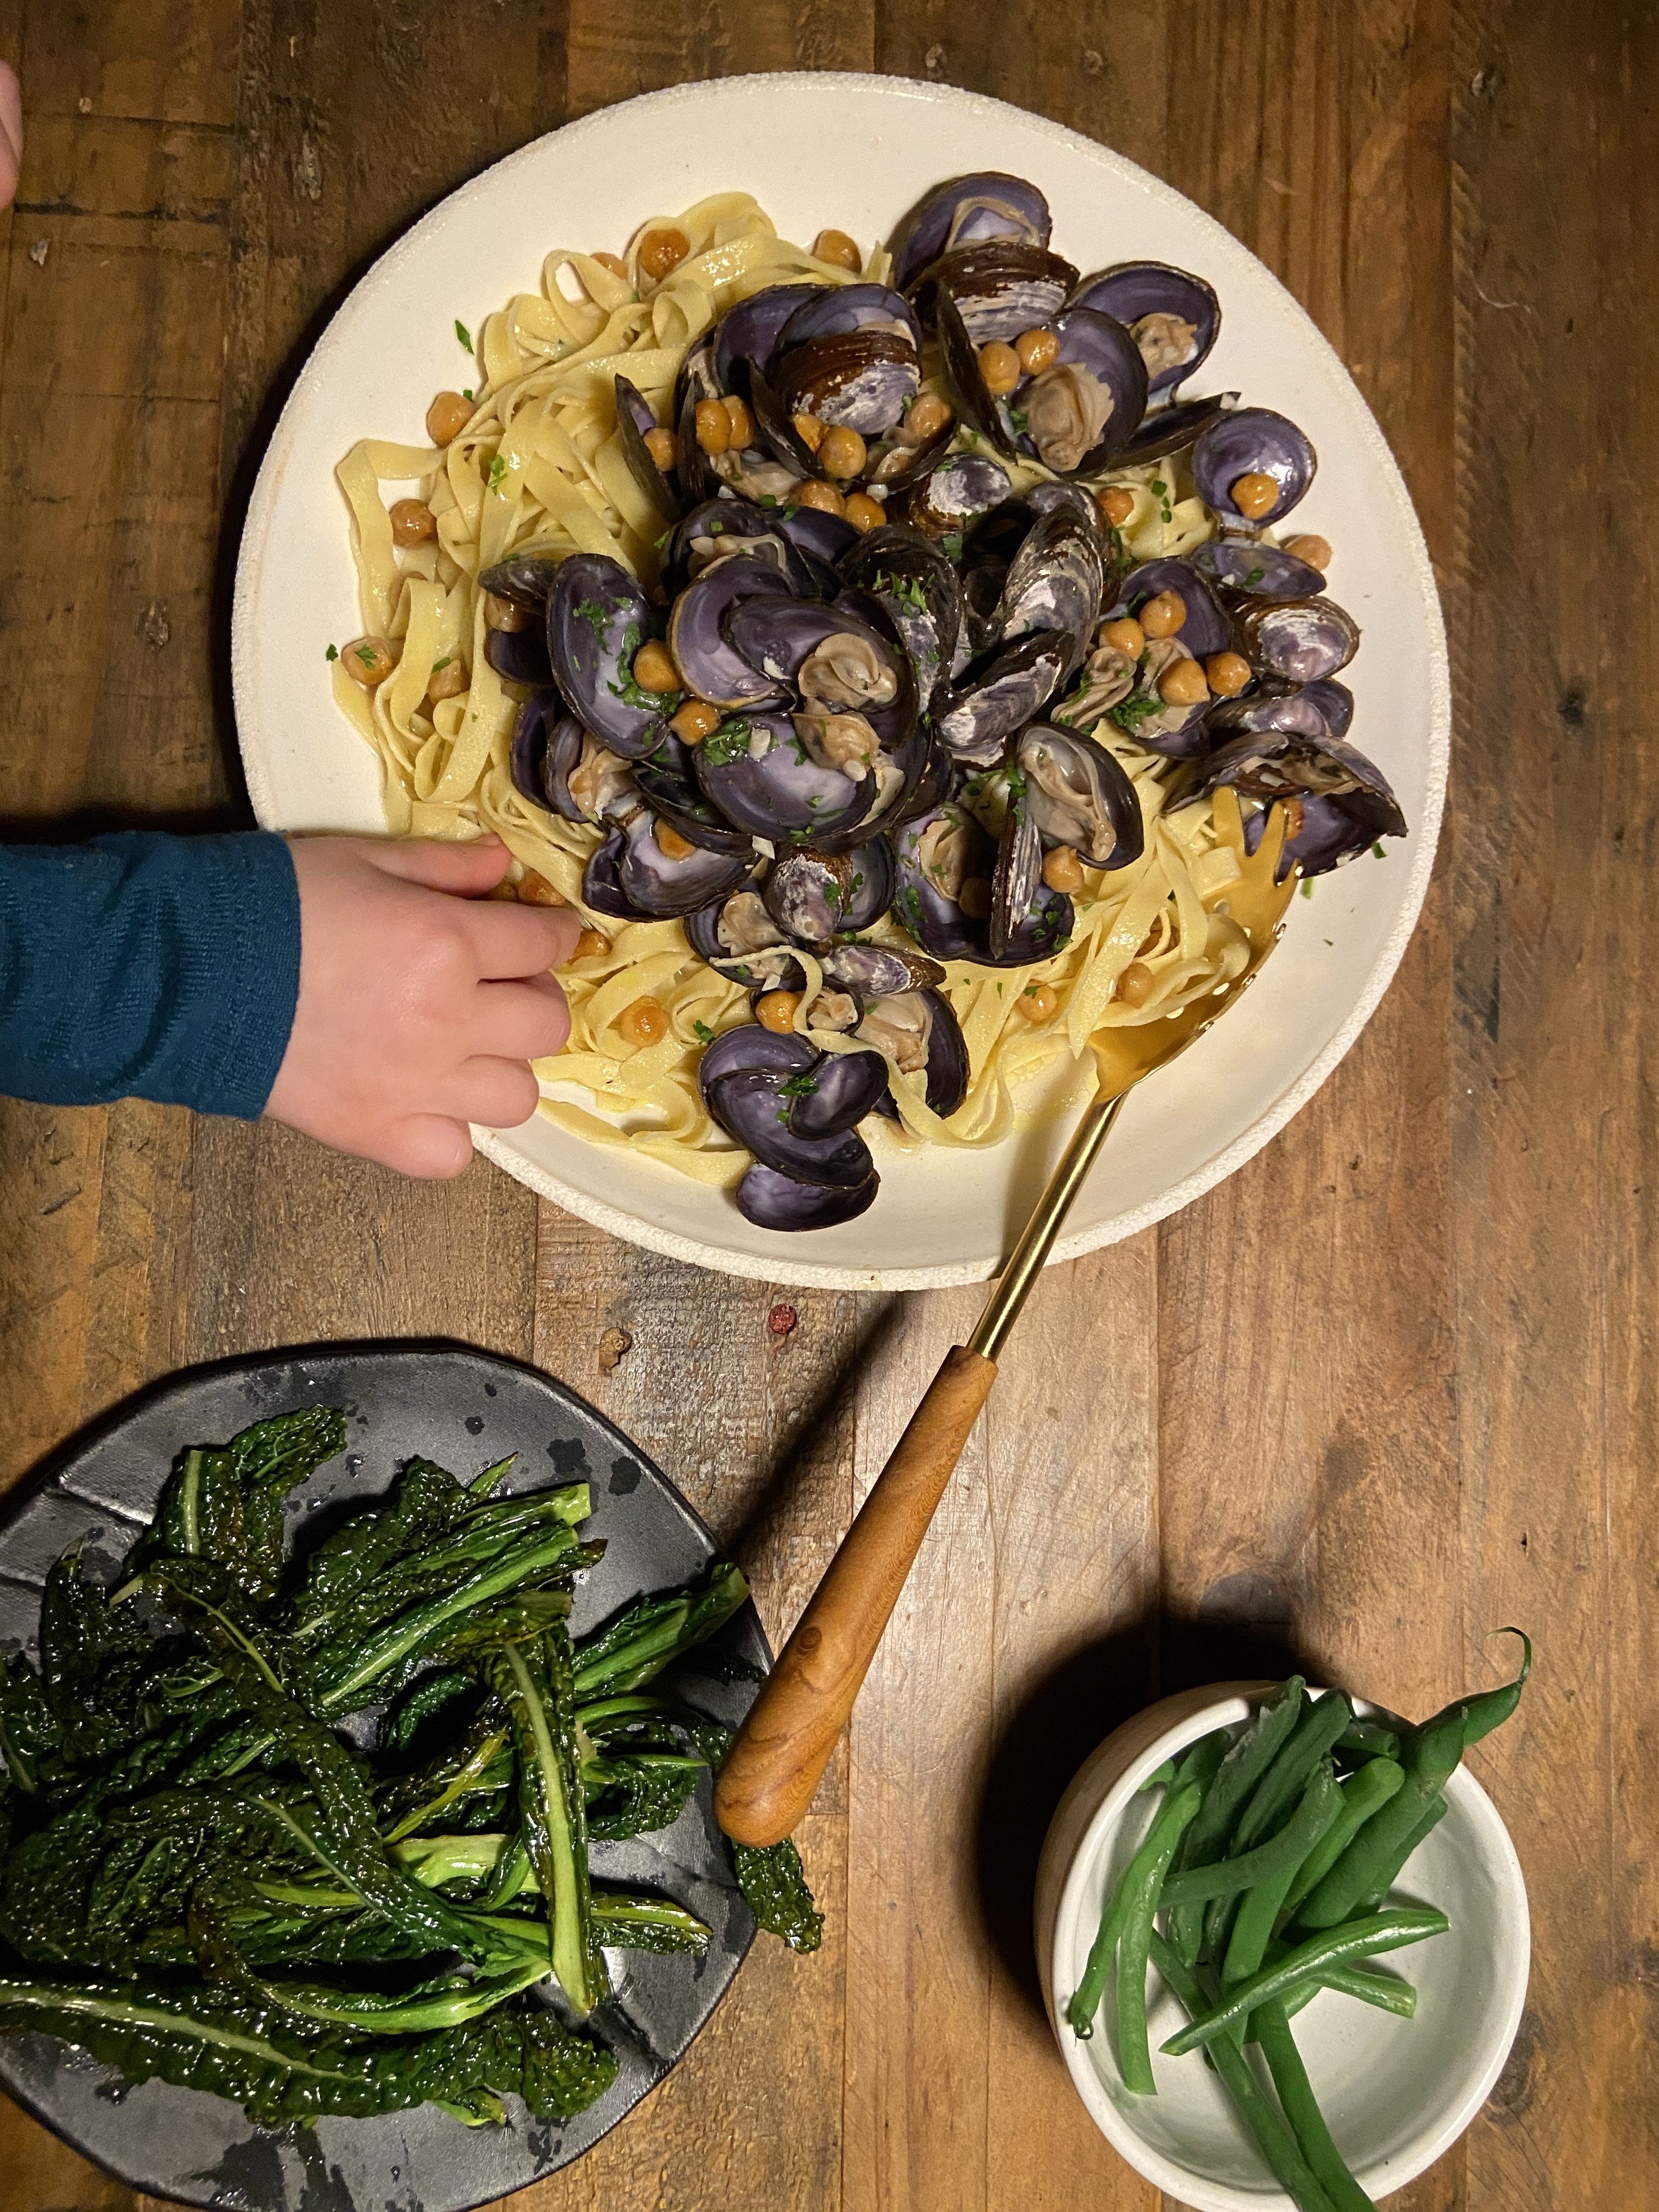
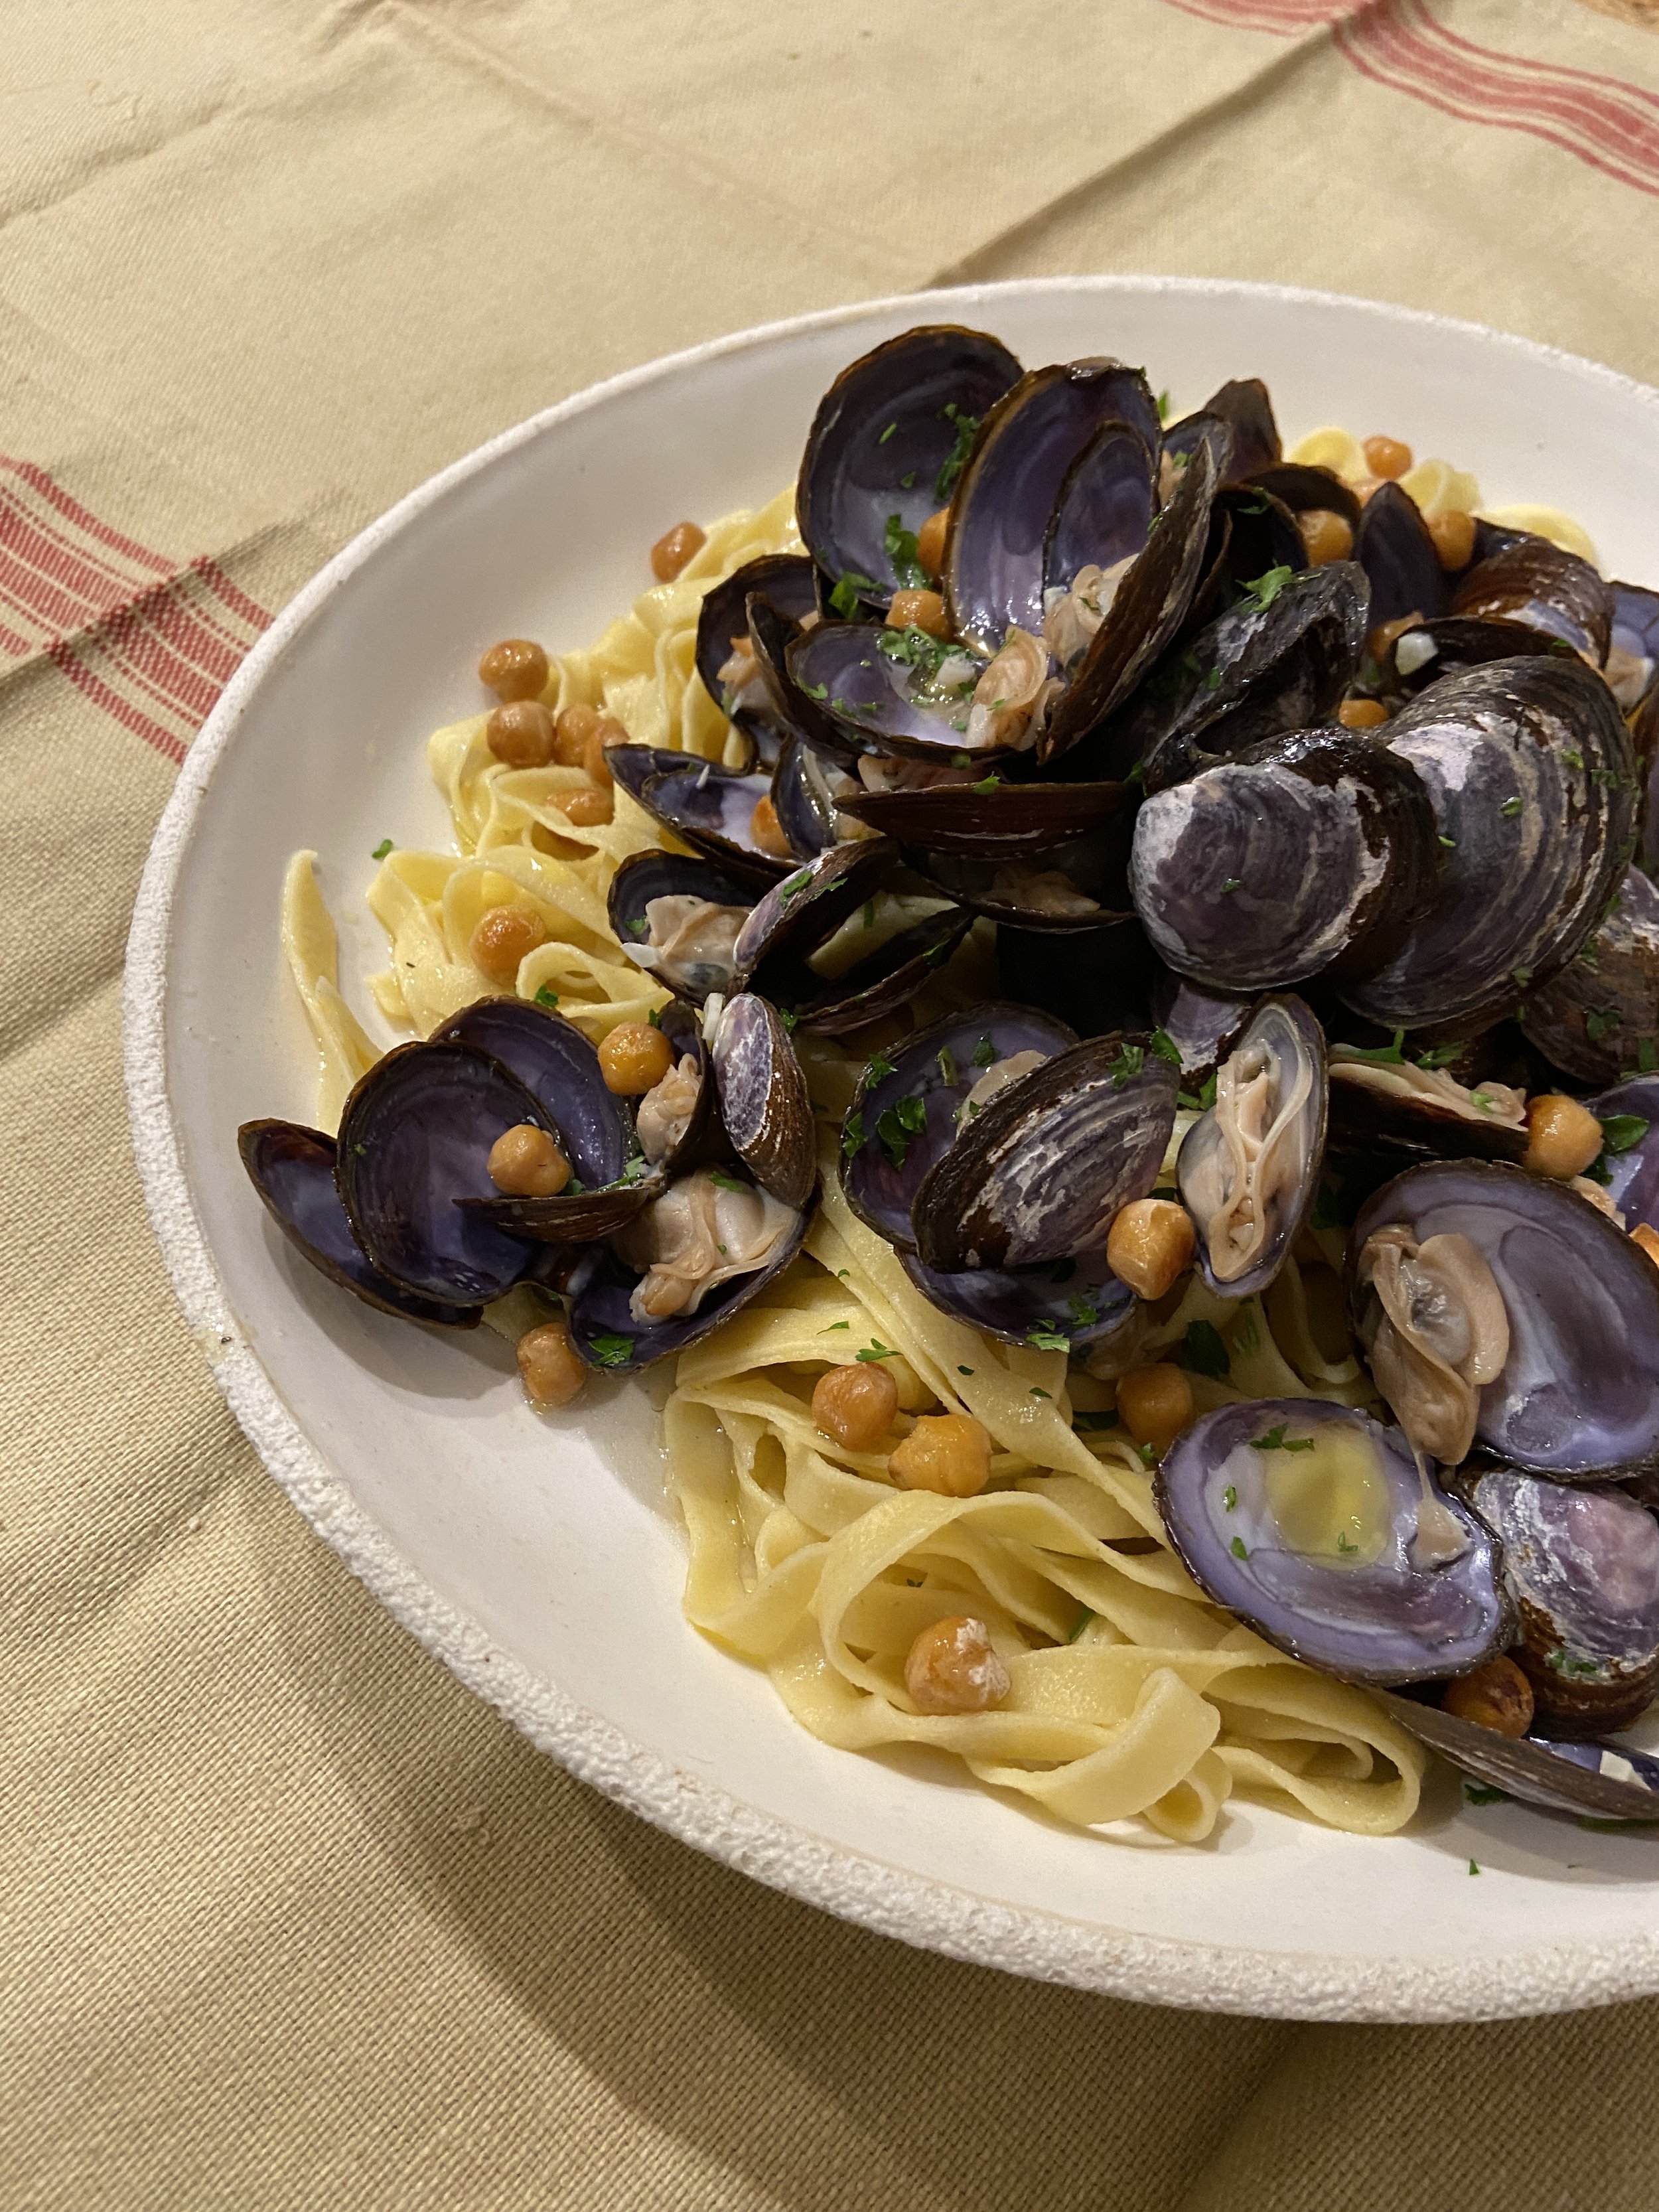
Linguini, Chickpeas, & Clams


Clams and bivalves in general can be intimidating but - spoiler alert - they’re actually very easy to cook! Don’t be scared, they won’t bite. Also, compared to other fish and especially to other animal foods, they’re a much more sustainable protein option and, bonus, they’re also a good source of omega-3s. Many are looking to so-called “blue foods” as a key way to improve global health. You can dress them up or down, but I find that simple is usually best (pairing with pasta never hurts) and they’re ready in minutes. Just make sure to buy them from a reputable source and only eat the clams that open when you cook them.
In this recipe, I added a cup of chickpeas that had been sautéed in olive oil/salt. I like adding chickpeas to give the dish more plant-forward fiber and variety, but you can stick with the classic version and leave them out.
Serves 4.
1-2lb fresh clams (we purchased ours from Flying Fish PDX - I believe they’re sustainably farmed)
1 cup cooked chickpeas (optional, see below for cooking recommendation)
1-3 tablespoons olive oil, separated
1 tablespoon butter (can do another tablespoon olive oil, but butter provides great flavor)
1-3 garlic cloves (depending on your love of garlic), chopped
1/2 cup of dry white wine
1-1.5lb fresh pasta, such as linguine (or 8-12oz dried)
Black pepper and sea salt
Fresh parsley, chopped
Freshly grated parmesan (optional)
To Prepare:

Heat a big pot of salted pasta water to a boil. Rinse clams, set aside.
If you’re adding chickpeas, now’s a good time to sauté them in ~1 tablespoon olive oil on medium-high for 5-7 minutes and sprinkle with salt. I like to use the pan that I’m going to cook the clams in then set the chickpeas to the side so I don’t dirty another pan. You can also roast them on a baking sheet - just toss with olive oil/salt and roast on 400 for 20-30 minutes.
In a large sauté pan big enough for all of your clams and some liquid, heat garlic in 1-2 tablespoons olive oil and butter (or just olive oil) on medium until softened, about 3 minutes.
Once garlic has softened, add clams, increase heat to medium-high, add wine, and toss clams until coated and sizzling.
Cook on medium-high until clams pop open. Do not eat any clams that do not open.
Once cook water is boiling, cook pasta (generally, 1 minute for fresh pasta or as directed for dry). DO NOT OVERCOOK because you’ll be adding this pasta to the hot clams before serving.
Once pasta has cooked, drain (save a few tablespoons of pasta water) and toss with olive oil in a large bowl.
Add pasta water to the clams. Serve over pasta and top with coarse ground black pepper, salt, parmesan, and parmesan (if desired).

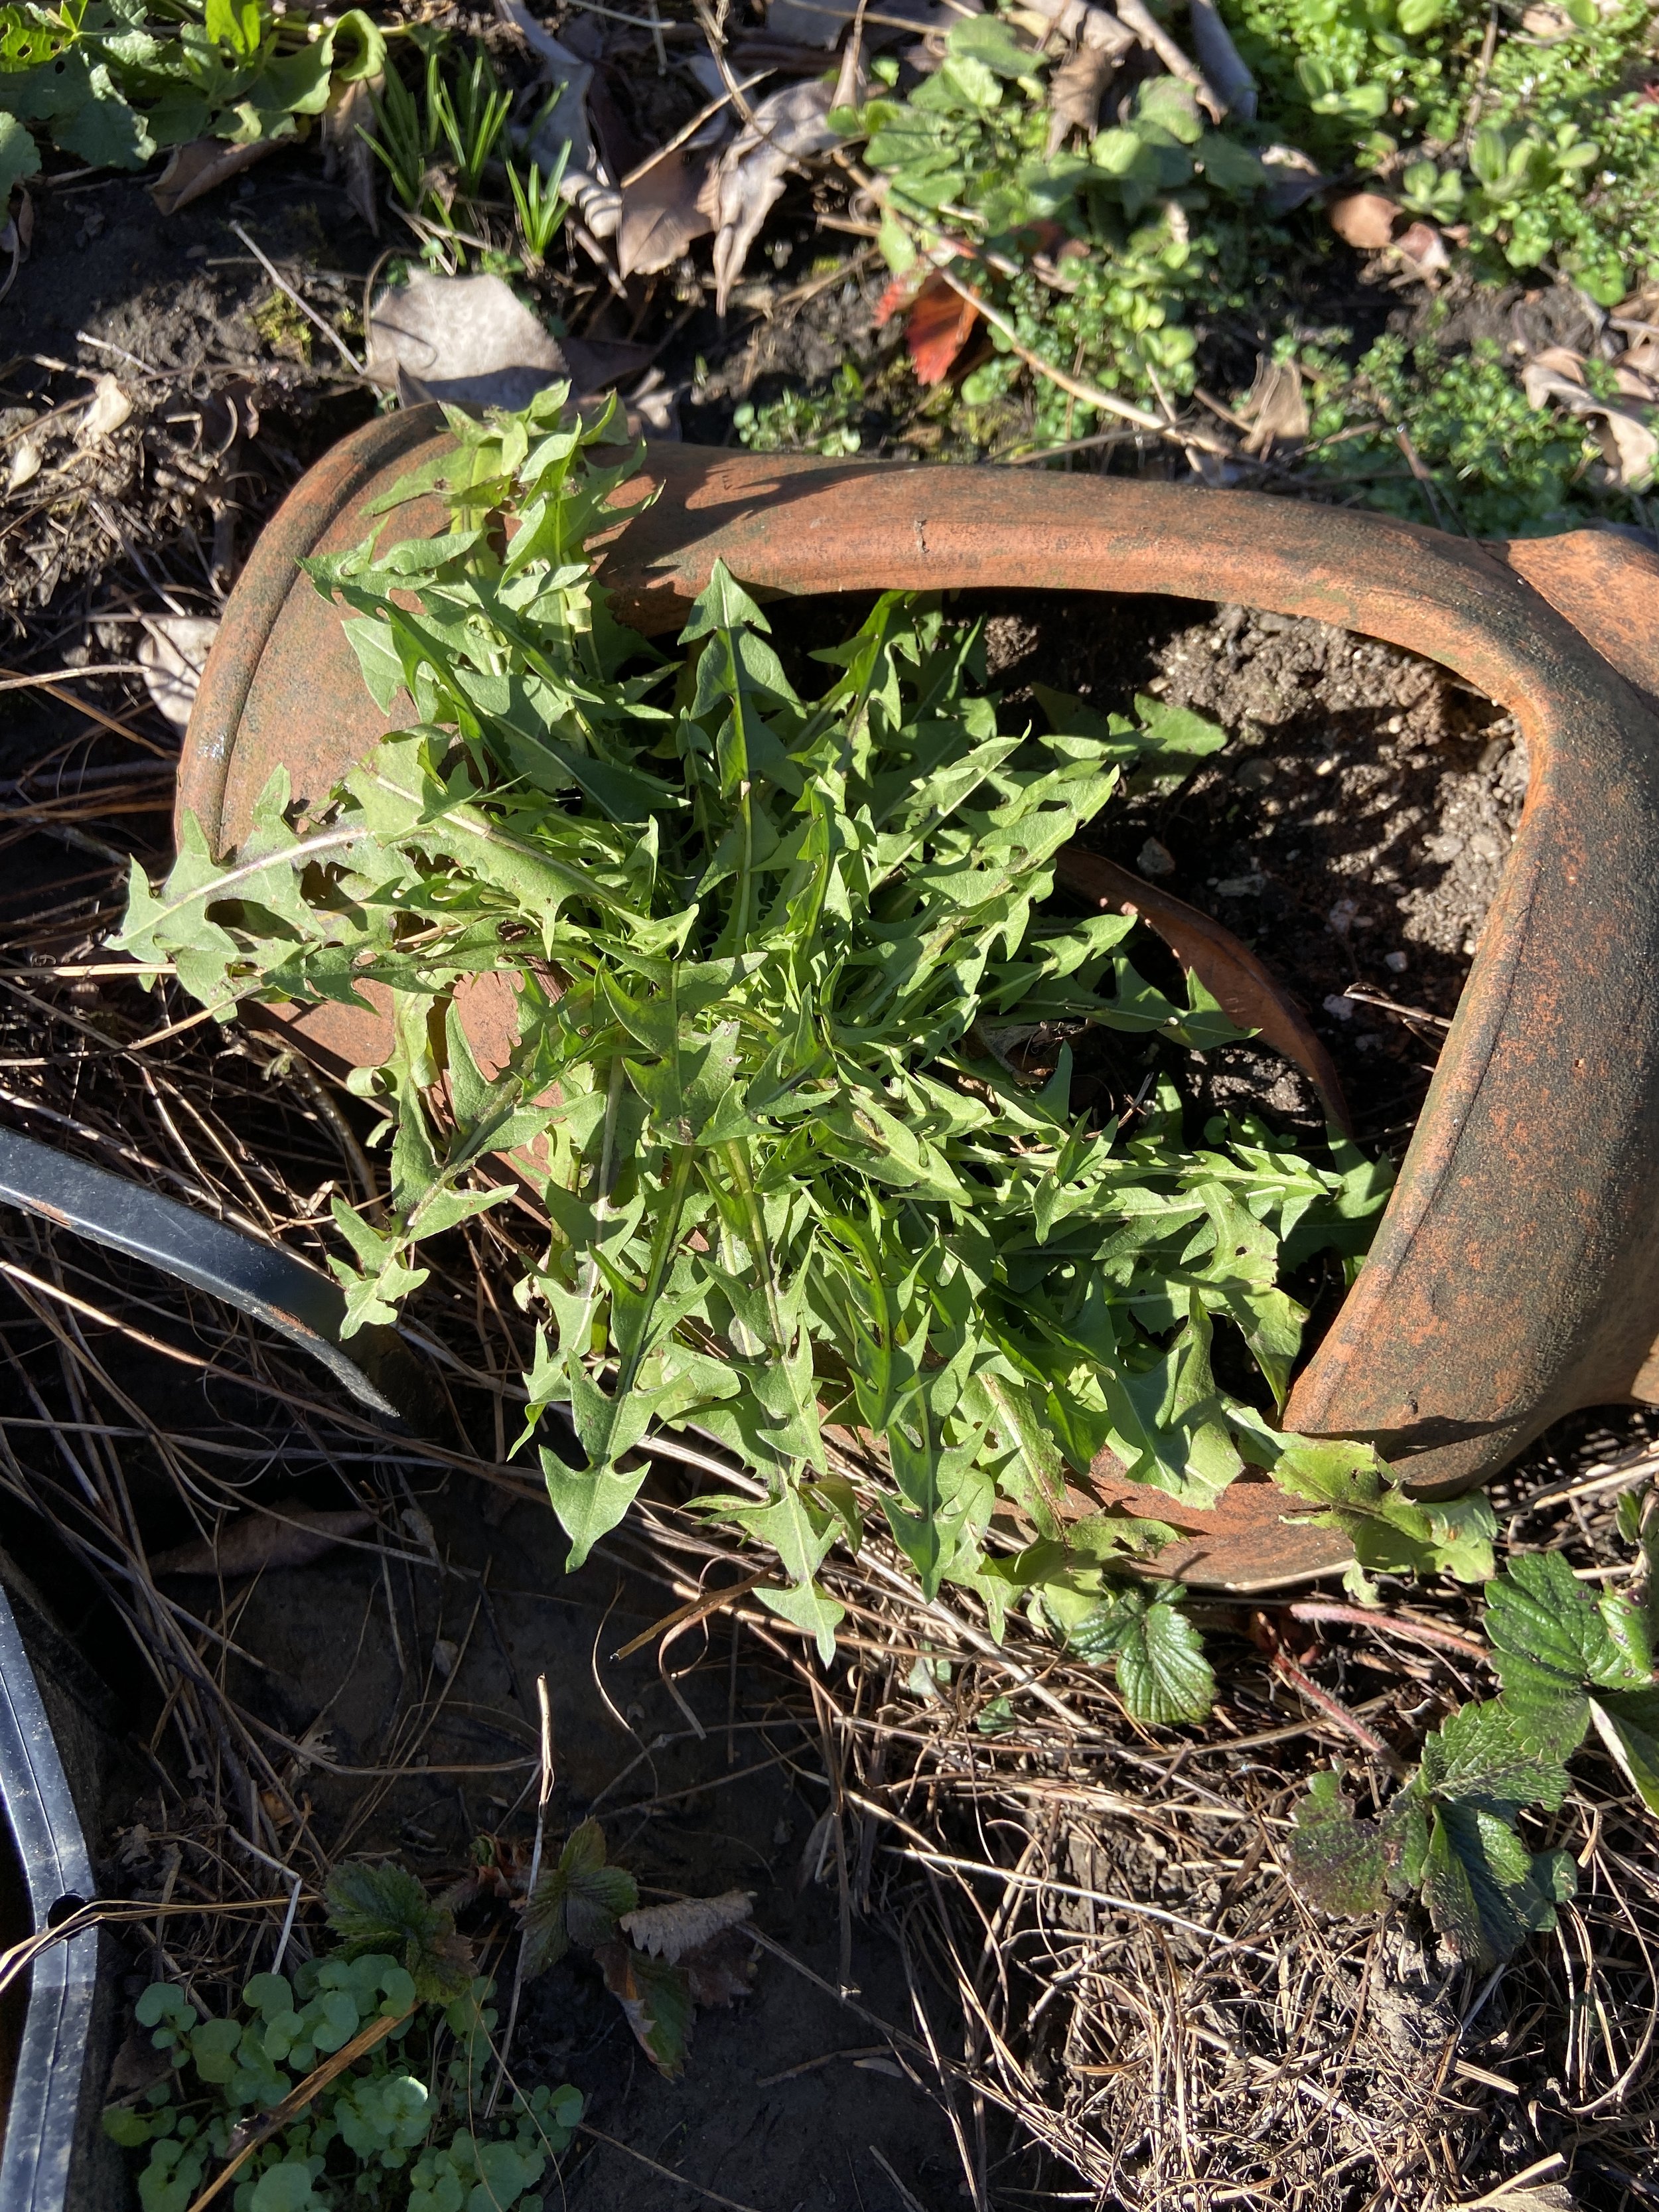
Seared Dandelion Hearts

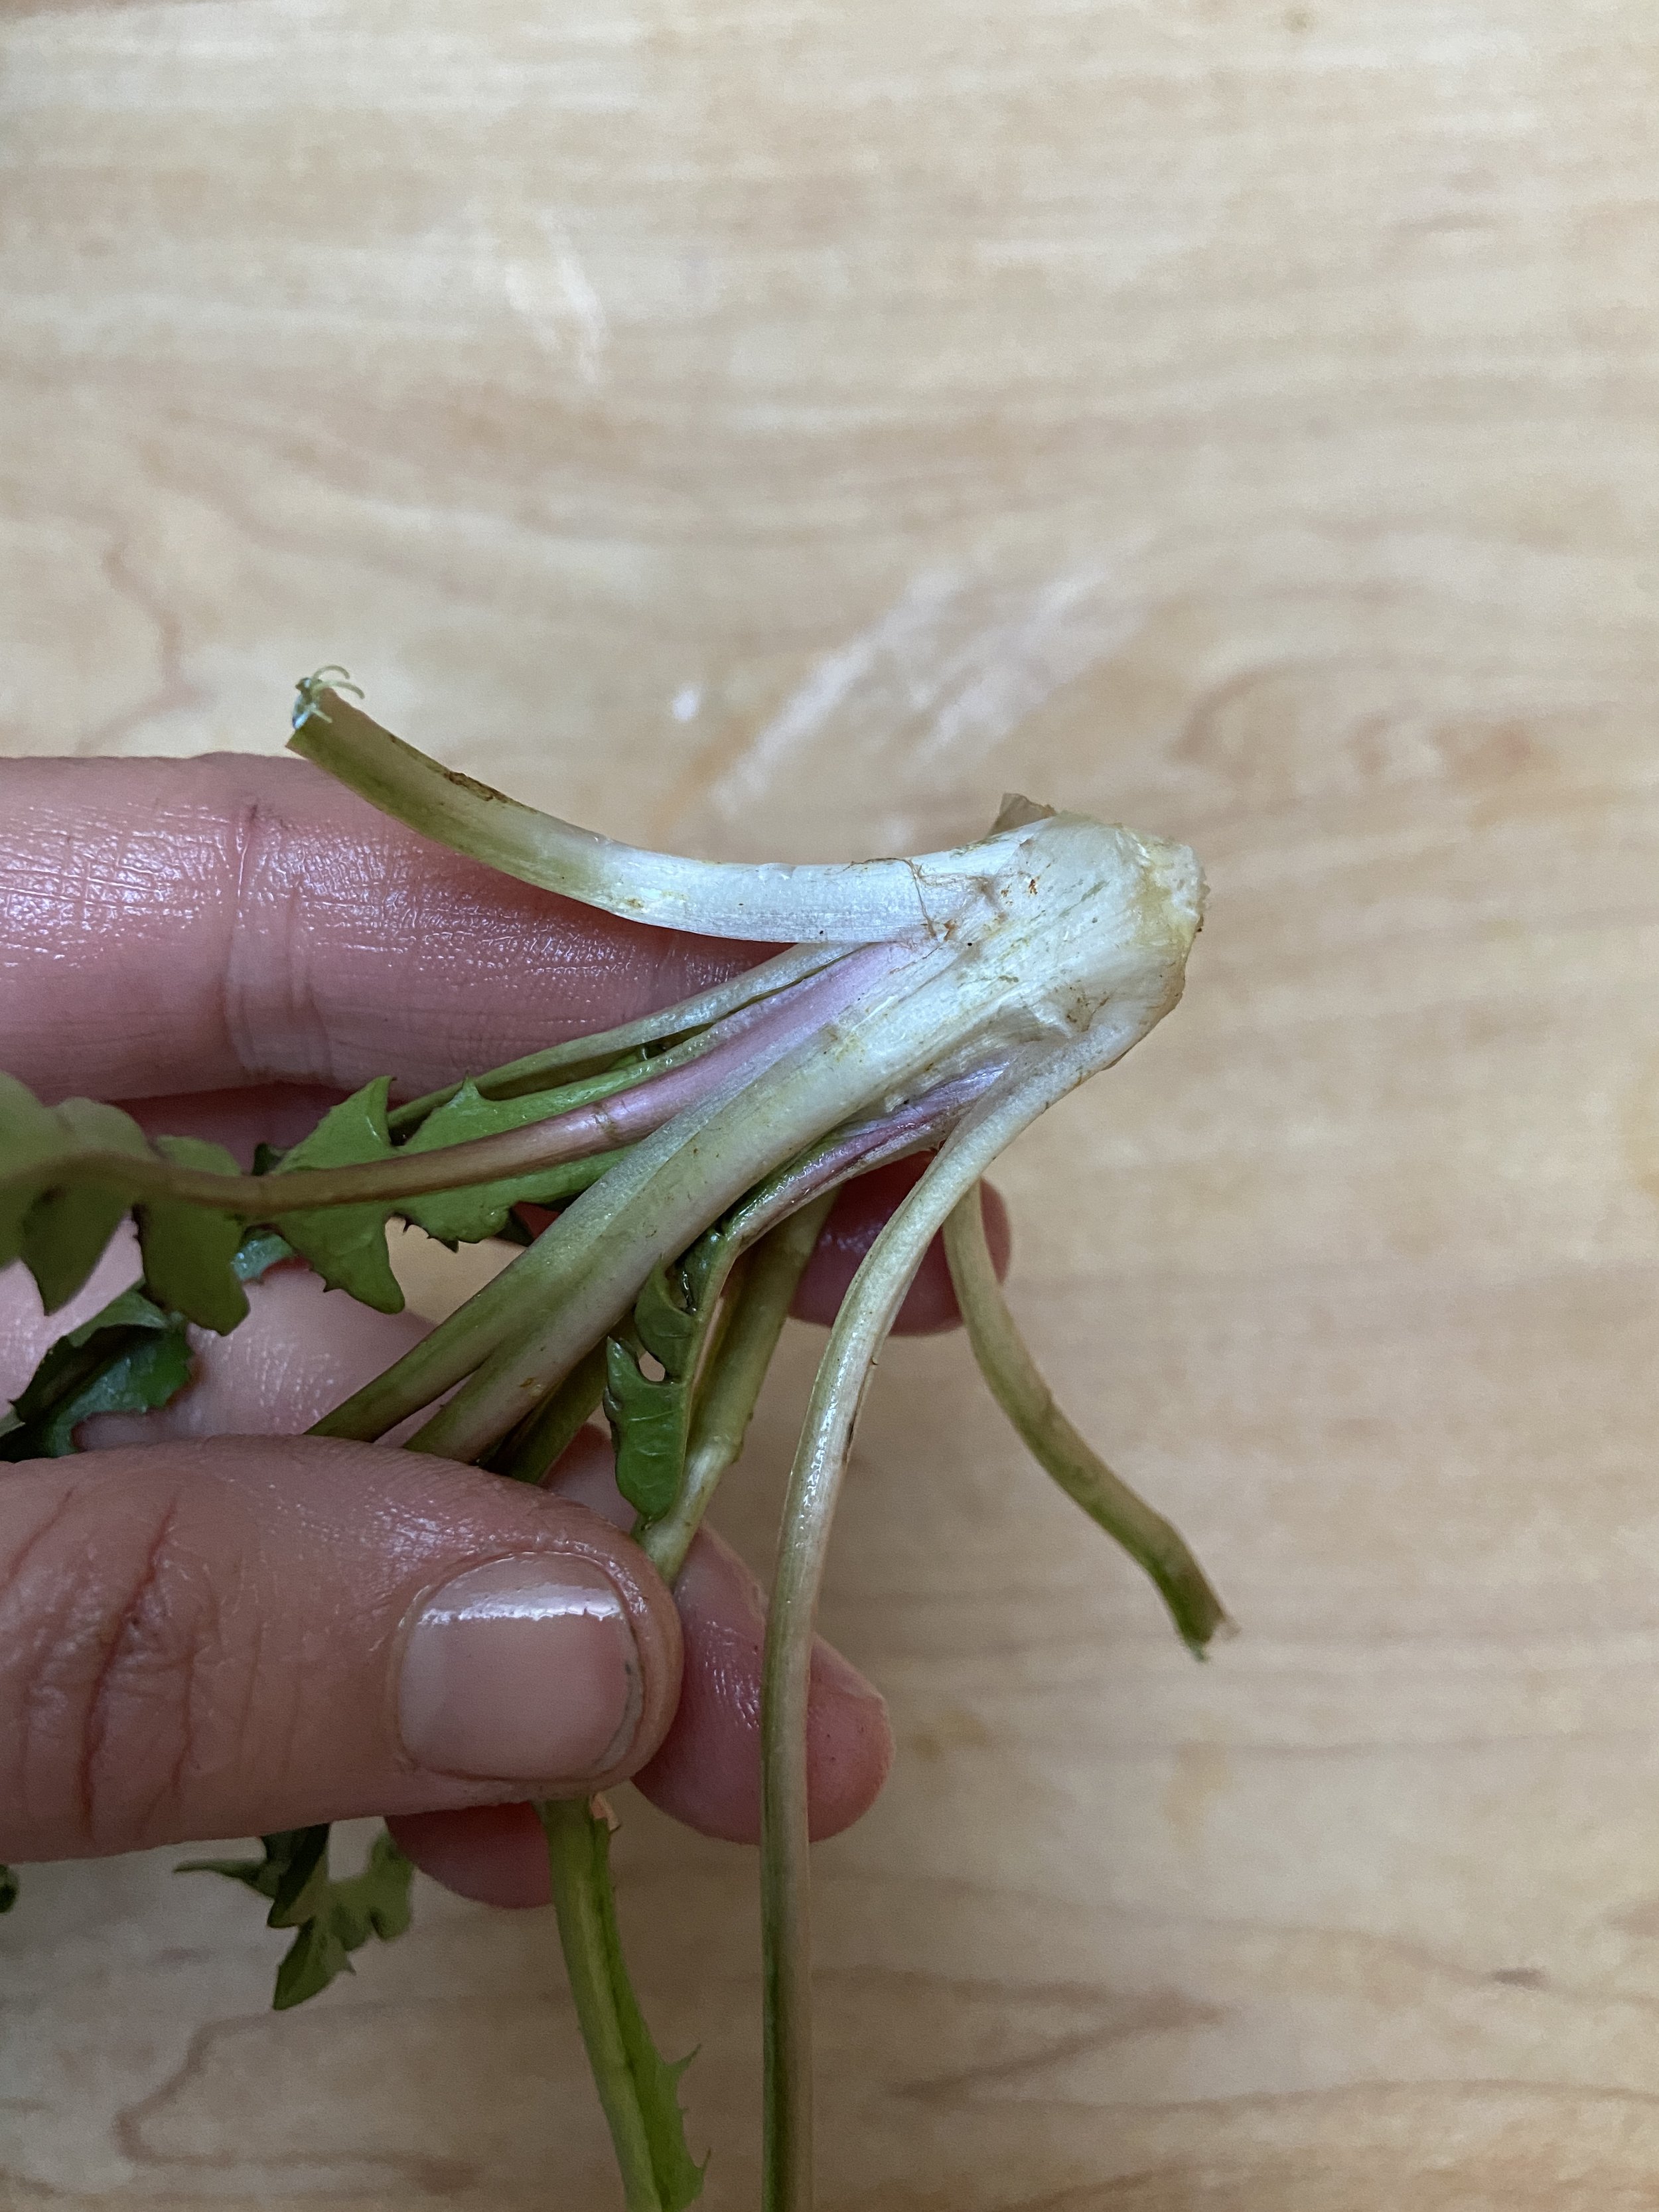
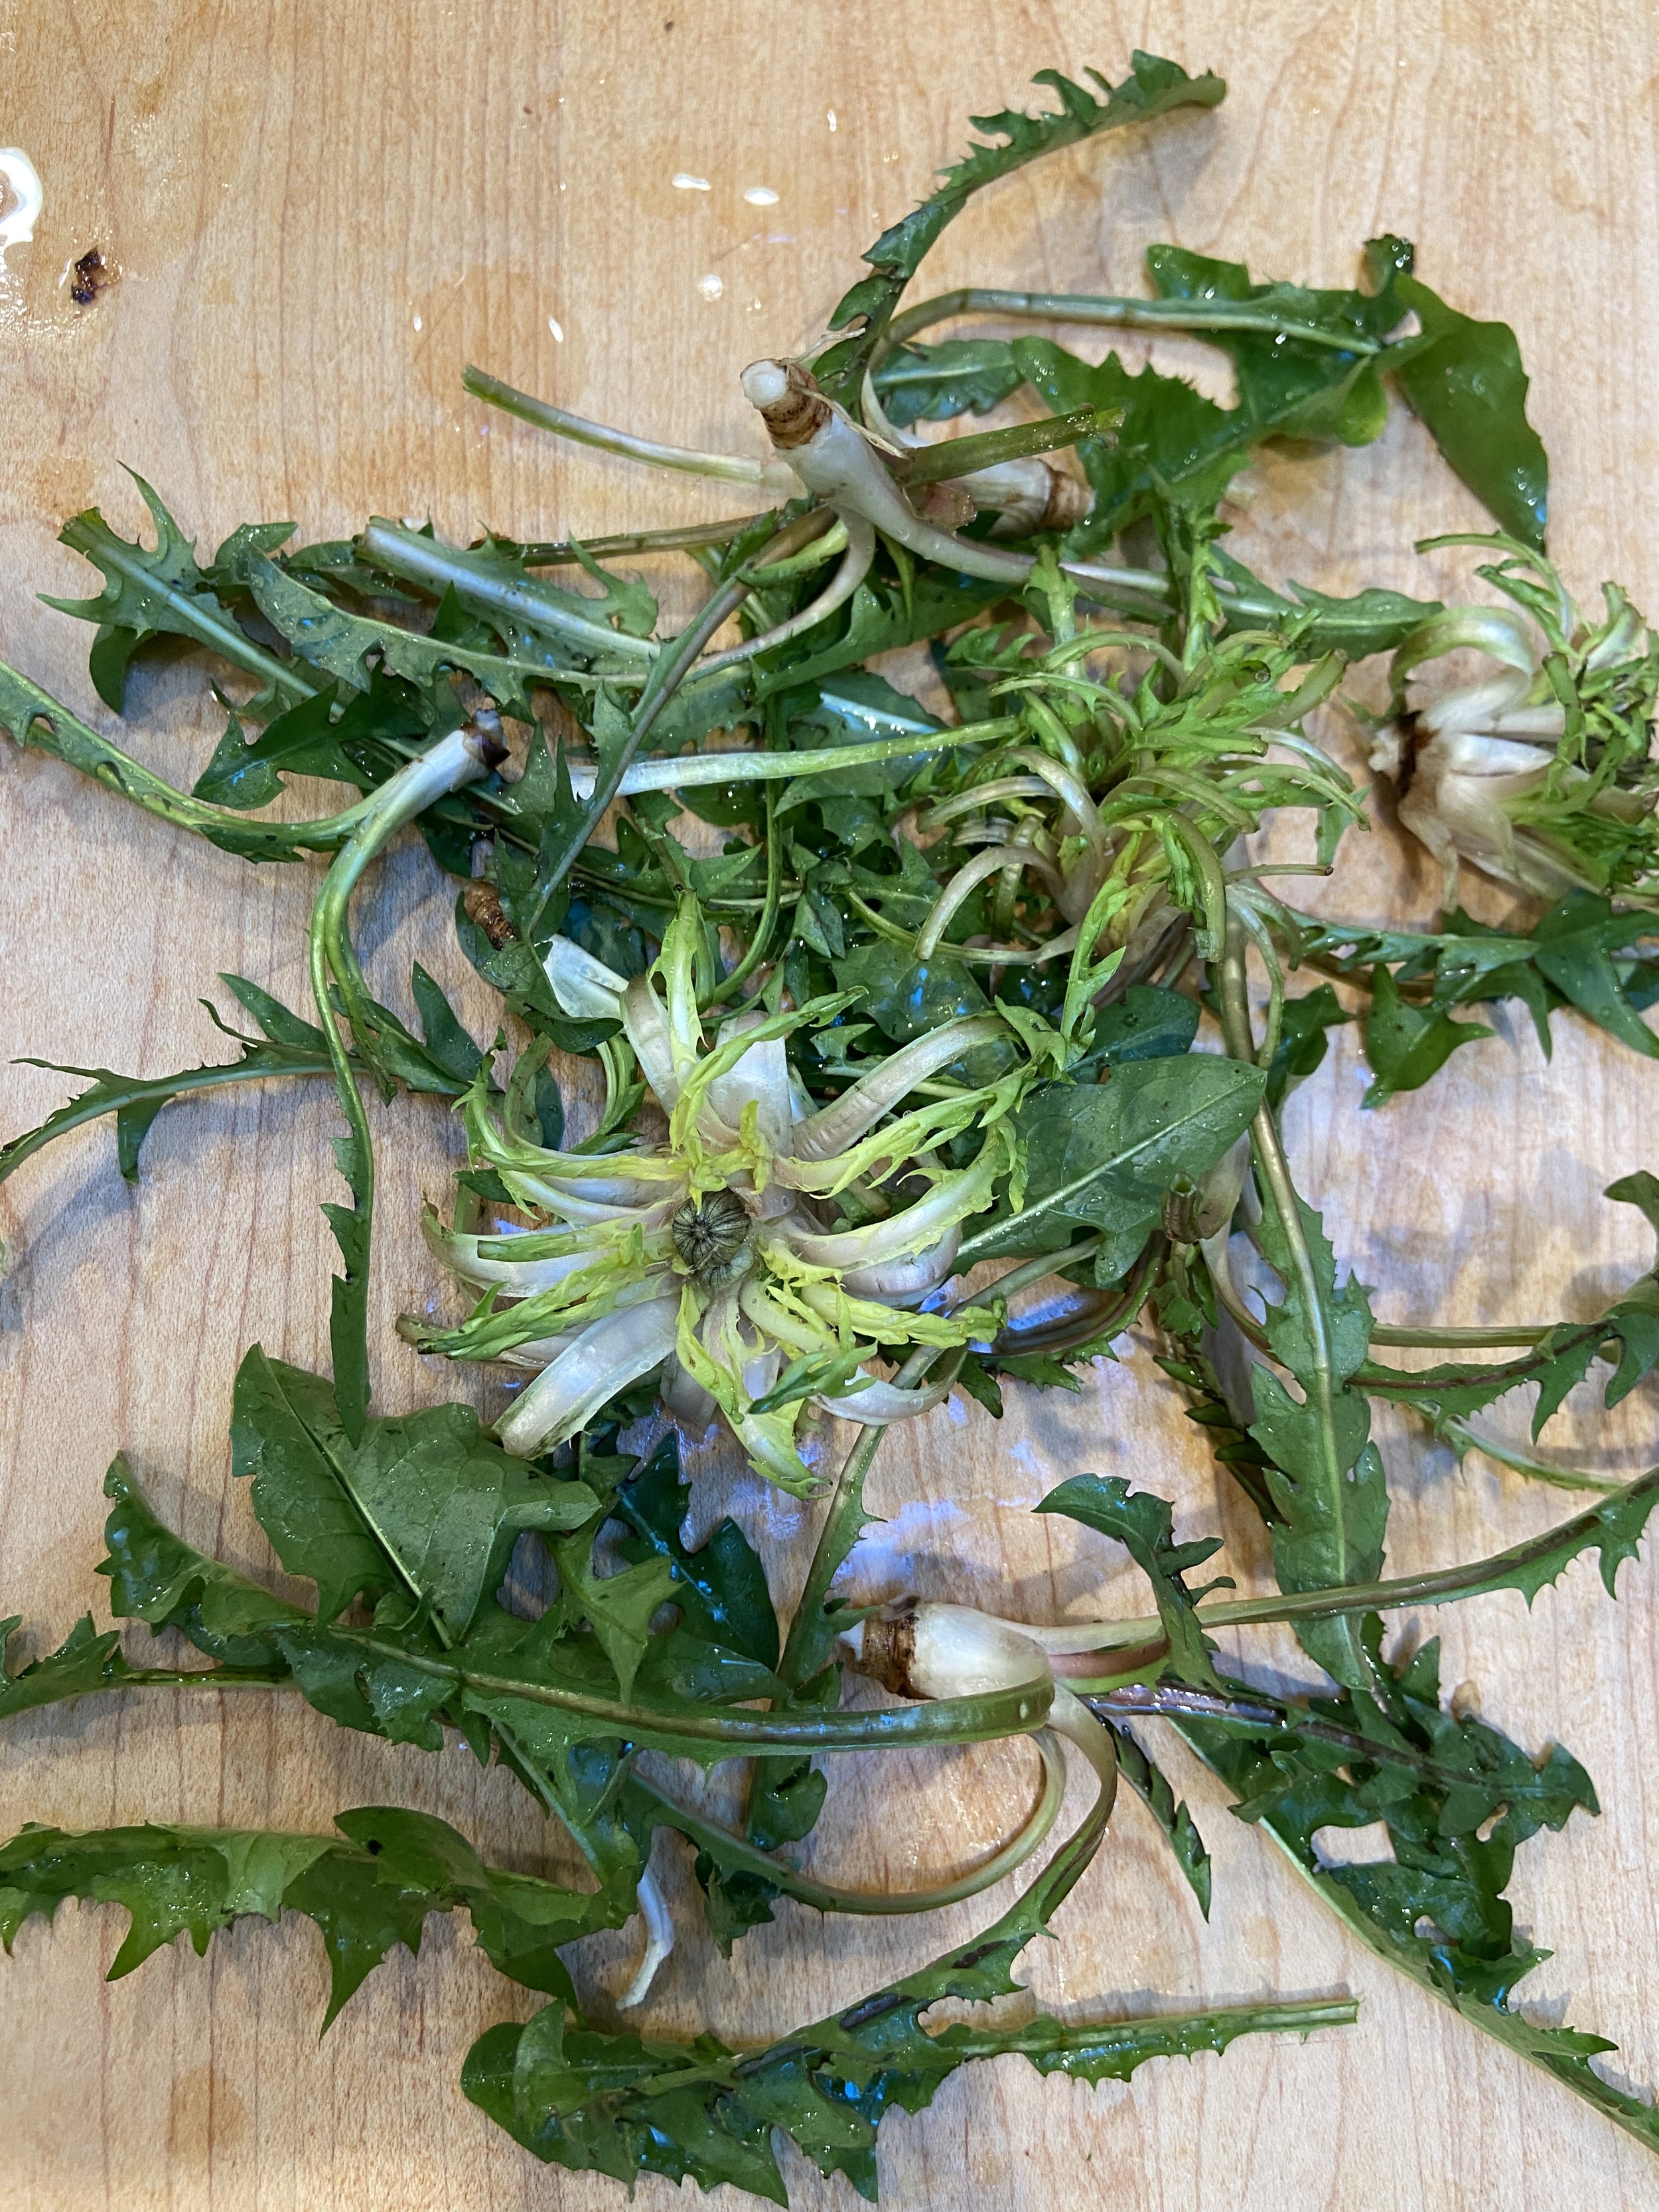
Dandelion hearts (aka dandelion crowns) are even more under-appreciated than dandelion greens, but they are really incredible - kind of like eating an artichoke heart vs. the artichoke leaves. They have the best texture and more mild/less bitter flavor when harvested in the early spring/late winter (or from young plants). It does take a bit of digging to unearth them, but they’re worth it! Because they have similar properties as something like chicory or raddichio, I think they are most delicious seared or wilted with a salty umami dressing with citrus zest. This recipe calls for anchovy, but it can easily be substituted with miso. Would pair beautifully atop polenta or in pasta/ramen noodles!
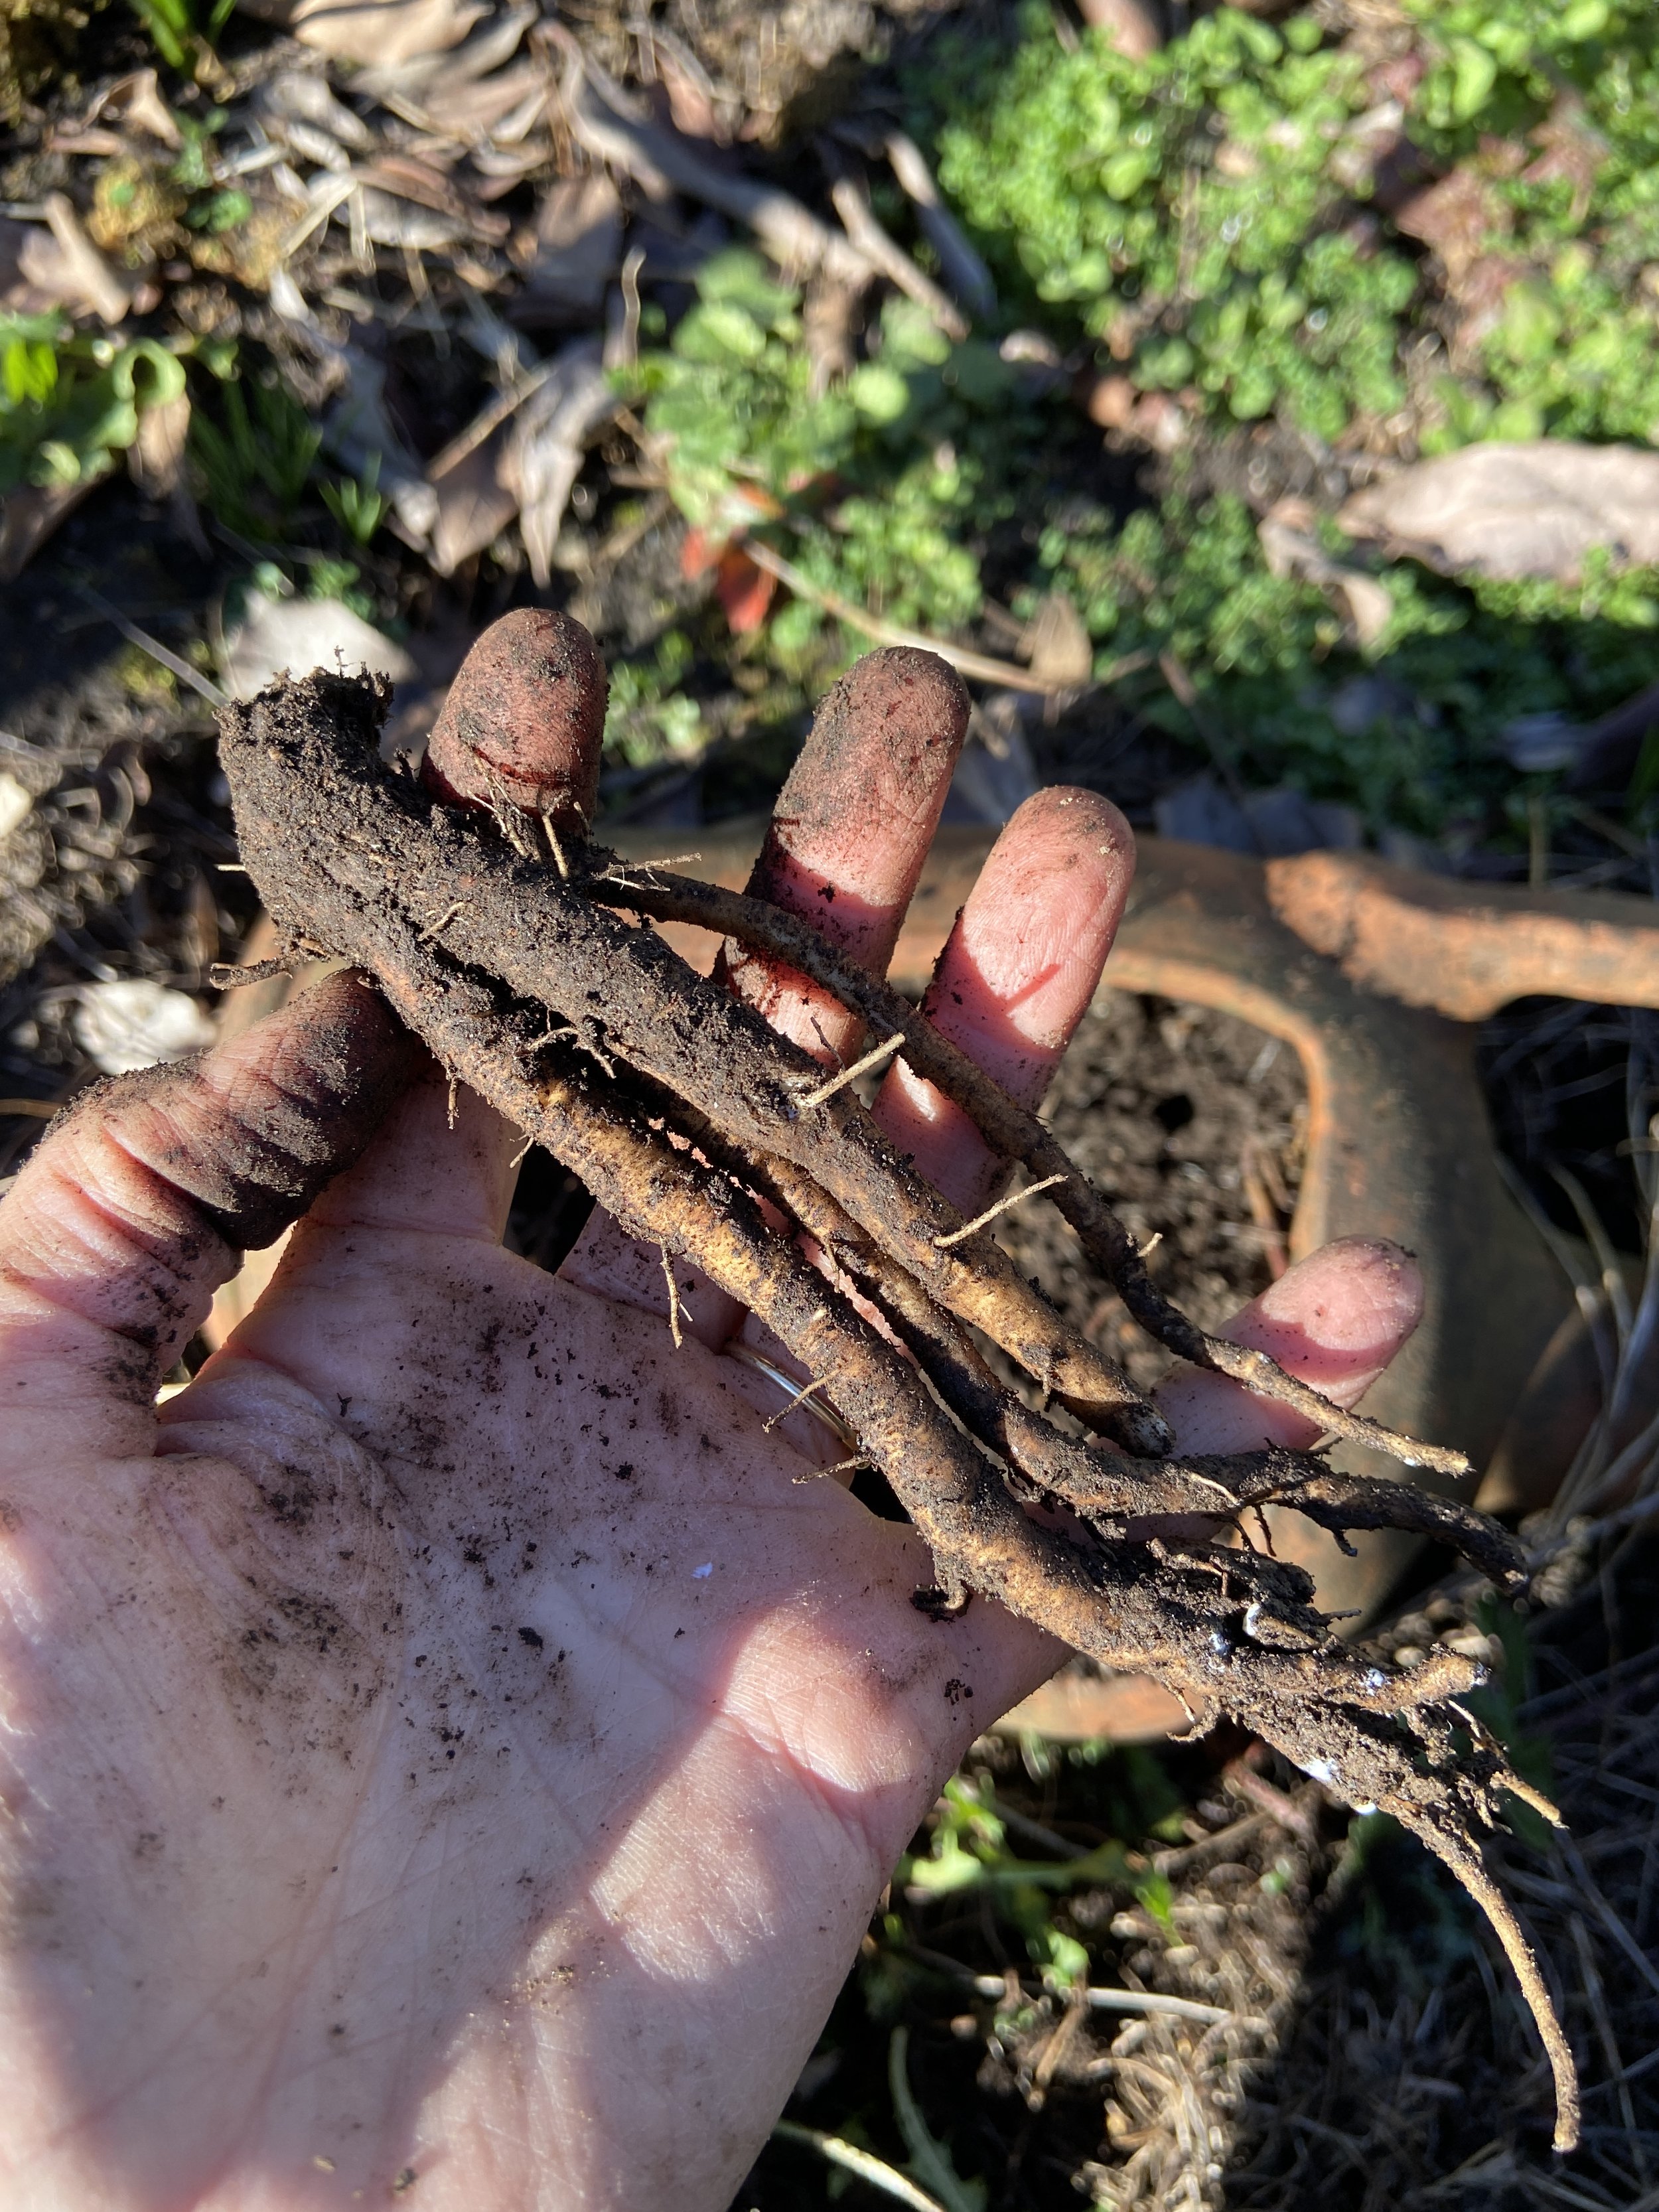
To harvest: Dig out the dandelion so that you remove the entire base or “heart”. You can also dig up the roots at this point if you want to use them or if you’re in a situation where you’re also weeding a garden and don’t want the dandelion to grow back. Unlike some other foraged wild ingredients, dandelion doesn’t not need to be rationed:) I keep meaning to make dandelion bitters, so maybe I finally will(?)

Ingredients:
6-8 dandelion hearts + tops (you can save the tops for something else if you want)
3 anchovies or 1 tablespoon miso
Juice from 1 lemon or 1-2 tablespoons red wine vinegar
2-3 tablespoons olive oil, separated
Citrus zest - I used orange this time
Black pepper (optional)
Clean dandelion hearts well - I soaked in water a few times and checked between the crevices to make sure dirt was removed.
Chop anchovies and mix with lemon juice using a fork until it creates a paste (a few chunks of anchovy is a-okay). I like to do this in a jar so I can shake it with the olive oil.
Add 1 tablespoon olive oil, mix/shake in jar, and set aside.
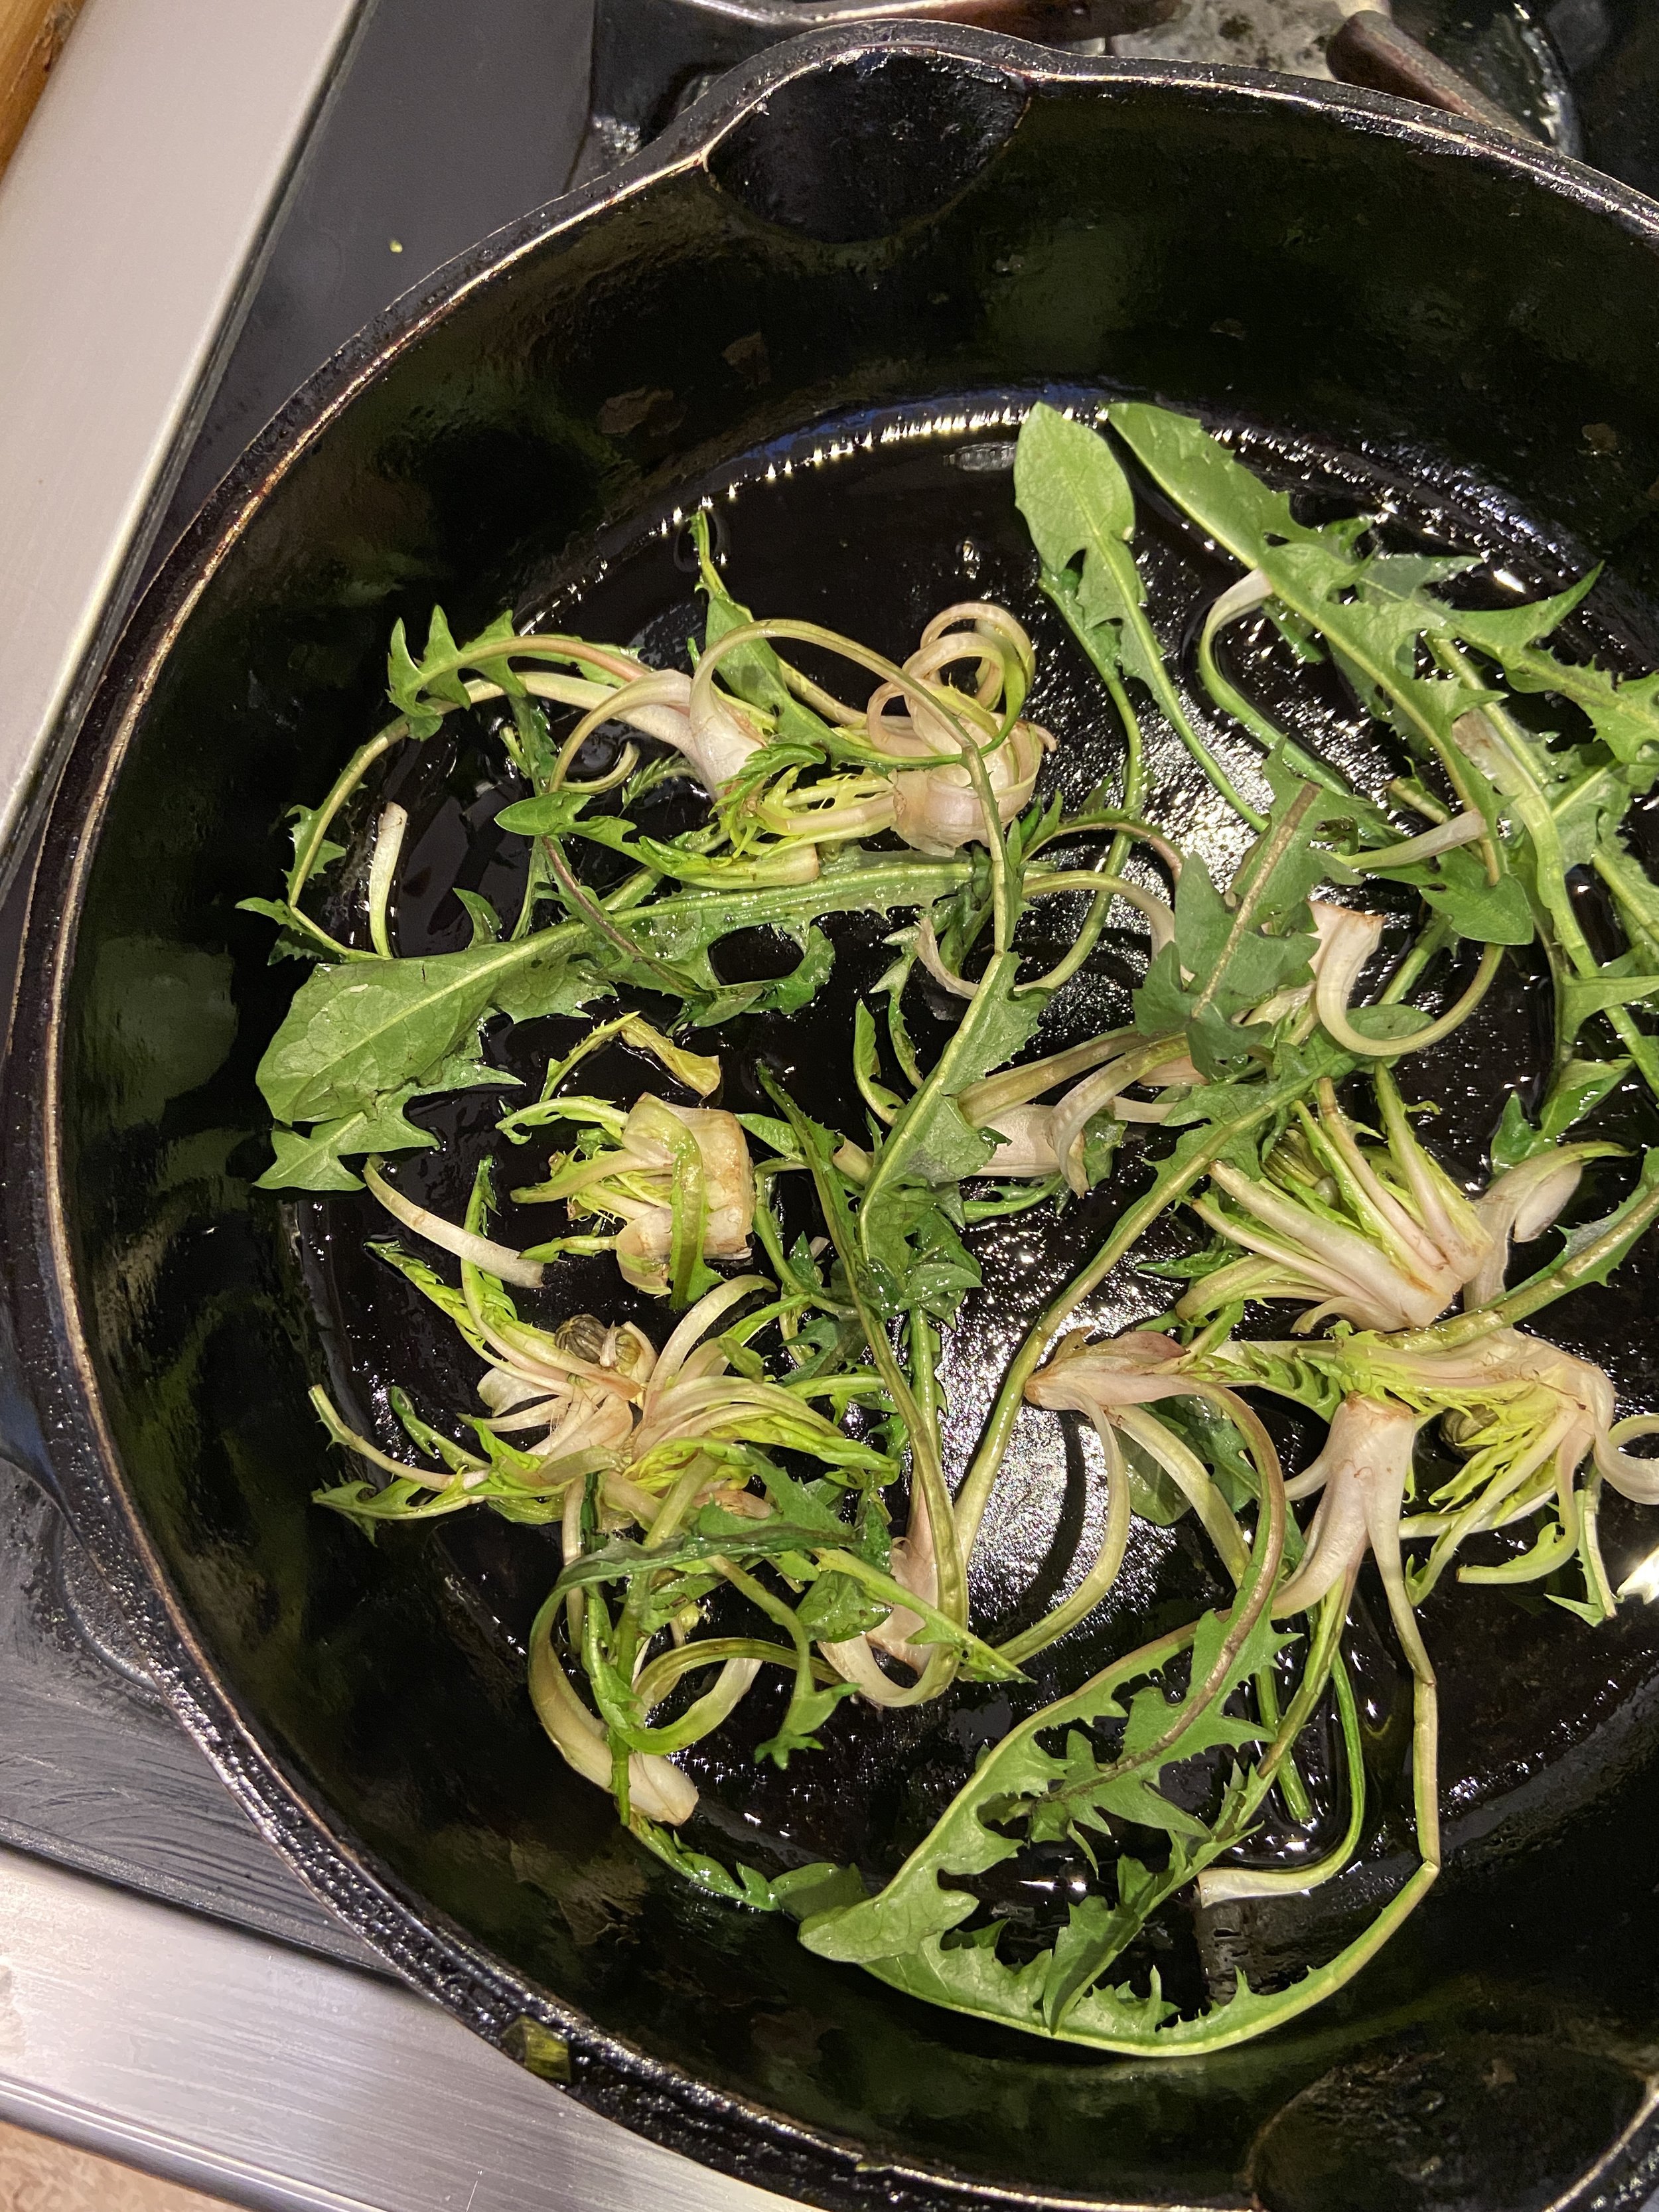
Drizzle olive oil in pan (I like to use cast iron for browning) on medium-high. Once hot, add dandelion crowns. Toss for a few minutes, tossing occasionally, until softened and slightly browned. Toward the end, add the dandelion greens and dressing (shake dressing first if it has separated). Toss and remove from heat onto plate.
Top with Citrus zest and black pepper. Add another drizzle of olive oil if needed.

Voila.

Preserved Lemons
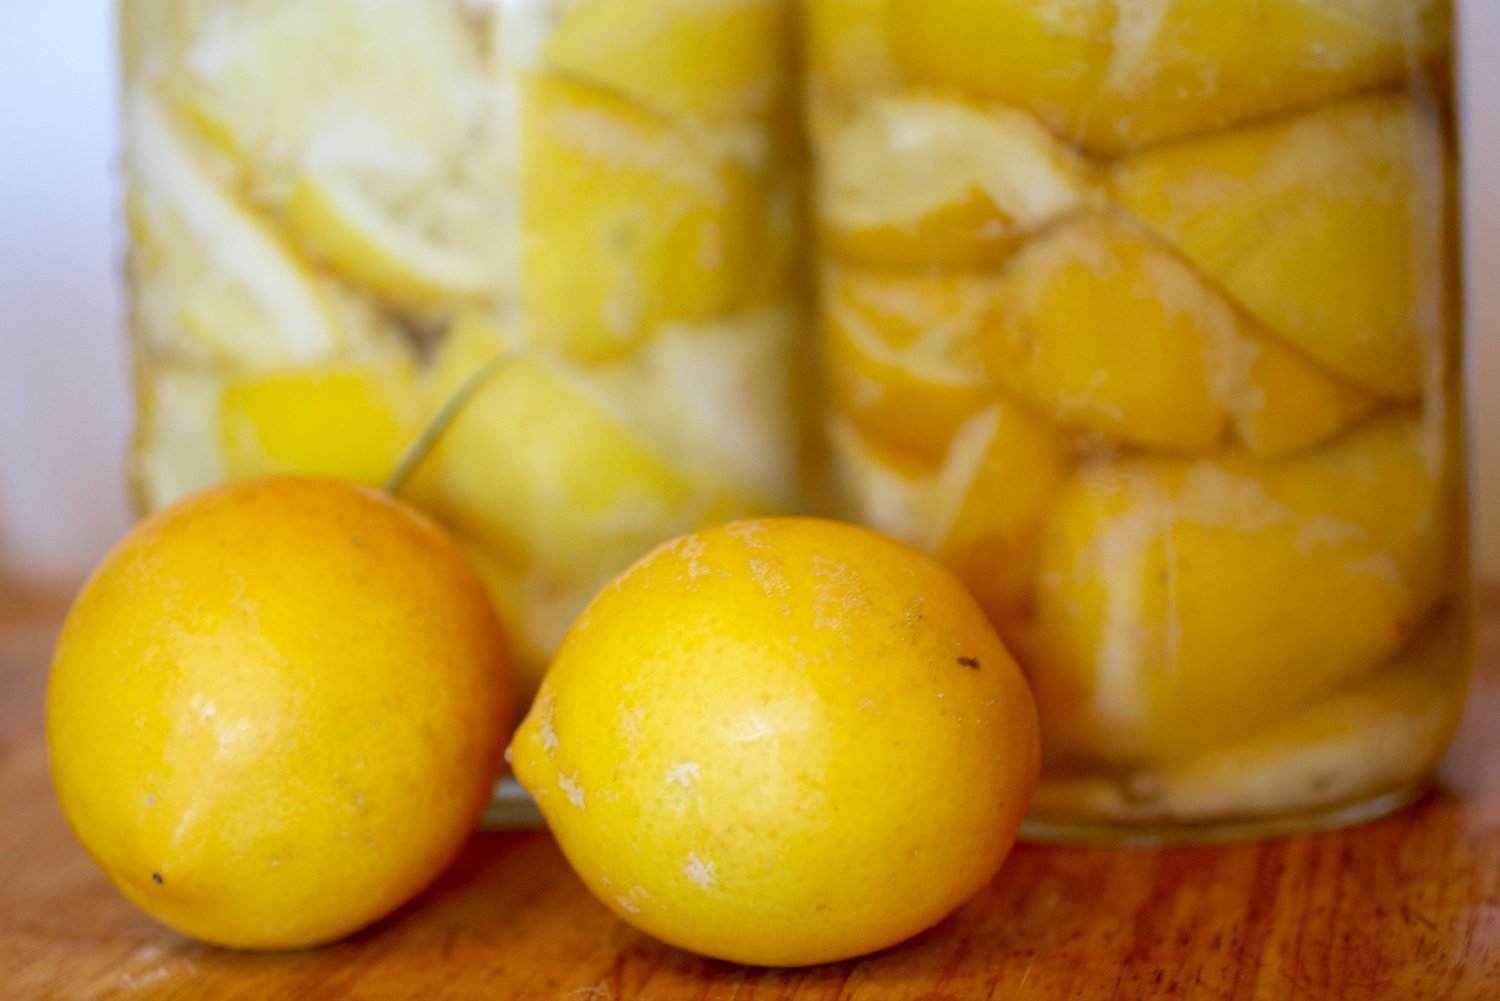
You know what they say - when life hands you lemons...preserve them! I don't remember the first time I made preserved lemons and discovered how incredibly easy it is, but I do know that I've been making them pretty much at least once a year ever since. By rubbing generously with salt and pressing under the saline brine created, fresh whole lemons are transformed over time into the best kind of funky, fermented condiment. The very acidic, salty, and oxygen-free (because you submerge them under water) environment keeps the bad microbes out while the good microbes take over to create a more delicate texture and heighten deliciousness.

Complex flavor from a simple, salty ferment.
Preserved lemons are common to Moroccan/Mediterranean/Middle Eastern cuisine, but the possibilities don't stop there. I like to chop them up and use them on all kinds of foods such as sautéed greens, grain pilafs (think couscous with cinnamon and toasted almonds/pine nuts), roasted winter squash, chickpeas or other beans, grilled fish, and slow-cooked meats or soups (think chicken with olives and saffron). Really, the possibilities are endless and delicious - adding preserved lemon is the easiest of ways to impress your friends when you serve them a meal ("what's that delightfully savory-sour flavor, you ask? Why, my own preserved Moroccan lemons of course!") I was fortunate enough recently to come across a laundry basket's worth (literally) of lemons from my parents and couldn't think of a better way to harness the power of a garden lemon for a later date.
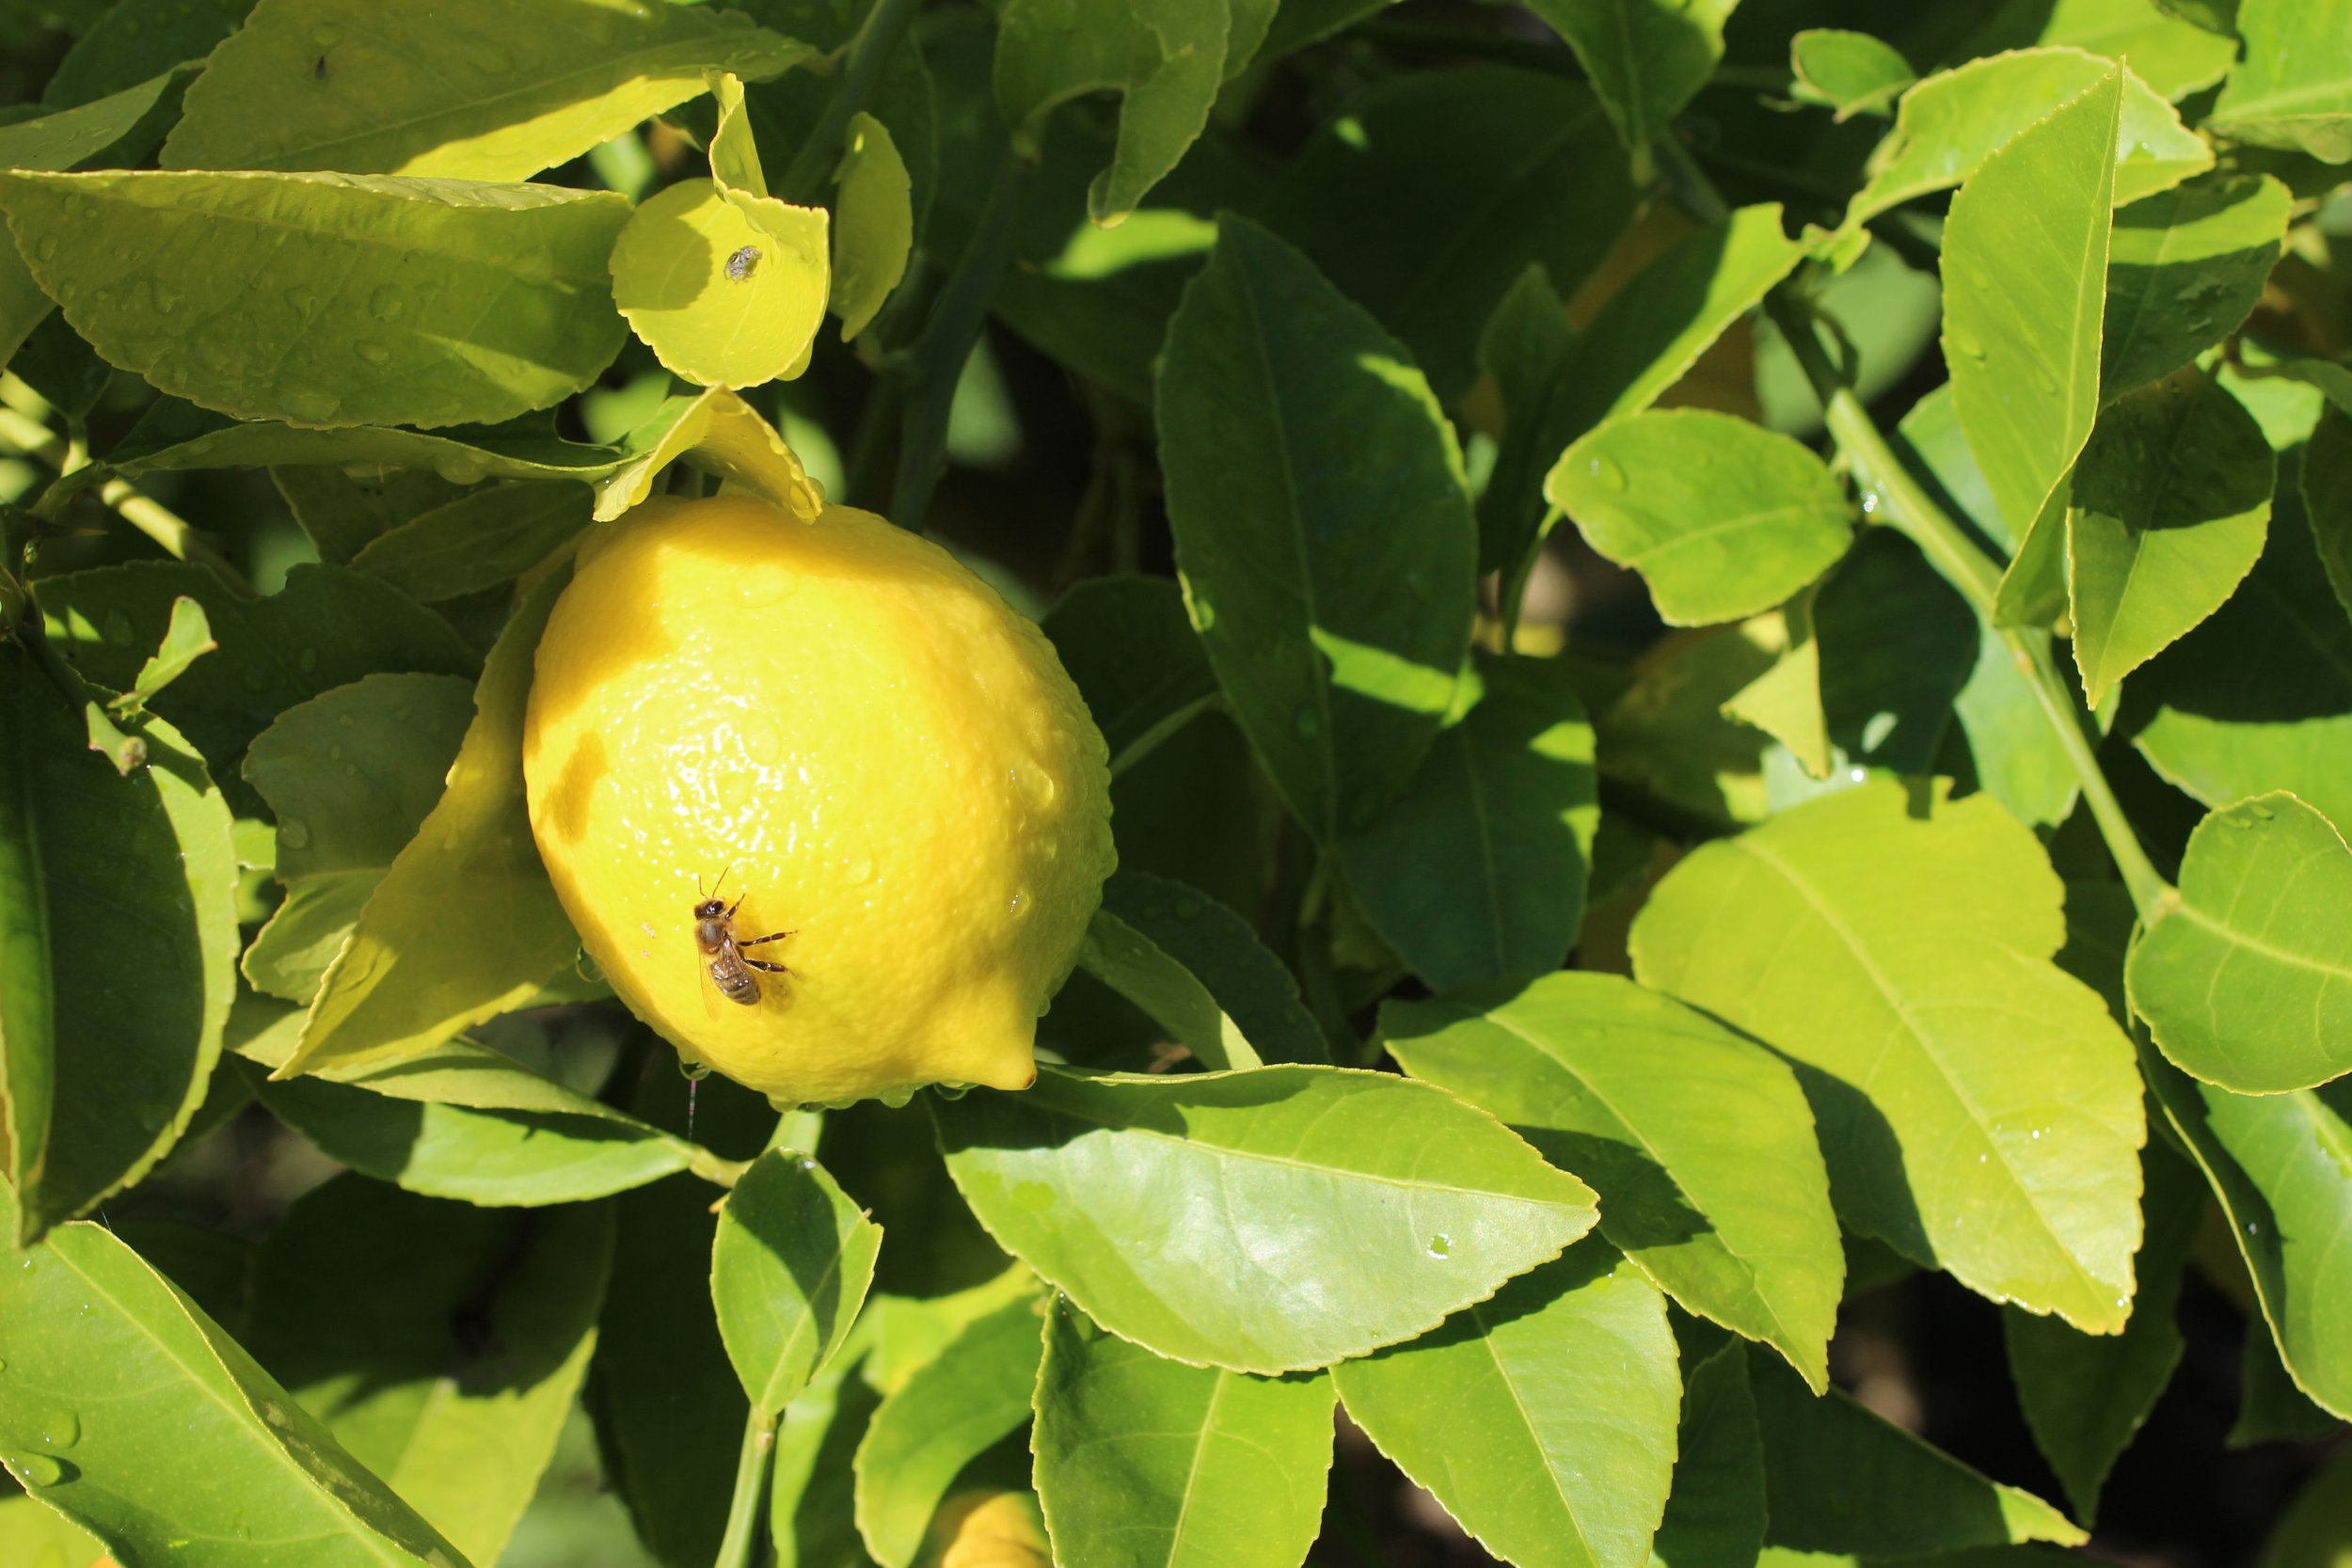
Hello bee!
When life hands you lemons…(from your parents’ tree)
A bunch of lemons (example: 10 lemons)
A bunch of coarse sea salt (example: 1/2 cup salt)
Additional lemon juice and salt as needed
Other ingredients if desired such as bay leaf, peppercorn, coriander, clove (I never use additional ingredients, as I like the lemon flavor to shine on its own)
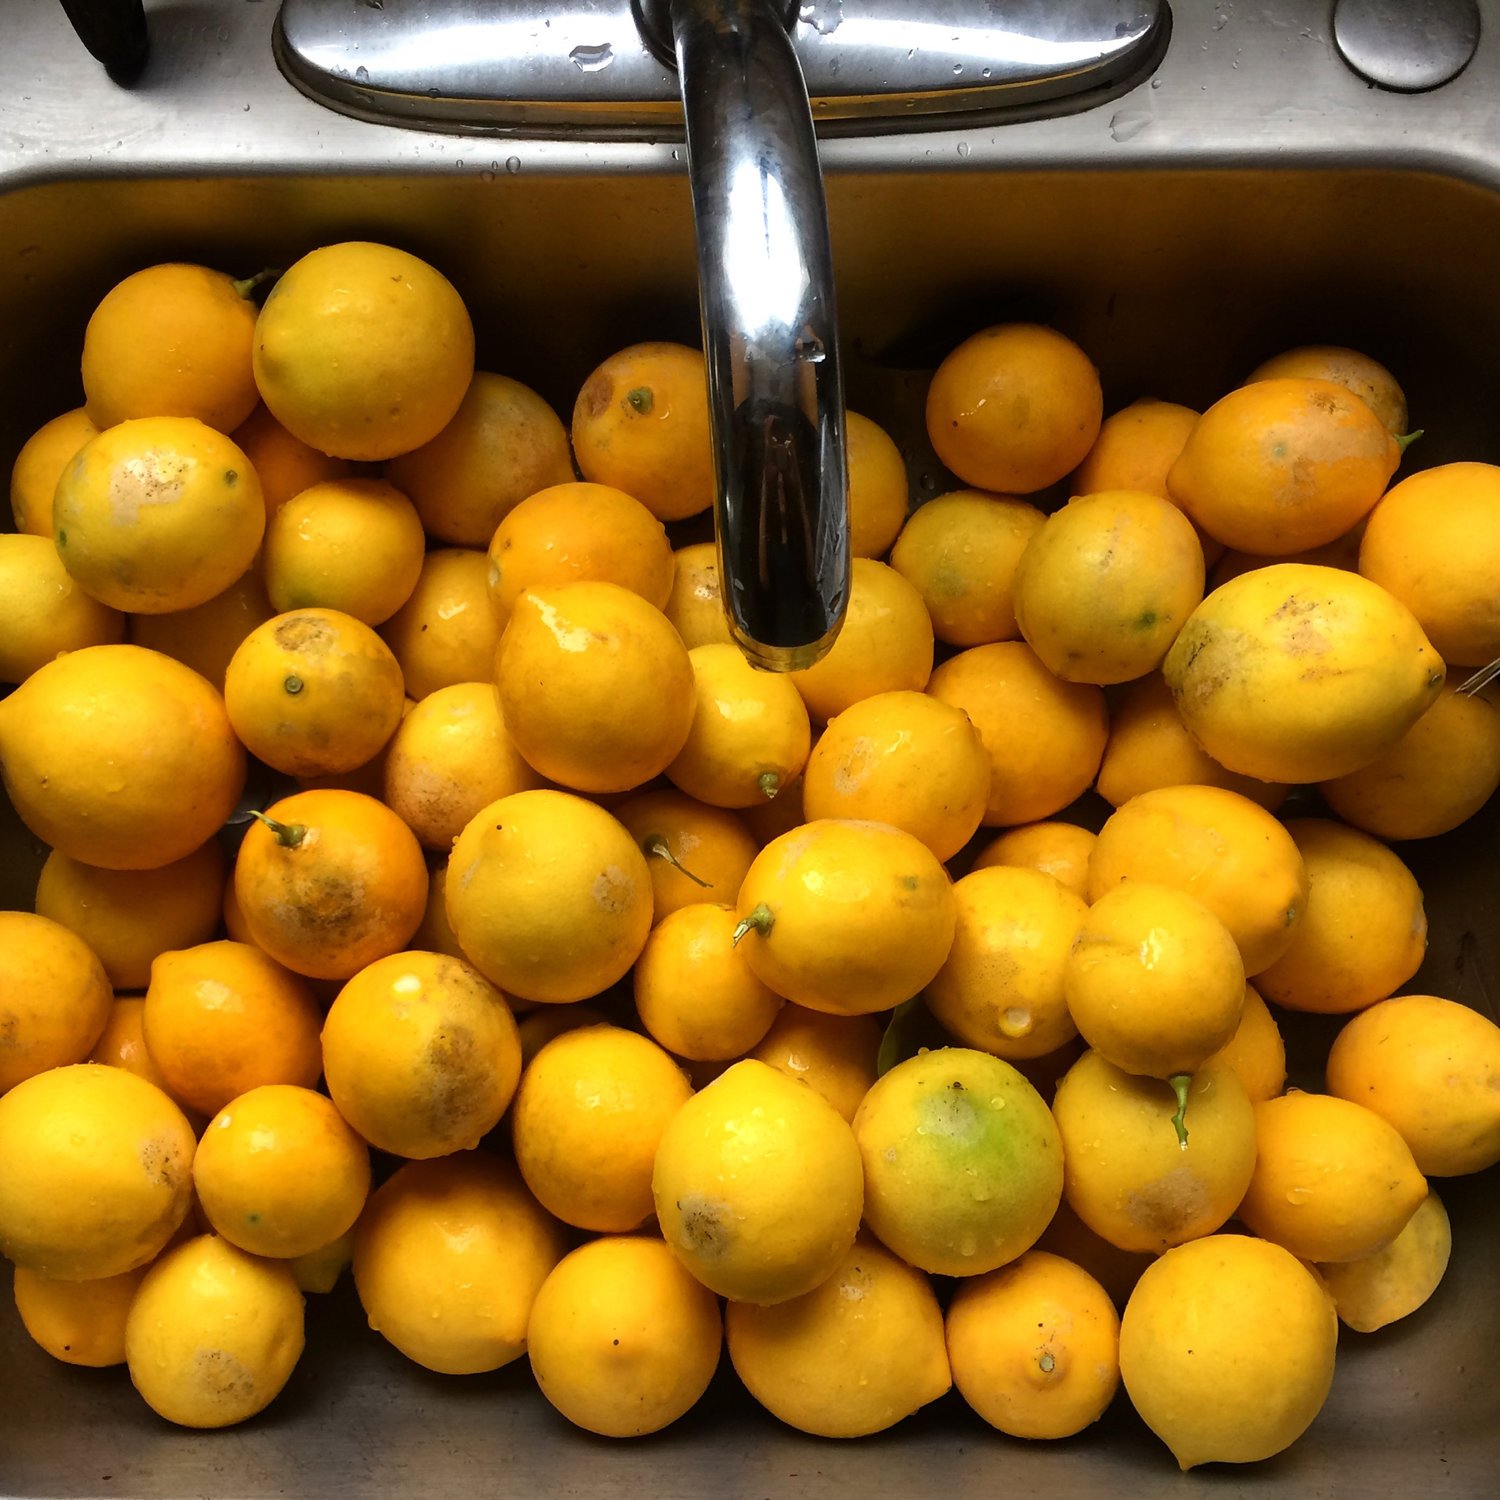
Wash mason jars (a one-pint jar will hold 3-4 lemons) with hot soapy water and wash lemons well with water, scrubbing off any dirt. For 10 lemons, you will about 4 one-pint jars or about 2 quart jars.
Cut lemons in half then quarter each half without cutting all of the way through so there are 4 attached segments on each half.
Rub lemon halves all over with salt, making sure to get in between the crevices, and press down into jars as you go. Press lemon halves on top of each other into jars tightly, squeezing out as much water as possible.
The lemons in each jar should be submerged in their own salty lemon juice. If they aren't submerged, add more lemon juice and press down again. You may need to wait a few hours and press down another time (making sure to wash your hands any time you come into contact with the lemons), as they absorb liquid and are easier to press down over time. I like to also put something (that has been well-cleaned) on top of the lemons so that they stay submerged. A smaller jar (such as a 4-ounce jar) filled with water works well for this. I have also used plastic bags filled with water for this purpose.
Leave on the counter for about 3 weeks then screw on lid and store in the refrigerator for up to one year (even 2 years in some circles, but they probably won't last that long!)* To use, remove rind, rinse, chop, and add at the end of cooking. Juice (and even chopped pulp) can be used as well - it's not as common, but has a similar flavor!
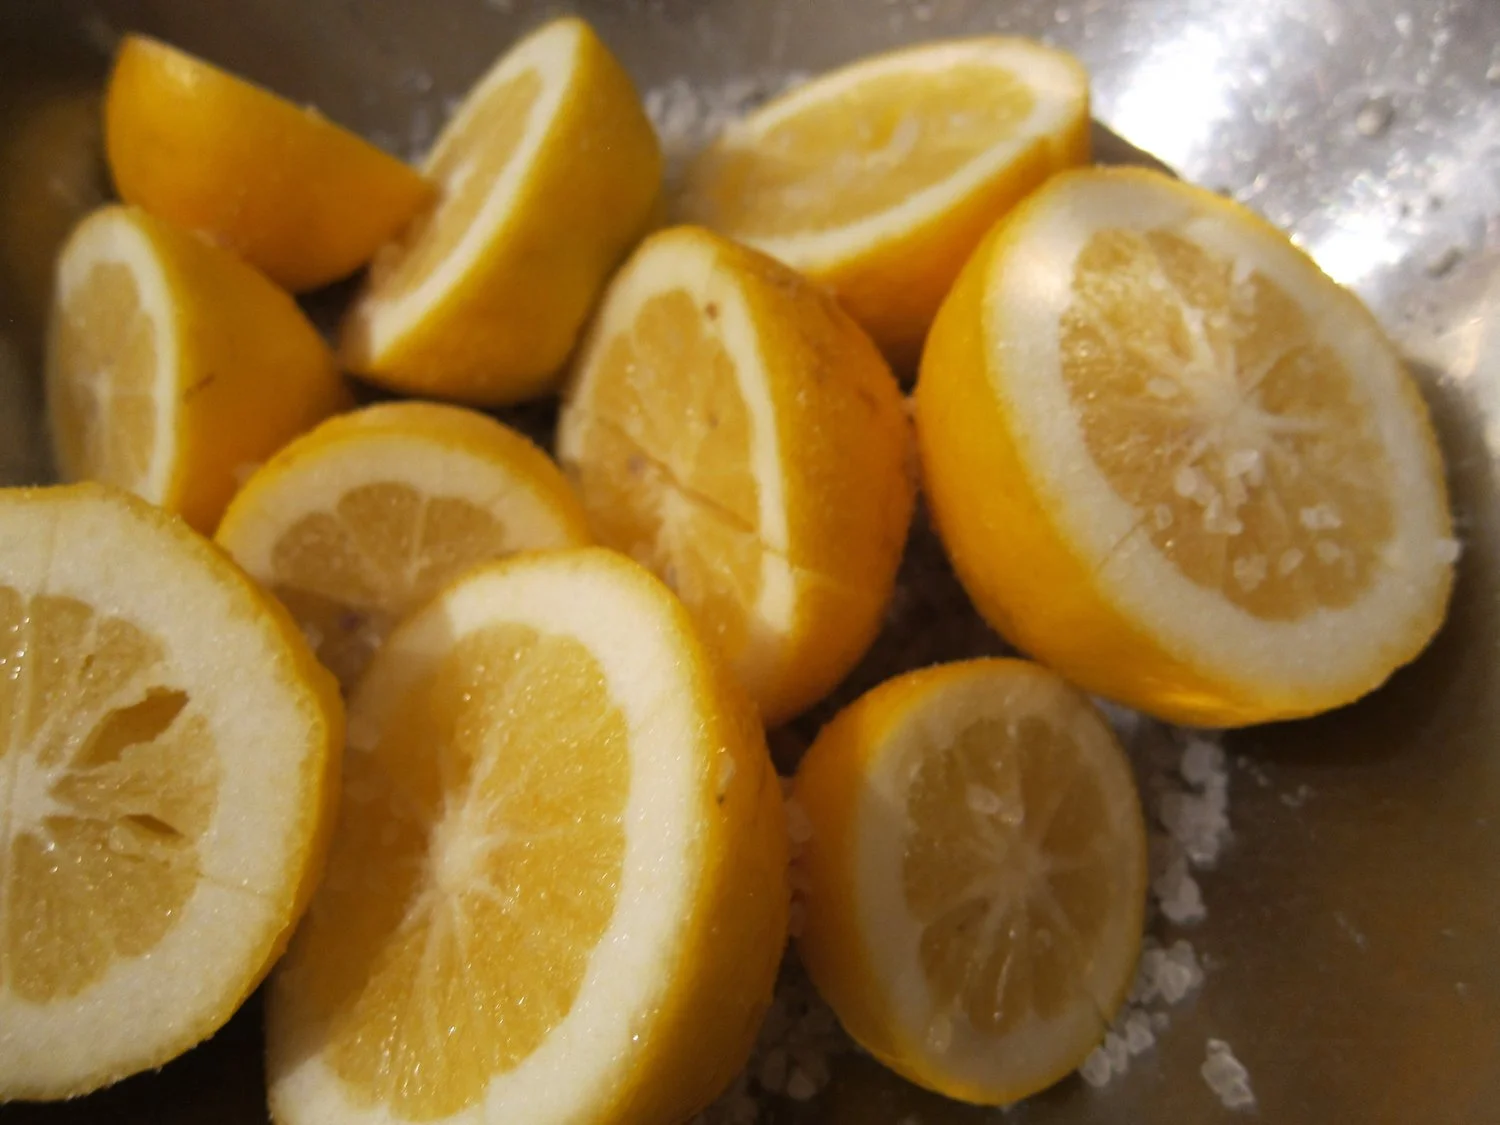
Lemons halved and quartered so segments remain attached before salting.
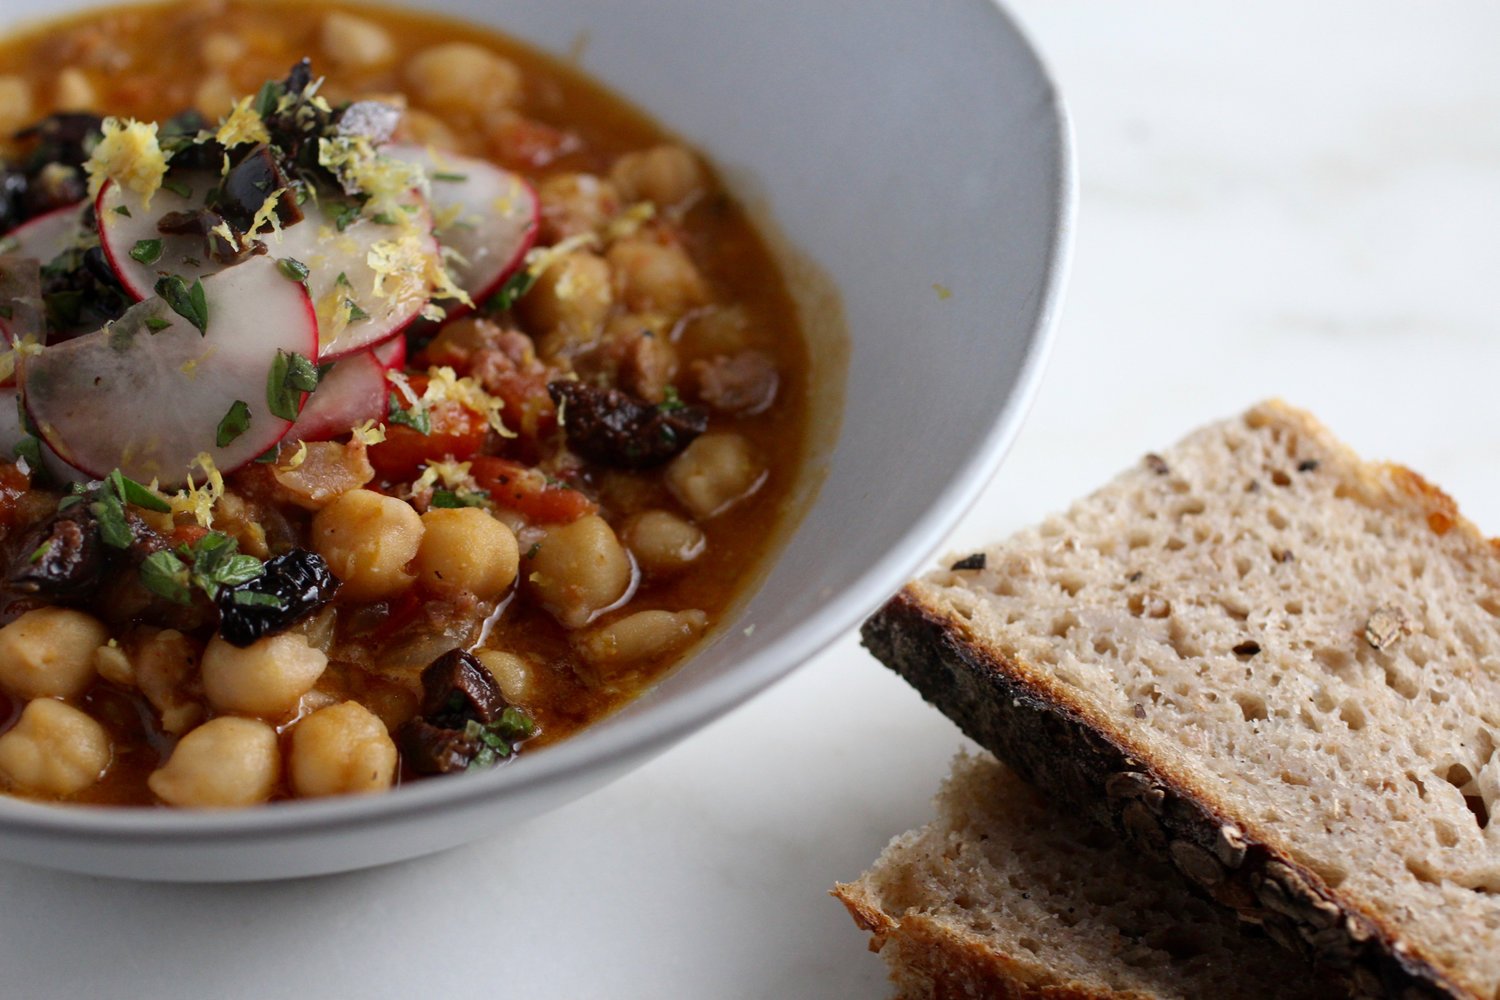
Chickpea soup with preserved lemon juice, tomato, olives, and lemon zest.

Gravlax with Dill and Peppercorn
Like panna cotta and aioli, gravlax is one of those intimidating-to-make foods that are, in actuality, incredibly easy. The most important thing to remember is to stop the curing process at the right time or your salmon will become overly salty and stiff. I learned this the hard way a few times, but luckily the stiff and salty version is still tasty when used as a condiment in omelettes and rice bowls. Thus, never fear - even if you mess up, your salmony goodness will still be appreciated.
When cured to just the right level however, gravlax reaches an ethereal luxuriousness that both impresses friends and is incredibly cheaper than the store-bought version. Everyone will be wondering how you did it and you'll be wondering why you ever eat gravlax that aren't home-cured.
Curing is a generic term that can mean anything from drying apple slices to smoking pork belly for bacon - essentially, preserving a food by altering its ingredients. Gravlax, which is a Scandinavian type of lightly cured fish, uses sugar and salt to draw water from the fish and create an inhospitable environment for microbes. This both (slightly) preserves the fish and changes the flavor and textural properties. What is incredible about humans is that so many of the processes we figured out to survive (food preservation by adding salt being one of them) resulted in foods that we now cherish. A lot of the most culturally definitive foods, from fish sauce to cheese, were originally created out of necessity, but are now valued for their gastronomy and cultural significance.

Pink peppercorn
Although no longer a necessity, gravlax is one of those cured foods that will endure because it's so darn delightful. When curing fish, it's important to have the right about of sugar, salt, and time, but beyond that the herb/spice pairing is up to you. I have made gravlax with fresh dill, as is outlined in the recipe below, but I have also used dry dill in a pinch or even other combinations of herbs and spices (for example, coriander and sweet fennel fronds), all with pleasant results. Nothing really beats the classic fresh dill, white pepper, and fennel seed combination however! the below recipe makes enough for about 12 servings as an appetizer or on a bagel, but it can be adapted according to needs (more fish will require a longer curing time). As gravlax is only lightly cured and no heat is involved, the fish is only preserved for about 5 days after the curing process. This recipe uses a ratio of 1 part sugar to 1 part salt, but you can play around with it to get it to your liking. You can also experiment with different sugars, such as turbinado or brown. This is a more classic version with granulated sugar and dill. Makes 12 ounces/4-6 servings, but can be expanded as needed.
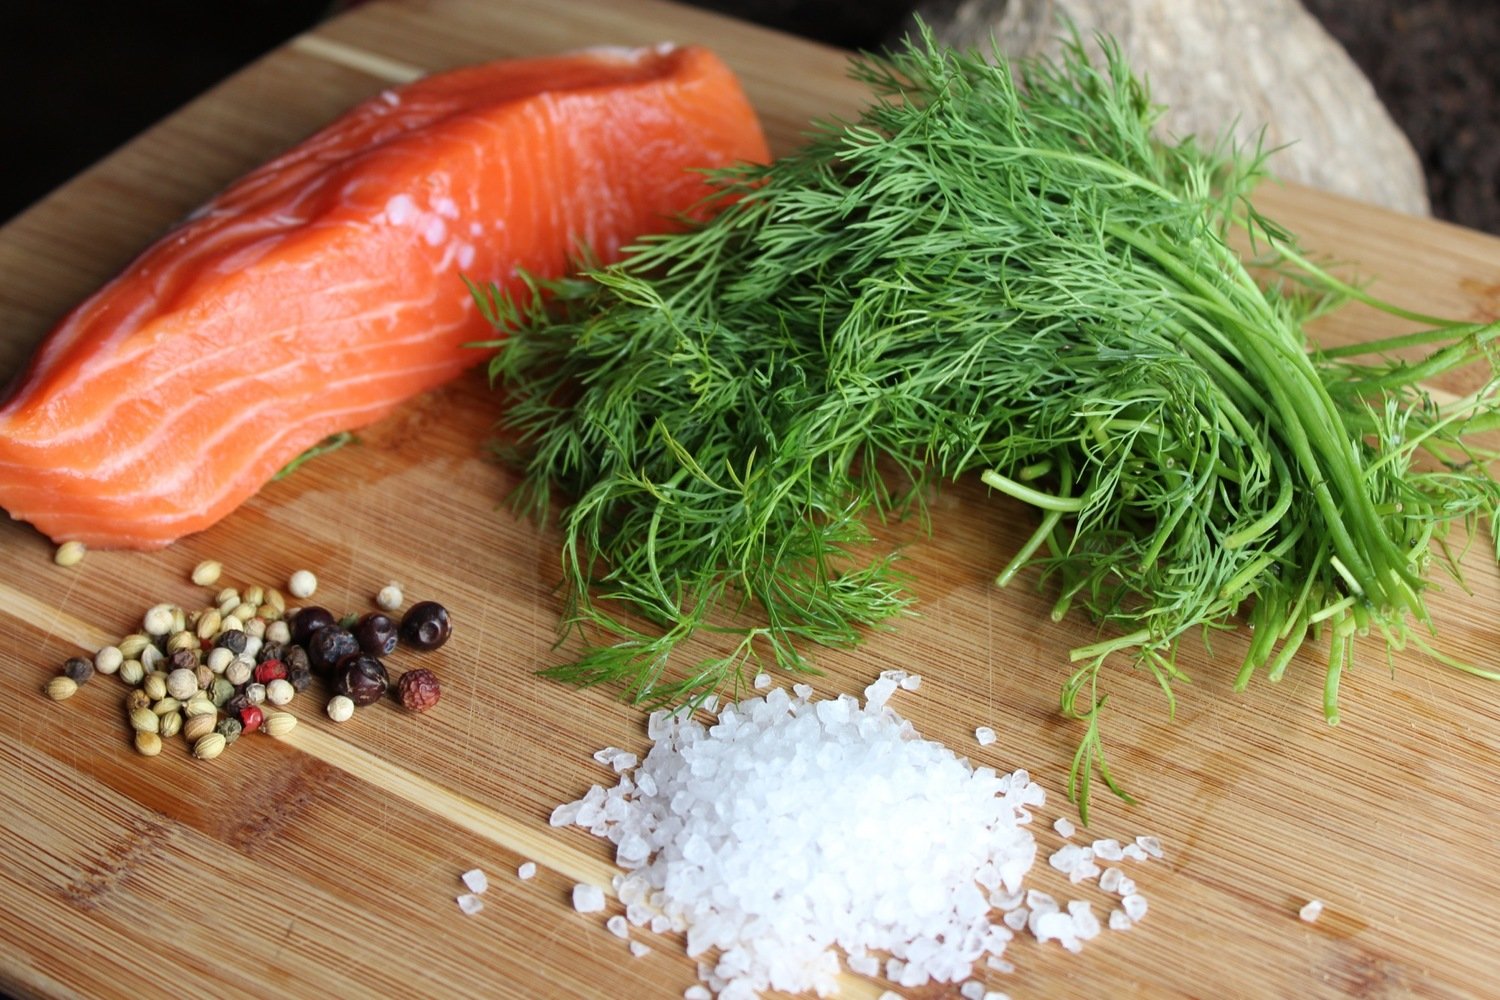
50 grams (1.75 ounces) fine or medium grain sea salt or kosher salt
50 grams (1.75 ounces) granulated sugar
15 grams (0.5 ounce) pink or white whole peppercorn, crushed with mortar and pestle (optional)
30 grams (1 ounce, about 1/2 bunch) fresh dill, chopped
0.75 pounds fresh salmon fillet, with skin
Blend salt, sugar, peppercorn, and dill in large bowl. Rub mixture evenly all over both sides of the fish and press into the surface slightly so it sticks.
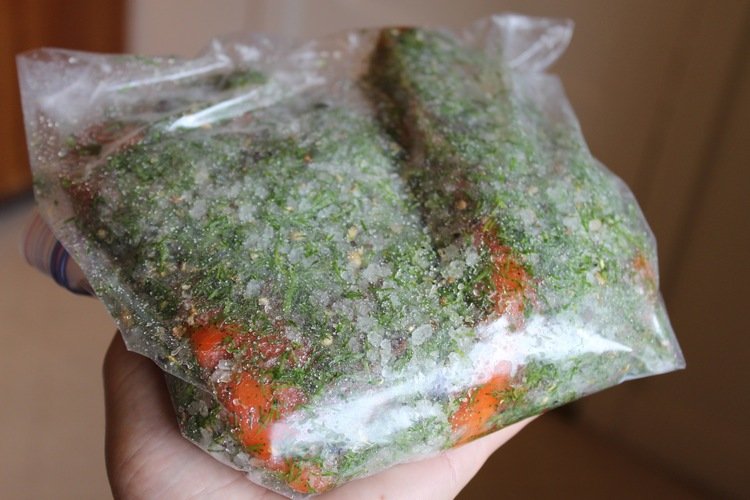
Cover the fish coated in the sugar-salt-dill mixture in plastic wrap and place in glass or ceramic baking dish (do not use metal unless you line it with plastic or parchment) or, alternatively, put everything into a large ziplock bag. Weigh down the fish to express moisture as it cures. Some items that can be used include another smaller baking dish or jars filled with liquid.
Salmon with salt and herbs for curing.
Refrigerate the salmon for 48 hours. At 24 hours, flip the fish and weigh down again. Once curing is finished, rinse the salmon and -delicately- slice away the skin. Gravlax can be stored in the refrigerator for up to 3 weeks wrapped in parchment paper or plastic. Mine never lasts that long however!
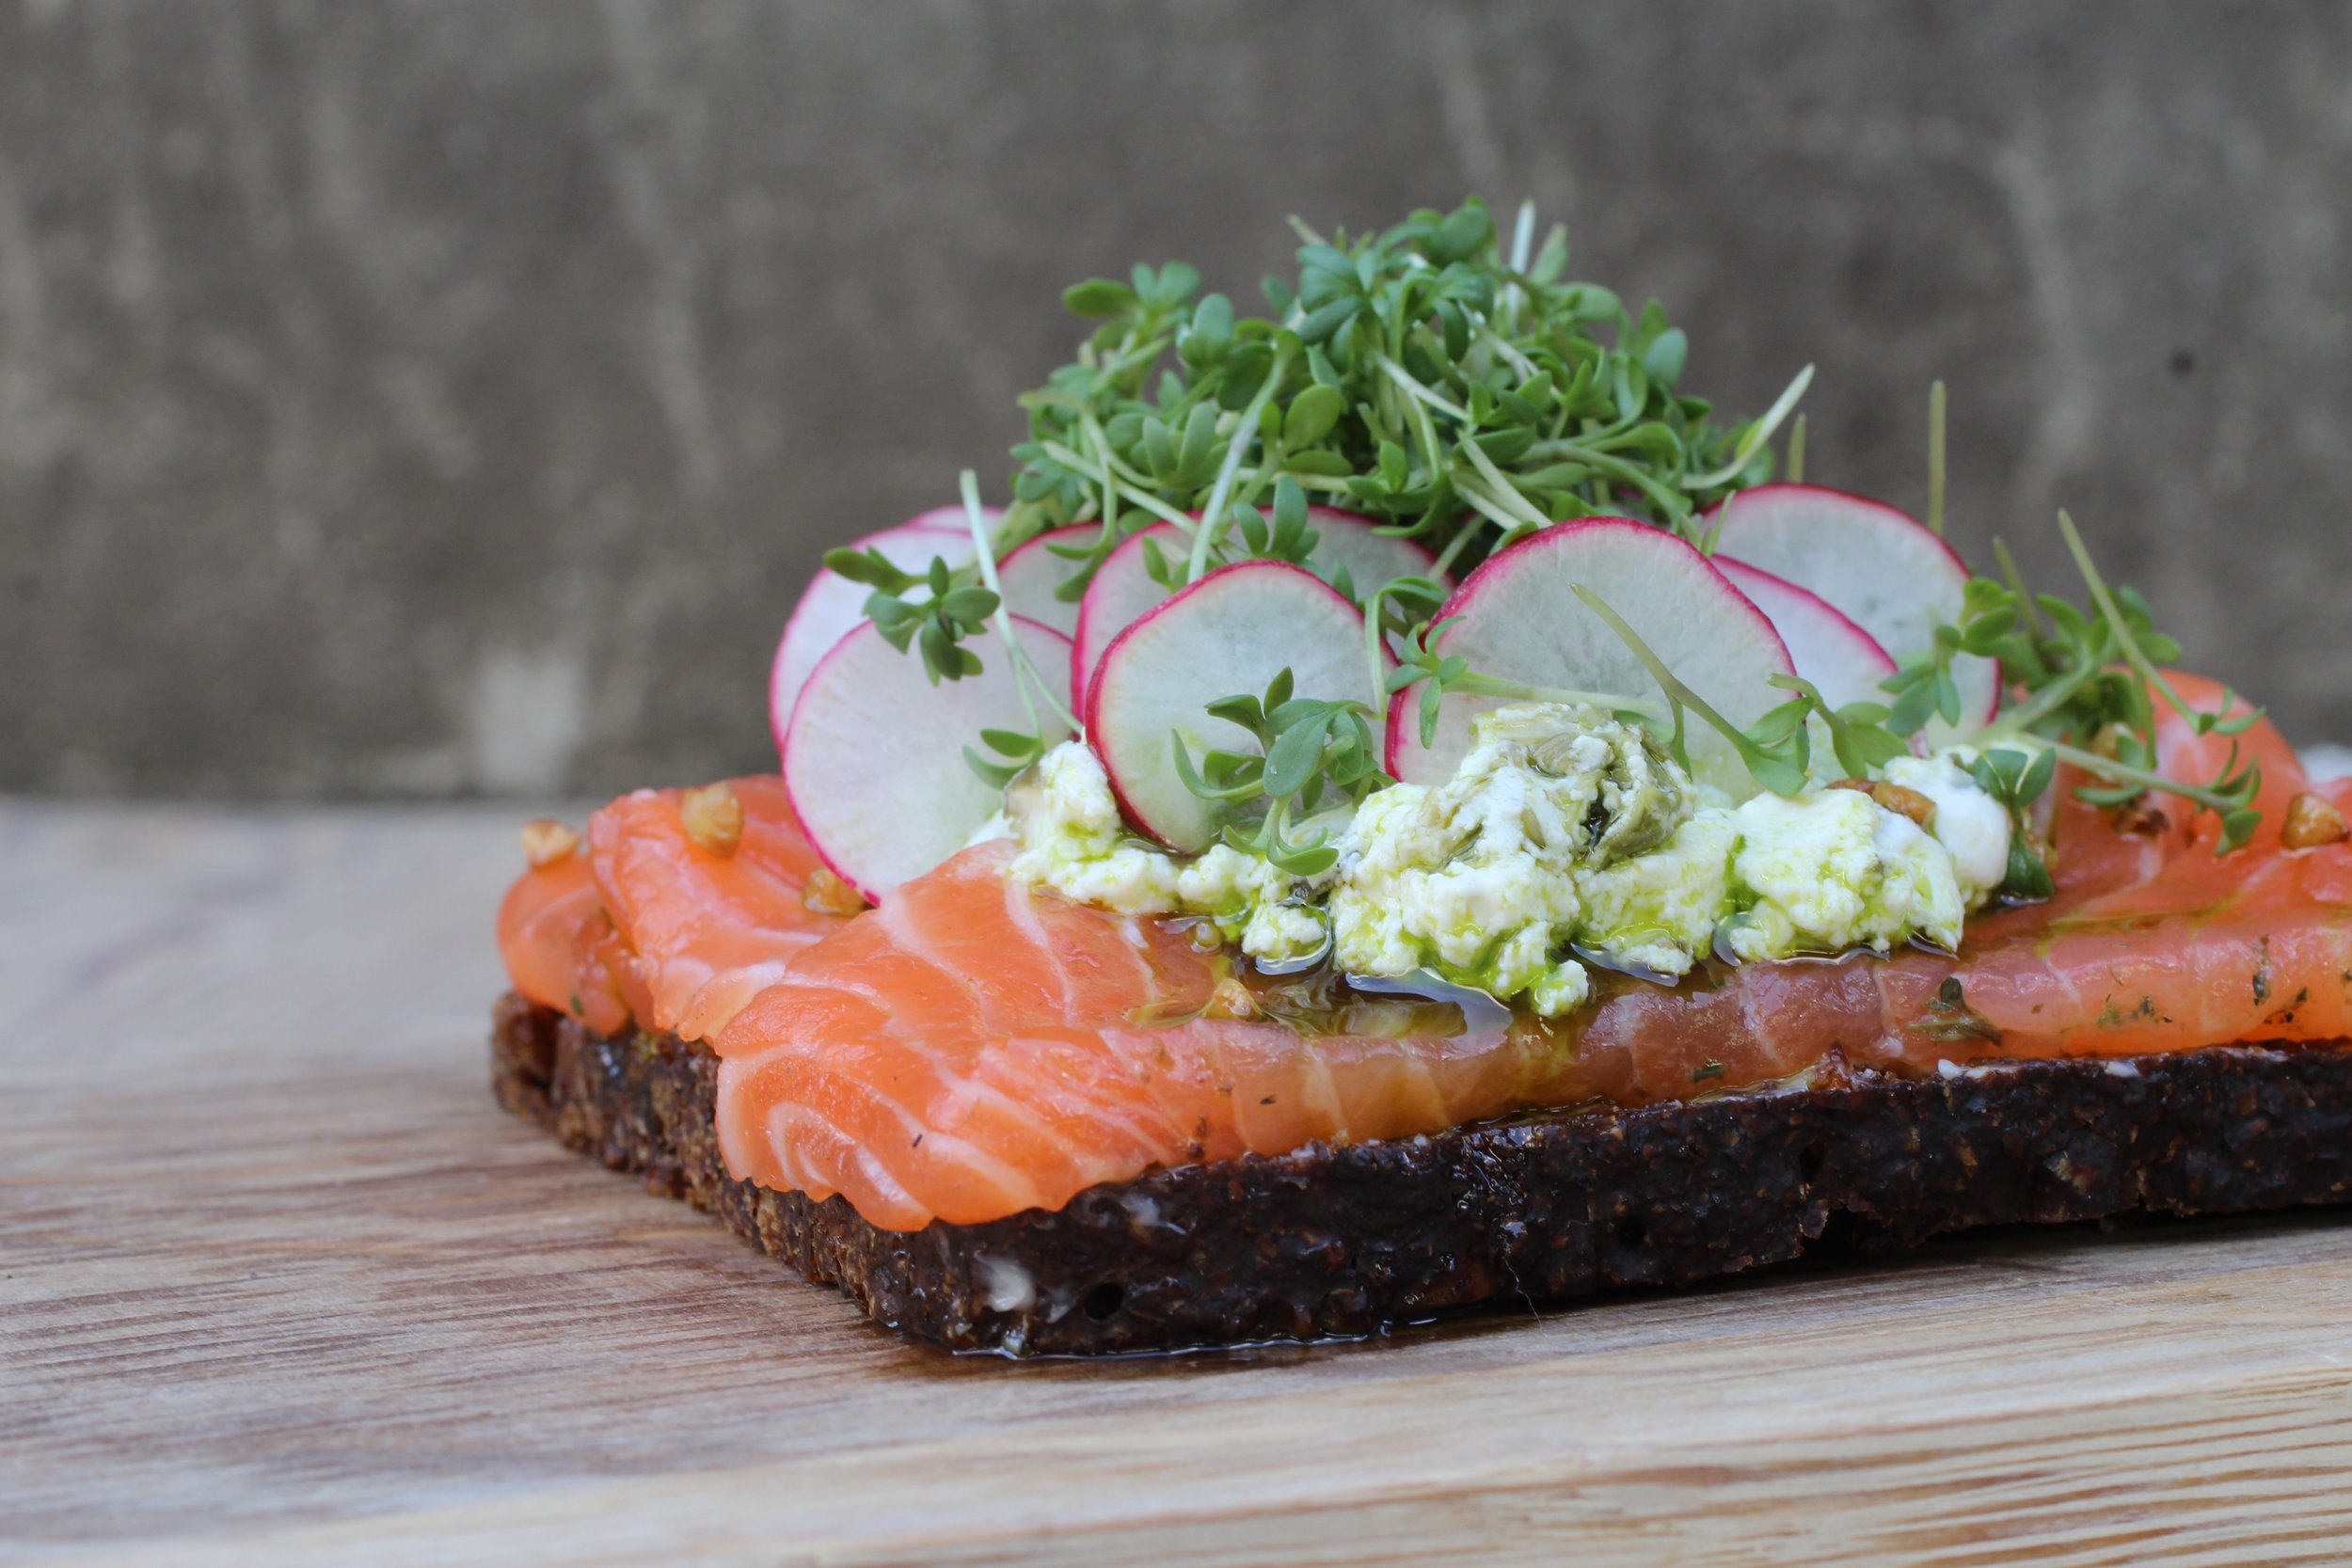
To serve, slice the fish thinly and use as an appetizer atop rye bread/crackers or cucumber with crème fraîche, on the classic bagels and cream cheese, or in a number of other creative ways, such as the smørrebrød (buttered bread with toppings) you see below!

Smørrebrøod - open faced rye with gravlax.

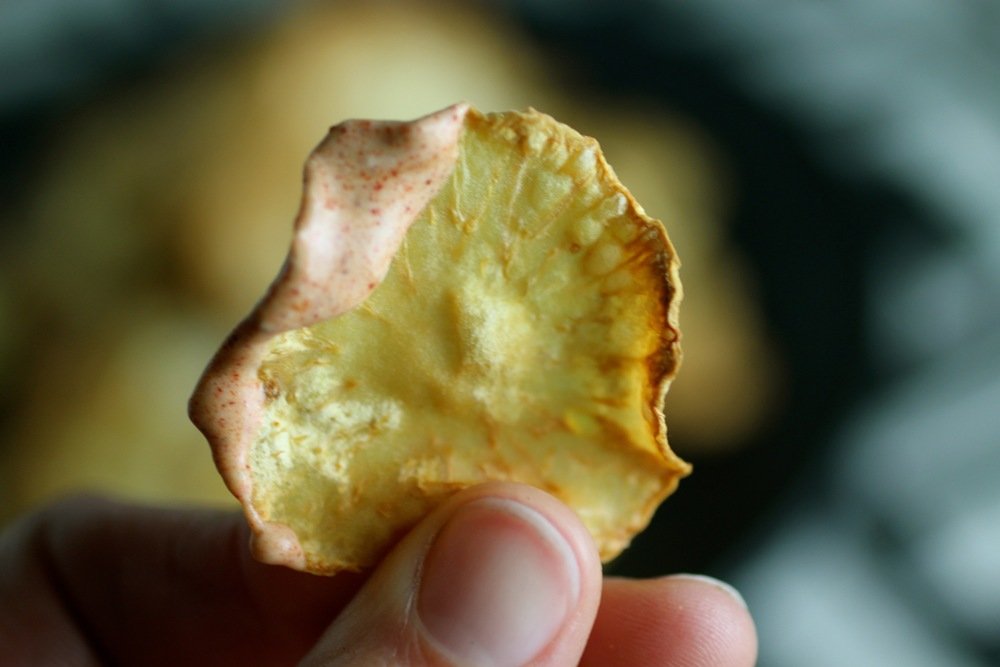
Celery Root Chips with Paprika Aioli
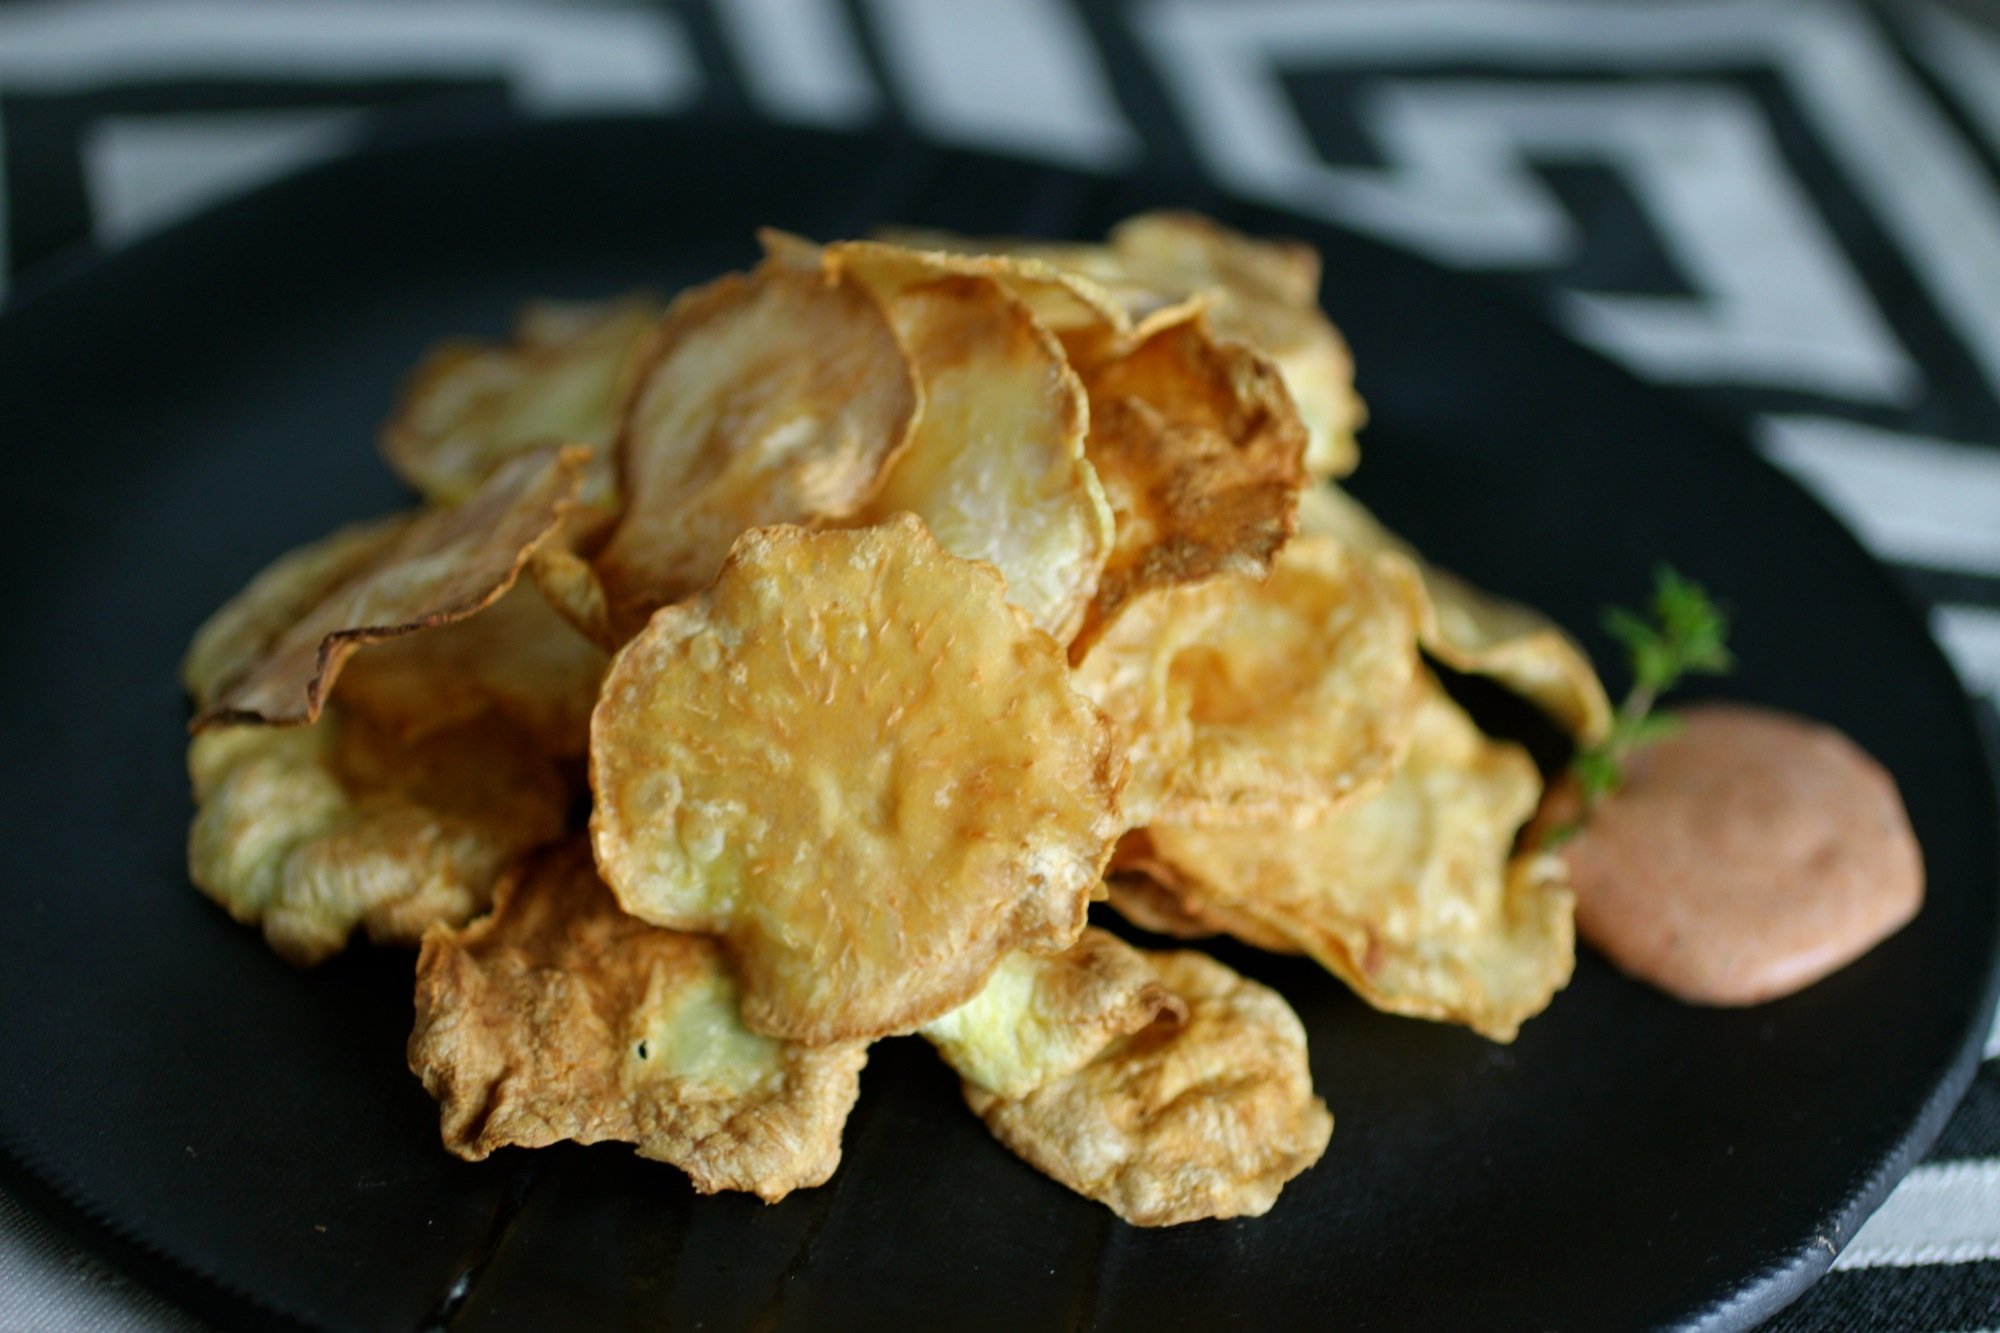
Celery root, celeriac, or whatever you want to call it, let's face it - this root is gnarly. What I love about celeriac is that even though it is gnarly and somewhat intimidating, it can be transformed into something like these chips, that are delicate, light, and elegant. Also - don't worry, it's really not that intimidating after you cut off the outside and the flavor is delightfully nutty - perfect in these chips tossed in coconut oil before baking and paired with smoked paprika aioli (or, honestly, also delicious on their own). Recipe makes enough for about 2-3 people as a snack, but you could probably eat them all on your own.
1 celery root (about 200g)
2-3 teaspoons coconut oil, melted*
About 1/8 teaspoon sea salt
Smoked paprika aioli (optional, see below)
To Prepare:
Preheat oven to 375 degrees F.
Rinse and cut off top and bottom of celery root then, using a knife, cut off remaining peel and any tougher outer layer into strips.
If needed, rinse again to remove any remaining dirt and pat dry.
Using a mandolin, slice into thin circles. The celery root may need to be cut in half first, depending on the size of the root and your mandolin.
Place chips on baking sheet and drizzle with coconut oil. Toss to coat, sprinkle with salt and spread out on baking sheet in a single layer.
Bake for 15-20 minutes or until golden brown, flipping halfway through. Chips might not be crispy while still warm, but they should become crispy as they cool.
*Olive oil can be substituted for coconut if desired. The flavor is not quite as nutty and can be more peppery, depending on olive oil.
Note: Leaving celeriac chips out for a long time, especially in a humid environment, will cause them to soak up water and lose their crispiness.
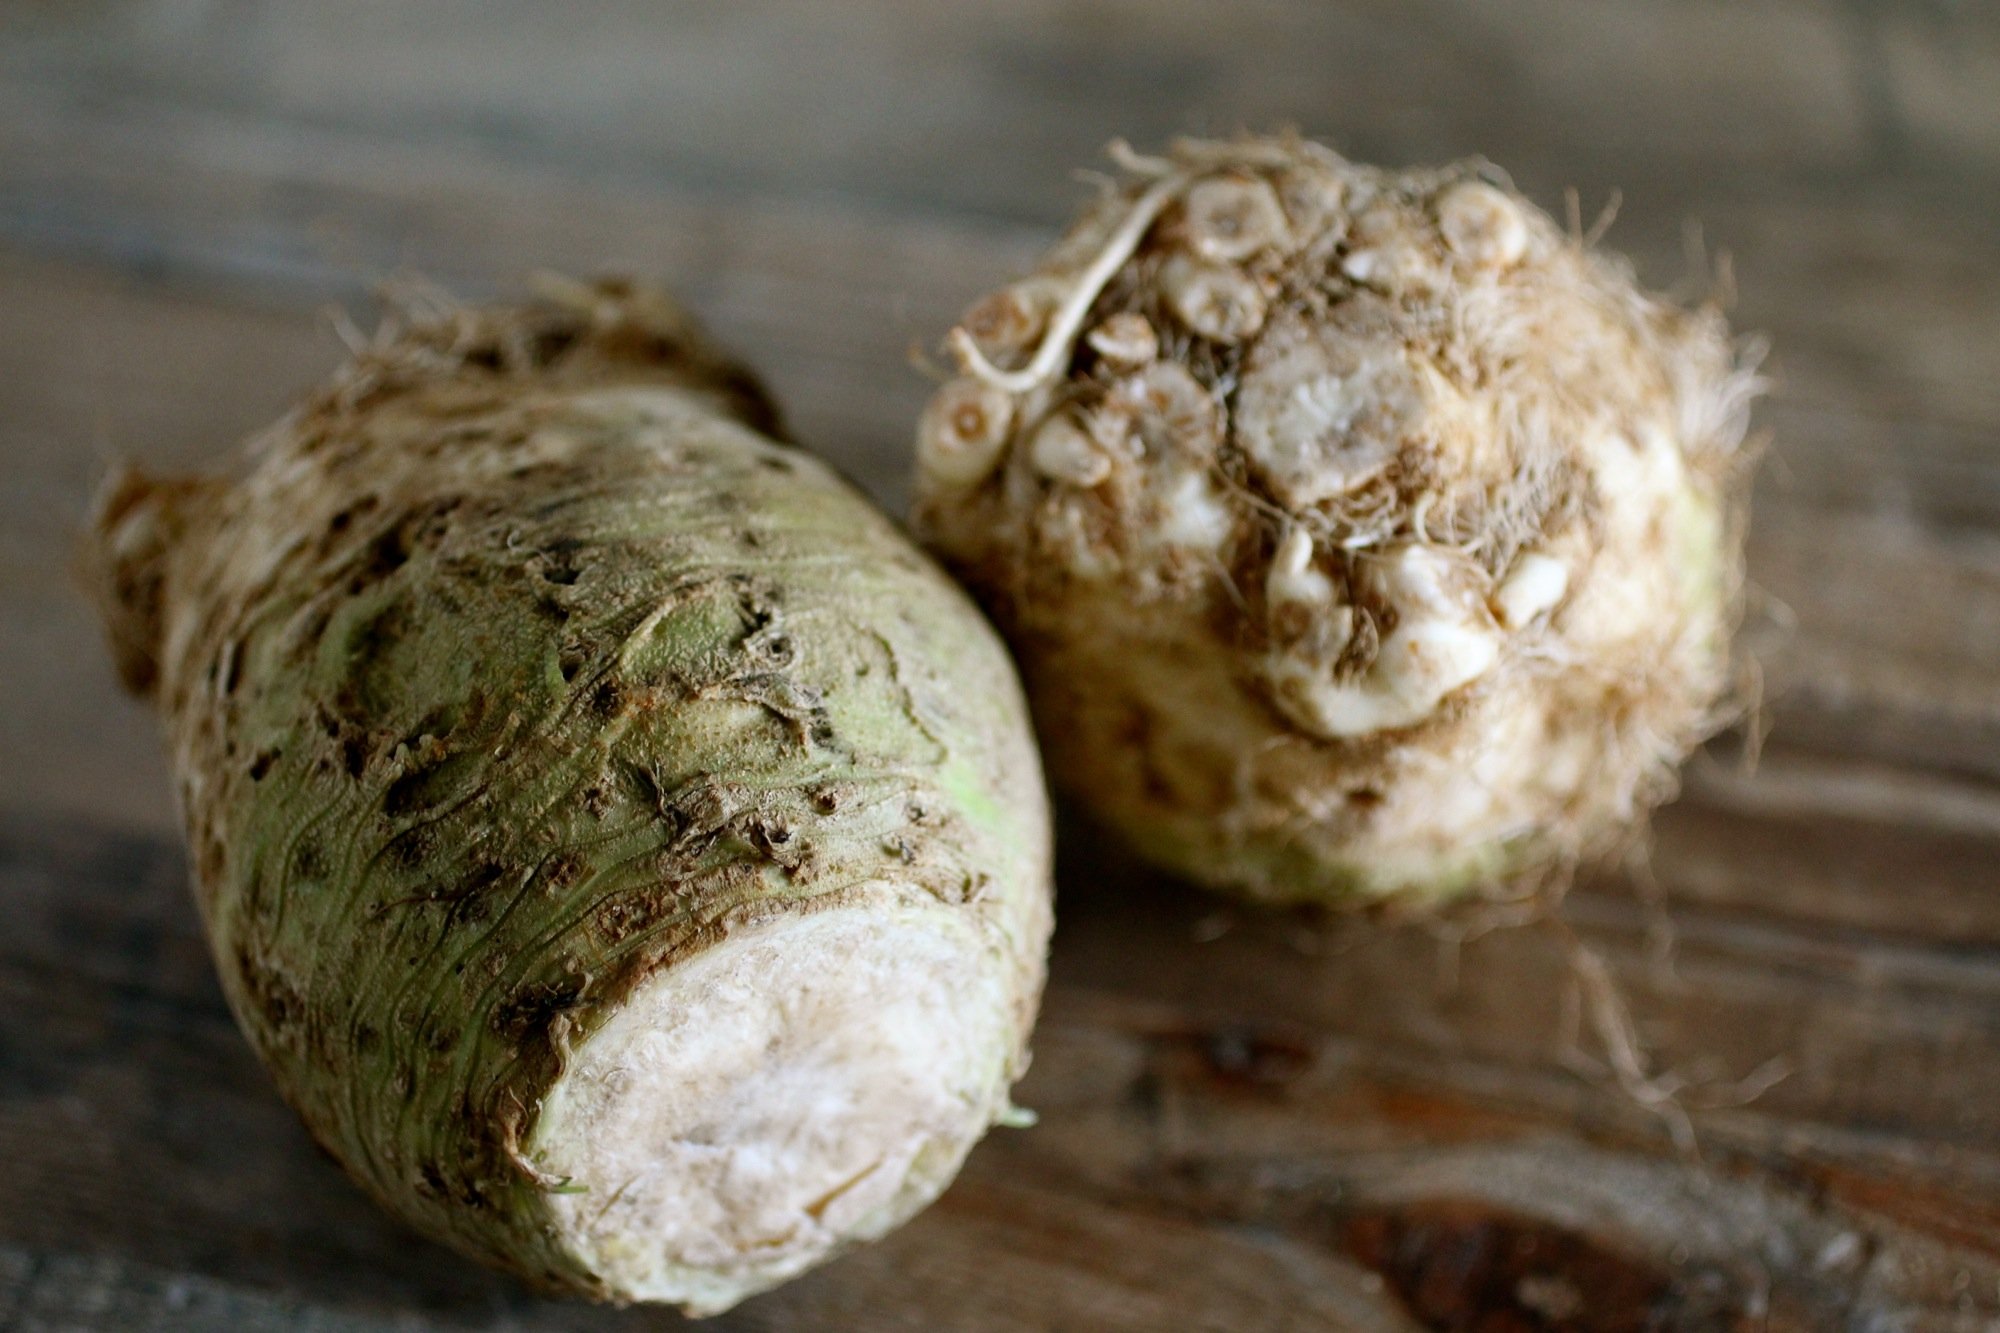
Gnarly celery root - love it!
For Smoked Paprika Aioli- This recipe will make much more than you need for these chips and goes great with raw or cooked vegetables, in salad dressings, on sandwiches, etc. When I make it, I usually split it in half and only add the smoked paprika to one half, as classic aioli is more versatile.
1 egg
1-2 medium cloves garlic, diced
1 teaspoon mustard or mustard powder
Pinch of sea salt
1 cup olive oil and either vegetable or grapeseed oil combination (adjust ratio depending on how rich olive oil-wise you’d like your aioli to taste)
2-3 teaspoons fresh lemon juice
About 1/2 teaspoon smoked paprika (to flavor one half of the aioli)
Blend egg with garlic, mustard, and salt until frothy.
While blending, slowly add in olive oil. Blend until thick and quickly mix in lemon juice. Divide aioli in half and whisk in smoked paprika to one half. Keep refrigerated until use.
CHOMP.

Savory Corn and Chard Porridge
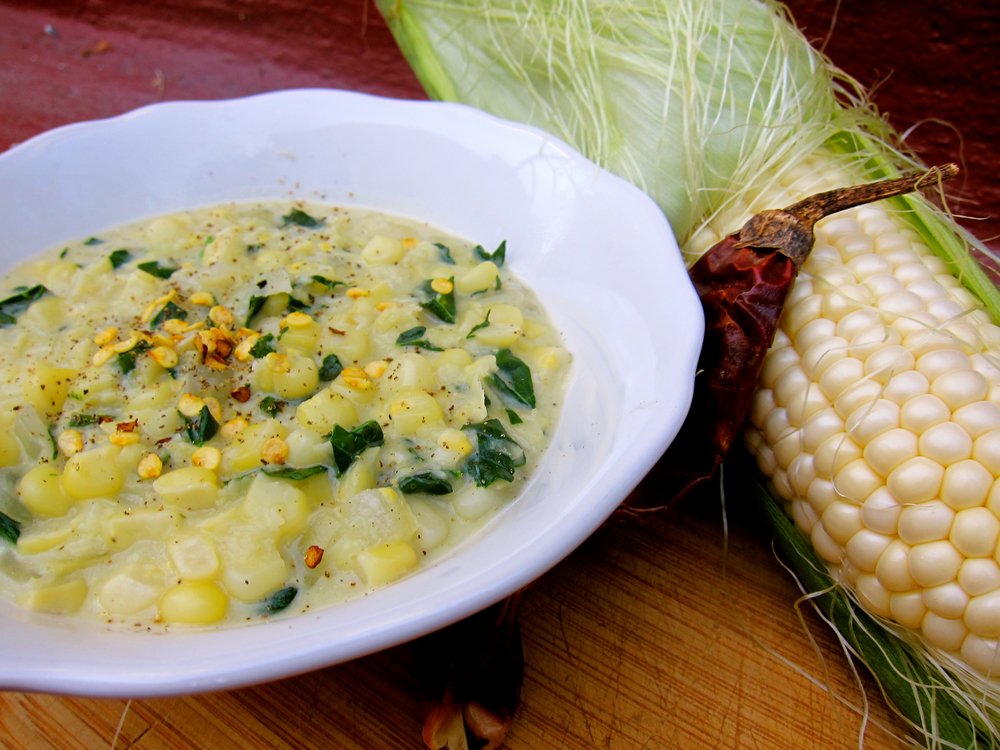
Try this flavorful dish for a unique way to sneak vegetables into your breakfast. Use mustard greens or spinach if chard is not available where you live. Serves 4.
4 large ears of corn
1 tablespoon olive oil
1 medium yellow onion, diced
1/2 cup water
1/2 cup whole or reduced fat milk
1-1/2 cups chard, chopped
1/4 teaspoon salt
1/4 teaspoon ground white pepper
1/2 teaspoon red pepper flakes
1/4 teaspoon coarse ground black pepper
To Prepare:
Using a cheese grater, coarsely grate the kernels off of 2 ears of corn into a large bowl to create a pulp. Using a knife, remove the kernels off of the other 2 ears and add to the bowl with grated corn.
In a large pot, sauté onion in oil on medium-low heat until soft, about 5 minutes.
Add the corn mixture and water to the pot and cook 5 minutes, stirring occasionally. Add milk, chard, salt, and white pepper, and cook until thickened, about 2-3 minutes.
Serve hot, topped with red pepper flakes and black pepper.

Spiced elderberry cordial
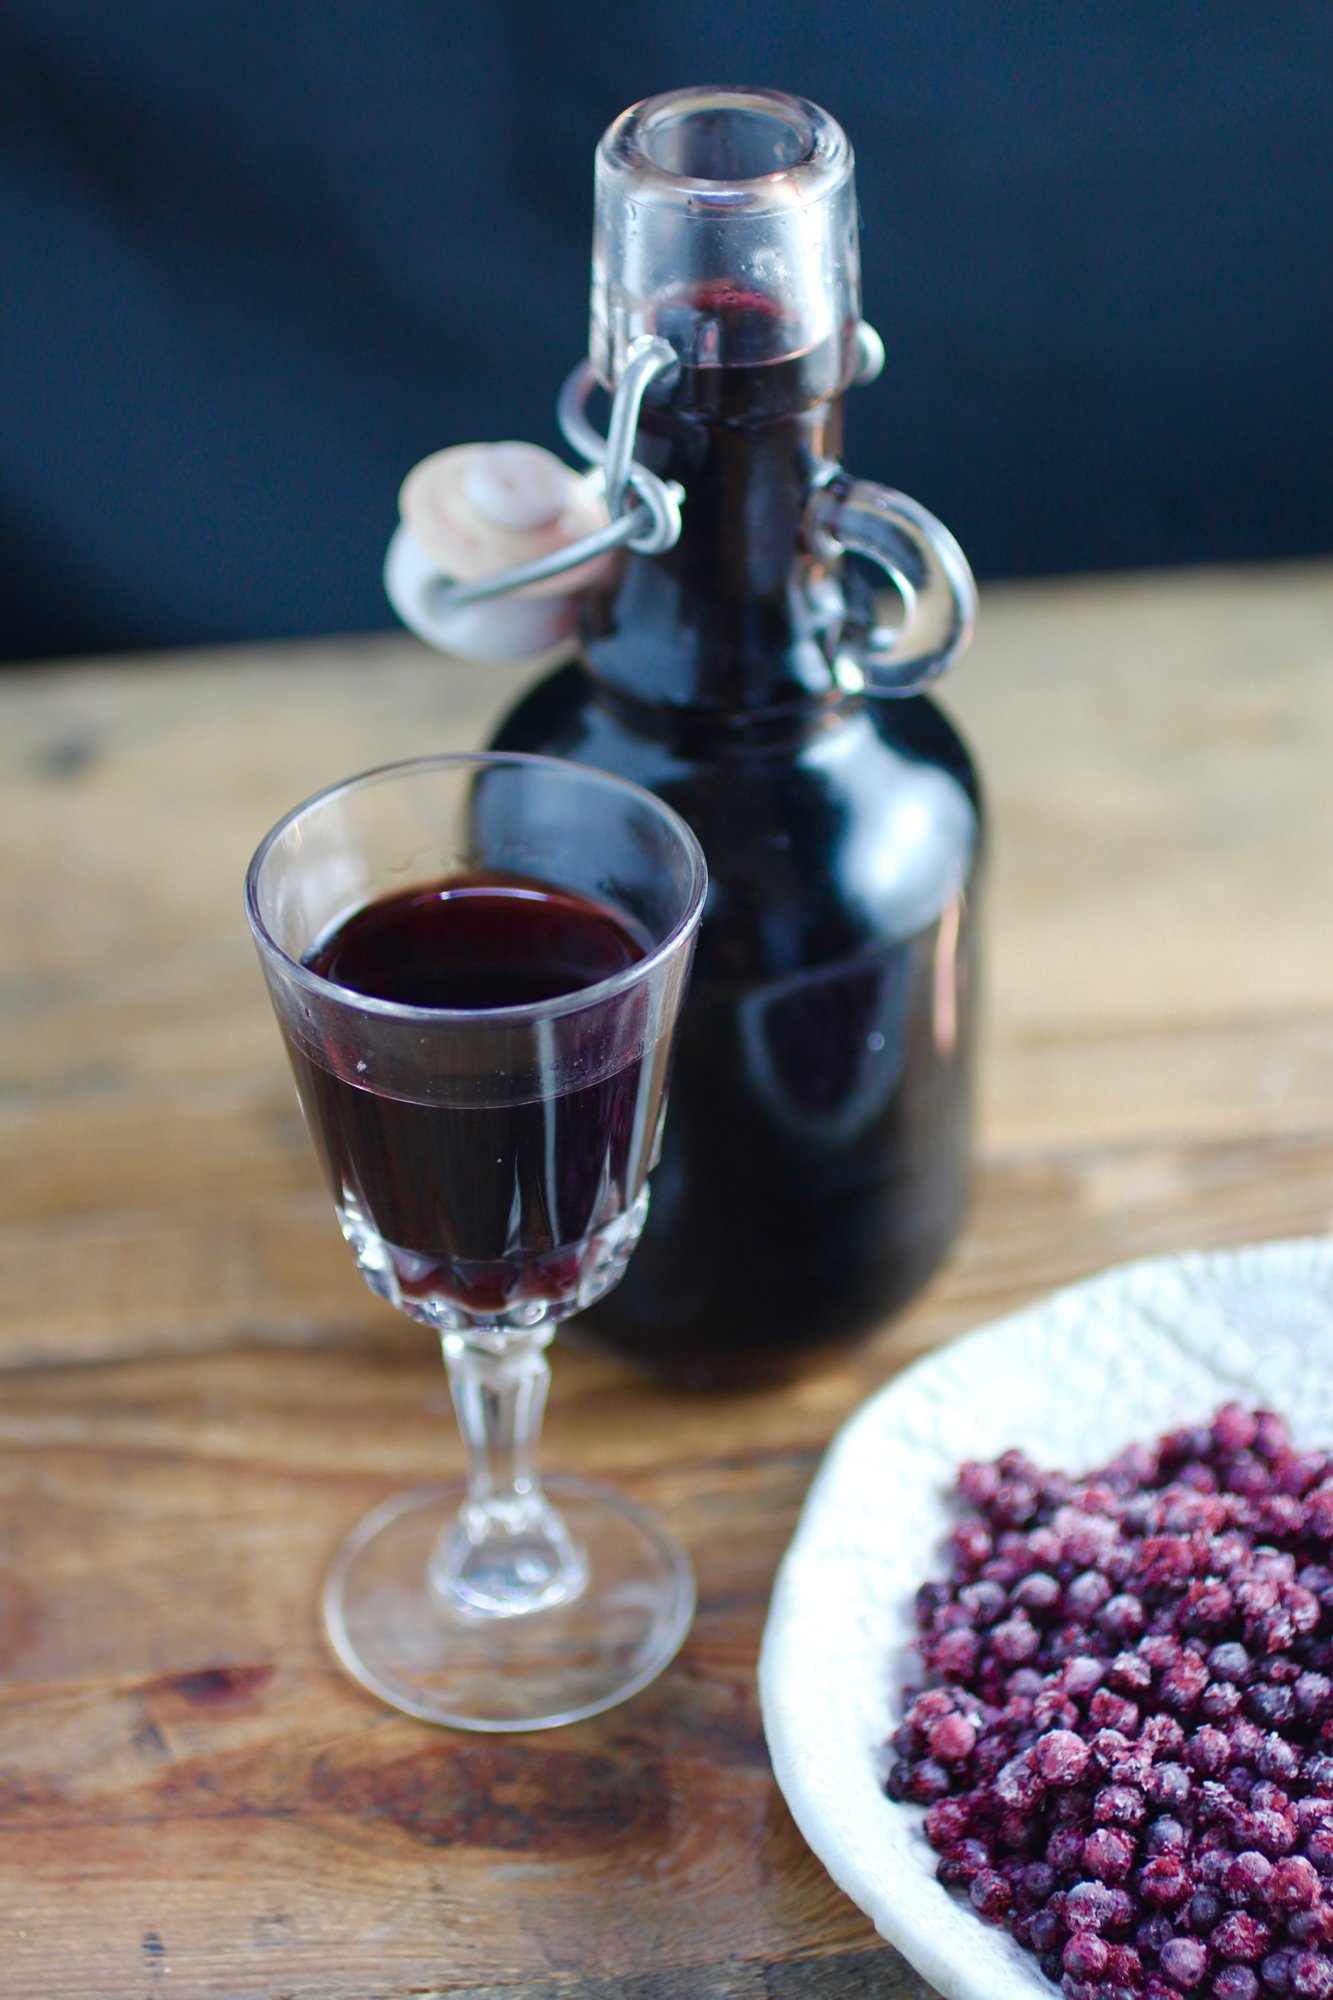
Unlike elderflower cordial, elderberry cordial is a stronger, thicker syrup containing alcohol that is used in both medicinal and culinary applications. The syrup is sometimes taken regularly for cold and flu prevention (there is limited peer-reviewed, but much anecdotal evidence suggesting the berries enhance immune response), to top pancakes, or, as I particularly enjoy, with champagne for an “elderberry kir royale”. Feel free to experiment with the spice blend, add other ingredients such as citrus peel and herbs, or keep it simple with just the berries.
1 1/4 cups dried elderberries or 2 cups fresh
1 cinnamon stick, crushed
1 star anise
About 3 cups brandy
Honey, to taste (maple syrup or other sweetener can be substituted for honey)
Place elderberries, cinnamon, and star anise into a clean quart-sized glass jar. Add brandy to fill the jar and cover with a lid. Label the jar with contents and the date. Set aside in a cool, dark place for 3 to 4 weeks.
Strain cordial through cheesecloth over a large bowl. Squeeze contents of cheesecloth to release remaining liquid into the bowl then discard solids.
Add about 1/2 cup sweetener, such as honey, for every 1 cup liquid (or to taste). Stir to dissolve. Using a funnel, pour cordial into a clean bottle (or several clean bottles) and seal with cap or cork. A cordial using fresh
A cordial made with fresh elderberries will last about a year, whereas a cordial made with dried berries will last for 2-3 years and improve with age. Store in a cool, dark place and use as a cold and flu preventative, over desserts, or in beverages.

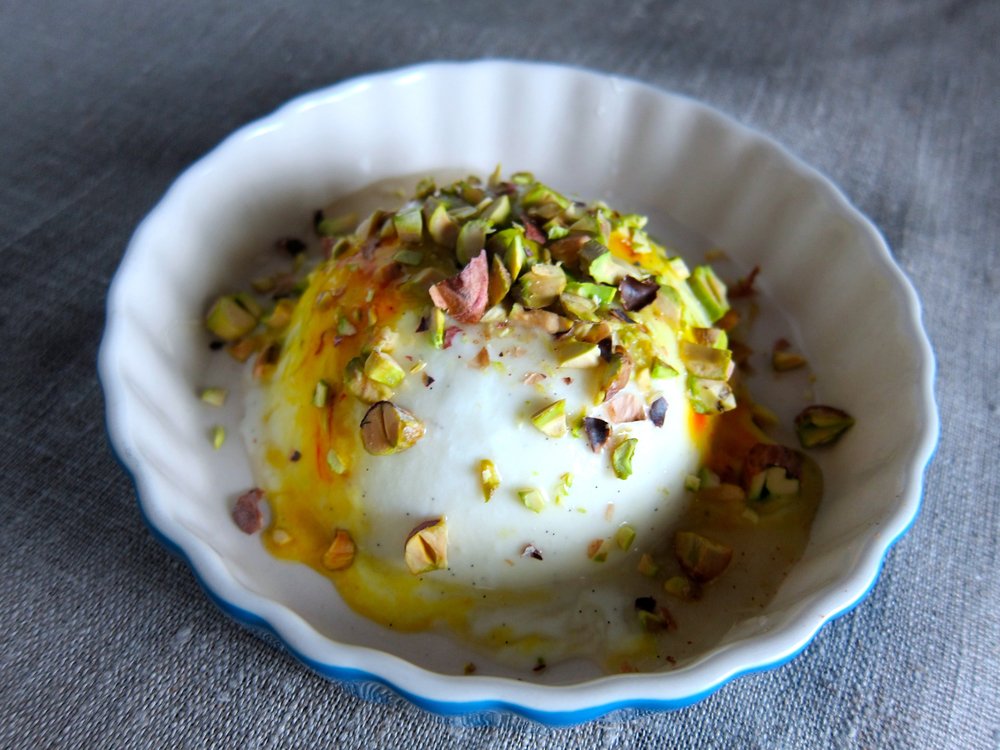
Yogurt Panna Cotta with Saffron & Pistachio
For those of you who have not made panna cotta, you might be intimidated by the idea. I was. After all, the results are impressive and seemingly skill-requiring - Italian grandmother slaving away all day skill-requiring. On top of that, panna cotta uses gelatin, something that isn't found in most present-day pantries and comes animal by-product. Yes, traditional panna cotta is not vegetarian.
What if I were to tell you that panna cotta is incredibly easy to make and not only that, it's also very forgiving? By forgiving, I mean that you can adjust the milk to cream ratio, incorporate yogurt or buttermilk, or even play around with dairy-free milks or vegan gelatin and still create a luscious and beautifully wobbly gel. The other great thing about panna cotta is that it's the perfect canvas for a variety of flavor combinations from saffron pistachio to berry compote and nutmeg to dusted dark chocolate or bay nuts.
There's nothing wrong with serving panna cotta in its container with a spoon, but it doesn't require much more work to remove the gel from it's container and put it on a plate and doing this elevates the dessert to very classy level. Recipe below is adapted from a Smitten Kitchen recipe and makes 4 individual servings.
Grapeseed oil, to crease ramekins or other containers used to hold panna cotta
A few saffron threads per panna cotta
1-1/2 teaspoons (or 4 grams) unflavored gelatin
1 cup plain whole-milk yogurt
1/2 cup heavy cream
1/2 cup whole milk
1/4 cup granulated sugar
2 teaspoons lemon juice
1/2 vanilla bean
1/4 cup toasted pistachios, chopped
Honey, to drizzle
Lightly grease containers for panna cotta with grapeseed oil and add a few saffron threads to each container. Ramekins or small cups or bowls work well. Taller/more narrow containers such as jars also work, but make it harder to remove the panna cotta once it has cooled.
Place 2 tablespoons of water in a small bowl. Stir in gelatin and allow to soften, about 10-15 minutes.
In a large bowl, whisk together yogurt with 1/4 cup cream and 1/4 cup milk. Add remaining cream and milk to a saucepan, stir in granulated sugar, and bring to a simmer. Stir in gelatin mixture to dissolve, remove from heat, then whisk into dairy mixture. Scrape the inside of the vanilla bean into mixture along with lemon juice and whisk. Pour into cups, stir once with a fork or chopstick to mix around saffron, and chill in the refrigerator for at least 2 hours. This can be done the night before.
To unmold the cups, fill a saucepan with about 3/4-inch of water and bring to a simmer. Turn off heat and a dip panna cotta cup into the water for 5 seconds, then invert it onto a flat plate. Repeat with remaining cups.
Right before serving, drizzle with honey and top with 1 tablespoon of chopped toasted pistachio. See below for inspiration for other panna cotta variations.

Panna cotta variation with blueberry compote and thyme.

Panna cotta variation with dusted foraged bay nuts and olive oil.

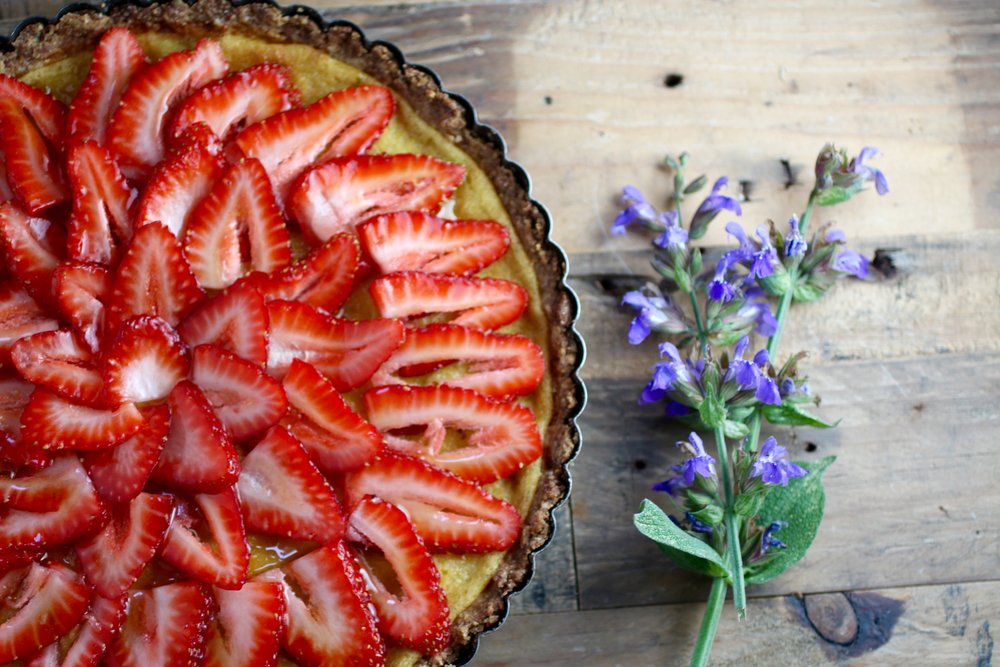
Strawberry Mascarpone Tart with Lavender

Strangely, I have made this tart (or variations on this tart) several times and have never recorded the recipe - it is just that easy and forgiving! In the interest of posterity and the sharing of deliciousness, I decided to finally post the recipe to the blog.
As mentioned, this recipe is very forgiving so variations are accepted and encouraged, though the combo of cornmeal-strawberry-mascarpone-lavender should not be treated lightly. The cornmeal crust is a variation on a classic pâte sucrée that I use for almost every tart shell. I have also subbed the cornmeal for buckwheat, which is just as delightful, but a little darker/nuttier. Other variations include brown sugar in place of white, addition of different herbs and spices such as rosemary, cinnamon, or saffron, different fruit, etc. Again however, you might want to just stick to this very delicious combination! Makes one tart, about 6-8 servings.

Mascarpone tart awaiting strawberry slices.
7 tablespoons cold unsalted butter, plus more for greasing the tart pan, diced
1/2 cup plus 2 tablespoons all-purpose flour
1/2 cup cornmeal (medium-grind)
1/2 teaspoon plus one pinch salt (medium-grind), divided
2/3 cup granulated sugar, divided
2-3 tablespoons plain yogurt, cold milk, or cold water (I prefer yogurt for its tangy quality)
8 ounces mascarpone
1 large egg
1/2 vanilla bean pod scrapings
1/2 teaspoon vanilla extract
1 pint strawberries
1/4 cup lavender flowers (other edible flowers can be used, but lavender is very easy to find as it often grows wildly or is feral on roadsides)
Honey, for drizzling
To Prepare
Lightly grease the bottom and sides of an 8-inch or 9-inch tart pan. Set aside.Mix flour, cornmeal, 1/2 teaspoon salt, and 1/3 cup sugar and cut in butter. Using pastry blender, fork, or hands mix butter into flour mixture until the dough resembles small peas. Add yogurt, milk, or water and blend until dough sticks together when pressed, but is still crumbly.
Press dough into and up sides of pan, chill in refrigerator for 30 minutes. Preheat oven to 350 degrees F and bake for 15 minutes, until golden-brown. Remove from oven and allow to cool.
While tart shell is cooling, remove the tops from the strawberries and thinly slice. set aside.
Whisk mascarpone with remaining 1/3 cup sugar, egg, vanilla bean pod scrapings, vanilla extract, and pinch salt until combined. Once tart shell is completely cool, spread mascarpone evenly over shell and bake for 30-35 minutes, or until set. Tart will turn golden and may have some areas of browning and start to rise some - don't worry, that's what is supposed to happen!
Remove from oven and cool for 20-30 minutes. Top mascarpone with strawberries in overlapping concentric circles, starting with the largest strawberry slices around the outer edge and working your way in until the entire tart is covered with strawberries.
Top with lavender flowers and drizzle with honey. Serve at room temperature or cold.
Strawberries laid out in concentric circles - now just awaiting the lavender and honey!

Plantago, Butter, & Thyme Morsels
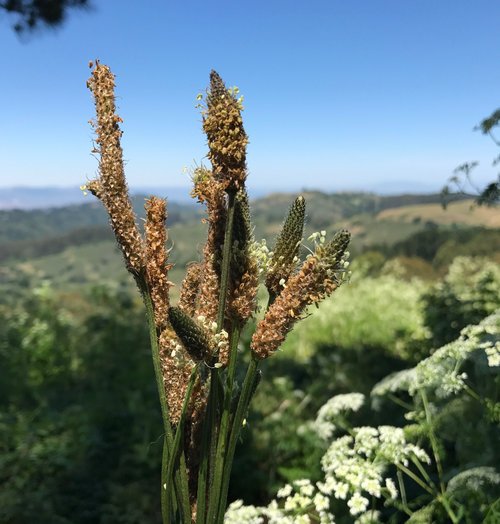
Plantago seedpods are as great for eating as they are for flinging!
Plantain (Plantago major and Plantago lanceolata) is easy to recognize and grows everywhere. You probably have some growing within a block of where you are RIGHT. NOW. Plantago major is the plantain with the wider, oval-shaped leaves and Plantago lanceolata is the plantain with the thinner leaves (lance-shaped, as the name indicates). I will save explanation of of the plantain in general and using the leaves for another post (in short: the leaves can be eaten as you would other greens, ideally cooked, as they are quite fibrous) and focus this post on the late-spring/summer/early fall delicacy - plantain seed pods.
When I was young we used to catapult the brown seedpods by wrapping the stem around the pod and flinging it. This is an enjoyable activity to this day, BUT maybe instead of flinging the pods at your sister (ahem - you know who you are!), fling them into a pan with some butter and thyme to prepare this simple, delicious recipe. Alternatively, just cut or pull off the pod stems away from the plant.

Entire Plantago lanceolata, complete with leaves, seedpods and roots.
When I first heard that these seedpods tasted like morel mushrooms I didn't think it was possible, but I was wrong - it is. I promise - give it a try and you will see. The other great thing about these pods is that they are packed with psyllium, a form of fiber that is often added to foods to increase dietary fiber content, as well as calcium. Yes, that's right - grow everywhere, taste like morel mushrooms AND high in nutrients. The pods can also be broken up into smaller seeds and toasted in a pan with herbs and spices to sprinkle on top of salads/popcorn/etc. or eat as a snack. This method of preparing plantago seeds is very simple, so there is no excuse not to try!
To Prepare:
Heat butter and/or olive oil (enough to coat bottom of pan) in a cast-iron pan on medium-high.
Add seedpods (with or without stems, I like to include the stems to use for serving) and heat for 2 minutes, tossing to coat in butter/oil. Add thyme and a sprinkle of salt and continue cooking another 1-2 minutes, stirring occasionally until pods are toasted and seeds just begin to fall off. If seedpods look to dry, add more butter or oil and toss to coat.
Serve immediately. If stems are still attached, they can be used as a serving stick (eat just the pod off of the stem - the stem is very tough).

Sautéing seedpods in cast-iron. At this point, they have soaked up all of the butter/oil and if I need to cook them longer I would have to add more.

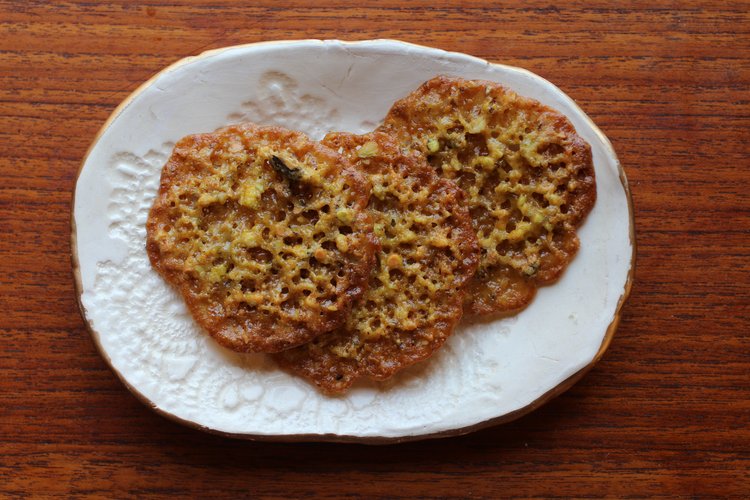
Saffron Pistachio Laceys

Brittle and delicate with amazing crunch and flavor.
More toffee than cookie, I grew up with lacey cookies purchased from the local grocery store. Although not invented by the Humboldt County company that made them in my hometown, they definitely cornered the market and brought "Laceys" (now a registered trademark) to the forefront of local graduation parties, holiday gatherings, gift baskets, and this girl's heart.
The classic registered trademark Laceys cookie is composed of melted chocolate sandwiched between two toffee cookies, which is delightful and worth making, whereas this version is uniquely different and much lighter, with pistachio, saffron, and and absence of chocolate (trust me) for a truly crisp taste and more unique Middle Eastern/Indian flavor. Lacey cookies have barely any flour, but a relatively larger amount (compared to typical cookie recipes) of sugar that, when heated, caramelizes and, in combination with the butter and nuts, create more of a brittle nutty candy than cookie.
I'm a sucker for caramelly, nutty, crunchy, slightly salty, exotic-spicey desserts and this version of a lacey cookie (or Laceys®) takes the cake - er - cookie! This version has a great brightness from the orange zest (just in time for the approaching citrus season!) and is light enough to warrant pairing with vanilla ice cream or frozen yogurt, no complaints! Or perhaps making an ice cream sandwich that crackles to the bite and turns into a saffron-pistachio toffee ice cream in the mouth? Just a thought. Additional bonus is that they're so thin, one batch makes quite a lot and they keep well in the freezer - just remove, thaw for 5 minutes until you can slice them and cook them up as directed. Recipe is adapted from one found here and makes about 48 cookies, depending on how thick you slice them.
2 1/2 tablespoons unsalted butter, melted
1/8 teaspoon finely chopped saffron threads
3/4 cup unsalted shelled pistachios (about 3 ounces)
1/2 cup granulated sugar
1/4 teaspoon almond extract
1/4 cup all-purpose flour
2 teaspoons grated orange zest
2 tablespoons orange juice
In a small bowl, add saffron to melted butter and let sit for five minutes.
In a food processor, pulse pistachios and sugar until nuts are very finely chopped. If you do not have a food processor, you can simply chop them with a knife until fine, but it will take some time.
In a medium bowl, stir together saffron butter, pistachio-sugar mixture, almond extract, flour, orange zest, and orange juice.
Cover bowl and chill in refrigerator for 15 minutes (dough will be too sticky to handle otherwise).
Remove from refrigerator and roll into two logs about 1/2-inch in diameter. Wrap in plastic wrap or parchment paper and freeze at least one hour.
Preheat oven to 325 F.
Using a sharp knife, slice each log into about 1/4-inch thick slices. Place sliced dough discs two inches apart from each other on parchment-paper or Silpat-lined cookie sheets.
Bake 10 minutes or until golden.
Cool on cookie sheets (the cookies will break if you remove them while warm).
Store layered between parchment in an airtight container at room temperature for up to a week. If you leave them out to open air for more than a few hours, they will absorb any moisture from the air and potentially become soggy.
Try using for toffee ice cream sandos!
Pickled Magnolia Blossoms
Pickled magnolia blossoms

Fresh and pickled magnolia blossoms.
When magnolia trees bloom, they aren’t shy about it - they burst forth in seductive, fragrant glory and leave a slew of thick, oxidizing, hard-to-clean-up flowers in their wake. I love them for this and was pleasantly surprised to find out that the blossoms are also edible. Let’s be honest, these past two (pandemic) springs has been surreal and anxiety-provoking, so having an excuse to go outside and work on a foraging project is and was definitely appreciated. Most magnolias bloom in the spring and all varieties of Magnolias are edible - star magnolia, saucer magnolia, lily magnolia - you name it. The blossoms have variations in color/flavor/texture, so I’d recommend tasting a sliver and seeing what works best for you. Fresh, they have a texture similar to endive with a spicy/floral flavor.
Uses: Prior to this experiment, I’d only used fresh magnolia petals to top desserts, more for decorative purposes than anything. But, you can also use them in small amounts in salads/grain bowls/etc. or they can be pickled, which is the most common application. I would like to try infusing a liquor with them as well, but haven’t gotten around to that yet! Any time you handle the flowers (if you care at all about their appearance) it’s important to be very careful, as the petals bruise/brown easily.
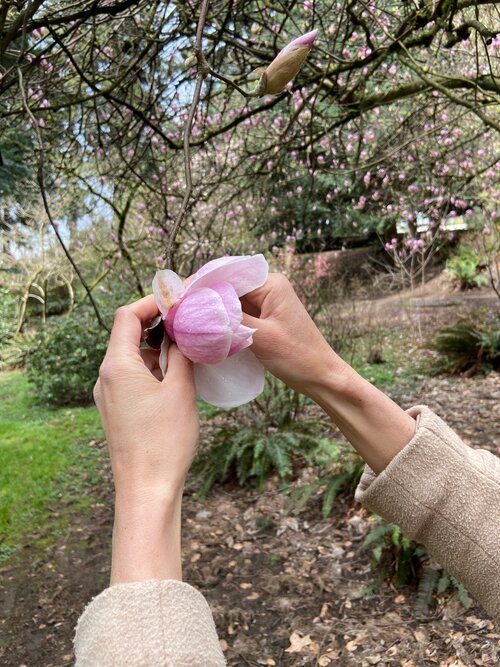


Gorgeous magnolia blossom - for eating raw, the younger leaves are best.
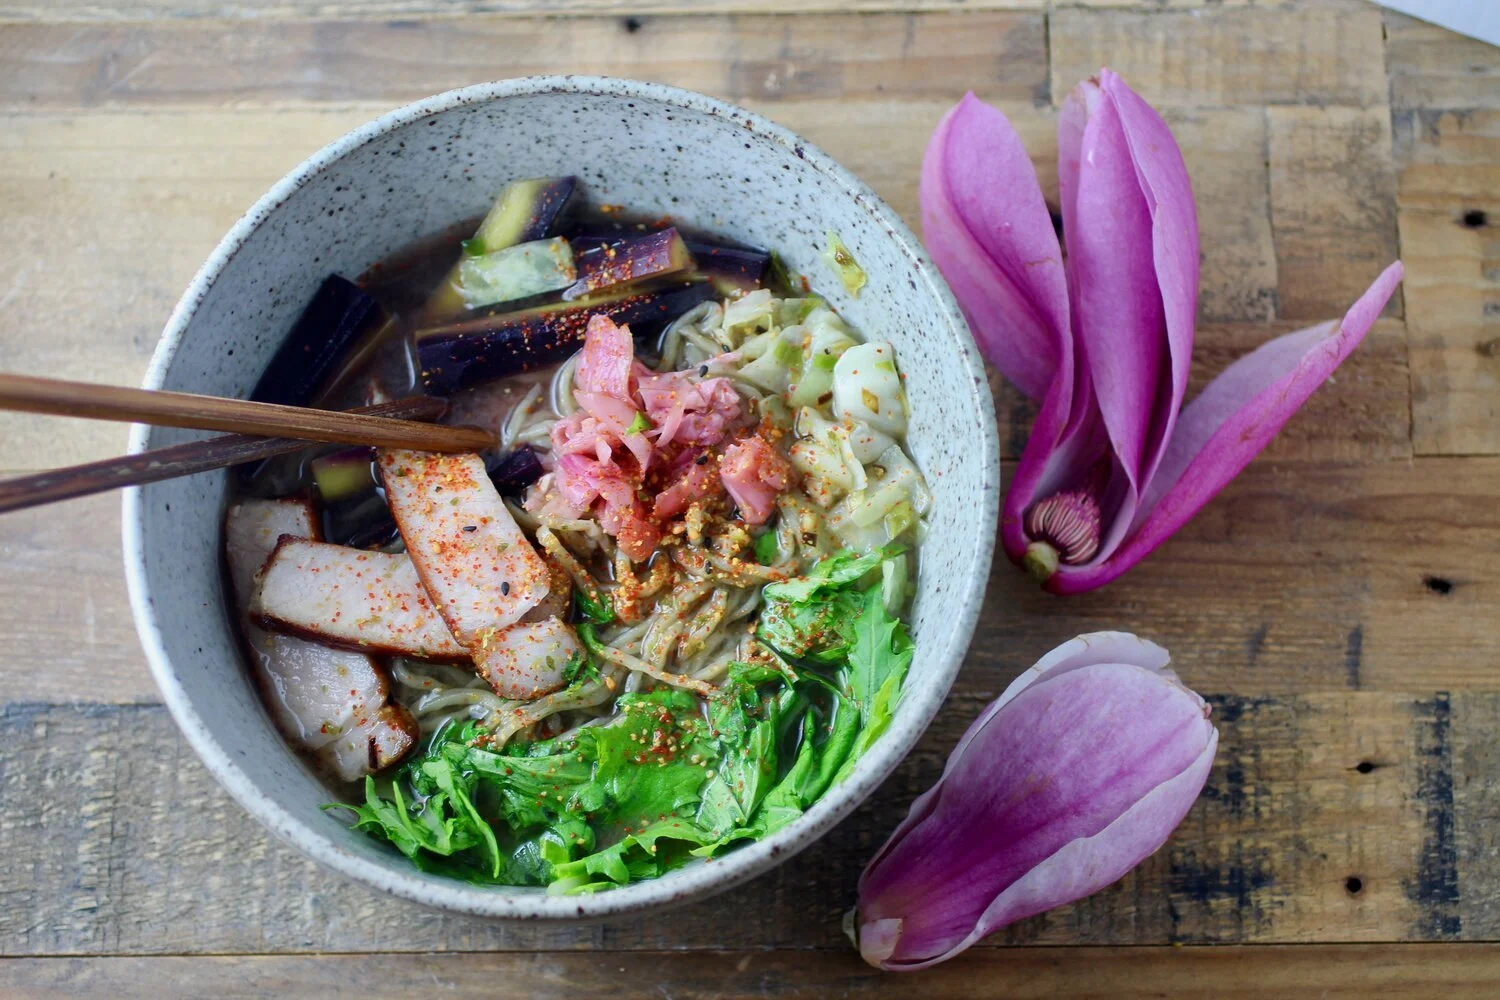
Pickled Magnolia Blossoms: This recipe is an adaptation/combination of two recipes I found (shoutout Medium and eatweeds.co.uk) along with what seemed like it would work and taste the best to me. You can liken the final product to a strong/very floral pickled ginger (with an appearance/texture to match). As you might guess, they work really great with Japanese/Asian flavors like sesame, soy, and seaweed - I’ve used them in a miso noodle bowl (pictured below) and am looking forward to trying it out in a brown rice/sesame bowl or maybe with some homemade sushi/salmon? I could see pickled magnolia being great in any application where pickled ginger sounds good, but also creamy foods to counter the spicy like a compound butter or mild fresh cheeses. The vinegar can be used as you would use regular vinegar as well - for both petals and vinegar, a little goes a long way. Below recipe makes about 1 cup.
220g magnolia flowers (about 6-7 cups packed) - For pickling, it’s ok to have older leaves. For eating fresh you want the younger nicer leaves.
500mL rice vinegar (about 2-¼ cups) - Other light-bodied vinegars or a combination also works, I see a lot of people use apple cider vinegar, but I wanted the subtlety of the rice vinegar.
110g granulated sugar (about ½ cup)
2 teaspoons Kosher salt
To Prepare
Clean and dry flowers - carefully so you don’t bruise the petals.
Add petals to a quart jar or two pint jars (pack tightly). Naturally, jars should be clean.
Heat vinegar with sugar and salt to simmer and sugar/salt is dissolved, stirring as needing.
Pour hot brine over petals.
Using a clean spoon or other utensil, submerge petals under brine several times as they inevitably rise to the top. Optional: I like to use a clean plastic bag or smaller mason jar with a little water to make sure the petals stay submerged.
Cover with lid, allow to come to room temperature, then refrigerate.
Pickled blossoms are ready in 24 hours and will keep in the refrigerator for 4 months to 1 year (still looking into this as I keep them in my fridge - I know that the color will become browner).

Pickled magnolia blossoms in a bowl of miso-ramen.
Danish Almond Sweet Bread

While at my parents' house over the holidays, some friends were visiting one morning and I had to scramble to bake something using ingredients from the pantry, which was pretty bare (note: by no fault of my parents, it had just been many days of feasting). Santa brought my sister a small Danish recipes cookbook where I found a recipe for "Danish Almond Bread". I didn't actually like the look of the recipe in the cookbook, but it inspired me to adjust another recipe I had to ultimately create what I was looking for - something very nutty and chewy, but sweet and satisfying. My parents didn't have almond meal on hand, so I put my niece to work picking out almonds from a mix of nuts that I then blended and, surprisingly, it worked just fine. I have since made the recipe two times and each time it has been quickly devoured.
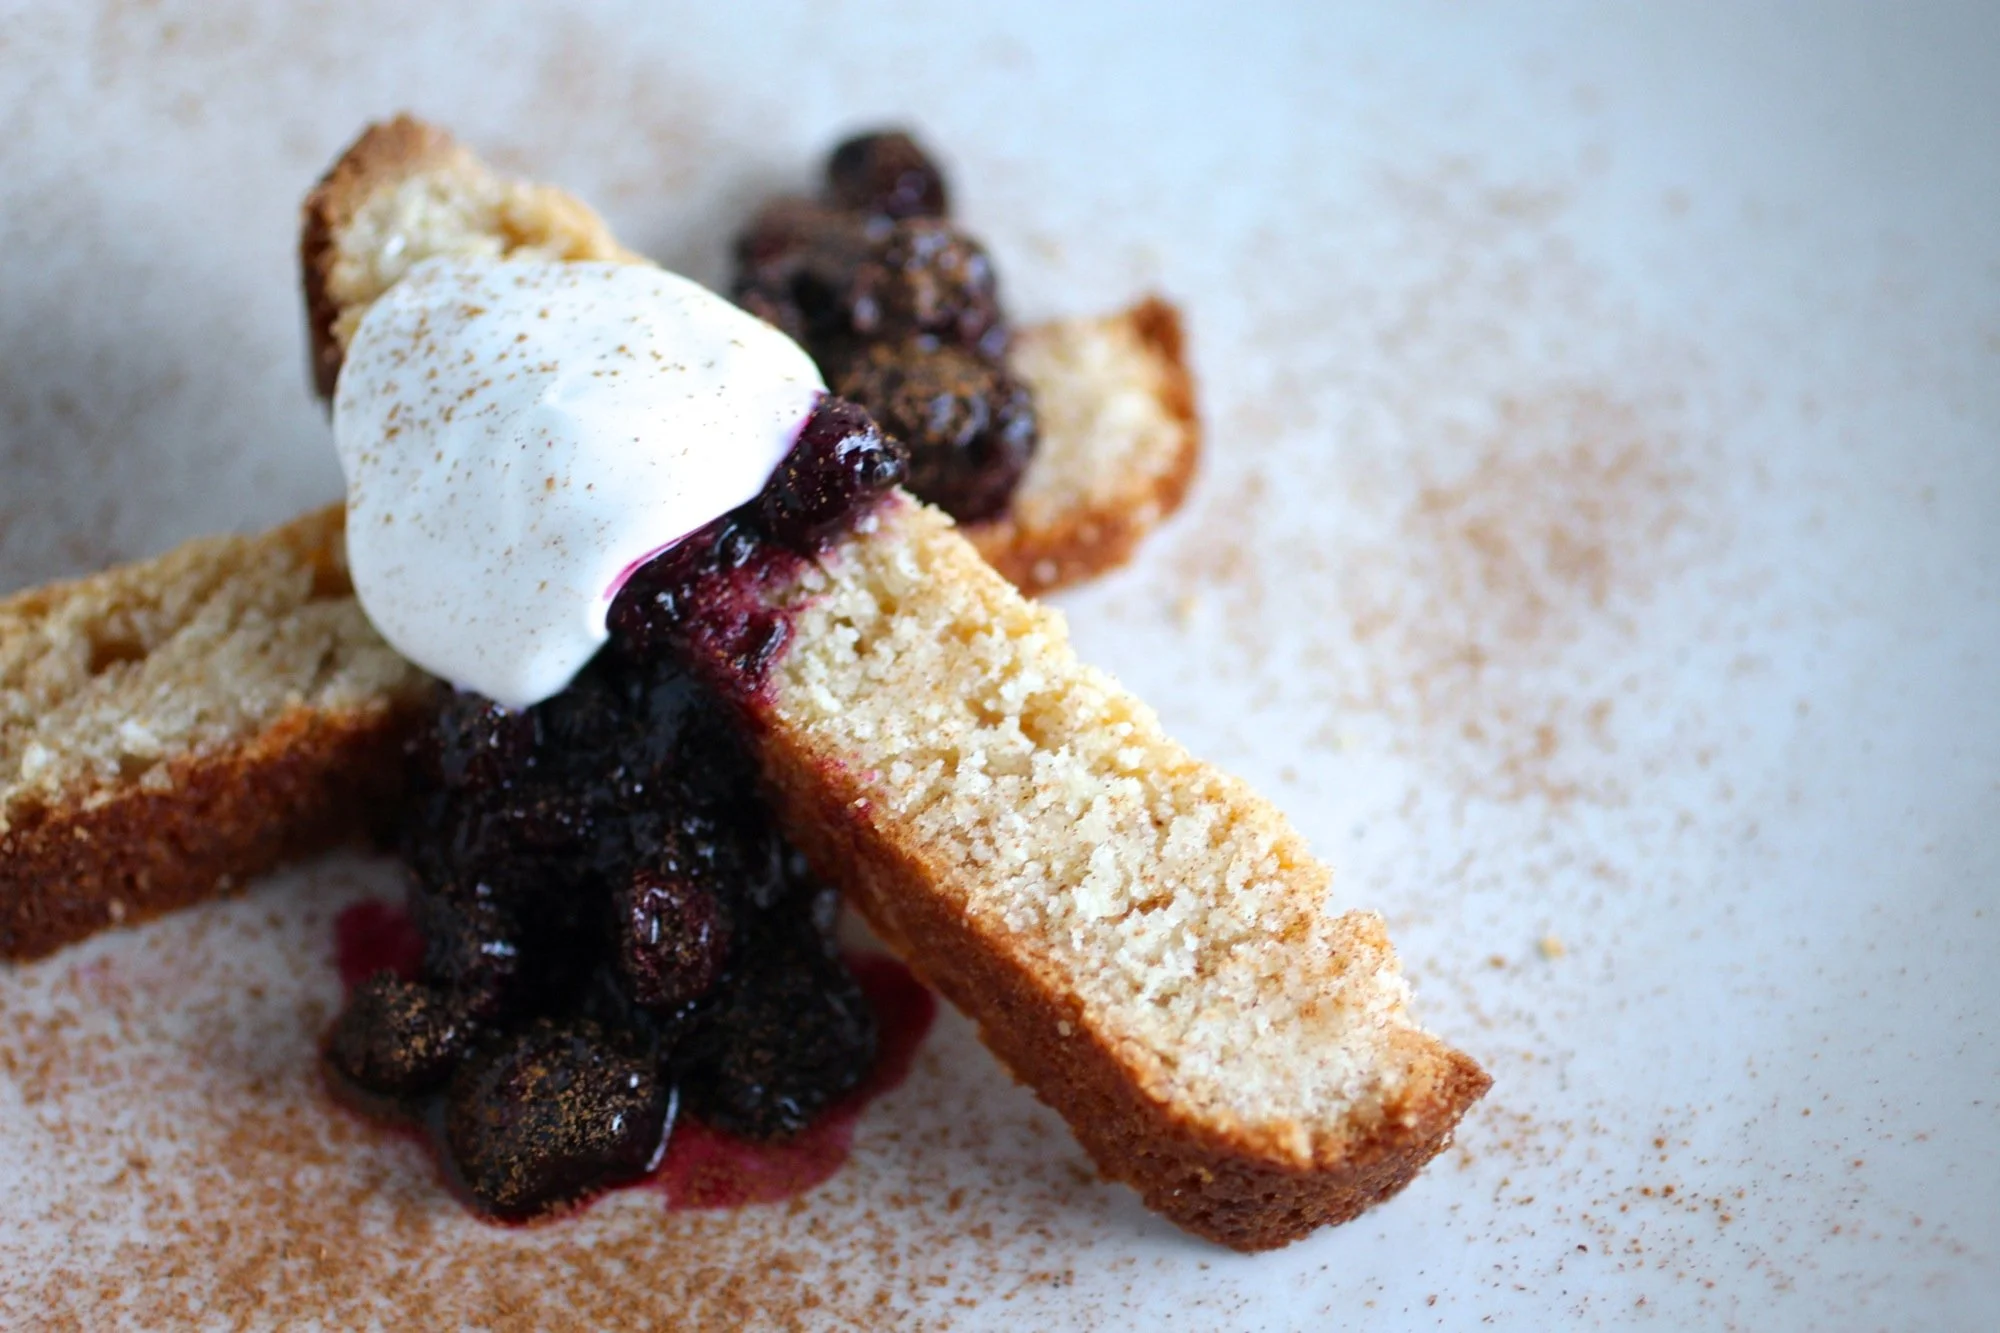
The batter itself is more like cookie dough than bread or cake batter and is lovely sliced thin and topped with crème fraîche and berry or citrus compote and a dusting of cinnamon. I could also see it pairing well with a variety of other ingredients - sautèed stone fruit and herbs, chestnut purée and honey, fresh cherries and fennel seed... Makes one loaf that serves 8-12.
2/3 cup butter, room temperature
1 cup sugar
2 eggs
1 cup almond meal
1/2 teaspoon almond extract
1/2 teaspoon ground cinnamon
1 cup all-purpose flour
1 teaspoon baking powder
1/2 teaspoon salt
Preheat the oven to 350 degree F and grease a loaf pan.
In a large bowl, beat the butter and sugar until soft and fluffy using a pastry blender or electric beater. Gradually beat in the eggs, one at a time, until incorporated. Add the almond meal, almond extract, and cinnamon and mix thoroughly. Blend in the flour and baking powder and salt.
Spread the batter into the loaf pan (it will be thick) and bake for 50 to 60 minutes or until a toothpick inserted in the center comes out clean and top is golden brown.

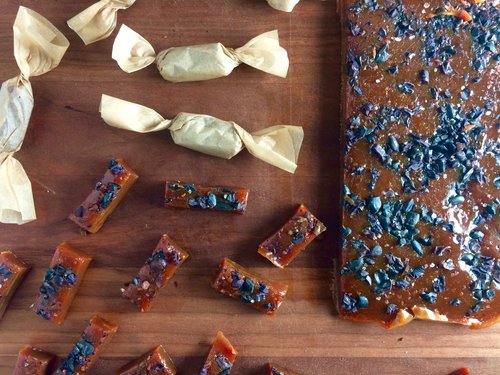
Prickly pear salty caramels
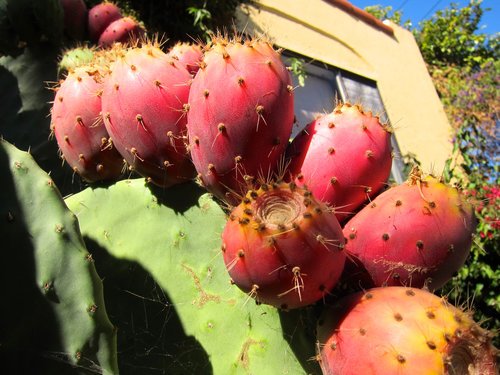
Prickly pear margaritas, prickly pear sorbet, prickly pear cheesecake, prickly pear fermented beverage, prickly pear marinade - you name it, I've tried it with prickly pear. This is primarily because at my house in Oakland has a giant prickly pear cactus (Opuntia) that is very, VERY productive. Like, part-time job in the late summer/fall productive. At first, I was so pumped that I wasn't very generous with the fruit, but now, when I hear someone comment on the prickly pear cactus (which happens quite often) I run out and give them a bag of frozen fruit. You can read more about my harvesting methods here. Since there's so much fruit, I now pretty much stick to the second process listed, which is a loss of the pulp, but dramatically less work.
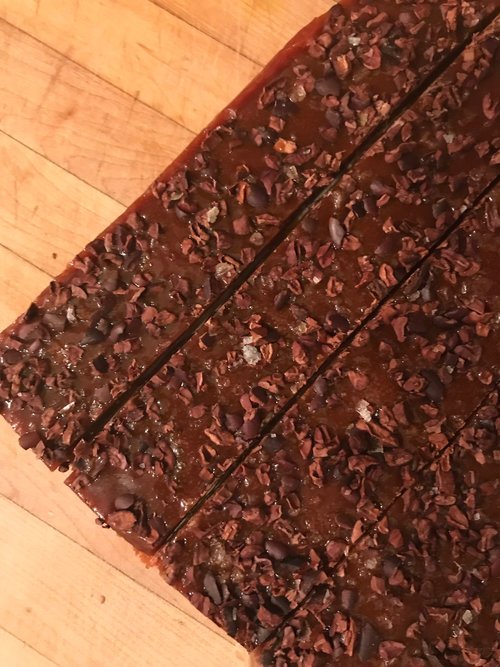
Cutting caramels into squares.
A few years ago, in an effort to get rid of as much juice as possible, I was trying to think of recipes where reducing the juice was required. I remembered making apple cider caramels at some point, so I decided to give that a try using this Smitten Kitchen recipe for apple cider caramels, but substituting out cider for prickly pear juice. There are also a few other changes, like adding cacao nibs to the top and omitting cinnamon (wouldn't be bad, but just already a lot going on). The caramels were above and beyond my expectations - a deep, rich sweetness balanced by the salt and toasty cacao nibs. Really so, so good and now my favorite prickly pear concoction. Additionally, they can be wrapped and keep well, so a great unique holiday gift item! Recipe makes about 50 caramels, depending how large they are cut.
4 cups (945 ml) prickly pear juice
8 tablespoons (115 grams or 1 stick) unsalted butter, cut into chunks
1 cup (200 grams) granulated sugar
1/2 cup (110 grams) packed light brown sugar
1/3 cup (80 ml) heavy cream
Up to 1/4 cup cacao nibs
Up to 2 teaspoons flaky sea salt, such as Maldon, or less of a finer salt
Neutral oil for the knife, if needed
Boil the prickly pear juice in a 3- to- 4- quart saucepan over high heat until it is reduced to a dark, thick syrup, about 1/2-3/4 cup in volume. This takes about 40-60 minutes on my stove. Stir occasionally.
Meanwhile, get your other ingredients in order, because you won’t have time to spare once the candy is cooking. Line the bottom and sides of an 8- inch square metal baking pan with 2 long sheets of crisscrossed parchment. Set it aside. Put salt and cacao nibs in a small dish.
Once you are finished reducing the juice, remove it from the heat and stir in the butter, sugars, and heavy cream. Return the pot to medium- high heat with a candy thermometer attached to the side, and let it boil until the thermometer reads 252 degrees, only about 5 minutes. Keep a close eye on it. Stir occasionally. (Don’t have a candy or deep- fry thermometer? Have a bowl of very cold water ready, and cook the caramel until a tiny spoonful dropped into the water becomes firm, chewy, and able to be plied into a ball.)
Immediately remove caramel from heat and give the caramel several stirs to distribute it evenly. Pour caramel into the prepared pan then sprinkle with cacao and salt. Let it sit until cool and firm—about 2 hours, though it goes faster in the fridge. Once caramel is firm, use your parchment paper sling to transfer the block to a cutting board. Use a well- oiled knife, oiling it after each cut (I have never had to do this...), to cut the caramel into 1-by-1-inch squares or 0.5-by-2-inch. Wrap each one in a larger piece of parchment or wax paper, twisting the sides to close. Caramels will be somewhat on the soft side and will keep for 2 weeks at room temperature, 1 month in the refrigerator.

Gnocchi with porcini and Wilted wild greens
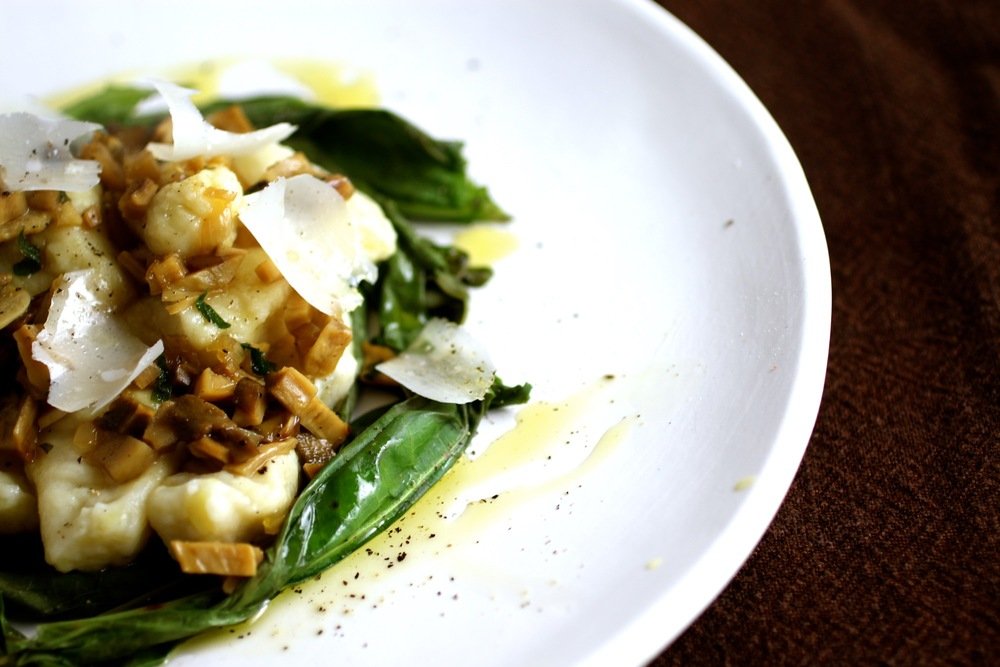
Gnocchi - the pasta of potatoes. If you see gnocchi as simply a vehicle for toppings then you haven't tried legit gnocchi. Making gnocchi from scratch may take time and attention, but the effort is worth it. The resultant soft, pillowy dumplings are stars of the show as much as any sauce. The first time I had the pleasure of tasting homemade gnocchi was in Turin, Italy when I was there for the Slow Food Terra Madre conference and I can still remember the meal - it was that good. My gnocchi may not quite achieve the same level of perfection, but I'll certainly keep trying.
I've made gnocchi several times in the past, each time with a different topping, and I really like how the richness of the mushroom sauce and the green notes of the wild greens (in this case, curly dock - more on the plant in general here) paired with the simple potato pasta in this recipe. The next time I make it however, I will blend the mushroom sauce with an immersion blender for a smoother consistency that doesn't compete with the soft gnocchi "pillows". Feel free to take just the gnocchi portion of this recipe and experiment with your own combinations, such as different mushrooms, a pesto, or a simple marinara sauce. Recipe serves 4.
Gnocchi

Wee little gnocchi dumplings.
2 pounds of golden potatoes
1/4 cup egg, lightly beaten
1 cup all-purpose flour
Sea salt (fine grain)
Fill a large pot with water. Salt the water, then cut potatoes in half and place them in the pot. Bring the water to a boil and cook the potatoes until tender, about 25-30 minutes.
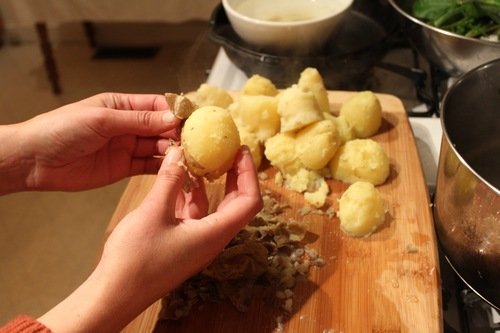
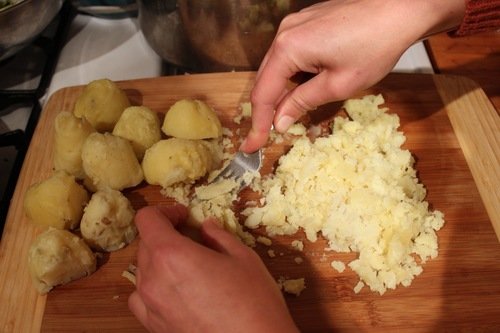
Working one potato at a time, remove potato halves with a slotted spoon and place on a large cutting board. As soon as possible after removing from the water, peel each potato before moving onto the next (these are, obviously, hot potatoes, but you want to work as fast as possible to mash them while they're still hot). Mash potatoes using a fork to create a mound of potato "fluff" - do not over mash. Save the potato water for later.
Let the potato mash cool for about 5 minutes (you want to prevent the egg from cooking). Join the potatoes into a soft mound, drizzle with the beaten egg and sprinkle 3/4 cup of the flour across the top. Using a spatula, scrape underneath and fold to mix in egg and flour. With a very gentle touch, knead the dough. Knead in more flour if dough is too gummy/tacky. The dough should be moist but not sticky.
Lightly flour a new cutting board and separate potato dough into 8 pieces. Gently roll each 1/8th of dough into a log, roughly the thickness of your thumb. Use a knife to cut pieces every 3/4-inch. Dust with a bit more flour.
Shape gnocchi using a fork to create lines in the middle of the gnocchi, so that they kind of look like footballs. Be sure to lightly touch fork into the gnocchi so that it still stays soft and doesn't break. Set gnocchi aside, dusting with flour if needed until you are ready to boil them. Meanwhile, make the porcini sauce.


Porcini Sauce
1.5 cups low-sodium chicken broth
0.75 ounces dried porcini mushrooms, rinsed
2 tablespoons extra-virgin olive oil
1 small shallot, minced
1 clove garlic, thinly sliced
1/3 cup dry white wine
2 tablespoons minced fresh parsley
Salt and pepper
Heat broth and porcini in a small saucepan until simmering. Turn off heat, cover, and Let stand until softened, about 5 minutes. Remove mushrooms, reserve liquid, and dice porcini. Heat 1 tablespoon olive oil in a medium skillet over medium heat. Add chopped porcini, shallot, and garlic; cook until lightly browned, 2 to 4 minutes. Stir in reserved liquid, wine, and remaining tablespoon olive oil, scraping up any browned bits. Increase heat to high and bring to boil; cook to reduce, whisking occasionally, about 5 minutes. Stir in parsley and season with salt and pepper to taste. Cover to keep warm.
Cooking and Serving Gnocchi
A few handfuls of foraged dock, dandelion, or other green, thoroughly washed and trimmed
Olive oil drizzle, salt, and pepper, for garnish
Parmesan shavings, for garnish
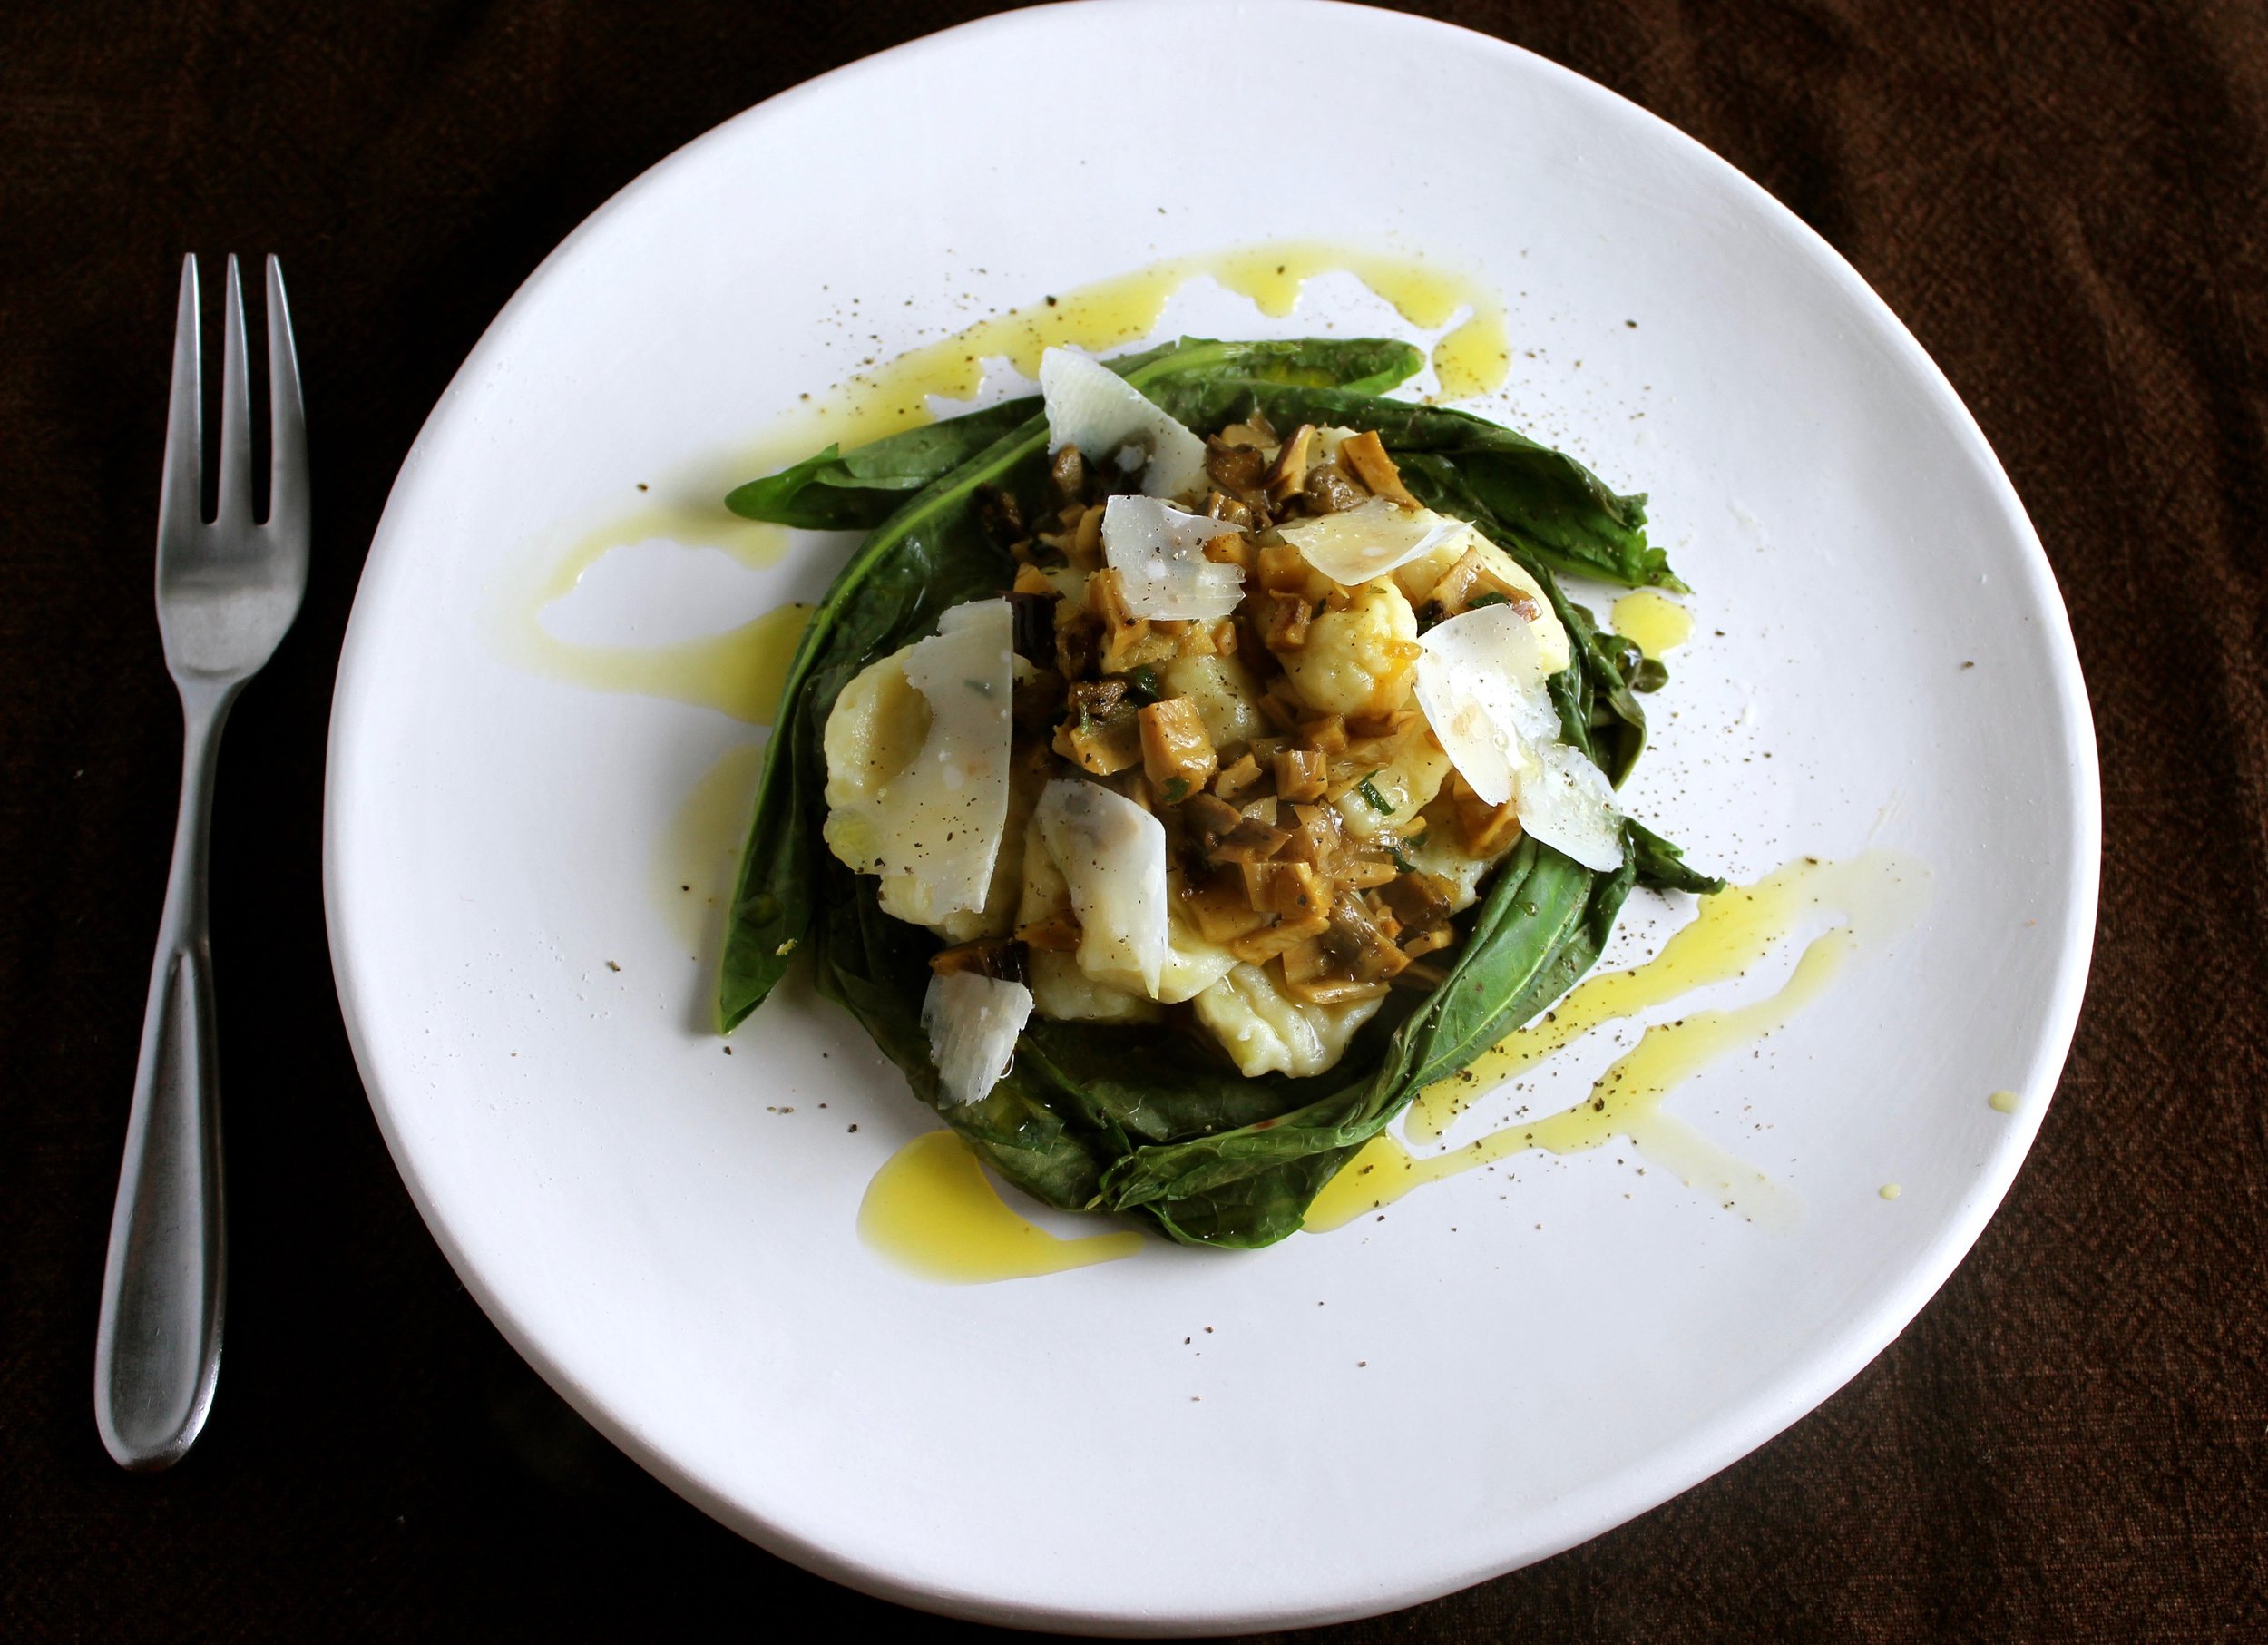
Reheat the potato water and bring to a boil, adding more water if needed (you need enough water to cover the gnocchi). Cook the gnocchi in small batches by dropping them into the boiling water. Once gnocchi pop up to the top, remove them with slotted spoon ten seconds or so after they've surfaced. Have a large platter ready with dock or other greens that you will be serving with the gnocchi on the plate. Place the gnocchi on the platter on top of the greens - greens will wilt from the heat of the gnocchi. Continue cooking in batches until all the gnocchi are done. Top gnocchi with porcini sauce, a drizzle of olive oil, salt, black pepper, and parmesan shavings.

Autumn crunch farro salad with Asian pear, celery, and toasted hazelnuts
Autumn crunch farro salad.
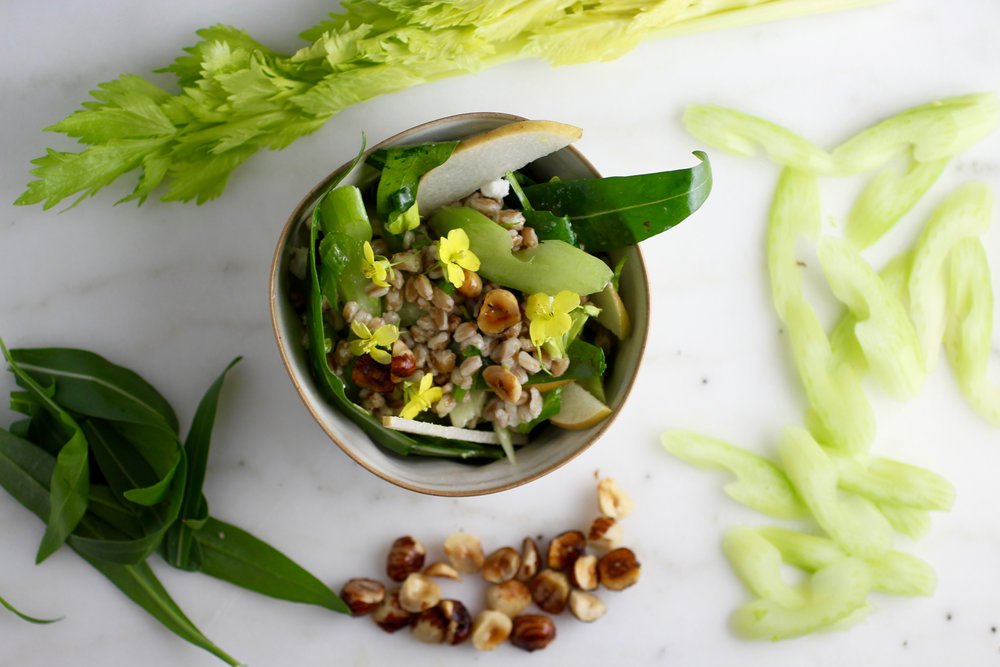
Wholesome, flavorful, crunchy.
By way of a recommendation from a food-minded friend, I was lucky enough to visit the restaurant Ned Ludd on a recent trip to Portland. Defining itself as "an American craft kitchen", Ned Ludd has all of the charm and menu items you'd expect in a Pacific Northwest restaurant with a photo of an axe in the woods on their homepage. Various pickled things, roasted brassicas, and charcuterie definitely make an appearance, as does other "good food that tells a story". Apart from delectable dishes including their delicious grilled flat bread served with olive oil (salivating just thinking about the doughy goodness), another menu item that I recall is one that we actually didn't order - a whole grain salad with a bunch of different chopped ingredients reminiscent of autumn. I specifically made a mental note to take the inspired ingredient combination of farro, arugula, asian pear, celery, toasted hazelnuts, and chevré, and try it at home. While I'm not sure if this is exactly like what they served, as again, we didn't order it, the salad was unique and delicious so I consider it an inspired-recipe win!
The fall is fading fast, but it's not too late to make use of the harvest with this salad. Also, farro is technically considered an "ancient grain" (a grain that is loosely defined as not having changed much over the last several hundred years), which is fun from a culinary sustainability standpoint and a stellar grain to have in your toolbelt. Below is an approximation (feel free to add more or less of whatever you have on hand!) and serves 4.
1 cup cooked farro*
2 large celery stalks, thinly sliced
1 asian pear, cored and thinly sliced
2 cups arugula
About 1/4 teaspoon Kosher or sea salt
Juice of 1 lemon
2 tablespoons olive oil
1-2 ounces fresh goat cheese (chevré), crumbled
1/4 cup toasted hazelnuts**
Arugula or other edible flowers for garnish (completely optional, I just happened to have arugula and flowers growing in my raised bed)
Toss farro with celery, pear, and arugula. Salt to taste.
Put lemon juice, olive oil, and a few pinches of salt in a small mason jar. Shake until combined then toss into farro mixture followed by goat cheese and hazelnuts, reserving a few to add to top.
Garnish with edible flowers (optional) and serve immediately.
*There are many ways to cook farro, but I usually just use 1 part farro to 2 parts liquid (water in this case), bring to a boil, reduce to a simmer, cover, and cook for about 30-40 minutes until farro is "al dente" (because I like it kind of firm), but soft enough to chew. In this instance, about 1/3 cup farro + 1 cup water will yield about 1 cup cooked farro. Some recipes call for cooking farro like pasta, but I feel that is an unnecessary waste of water.
**To toast hazelnuts, heat in a cast iron pan on medium-high until browned, tossing frequently, about 2 minutes and sprinkle with salt. A small amount of oil can be added to the pan and tossed with the nuts if you'd prefer a richer toasted nut.
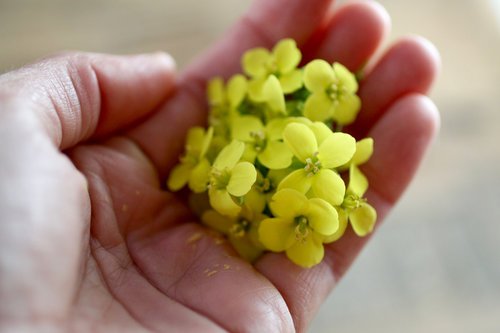
Arugula flowers for garnish that I happened to have from my raised bed arugula - not at all mandatory, but always fun to include some edible flowers!

elderberry jam
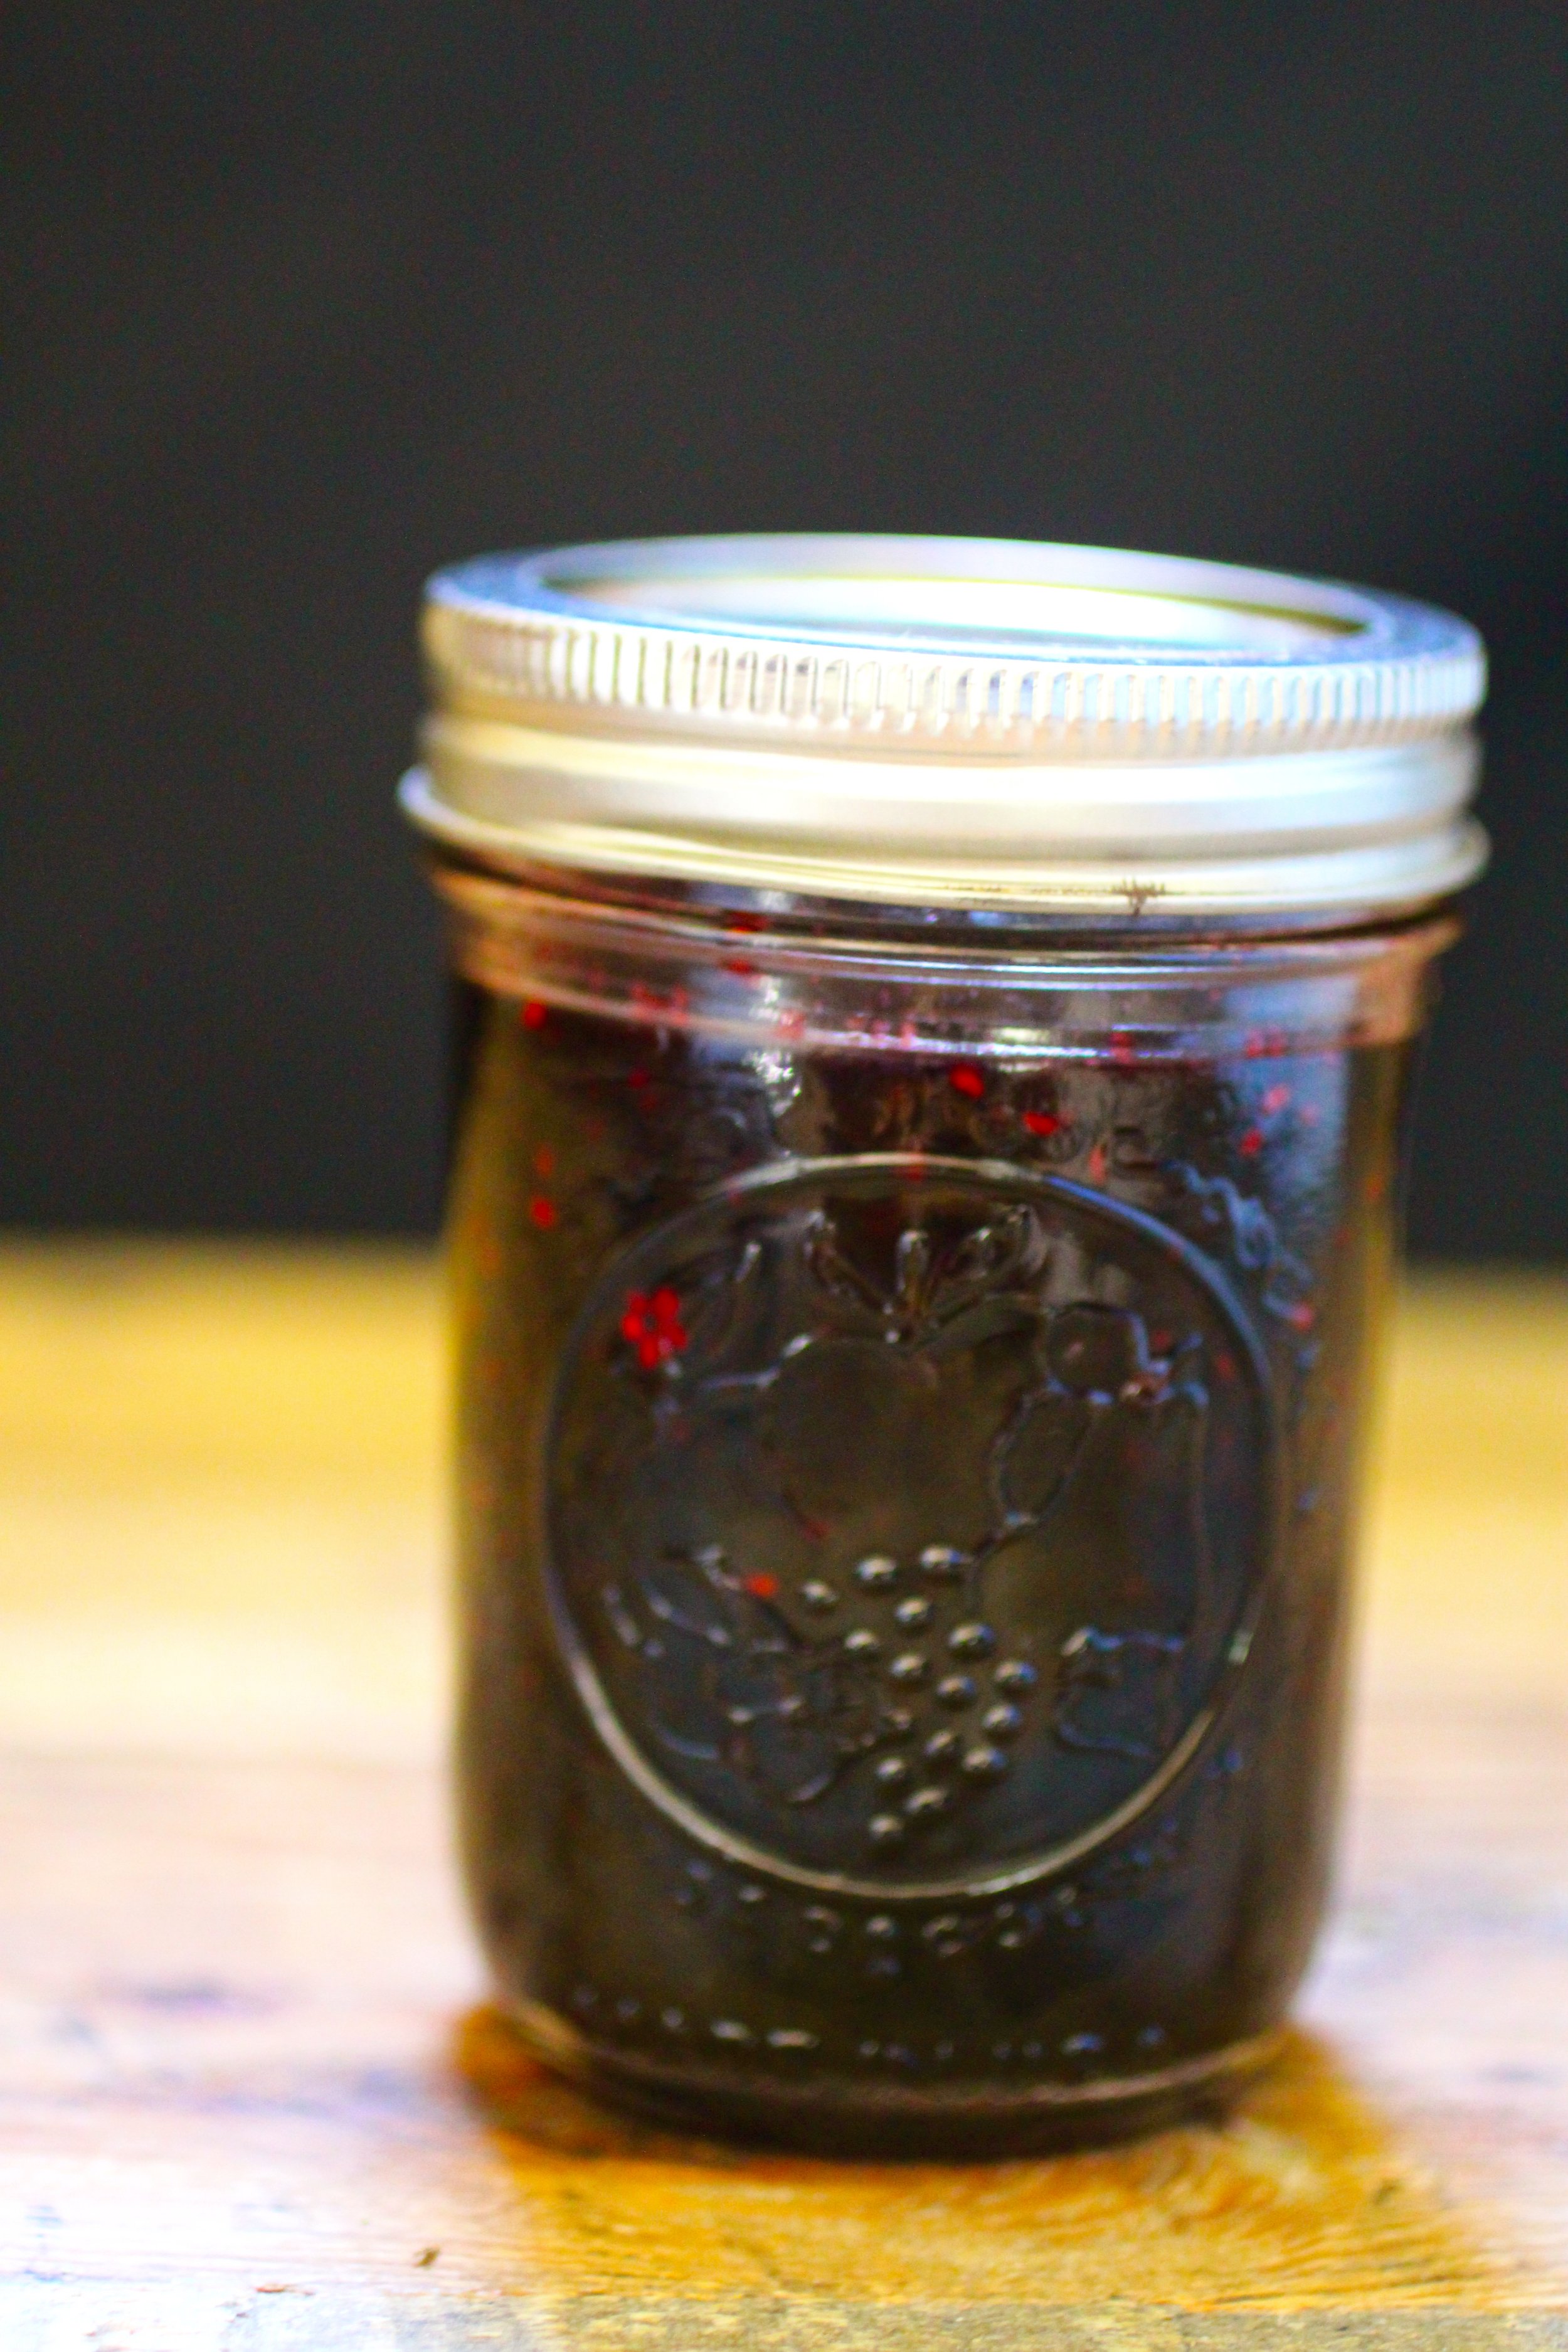
More information on foraging and exploring elderberry here.
This recipe is a great way to quickly preserve the flavor of elderberries for later use on toast or in dessert applications. Makes 4 half-pint jars.
4 cups fresh elderberries
3 cups granulated sugar
2 tablespoons lemon juice
Sterilize 4 half-pint Mason jars.
Bring ingredients to a boil, stirring until sugar dissolves. Continue boiling, stirring occasionally, until mixture reaches 220° or jam falls in a “sheet” when spoon is removed, about 20 minutes.
Pour evenly into jars and seal.

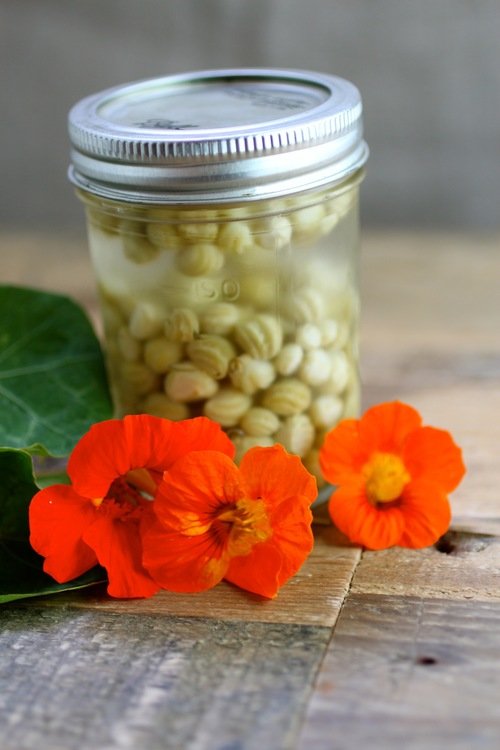
California Capers
California Capers.

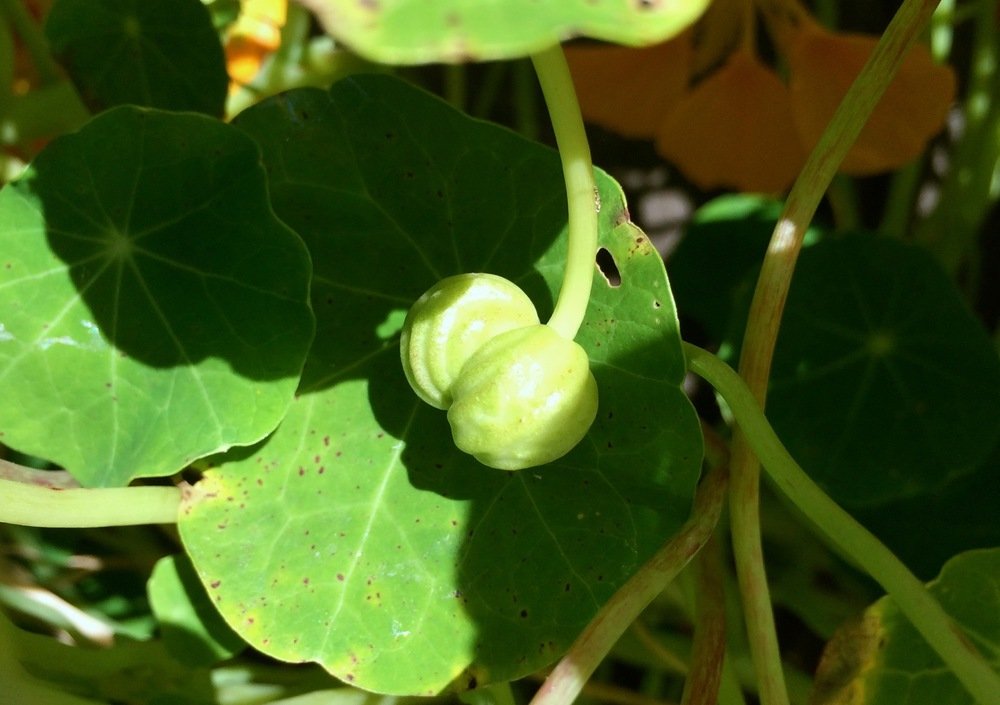
As I explore in a previous post, the nasturtium plant (Tropaeolum majus) has so much more going on than a pervasive vine with peppery bright flowers, including incredibly spicy leaves and (the subject of this post) pungent, clear-your-nasal-cavity seed pods. You want to pick the seed pods when they're young and green, as they toughen and get bitter with age (but are still edible). Try them raw - their wasabi-like flavor is so intense, it'll wake you right up! I like eating them as a snack, but as they are so intense a little goes a long way. By pickling them, you can preserve and enjoy these pearls of flavor for up to one year. As with most things in the culinary world, someone else has already done this and coined them "California Capers" - a designation I love and truly wish I'd created!
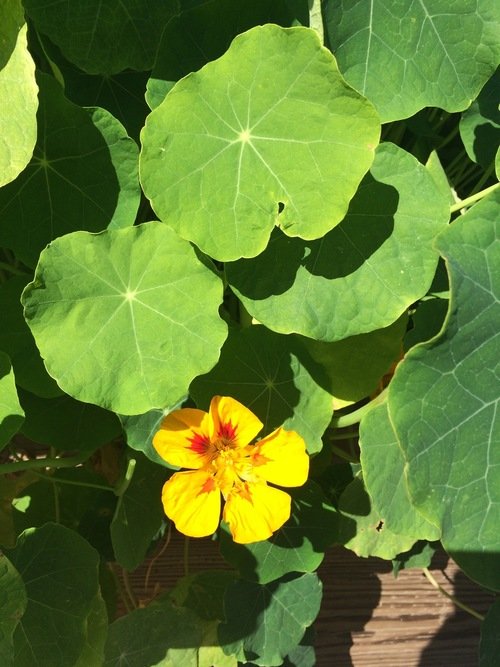
The nasturtium plant in all its glory.

Nasturtium seed pods stuck together in groups of three - these need to be separated before washing and preserving.
Don’t worry about sounding professional. Sound like you. There are over 1.5 billion websites out there, but your story is what’s going to separate this one from the rest. If you read the words back and don’t hear your own voice in your head, that’s a good sign you still have more work to do.
Be clear, be confident and don’t overthink it. The beauty of your story is that it’s going to continue to evolve and your site can evolve with it. Your goal should be to make it feel right for right now. Later will take care of itself. It always does.
I've tried making California capers a few ways, some ways more complex than others, but I find that I like the simple version from this site best, with a few alterations. If you find the caper pungency to be too strong, you can always submerge them in a salty brine for a few days (1/4 cup salt: 2 cups water). Pickled nasturtium pods work anywhere you'd use regular capers - they're amazing on bagels and lox (anything with smoked or preserved fish, really), pasta pomodoro, braised chicken, in tuna or egg salad, green salad, etc.
Makes 1 pint
1-1/3 cups young nasturtium seed pods
2 bay leaves
About 1-1/3 cups distilled white vinegar
2 teaspoons Kosher or sea salt
Separate seed pods that are stuck together - they are often joined in groups of three.
Soak seed pods in water to remove any dirt/debris, then drain and place in two sterilized half-pint jars along with 1 bay leaf per jar.
In a small saucepan over medium-high heat, bring the vinegar and salt to a simmer and stir until salt is dissolved. Pour hot vinegar mixture over seed pods, covering them completely.
Let the jars cool to room temperature before sealing with lids. Refrigerate for at least 24 hours before eating and enjoy for up to one year.

Rumex Crisps: Dock Seed Crackers
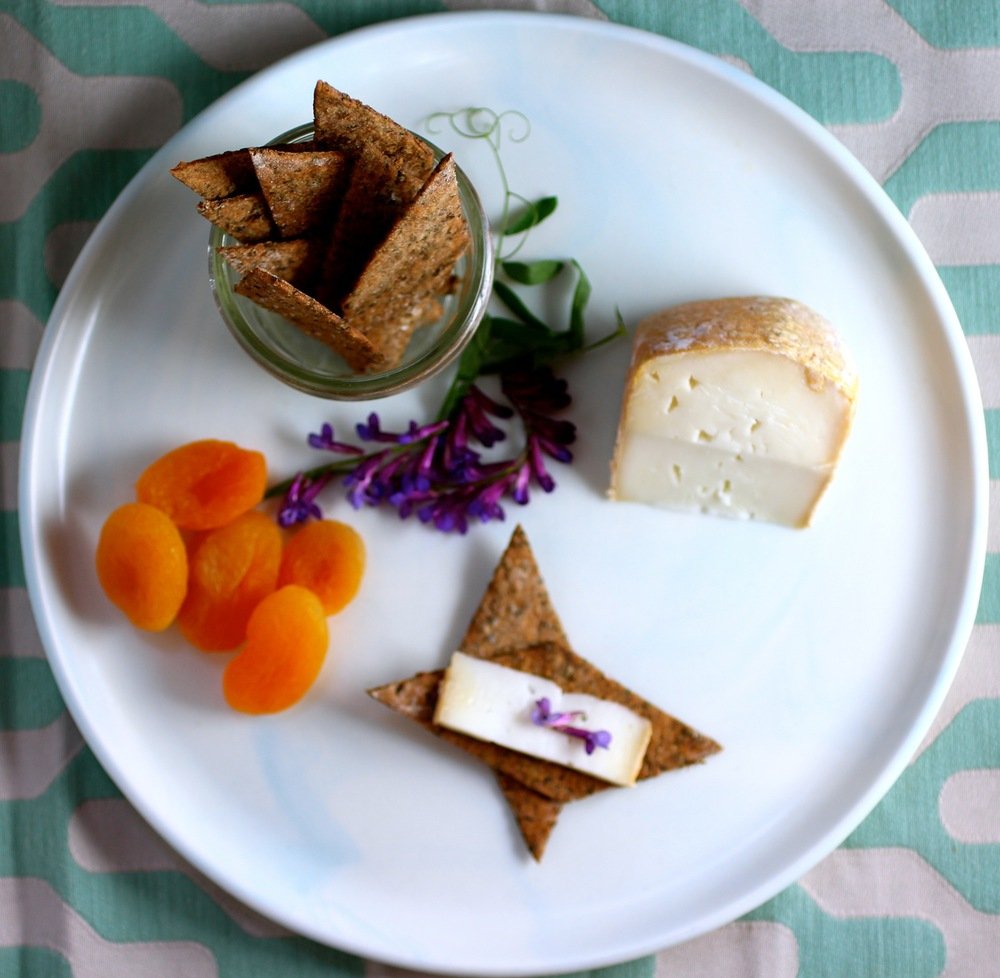
The latin name for curly dock, a wild plant with edible leaves and seeds, is Rumex crispus (see previous post for foraging/harvesting info). Thus, when I decided to use the toasted seeds in a cracker, the name was obvious. Let's be honest - I made these crackers specifically because I came up with the name Rumex crisps. I'm a sucker for wordplay. On the plus side, the seeds paired beautifully with the rye flour for a delicious, crispy, nutty-tart cracker that is great alongside rich creamy cheeses and sweet dried apricots (or other fruit). The below recipe makes about 36 2-inch crackers, depending on how thinly you roll out the dough.

Toasted vs. raw dock seeds.
1/2 cup toasted dock seeds
3/4 - 1 cup rye flour
1/4 teaspoon sea salt, plus more for sprinkling
1 tablespoon grapeseed oil, plus more for brushing
1/2 tablespoon honey
1/3 cup water
Preheat oven to 300 degrees F.
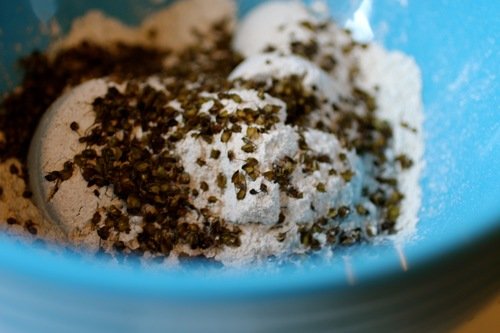
In a large bowl, blend together dock seeds, 3/4 cup rye flour, and salt. Stir in grapeseed oil, honey, and water until incorporated. Add more rye flour as needed so dough is no longer sticky, but still moist.
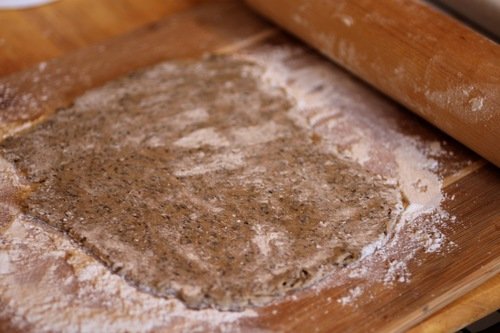
Divide dough in half and roll out thinly on a floured surface (not paper-thin, but "cracker-thin"). Don't stress too much about the thickness - if the crackers are thicker, they'll just take a bit longer to cook.
Cut crackers into any shape that you like, such as squares, diamonds, or strips, and place them on a baking sheet. Crackers can be close together, as they hold their shape as they cook. Gather dough scraps, re-roll, and cut as needed. Repeat with remaining dough half.
Brush crackers lightly with grapeseed oil (or rub with fingers), sprinkle with a little more salt, and bake for 15 - 20 minutes. Remove from oven and cool on rack. Store in an airtight container and enjoy for up to 2 weeks. If you live in a humid environment, crackers can be re-toasted in the oven.
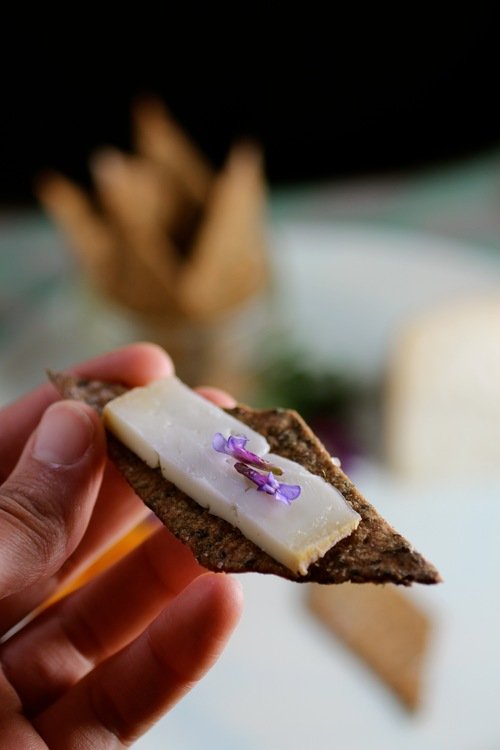
A diamond-shaped Rumex crisp with a creamy sheepsmilk cheese and vetch tip flower.

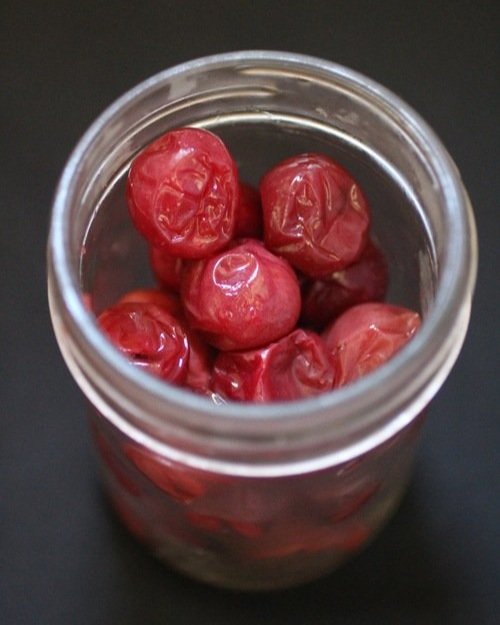
Umeboshi with Wild Plums
Umeboshi wish California wild plums.
Wild plums and red shiso make for impressive color.
As it turns out, you can't find ume plums (Prunus mume) easily on the West Coast to make a truly traditional umeboshi, or Japanese salt-pickled plum. Fortunately, wild plums are small and tart enough to work in much the same way. Ume plums are actually more closely related to an apricot, so if you eat them raw the texture will (theoretically, I have never eaten them myself) be very different than a wild plum from the West Coast, but when pickled the different is very subtle.
By preserving wild plums in salt, you keep the harmful bacteria out and, over time, create many amazing complicated flavors. The resulting wild plum umeboshi can be chopped and used as a condiment to bring bright, tart, pungent, savory/sweet flavor to a wide variety of dishes. Traditionally, it's eaten with rice, but I've tried it sautéed with sweet corn and in a nectarine compote that topped seared pork and I'm definitely looking forward to more experimentation! The salty-tart juice leftover from the umeboshi can be used for quick-pickling radishes or as an interesting addition to sauces and dressings.
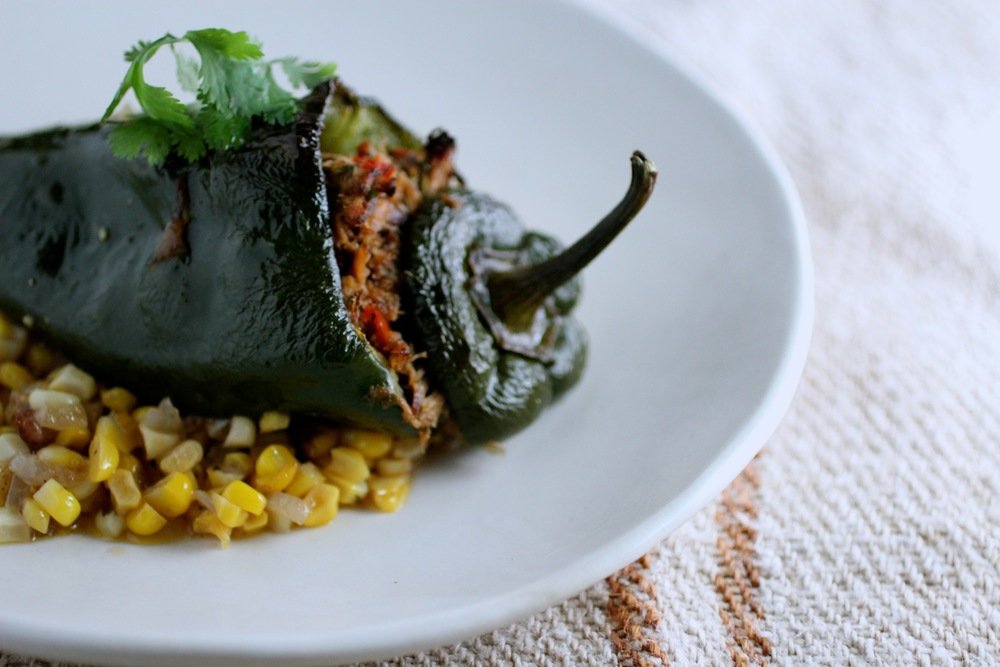
One of my favorite discoveries - sautéed sweet corn with umeboshi and butter.
The below recipe is adapted from from here, which is supposedly the most popular umeboshi recipe translated into English and can be adjusted as needed for amount of plums that you have. We made a few batches with shiso (purple shiso from our garden) and a few without and although the shiso is nice, it's pretty subtle and both versions are great. Be careful handle the plums VERY gently - any bruising and cutting can lead to mold.
1 pound (metric example = 1 kilogram) small wild plums, about the size of cherries or slightly larger and still firm (we picked up red ones from Tilden Park - yellow can be used, but the color will not be as characteristic)
2 cups (metric example = 1 liter) vodka or other distilled alcohol (such as shochu), for rinsing plums
1.6 ounces (metric example = 100 grams) red shiso leaves (about 10% by weight of plums)
1.6 ounces (metric example = 100 grams) coarse sea salt or Kosher salt (10% salt solution)*
Step 1: Sterilized the plums and process the shiso
Remove stems from plums. Wash plums in water twice then soak in a bowl of cold water and allow to soak overnight. This removes some of the bitterness in the plums (wild plums are less bitter than ume plums, but I went ahead and did this to be safe).
Drain plums, dunk in a bowl of vodka, and set out on a clean towel to dry. The alcohol helps to ensure any mold spores that might still be on the outside of the plum are removed/rendered safe.
Wash shiso leaves, remove tough stems, sprinkle with salt and massage leaves with fingers until they are limp.
Step 2: Get your plums nice and salty so they ferment
Clean a large, wide-mouthed container (such as a gallon-sized jar) that can hold all of your plums. Spray with vodka to disinfect it, then allow to air dry.
Fill your pickling container with salt and plums by starting with a layer of salt, then a layer of plums, followed by a portion of shiso. Repeat until all ingredients are used and weigh down with a plastic bag filled with water or another smaller jar filled with rocks and water (make sure these are clean). Once the container is full and weighed down, cover the top with cheesecloth and secure with a rubber band. You might have to wrap cheesecloth around the weight then secure with a rubber band. As long as the top is covered with cheesecloth, all is well. It doesn't have to be pretty!

Salt, shiso, and plums weighted down and covered with cheesecloth.
Leave fermenting plums in a cool, dark area until the plums are soft and completely immersed in a reddish liquid (about 1-2 weeks). This liquid is extracted from the plums by the salt. If liquid is not completely covering plums, try increasing the weight. Liquid should be about 1 inch above the top of the plums. Leave the plums in the liquid until you are ready to dry them, about 2-3 weeks.
Step 3: Hoshi/boshi ("to dry") your plums
Wild plums (or ume plums in Japan) are harvested in June and drying traditionally occurs on a specific date after the rainy season is over. Be sure to dry your plums at a time when the weather is dry and at least 2 weeks after plums have been submerged in liquid.
Put the plums in a single layer and the shiso leaves in spread-out clumps separately on flat baskets - we used a bamboo steamer - . Leave the baskets outside in a sunny place with good ventilation for about 3 days, turning them at least every 24 hours. If it rains, be sure to take them inside before they get wet. At the end of the drying process, they should look wrinkly.
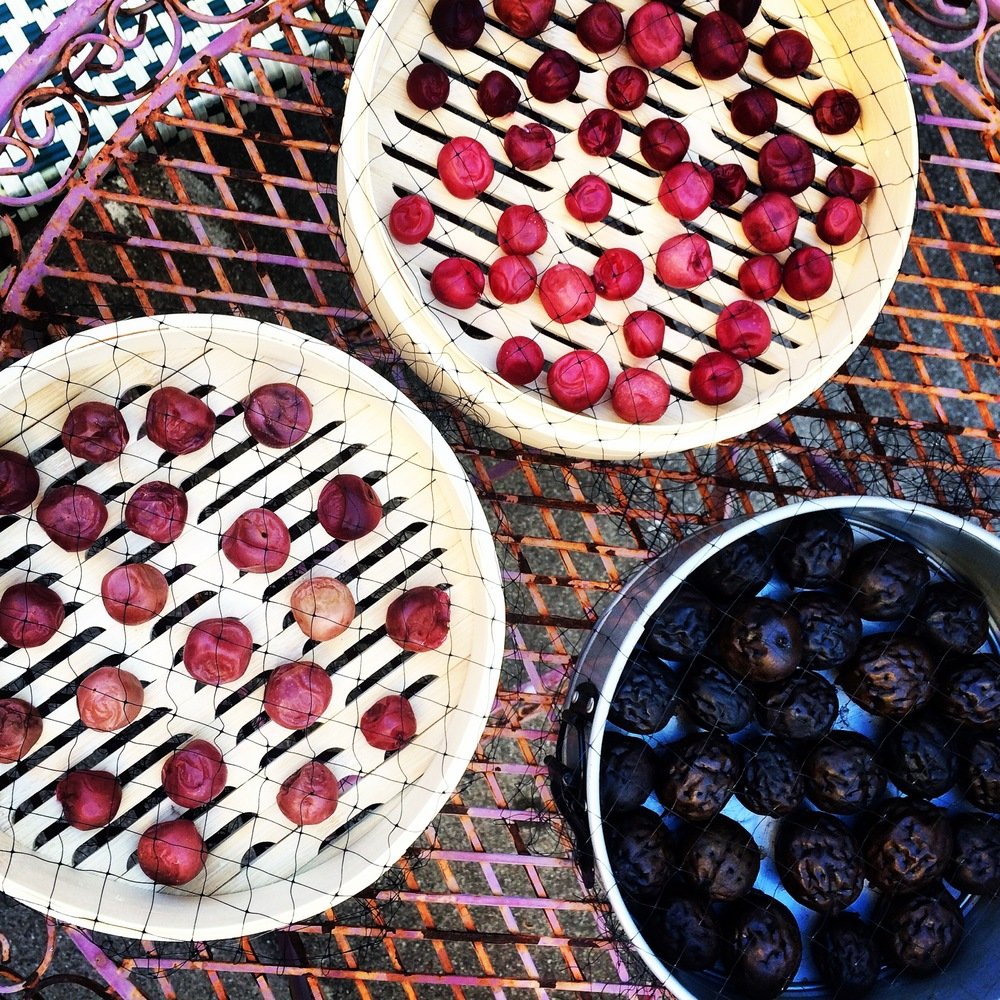
Umeboshi drying on bamboo steamer liners. Also in the photo are green walnuts in the process of pickling (but have nothing to do with the umeboshi, don't be confused!)
Step 4: Store and enjoy
Store plums in jars, pouring back in some of the ume liquid if you prefer softer plums (we did not do this, as we like them firmer). As I mentioned earlier, this ume liquid can be used for other things, such as quick pickles. The shiso leaves can be layered in with the plums, but we keep the shiso out for other uses, as they didn't have the best texture and we wanted to keep our umeboshi "clean". The umeboshi is now ready to eat - they can be eaten for up to 10 years (!) and grow in complexity over time, but I doubt we'll still have ours after even 1 year!
*Other salt solutions can be used, from 8% - 20%. The higher the salt percentage, the saltier the umeboshi will be (obviously). The lower the salt percentage, the more likely they are to mold. It is recommended that beginners use at least 10%.
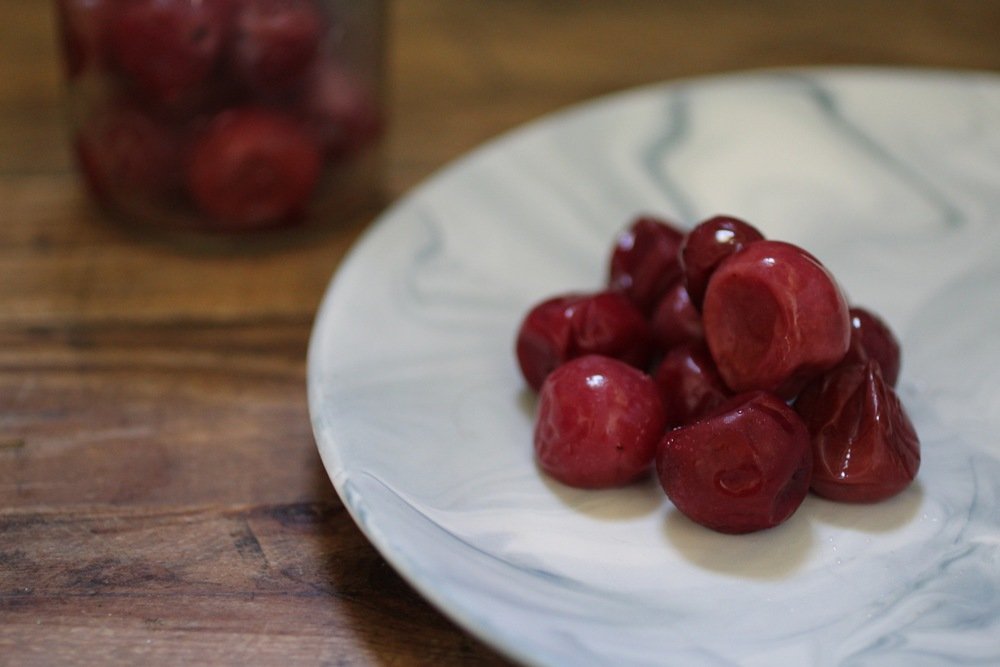
Finished umeboshi straight from the jar.