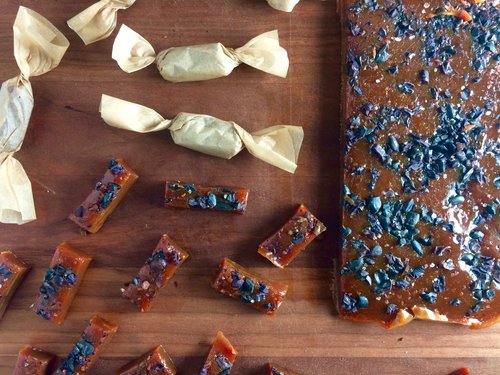
Prickly pear salty caramels
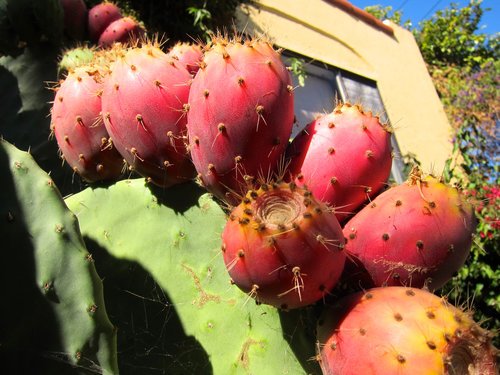
Prickly pear margaritas, prickly pear sorbet, prickly pear cheesecake, prickly pear fermented beverage, prickly pear marinade - you name it, I've tried it with prickly pear. This is primarily because at my house in Oakland has a giant prickly pear cactus (Opuntia) that is very, VERY productive. Like, part-time job in the late summer/fall productive. At first, I was so pumped that I wasn't very generous with the fruit, but now, when I hear someone comment on the prickly pear cactus (which happens quite often) I run out and give them a bag of frozen fruit. You can read more about my harvesting methods here. Since there's so much fruit, I now pretty much stick to the second process listed, which is a loss of the pulp, but dramatically less work.
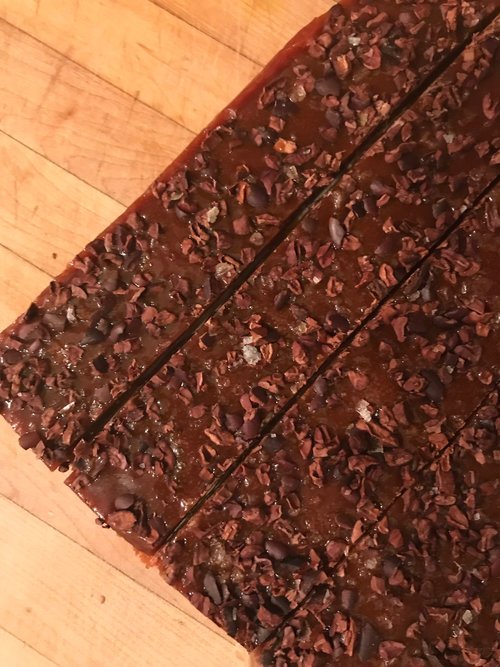
Cutting caramels into squares.
A few years ago, in an effort to get rid of as much juice as possible, I was trying to think of recipes where reducing the juice was required. I remembered making apple cider caramels at some point, so I decided to give that a try using this Smitten Kitchen recipe for apple cider caramels, but substituting out cider for prickly pear juice. There are also a few other changes, like adding cacao nibs to the top and omitting cinnamon (wouldn't be bad, but just already a lot going on). The caramels were above and beyond my expectations - a deep, rich sweetness balanced by the salt and toasty cacao nibs. Really so, so good and now my favorite prickly pear concoction. Additionally, they can be wrapped and keep well, so a great unique holiday gift item! Recipe makes about 50 caramels, depending how large they are cut.
4 cups (945 ml) prickly pear juice
8 tablespoons (115 grams or 1 stick) unsalted butter, cut into chunks
1 cup (200 grams) granulated sugar
1/2 cup (110 grams) packed light brown sugar
1/3 cup (80 ml) heavy cream
Up to 1/4 cup cacao nibs
Up to 2 teaspoons flaky sea salt, such as Maldon, or less of a finer salt
Neutral oil for the knife, if needed
Boil the prickly pear juice in a 3- to- 4- quart saucepan over high heat until it is reduced to a dark, thick syrup, about 1/2-3/4 cup in volume. This takes about 40-60 minutes on my stove. Stir occasionally.
Meanwhile, get your other ingredients in order, because you won’t have time to spare once the candy is cooking. Line the bottom and sides of an 8- inch square metal baking pan with 2 long sheets of crisscrossed parchment. Set it aside. Put salt and cacao nibs in a small dish.
Once you are finished reducing the juice, remove it from the heat and stir in the butter, sugars, and heavy cream. Return the pot to medium- high heat with a candy thermometer attached to the side, and let it boil until the thermometer reads 252 degrees, only about 5 minutes. Keep a close eye on it. Stir occasionally. (Don’t have a candy or deep- fry thermometer? Have a bowl of very cold water ready, and cook the caramel until a tiny spoonful dropped into the water becomes firm, chewy, and able to be plied into a ball.)
Immediately remove caramel from heat and give the caramel several stirs to distribute it evenly. Pour caramel into the prepared pan then sprinkle with cacao and salt. Let it sit until cool and firm—about 2 hours, though it goes faster in the fridge. Once caramel is firm, use your parchment paper sling to transfer the block to a cutting board. Use a well- oiled knife, oiling it after each cut (I have never had to do this...), to cut the caramel into 1-by-1-inch squares or 0.5-by-2-inch. Wrap each one in a larger piece of parchment or wax paper, twisting the sides to close. Caramels will be somewhat on the soft side and will keep for 2 weeks at room temperature, 1 month in the refrigerator.