Elderflower Chive Fritters
A savory twist on a wild spring treat.

Chives provide brightness without overpowering the elderflower.
As I've mentioned before, I love elderflower and feel a strong connection to the elder tree (more on the “regal elder” and foraging here). Until recently however, the only things I've ever had made with elderflower have been using a sweet cordial. So when I saw a few recipes for elderflower fritters using the whole flower, I was immediately intrigued and wanted to attempt a savory version. The batter contains lemon zest and chives, because I felt that these would add some zest and complexity without overpowering the floral qualities. I served it with ponzu for a dipping sauce, but honestly, we didn't use it much as the fritters stand best on their own! The below recipe makes about 40-45 small fritters, enough for 4-6.
~10 medium-large elderflower heads, broken up into 40-45 small florets
1 cup all-purpose flour
Pinch yeast (champagne or baker's, I used champagne because I had some leftover)
6-8 fluid ounces apple cider or sparkling water
1/2 tablespoon finely grated lemon zest
1/4 teaspoon sea salt, divided
2 tablespoons diced chives, divided
Grapeseed oil, for frying
Ponzu or aioli for dipping (completely optional)


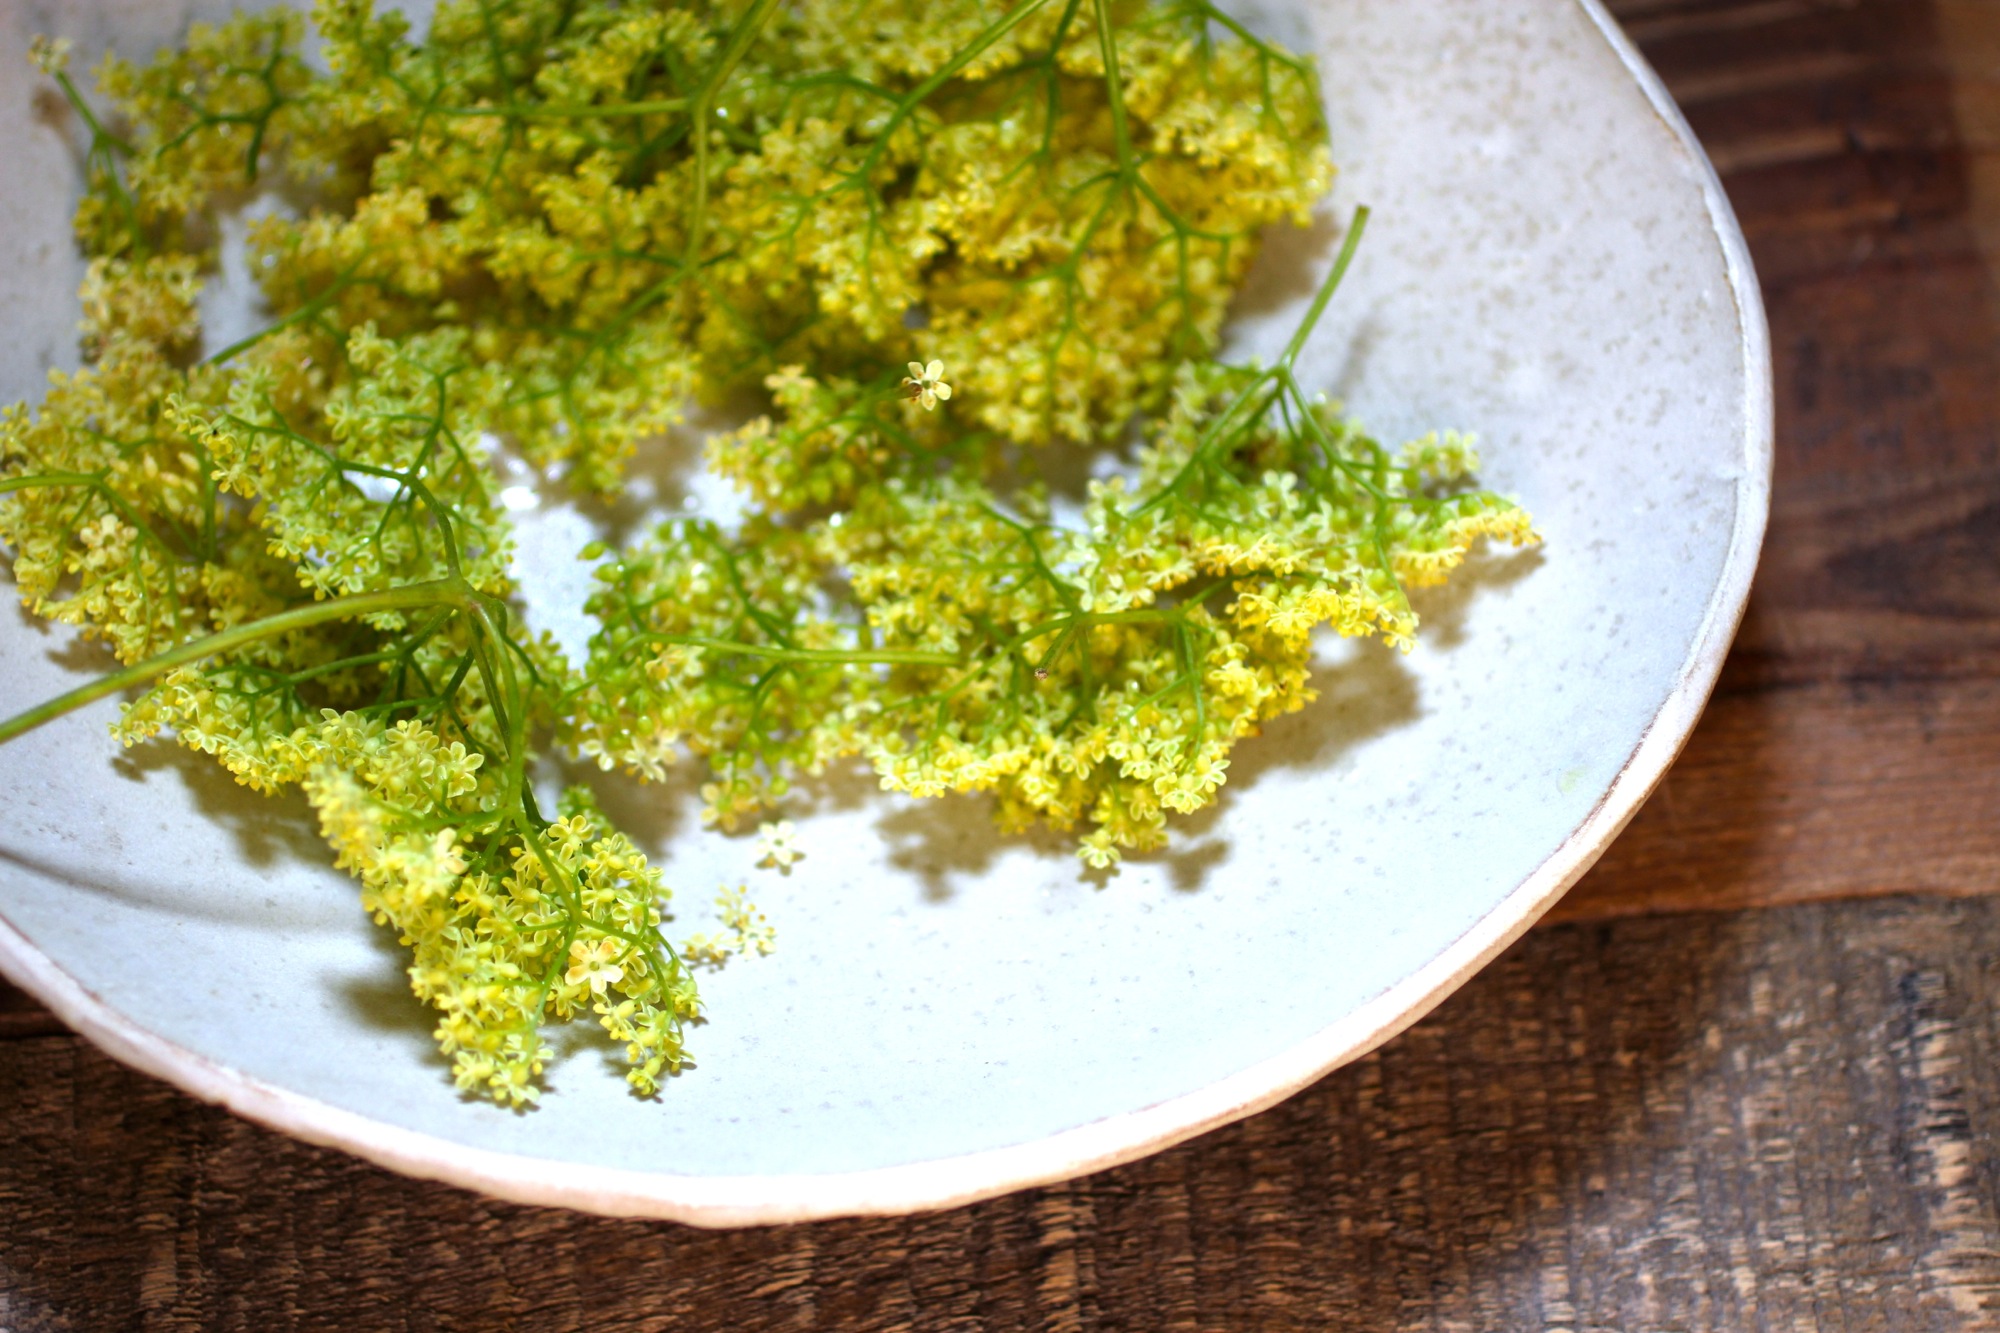
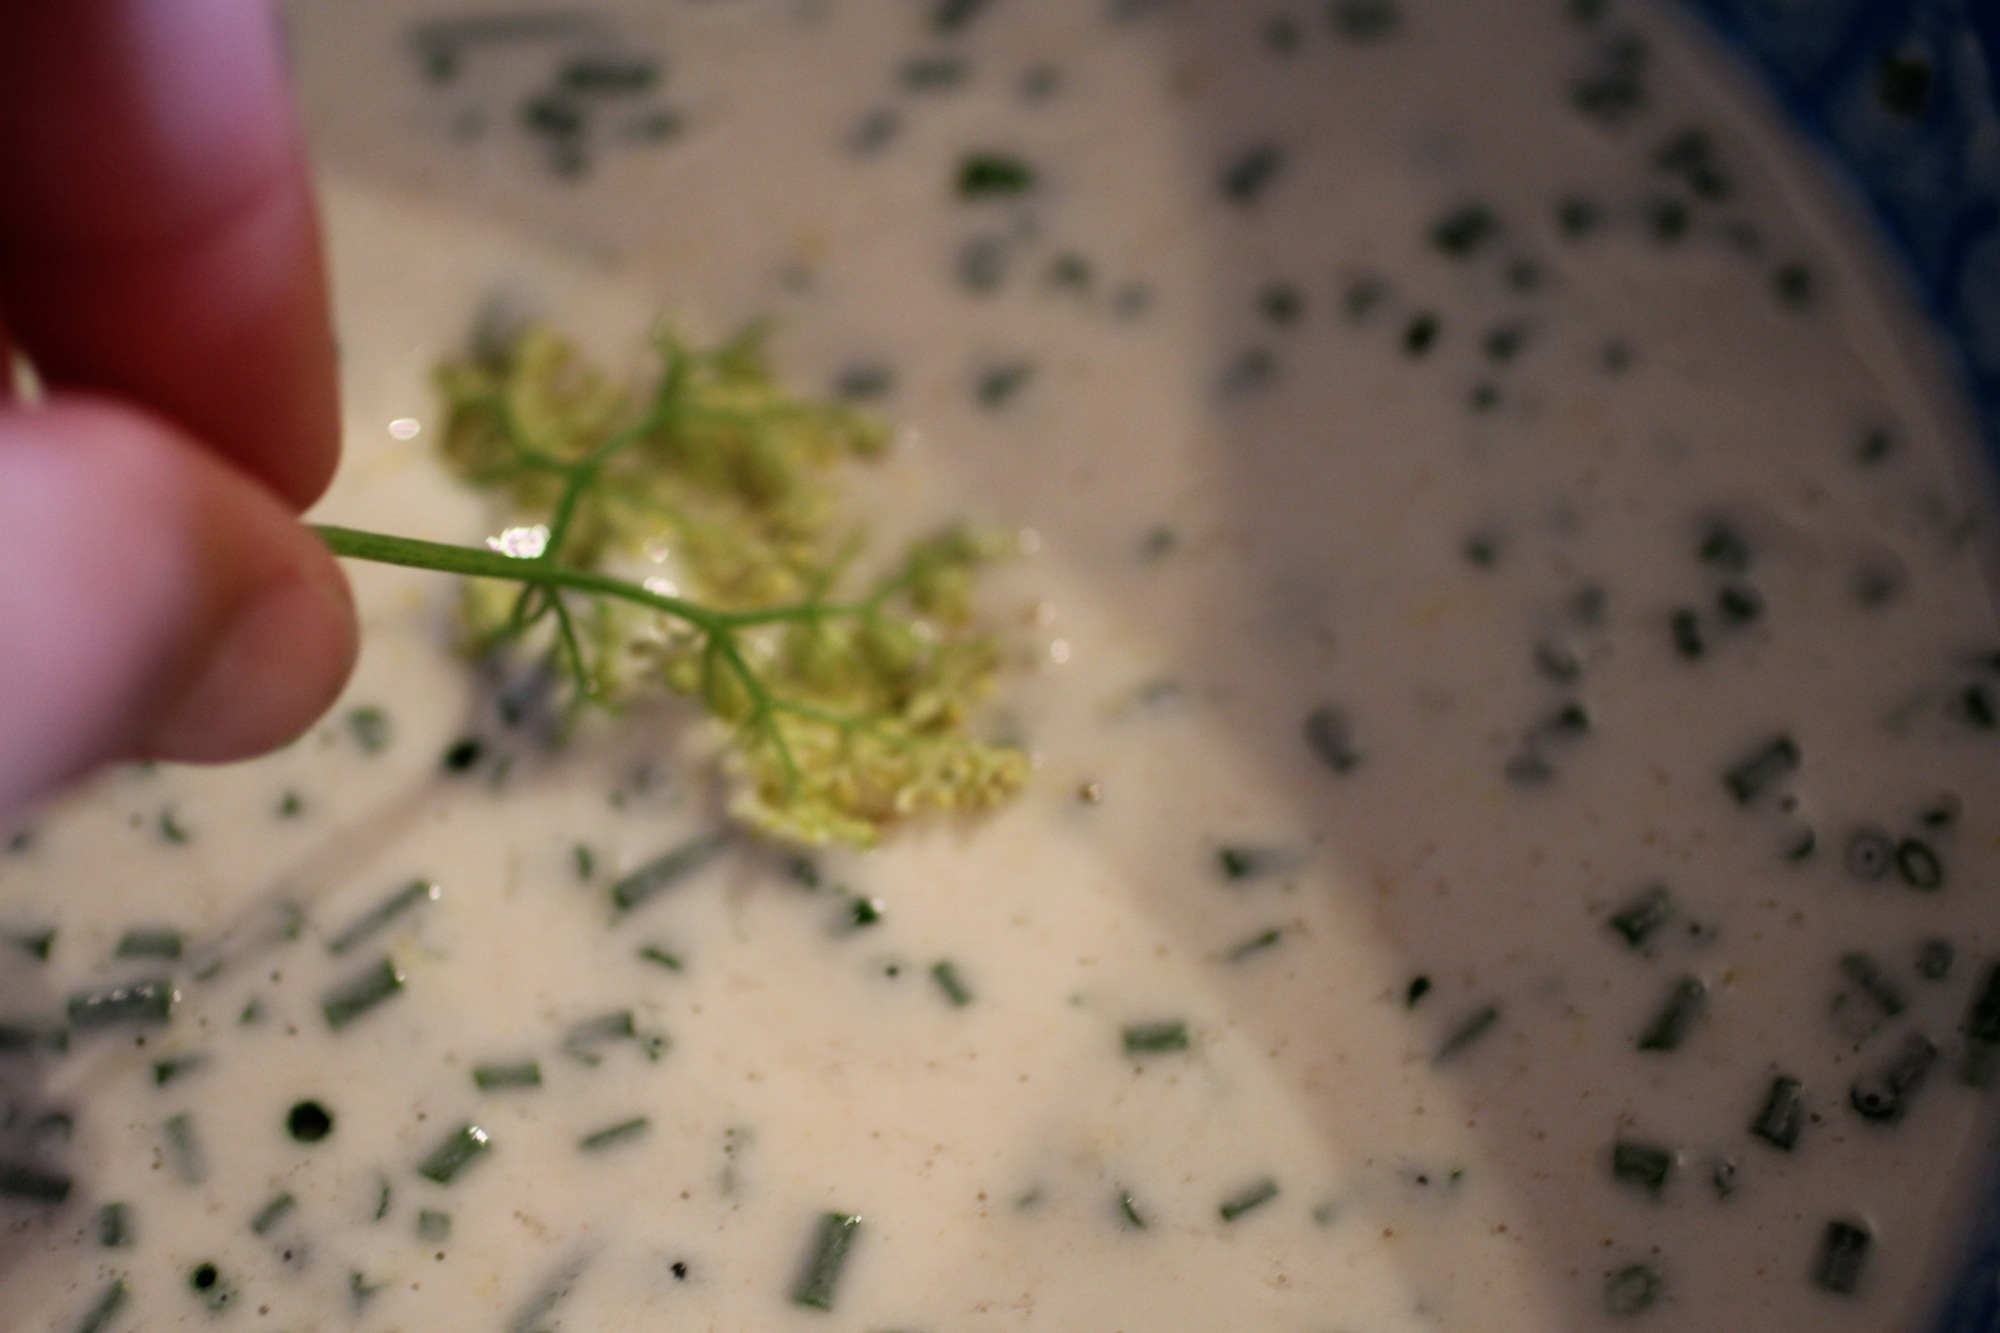
Shake blossoms to remove hitchhiking bugs and dunk into a large bowl of cold water. Remove from water, shake to remove as much water as possible (and probably more bugs!), and pluck smaller clusters (about 1-inch each) from larger clusters, removing as much large stem as possible (there will be some stems still, as that's how the flower clusters stay together). Set aside on a paper towel to dry more.
Whisk flour with yeast, 6 ounces cider, lemon zest, and 1/8 teaspoon salt until combined. Batter should be runny like pancake batter and will start to fluff up from the yeast. If batter is not runny enough, add some more cider then gently whisk in 1-1/2 tablespoon chives.
Pour enough grapeseed oil into a frying pan so that oil is 1/2-inch up the sides of the pan and heat to high.
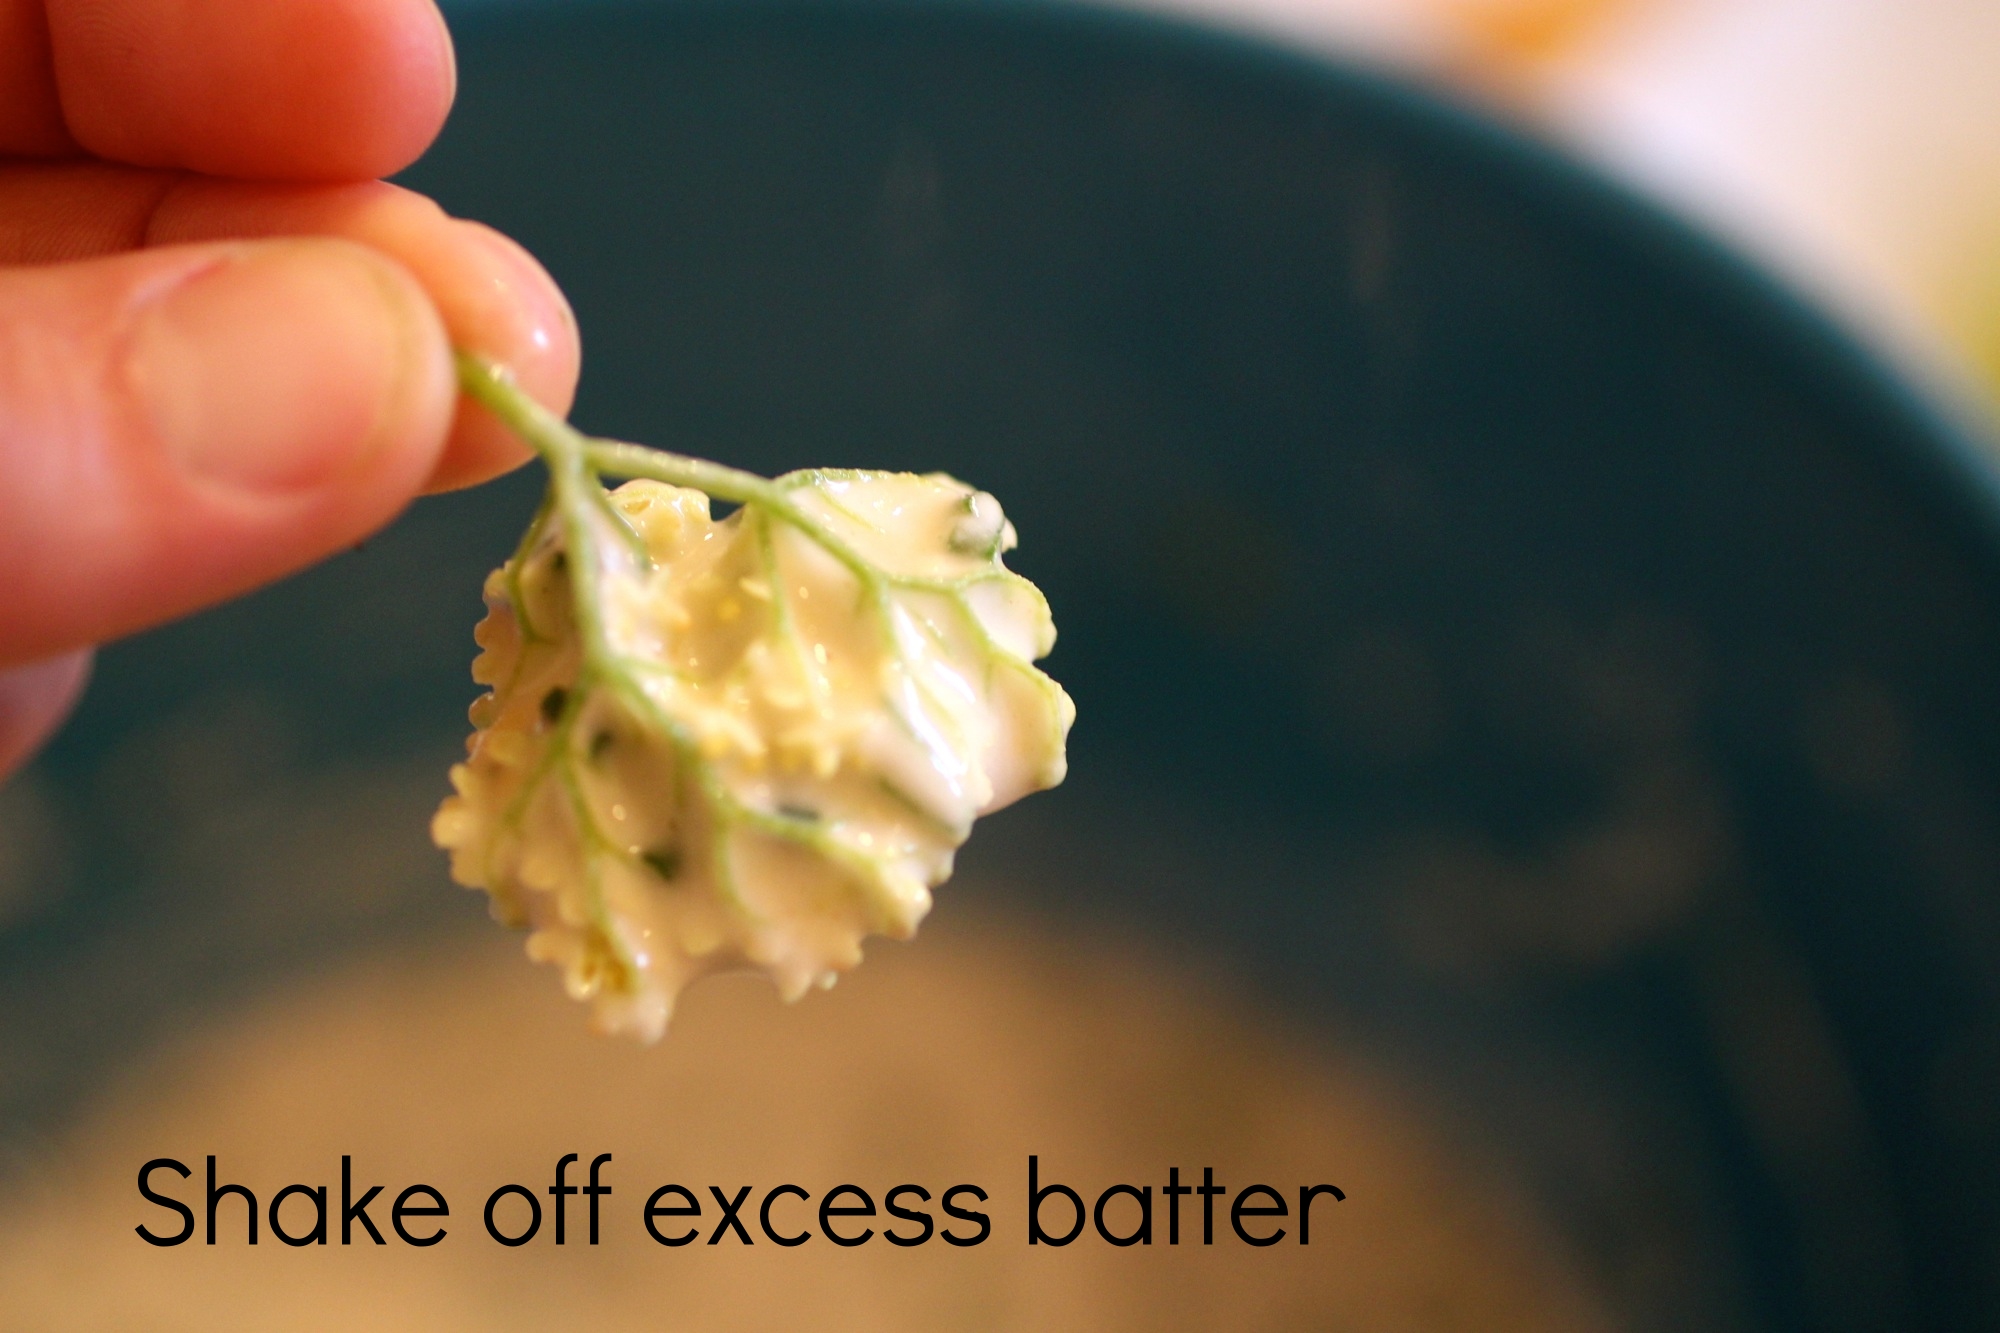
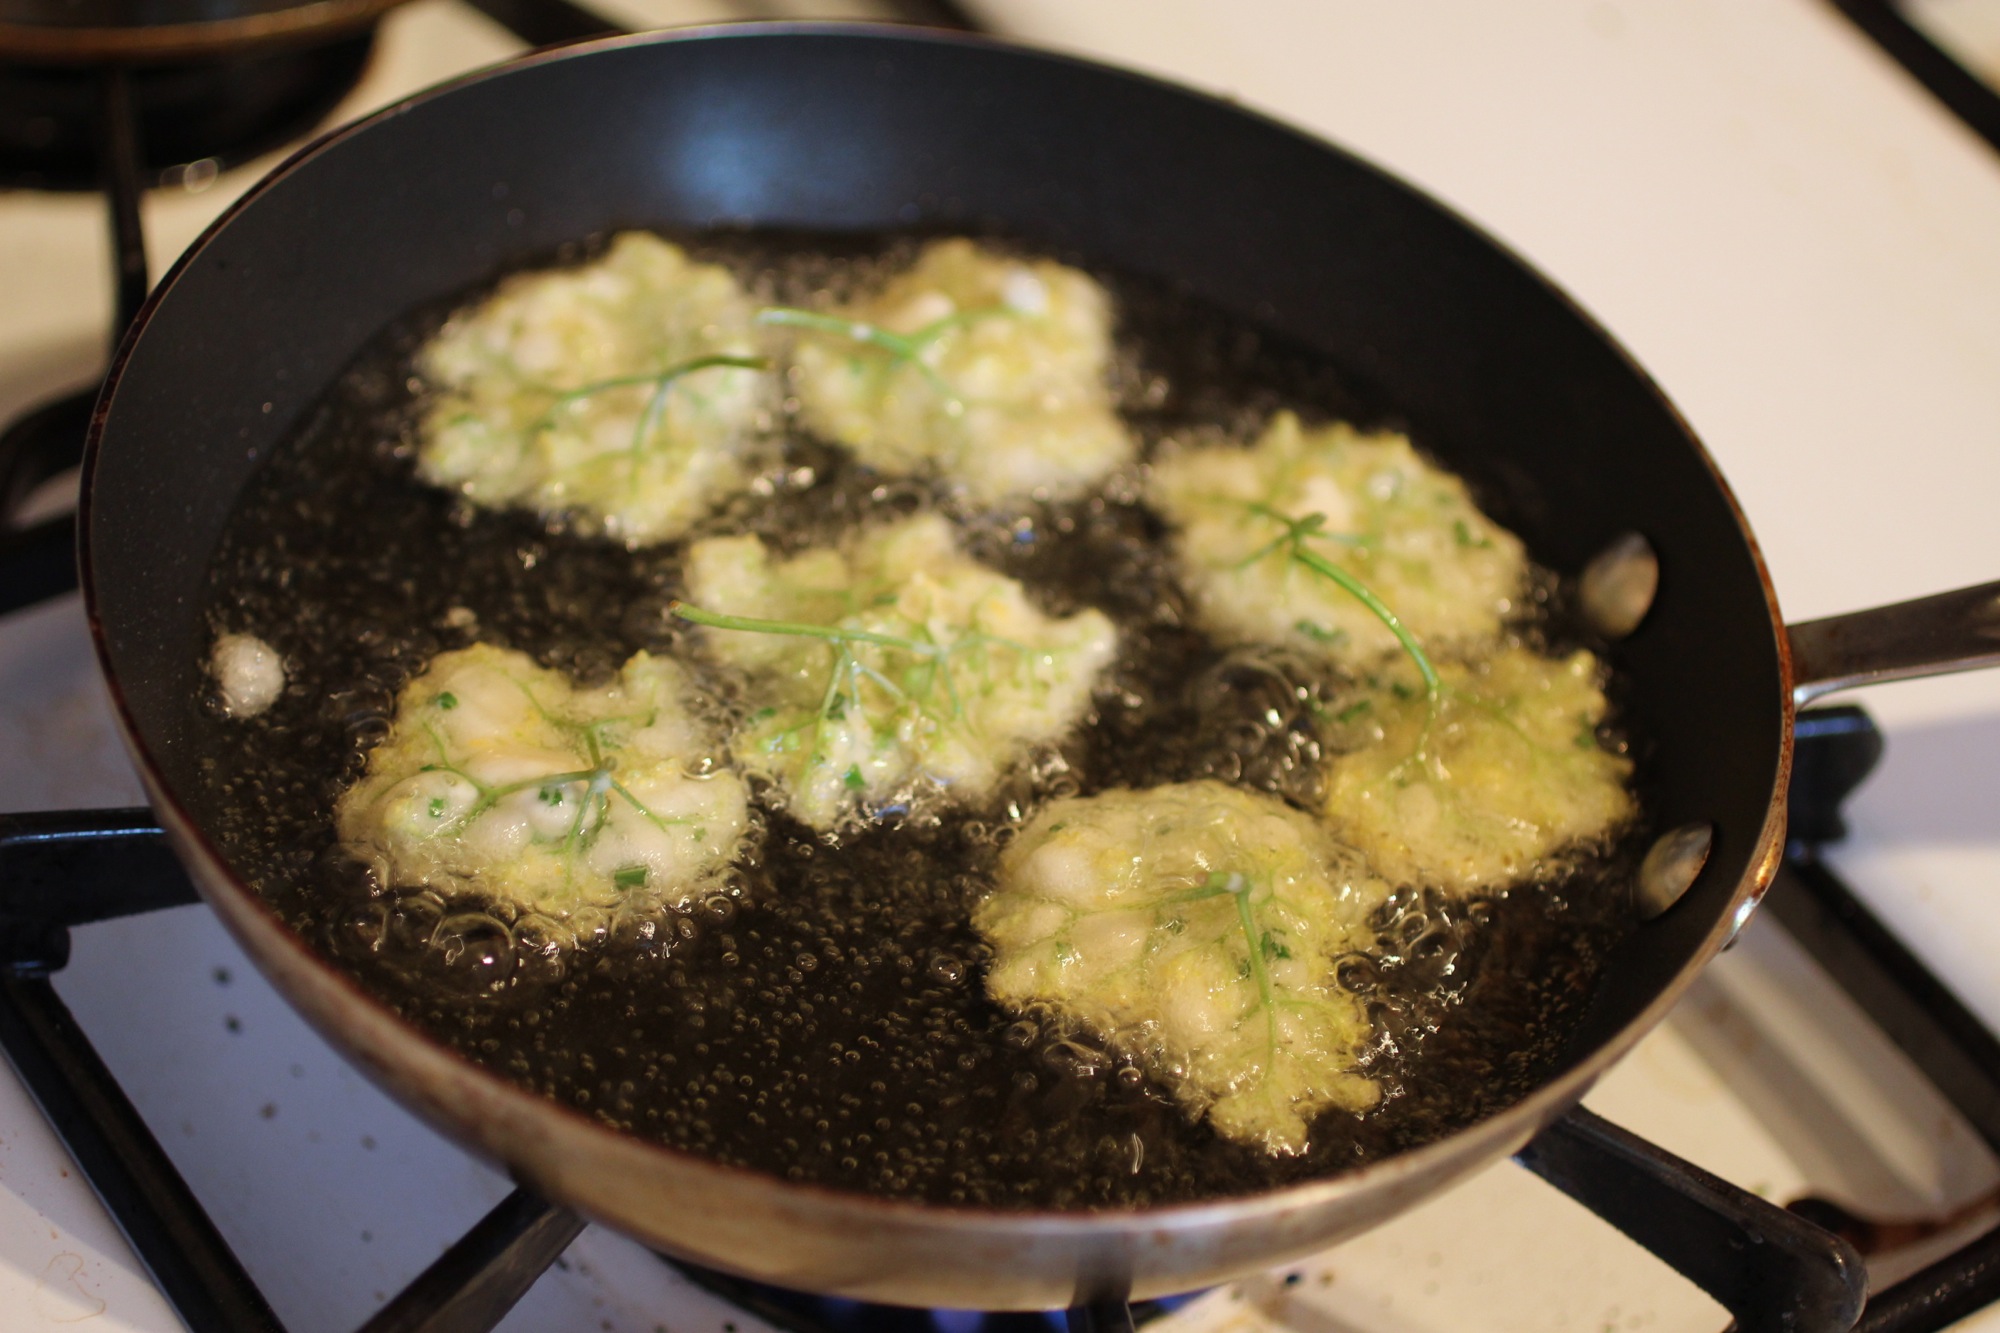
Once oil is hot, dip florets (one at a time) into batter, shake off any large clumps, and fry in oil until golden brown, about 1-2 minutes on the side opposite the stem, then flip and fry another 30 seconds on the stem side.
Remove fritters and place on paper towel, then repeat with florets in batches until all are fried.
Top fritters with dusting of remaining salt and remaining chives. Serve with ponzu or aioli if desired.

Ponzu not needed, but a cocktail is!
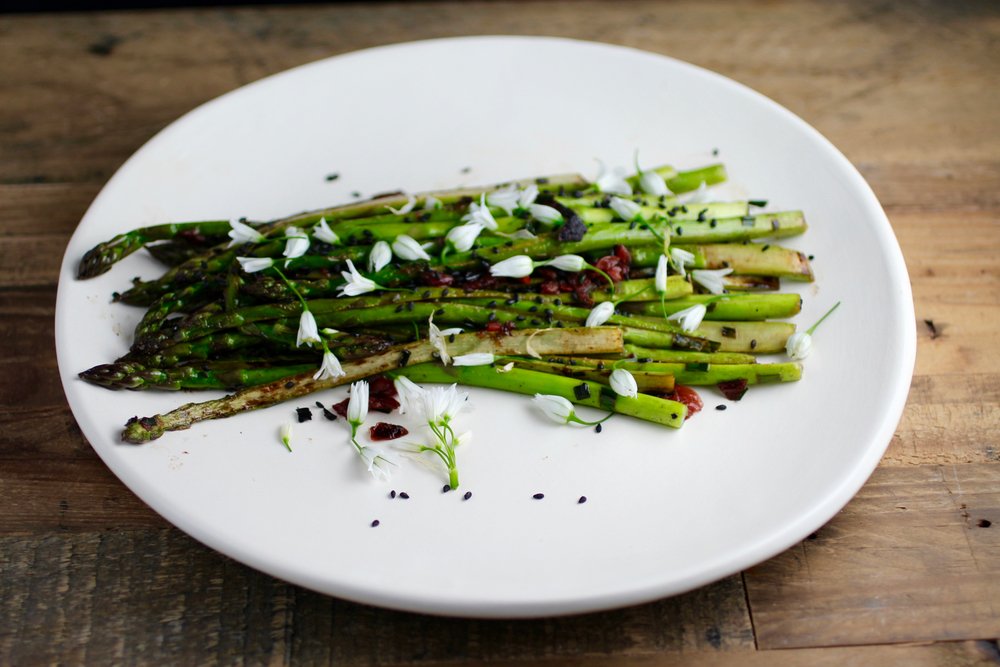
Asparagus-Wild Onion-Umami
Asparagus-Wild Onion-Umami
One of my favorite spoils of spring are the wild onions. In the Bay Area, the Allium triquetrum or "three-cornered leek" is the wild onion that abounds and it also happens to be as lovely in flavor as it is in appearance. This wild onion is nicknamed "three-cornered" because of the shape of its stems and has the characteristic allium smell and taste with a delicate sweet note, especially when using its small, white, star-shaped flowers.
There are many ways to enjoy these "three-cornered leeks", but pairing them with asparagus deliciously highlights the season. In California, not many foods are truly seasonal so when they are I like to indulge. Browning the asparagus and chopped onion stems in butter with umeboshi brings in umami elements then topping with the sweet wild flowers and crunchy bits of sesame really knocks it out of the park. We made umeboshi last year with local wild plums, but store bought umeboshi or even miso can be used as a substitute if you do not have access to umeboshi - either ingredient will contribute the umami flavor that you're looking for. Recipe is adaptable to the amount of asparagus you have preference for strength of flavors. The below recipe will serve 2-4 people (in our house, definitely only 2!)
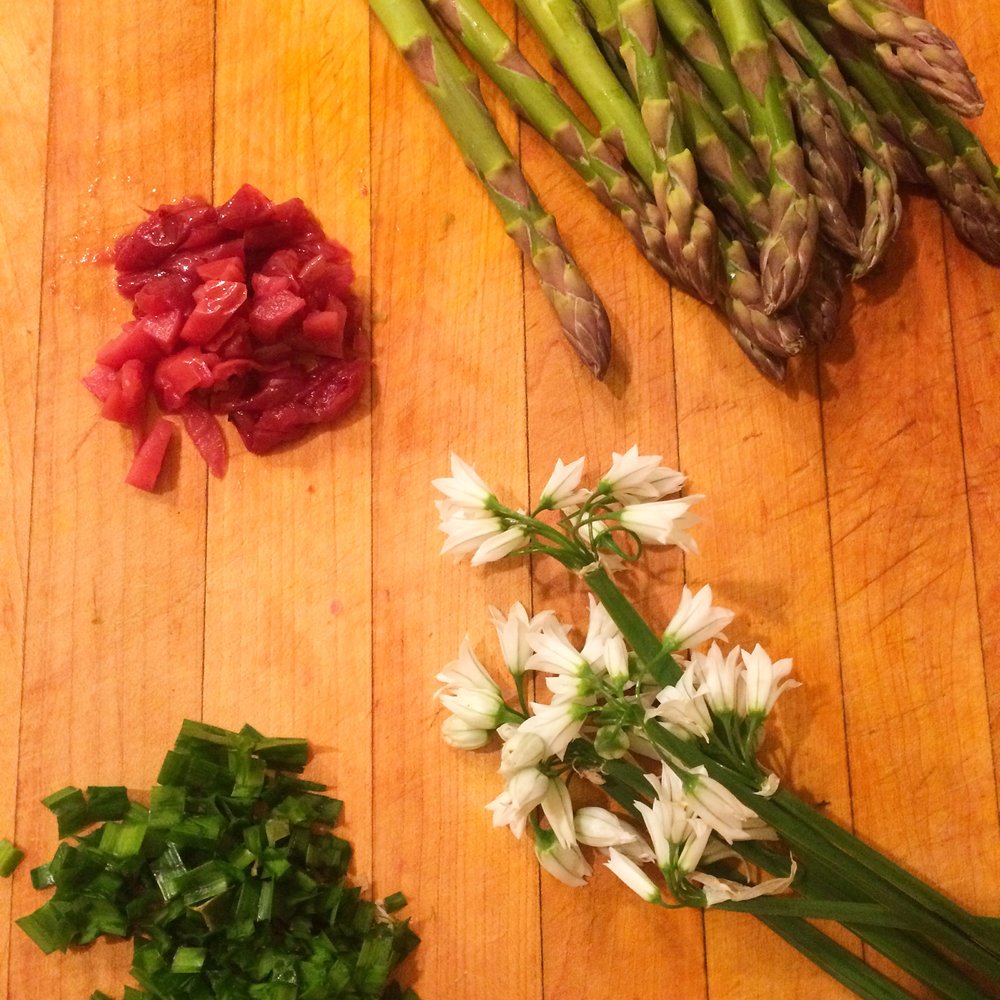
1 pound of asparagus (about 16 spears), tough fibrous stems removed
7 wild onion, aka three-cornered leek, stalks with flowers (there will be several flowers on each stalk)
1 tablespoon unsalted butter
3 umeboshi, finely chopped, or 1 tablespoon red or brown miso
1 tablespoon sesame seeds
For larger asparagus spears: Using a vegetable peeler, peel bottom of spear about 1-inch up from bottom and slice larger asparagus spears in half lengthwise. If you have thin asparagus spears, both of these steps can be skipped.
Remove wild onion flowers and dice stalks. Set aside.
In a cast iron pan, sauté butter over medium-high heat. Add asparagus, toss to coat, and cook until beginning to soften, about 1 minute. Add umeboshi (or miso in small pieces) and diced wild onion stalks, toss to coat, and cook until asparagus browns, about 3-5 minutes, tossing halfway through. Test an asparagus spear to see if it is flavored to your liking - if not, add more butter/umeboshi or miso/onion.
Remove from heat and top with sesame seeds and wild onion flowers. Serve hot.
Wild onion basking in the sun.
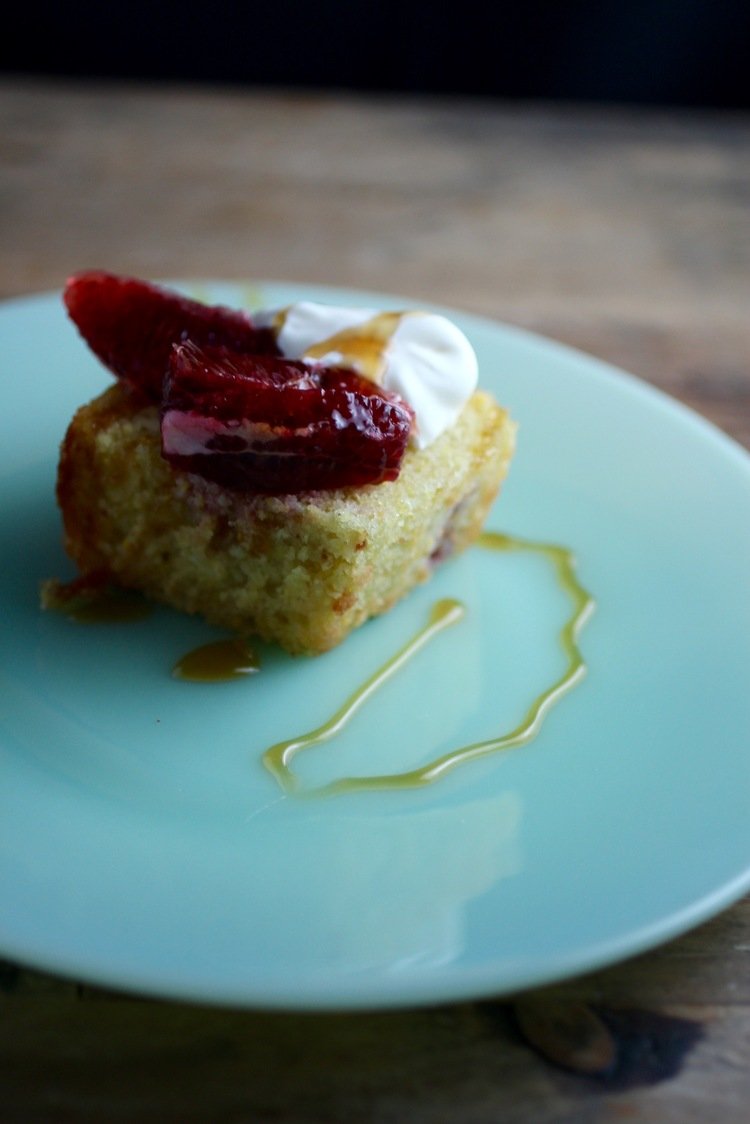
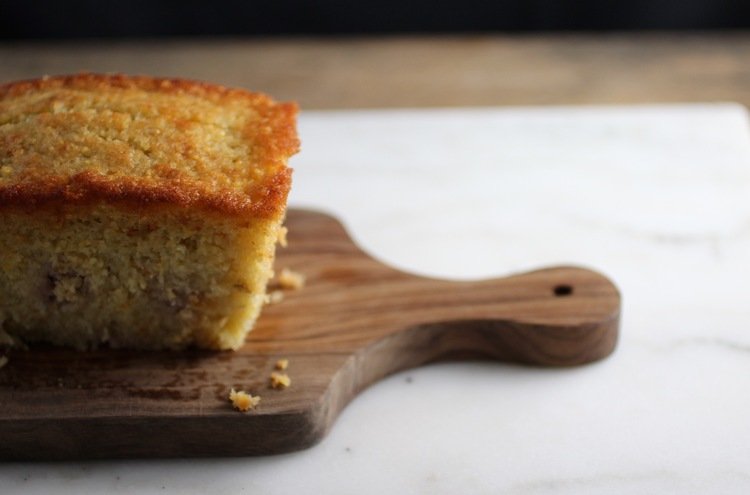
Olive oil cornmeal cake with blood orange and honey
A bit more olive oil can also be drizzled over the top - definitely won't hurt!
We recently returned from our honeymoon in Peru, where we picked up some palta (avocado) honey at the peak of summer to the other side of the equator where it is currently a different kind of seasonal peak - the height of the winter doldrums. Fortunately, grey winter days are not without their culinary delights, one of them being amazing citrus. Given our recent honey purchase, the cold weather begging me to "get my baking on", and beautiful blood oranges that fold so lovely into an olive oil cake, this combination was calling my name. The palta honey has very unique dark, earthy quality to it, but any honey that you enjoy will do for drizzling.
The recipe is adapted from a Smitten Kitchen recipe in a few ways including to incorporate cornmeal and deconstruct the compote - blood orange slices are so gorgeous it's a shame to chop them up for this application and we wanted the honey to shine on it's own. Makes one 9x5-inch loaf pan or four, 5x2.5-inch loaf pans. I happen to have four of these small loaf pans and am always looking for excuses to use them because they are pretty darn cute and more surface area = more crispy bits = delicious.
Butter for greasing pan
5 blood oranges
1 cup (200 grams or 7 ounces) sugar
About 1/2 cup (118 ml) plain yogurt
3 large eggs
2/3 cup (156 ml) extra virgin olive oil
1 cup plus 2 tablespoons all-purpose flour
6 tablespoons cup medium grind cornmeal
1-1/2 teaspoons (8 grams) baking powder
1/4 teaspoon baking soda
1/2 teaspoon salt
Honey, for drizzling
Crème fraîche for serving (optional, but perfect - just do it)
Preheat oven to 350 degrees. Butter a 9x5-inch loaf pan or four 5x2.5-inch loaf pans. Grate zest from 2 oranges and place in a bowl with sugar. Using your fingers, rub ingredients together until orange zest is evenly distributed in sugar.
Supreme an orange - aka "segment citrus like a boss" (I created that instructional post and just found out through this recipe that this technique is called "supreming"!). Break up segments with your fingers into about 1/4-inch sized chunks.
Halve 2 oranges and squeeze juice into a measuring cup; you’ll will have about 1/4 cup. Add buttermilk or yogurt to juice until you have 2/3 cup liquid altogether. Pour mixture into bowl with sugar and whisk well. Whisk in eggs and olive oil.
In another bowl, whisk together flour, cornmeal, baking powder, baking soda and salt. Gently stir dry ingredients into wet ones. Fold in pieces of orange segments. Pour batter into prepared pan.
Bake cake for 50 to 55 minutes (9x5-inch loaf pan) or 25-30 minutes (5x2.5-inch loaf pans), or until it is golden and a knife inserted into center comes out clean. Cool in loaf pan(s). While cake is cooling, supreme 2 more oranges and keep refrigerated until served.
Slice cake and serve with crème fraîche, blood orange slices, and a drizzle of honey. You can also drizzle some more olive oil over the top if you're feeling wild. Keeps for 3-4 days.
Bay Nut Mole Negro
Foraged bay nuts give the chocolate-coffee flavor you're looking for in a mole.

Most mole recipes leave me feeling overwhelmed and in a too-many-ingredients comatose. This one, although it does take about 2 hours to prepare, it a lot more approachable and some of that time is inactive, which means you can spend it on your other side dishes. Yes, this recipe is likely not as complex as others you may find, but even just with two chiles and some other key ingredients, you can create a delicious and robust mole negro.
“As bay nuts do not contain sugar or cinnamon, I added a little of each. If you don’t have bay nuts, replace them with mexican chocolate (such as Ibarra) and skip the brown sugar and cinnamon. ”
Also unique to this mole is that instead of the traditional chocolate, I chose to use bay nuts. Bay nuts are a foraged find from the bay laurel tree (more on bay nuts and foraging here). The bay nut is a member of the avocado family that, when roasted, becomes akin to a combination of chocolate and coffee - ideal for mole. Recipe serves 6.
2.5 pounds skinless chicken thighs and/or legs
~1-2 teaspoons salt
2 tablespoons grapeseed (or other neutral flavored oil), divided
1.5 cups low sodium chicken broth
Juice and zest from 2 blood oranges
2 cinnamon sticks
1 yellow onion, chopped
1/4 cup almonds, chopped
3 large garlic cloves, diced
2 teaspoons cumin seeds
2 teaspoons coriander seeds
1.5 ounces dried pasilla chiles, stemmed, seeded, and torn into strips
0.5 ounces dried negro chiles, stemmed, seeded, torn into strips
3 prunes, chopped
1 teaspoon dried oregano
2 ounces roasted bay nuts, chopped (mexican chocolate can be substituted for bay nuts, brown sugar, and cinnamon)
1 tablespoon brown sugar
Chopped fresh cilantro, queso fresco, avocado, and corn tortillas (to serve)
Rub chicken all over with salt. Heat 1 tablespoon oil in large pot (I use my large Le Creuset pot) over medium-high heat. Brown chicken on both sides, about 3 minutes per side.
Add broth, blood orange juice, and cinnamon sticks then bring to a boil. Reduce heat to medium-low; cover and simmer until chicken is tender and just cooked through, about 25 minutes.

Meanwhile, heat remaining 1 tablespoon oil in large saucepan over medium heat. Add onions and garlic and sauté until softened and beginning to caramelize, about 10-12 minutes, stirring occasionally. Add almonds, cumin, coriander, and chiles. Reduce heat to medium-low and cook while stirring until chiles soften, about 4 minutes.
Using tongs, transfer chicken from pot to large bowl. Pour chicken cooking liquid into saucepan with onion-chile mixture (reserve pot). Add blood orange zest, prunes, oregano, bay nuts, and brown sugar to saucepan. Cover and simmer until chiles are very soft, stirring occasionally, about 30 minutes. Remove cinnamon sticks and discard.
Transfer sauce mixture to food processor or blender and purée until smooth; return to reserved pot. Season sauce to taste with salt. Coarsely shred chicken and return to sauce; stir to coat and re-heat chicken.
Serve topped with cilantro springs, avocado, corn tortillas, and queso fresco (if desired).
Pair with: Vinegary red cabbage slaw (the vinegar is a great contrast to the dark, rich mole), roasted delicata or butternut squash.

Elderberry Buckwheat Tart
More on elderberry and foraging here.
Nutty buckwheat pairs perfectly with the tartly sweet berries balanced by a bright kick of ginger. Serves 8.
9 tablespoons unsalted butter, divided, plus more for greasing pan
½ cup buckwheat flour
½ cup plus 2 tablespoons gluten-free flour blend (or all-purpose flour)
⅓ cup plus ½ cup granulated sugar, divided
¾ teaspoon salt, divided
2–3 tablespoons cold milk or water
3 cups fresh elderberries
1/3 cup light brown sugar
2 teaspoons fresh grated ginger
2-3 tablespoons cornstarch
1 tablespoon lemon juice
Lightly grease the bottom and sides of an 8-inch or 9-inch tart pan. Set aside.
Mix flours, 1/3 cup sugar, 1/2 teaspoon salt, and cut in 7 tablespoons butter. With pastry blender, fork, or hands, mix butter into flour mixture until the dough resembles small peas. Sprinkle in milk or water by the teaspoon and blend until dough sticks together when pressed, but is still crumbly.
Press dough into and up sides of pan, chill for 30 minutes. Preheat oven to 350°and bake for 15 minutes until golden-brown. Remove from oven and allow to cool.
While tart shell is cooling, add elderberries, remaining ½ cup granulated sugar, brown sugar, remaining ¼ teaspoon salt, and ginger to a large pot and heat on medium-high. Blend cornstarch with 1 tablespoon water to create a slurry, and then add to the elderberry mixture, stirring to dissolve slurry and sugars.
Bring to simmer and continue cooking, stirring frequently, until mixture thickens, about 5 minutes. Add another tablespoon of water-thinned cornstarch if needed to get mixture to thicken.
Turn off heat, stir in lemon juice, and pour elderberry mixture into cooled tart shell. Dot with remaining 2 tablespoons butter and bake for 40 minutes until set.
Serve warm or at room temperature, ideally with vanilla ice cream.
Apricot Ginger and Almond Galette
Rustic, yet classy free form tart with a ginger kick.
There's something about me and tart shells - something...special. No matter the style or variation, I just can't seem to do wrong. I'm not sure what it is - call it skill or call it kismet, but you have to agree that it's also called delicious, delicious fate.

See what I mean? This flaky tart shell is off the hook.
This particular tart shell is a galette, meaning that it's free-form. The free-form shell is great because, as there is no pan, you can use the dough to make a whole bunch of smaller galettes if that sounds fun. Also, it has a very classy rustic look and can be eaten with your hands, like a slice of pizza - perfect for picnics!

Free form tart shell ready to be folded over filling. Also, a cocktail - rolling out pastry dough can leave you parched!
The other thing I love about tart shells is that the ingredient combinations are endless, from a simple pairing of fresh raspberries and honey to more complex variations like nectarines and cardamom brown butter or dark chocolate salty caramel. Stone fruit is one of my favorite bases for fillings (yay to summer!) and the ginger and almond in this galette pair beautifully with the apricot. Feel free to use this pâte brisée in any number of other combinations - the egg mixed it makes it ideal for rolling out and folding over scrumptious fillings as a galette. Go on, get crazy with your tart self!
Pâte brisée
1-1/3 cup all-purpose flour, plus more for rolling out
1/2 teaspoon fine sea salt
8 tablespoons unsalted butter, cold, diced
2 eggs, lightly beaten, divided
Ice water
Filling
1 pound apricots, pitted and quartered
1/4 cup sugar
1 teaspoon lemon juice
1/4 teaspoon almond extract
2 teaspoons cornstarch
Pinch coarse sea salt
1/4 cup slivered almonds
1 tsp grated fresh ginger
Honey, for drizzling (optional)
Crème fraîche, for serving (optional)
Mix flour with 1/2 teaspoon fine sea salt. Cut in butter and, using pastry blender or fingers, incorporate until mixture looks like pea-sized crumbs. Form a well in the center, crack in 1 egg, then stir egg into flour/butter mixture until incorporated. Add ice water as needed (you may not need it) just until dough holds together, but is not sticky.
Roll dough into a ball, flatten into a thick disc, cover with plastic wrap, and refrigerate for 30 minutes.
Meanwhile, preheat oven to 375 degrees F and toss all filling ingredients except honey in a medium bowl.

Folding over pastry dough edges.
Remove dough from refrigerator, allow to thaw for 5 minutes, and roll out dough in a circle on a floured surface to about 1/4-inch thick. Spread apricot filling in center, leaving 1.5-inches around edge. Fold over, pastry edges, brush with remaining lightly beaten egg, and place on a baking sheet lined with aluminum foil or parchment paper. Bake galette for 30 min or until golden.
Serve at room temperature or warm with crème fraîche and a drizzle of honey, if desired.
Toasted Dock Seeds
Raw dock seeds are beautiful, but (in my opinion) not as tasty.
Dock, or Rumex spp. (general and foraging info here), has tart edible leaves that are available in the spring, but the real treat to me are the seeds of the dock, which you can find in the later spring through summer on the West Coast (and most of the world). The seeds can be eaten raw, but are better toasted and, being a member of the buckwheat family, can be used like you would buckwheat (which is a seed itself, not a grain). Try mixing the seeds into a granola or dough for crackers, sprinkling them over poached fish, or grinding them into a flour and using it for baking.
To remove the seeds from the plant, first wash and shake out the dock to dry it then simply run your fingers down the length of the stalk, pulling off seeds as you go. You might want to do this outside, as dock seeds have a tendency to "jump".
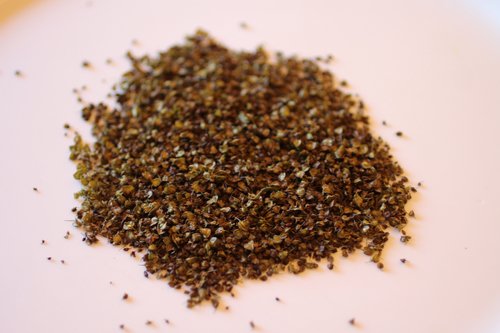
Toast the seeds in a cast iron pan on medium high, stirring frequently to cook the seeds evenly. In my experience, 1 cup of seeds in a medium cast iron pan will take about 10 minutes, but this will changed depending on how many seeds you're toasting at once and size of pan (less seeds = more exposure to heat).

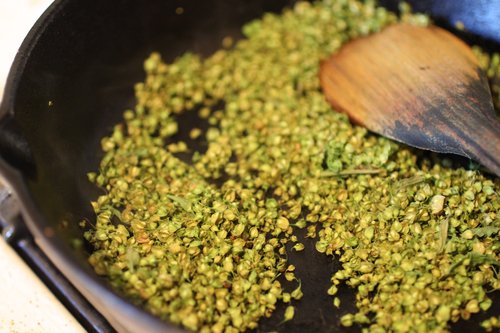
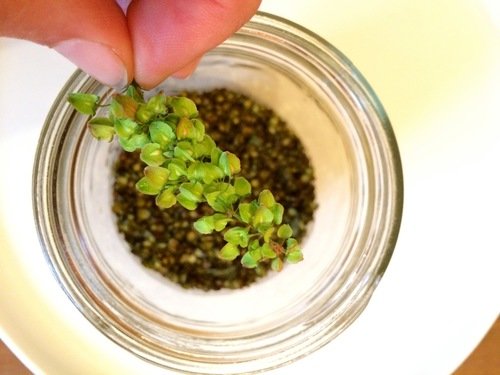
Dock seeds, toasty brown.
Cornmeal-battered nopales with smoked paprika
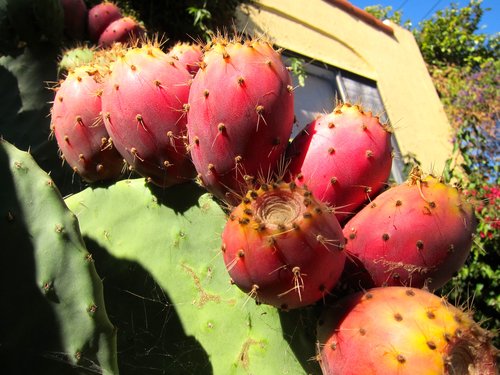
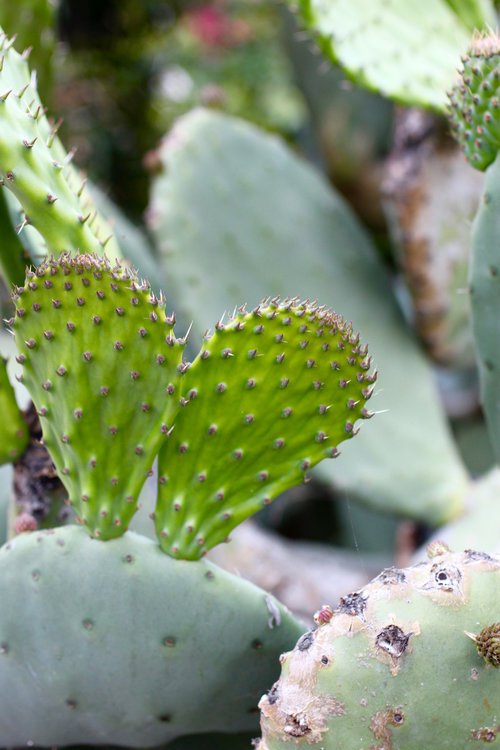
I had a very, very productive nopal cactus in front of my house in Oakland. So productive, in fact, that harvesting and processing its fruit felt like a part time job in the summer/fall. Nopal is the common name for members of a group (the Opuntia genus) within the cactus family, with the plural being nopales. Usually however, I see nopales referring to the cactus pads specifically, with prickly being the fruit. If you see a big cactus with large flat "paddle" leaves with thorns and bright red fruit, it's an Opuntia cactus and is edible. Some are better tasting than others and there are also better times to harvest the cactus pads. See my past post on harvesting nopal cactus pads for more details. The best piece of advice is to be careful because the thorns on the fruit have a tendency to jump onto you!
Oh how I loved my very productive Opuntia cactus.
This recipe is really just guidance, as the specific quantities aren't incredibly important. If serving as an appetizer or in tacos, which are probably the best uses, make about 1 medium cactus pad per person.
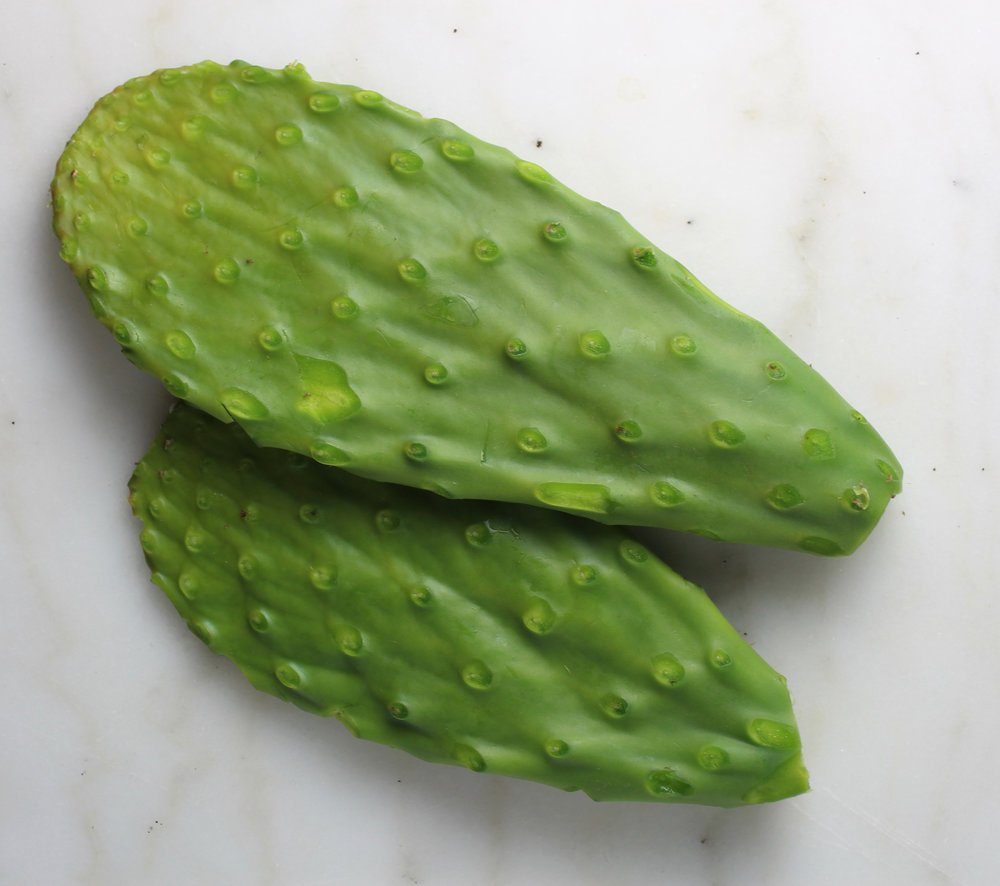
Nopales (cactus pads) that are at optimal tenderness - just remember to remove the spines!
What I like about it is the dry heat method of pan-frying helps to limit the viscous quality that can happen with nopales (similar to okra). And, of course, cornmeal crunch is always appreciated. Feel free to play around with the cornmeal to flour ratio, herbs and spices, and dipping sauces. I have also thought about cutting the nopales into strips before battering and frying, which might help further reduce the viscous qualities and make for easier serving. Enjoy!
Young/tender nopales pads
1 part medium-grind cornmeal (about 1/2 cup for 4 medium cactus pads)
2 parts all-purpose flour (about 1 cup for 4 medium cactus pads)
Smoked paprika or chili powder (about 1 teaspoon for 4 medium cactus pads)
White or black pepper (about 1/4 teaspoon for 4 medium cactus pads)
Salt (about 1 /4 teaspoon for 4 medium cactus pads)
Eggs, beaten (1-2 eggs for 4 medium cactus pads)
Oil for frying (about 1/3 cup for 4 medium cactus pads)
Cactus pad with spines removed.
To prepare
Coating with all-purpose flour before the egg and cornmeal batter.
Remove thorns from cactus pads (see this post for information on removing spines). Set up a plate with paper towels to lay the nopales after you fry them.
Mix cornmeal, 1/2 cup flour, spices, and salt on a plate. Set other 1/2 cup all-purpose flour on a different plate.
Toss each cactus pad in pure flour mixture to lightly coat then dip in beaten egg and shake off excess. Dredge each egg-covered pad in the cornmeal mixture so that it covers all sides and set aside.
Add oil to frying pan - oil should be about 1/4-inch high - and heat on high.
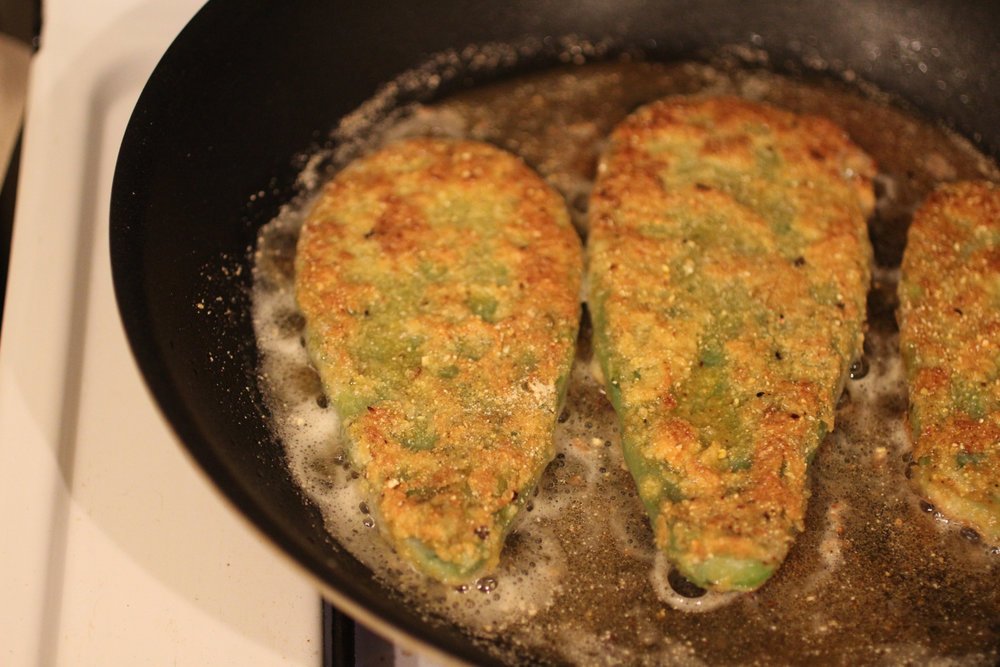
When oil is hot, cook nopales about 2 minutes per side, or until browned, and set on paper towel. You may cook these in batches if needed, adding more oil as necessary.
Serve hot with a squeeze of lemon and a dipping sauce such as aioli, romesco, or an herb blend (optional). Cactus can be cut into strips prior to serving.
Frying to a golden-brown.
Bay Nut Ricotta Cake
A lovely use of foraged and roasted bay nuts
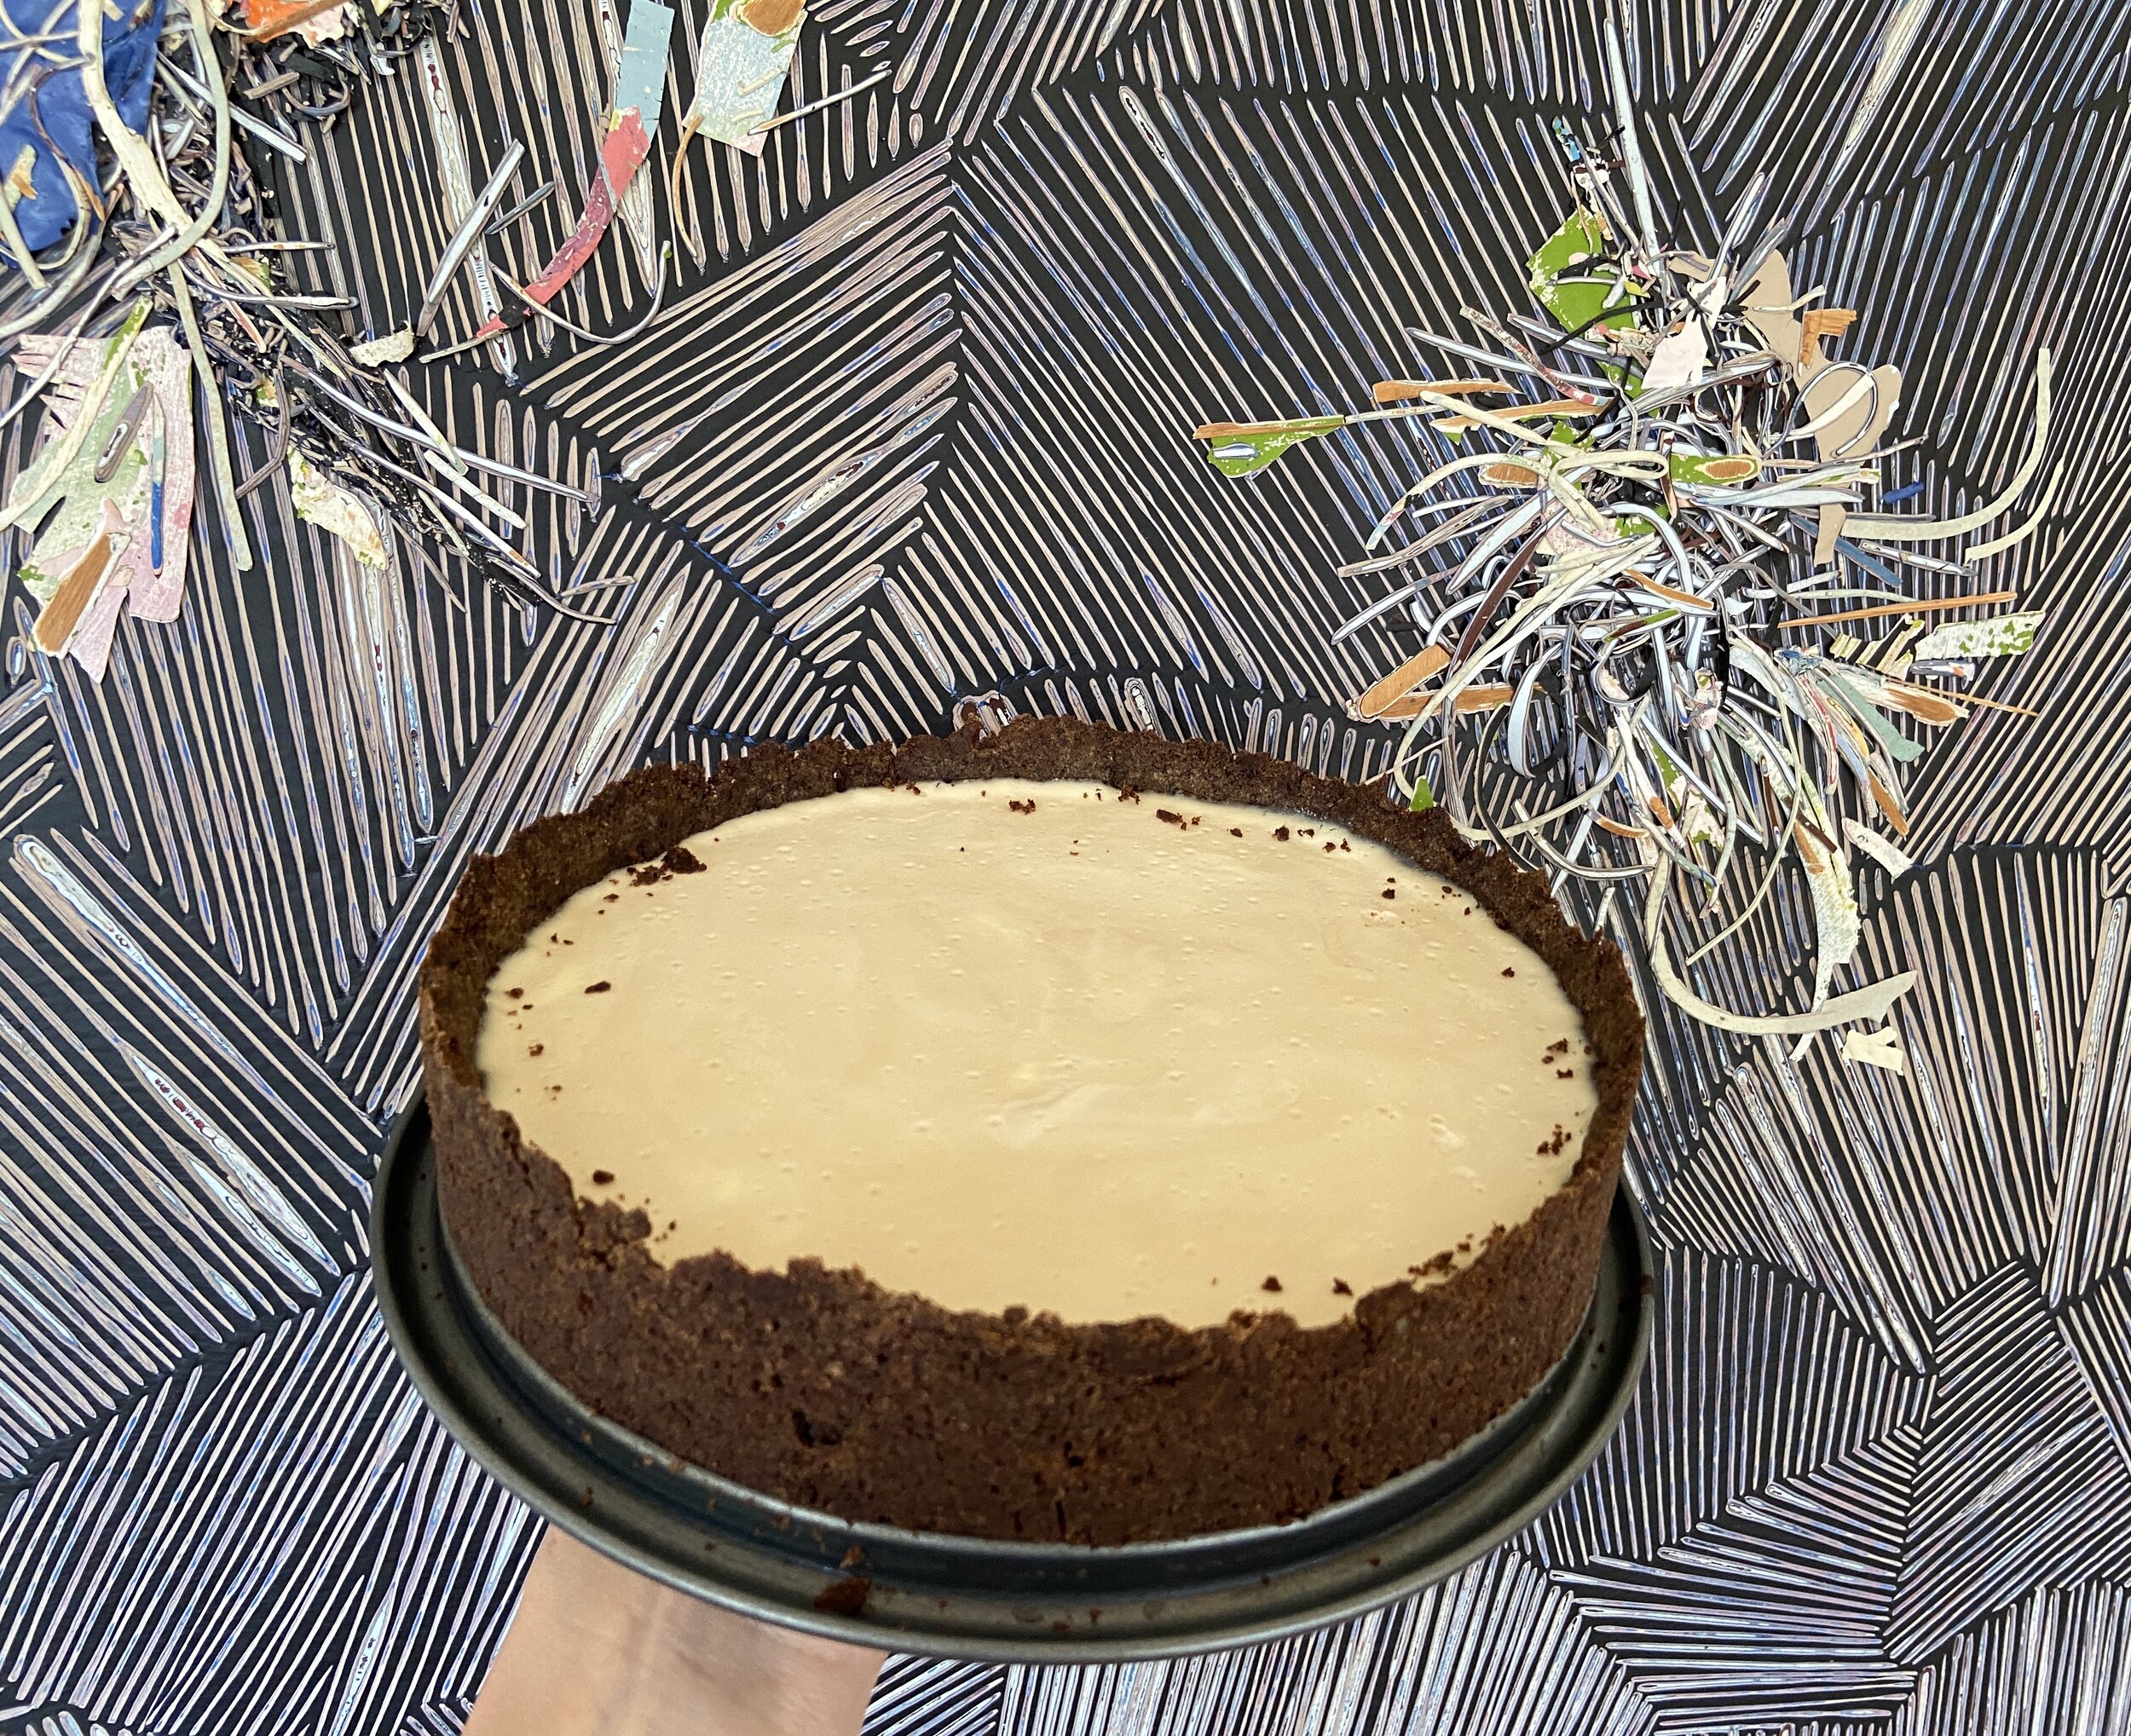
Cake in foreground, my brother’s art in background.
Here’s the deal: everyone likes coffee and chocolate. Okay, so that may not be entirely true, but who are we kidding? I probably don’t want to associate with those individuals anyway.
For those of us with *good* taste, the knowledge that there is a wild edible commonly found on the West Coast (the bay nut - more including foraging info here) that, when roasted, produces a flavor that can be likened to a combination of coffee and (bitter) chocolate is mind blowing. Now think about taking that amazing ingredient and adding it to a ricotta cheesecake - not bad. This brings us to the bay nut ricotta cake (which is really more of a tart, but using cake since a ricotta cake might be more familiar to some…)
“A graham cracker crust also works, but doesn’t have the same rustic qualities as buckwheat flour. Buckwheat is also gluten free - make the dessert gluten free by replacing the all purpose flour with a gluten free substitute. An entirely buckwheat crust can work, but is a little too crumbly. ”
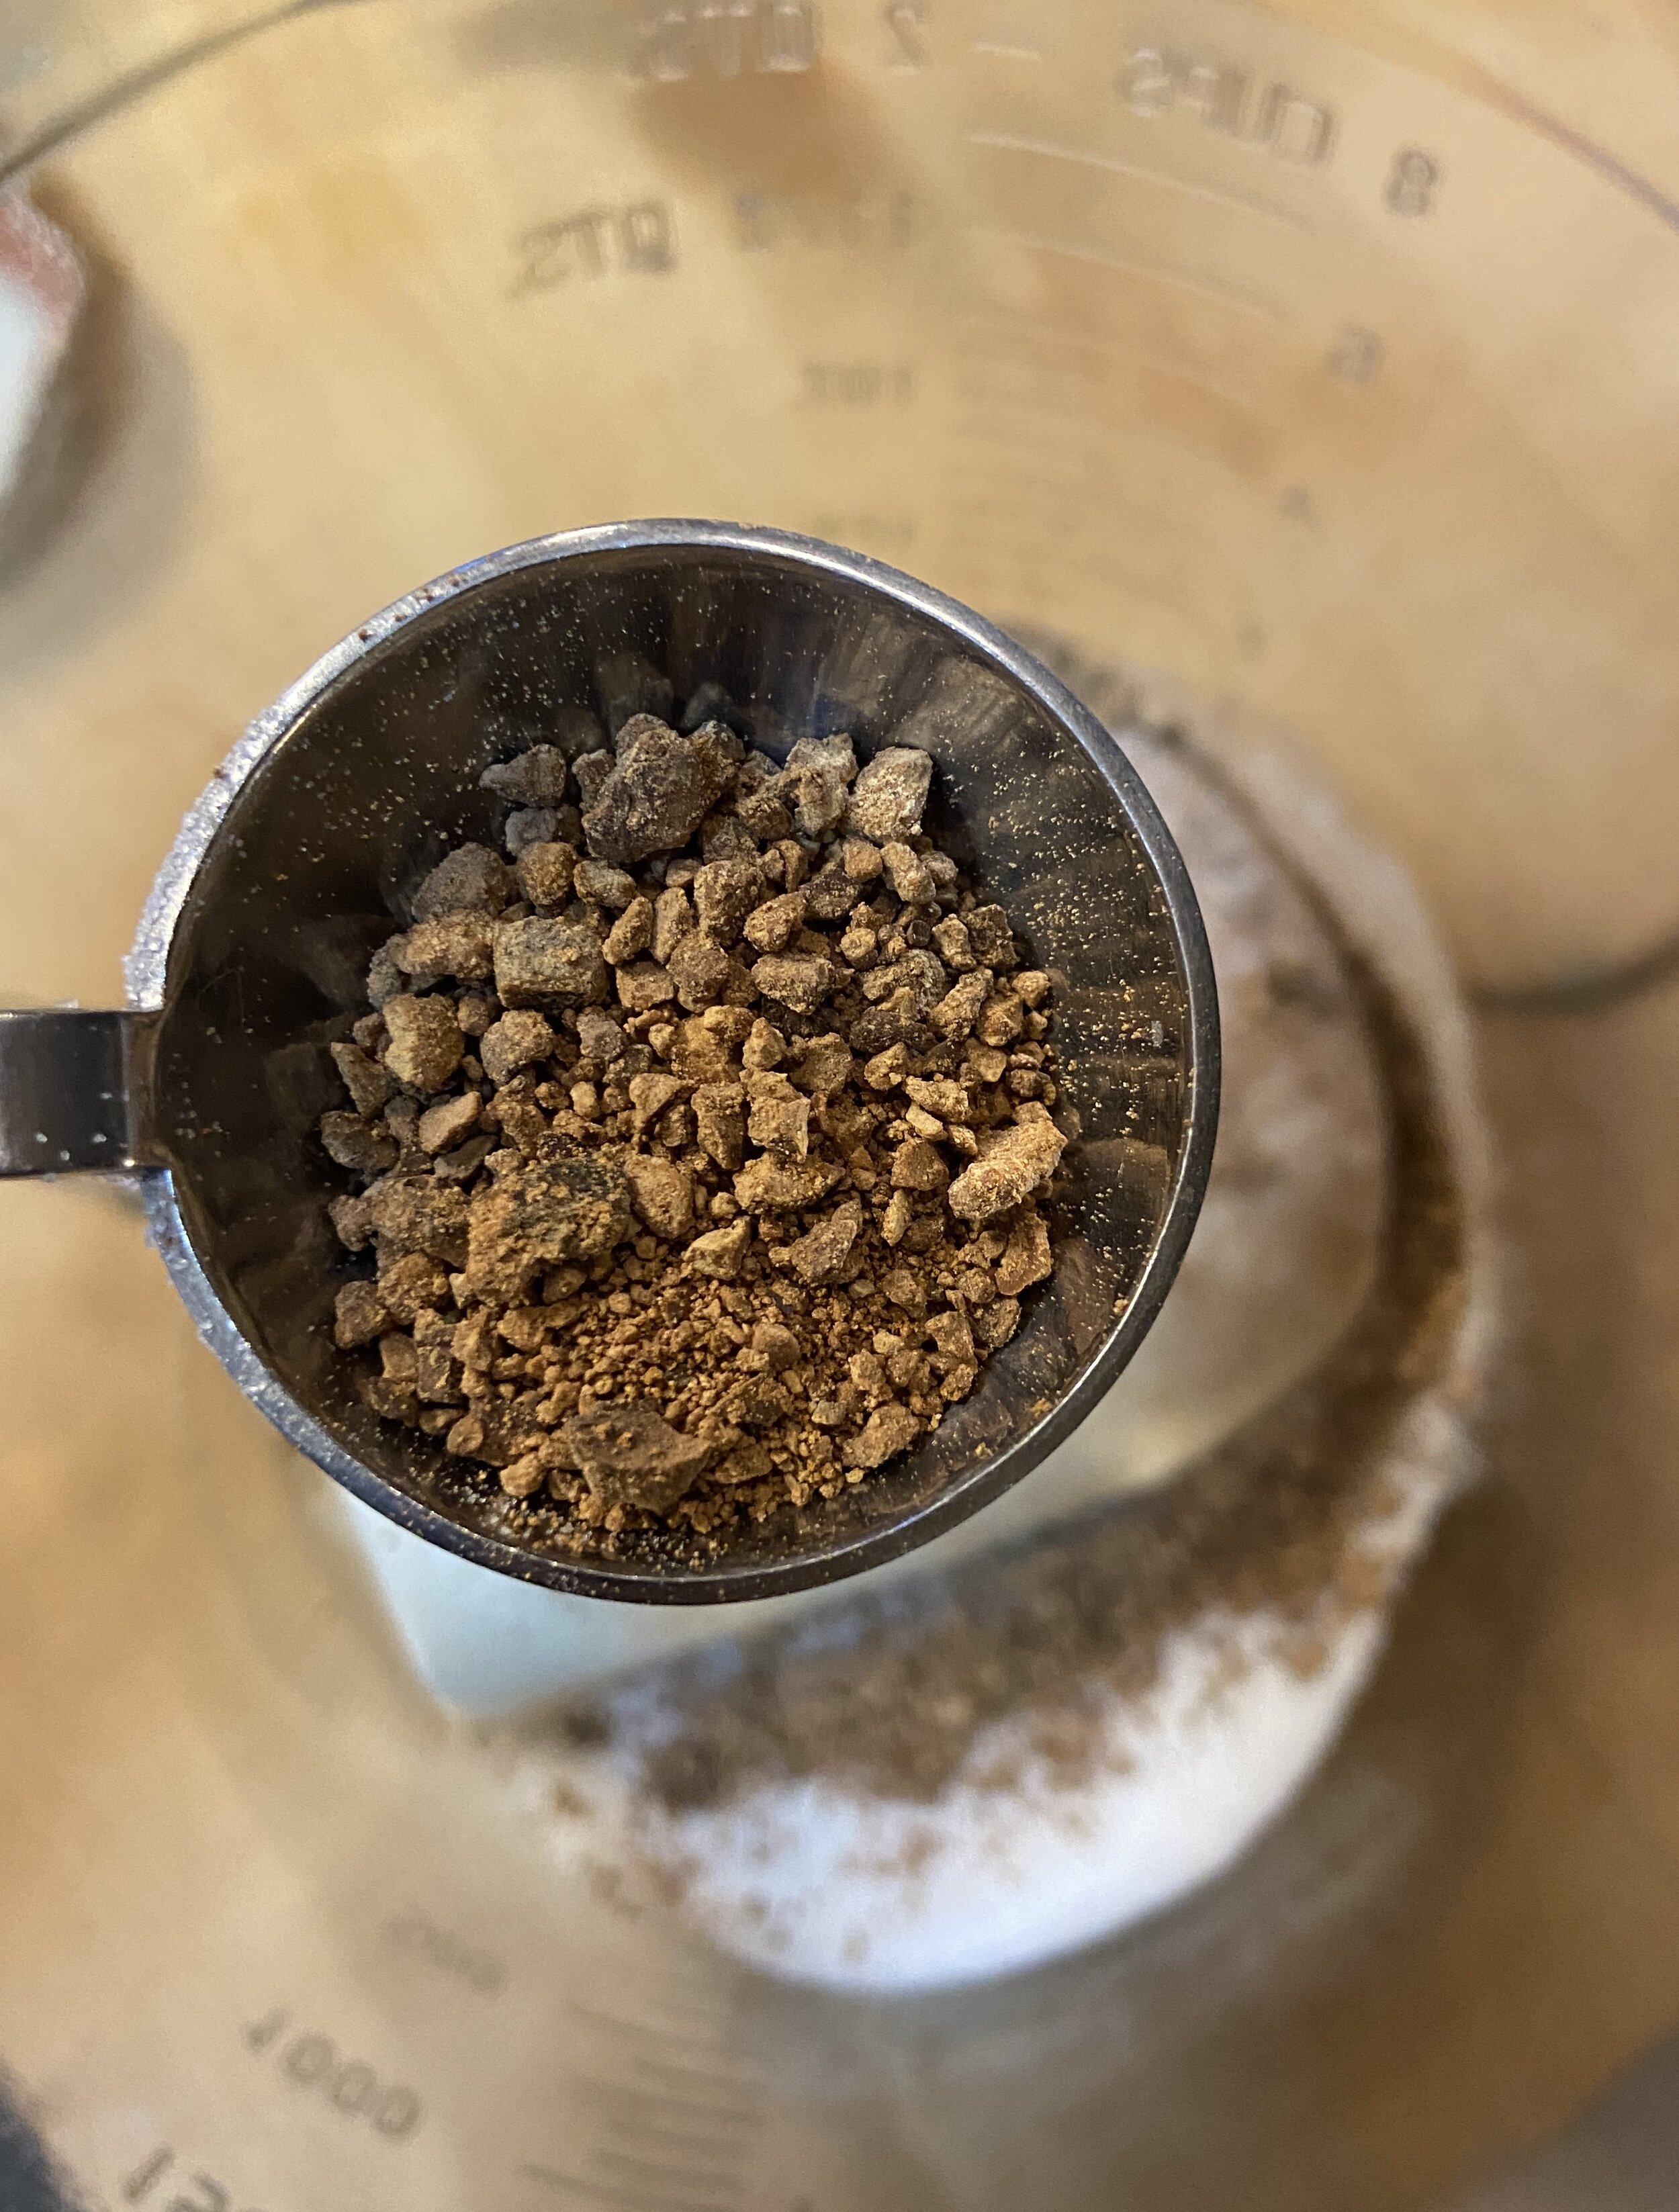
Crust Ingredients
3 tablespoons ground bay nuts (medium grind, as you would for french press coffee). You can use a coffee or spice grinder or chop with a knife.
1 cup buckwheat or other flour of choice (can use all -purpose, but crust won’t be as dark)
2 tablespoons all purpose flour (to help bind - if you want the cake to be gluten free, use another gluten free flour mix)
1/3 cup granulated sugar
1/4 teaspoon salt
7 tablespoons unsalted butter
1-2 tablespoons cold milk or water
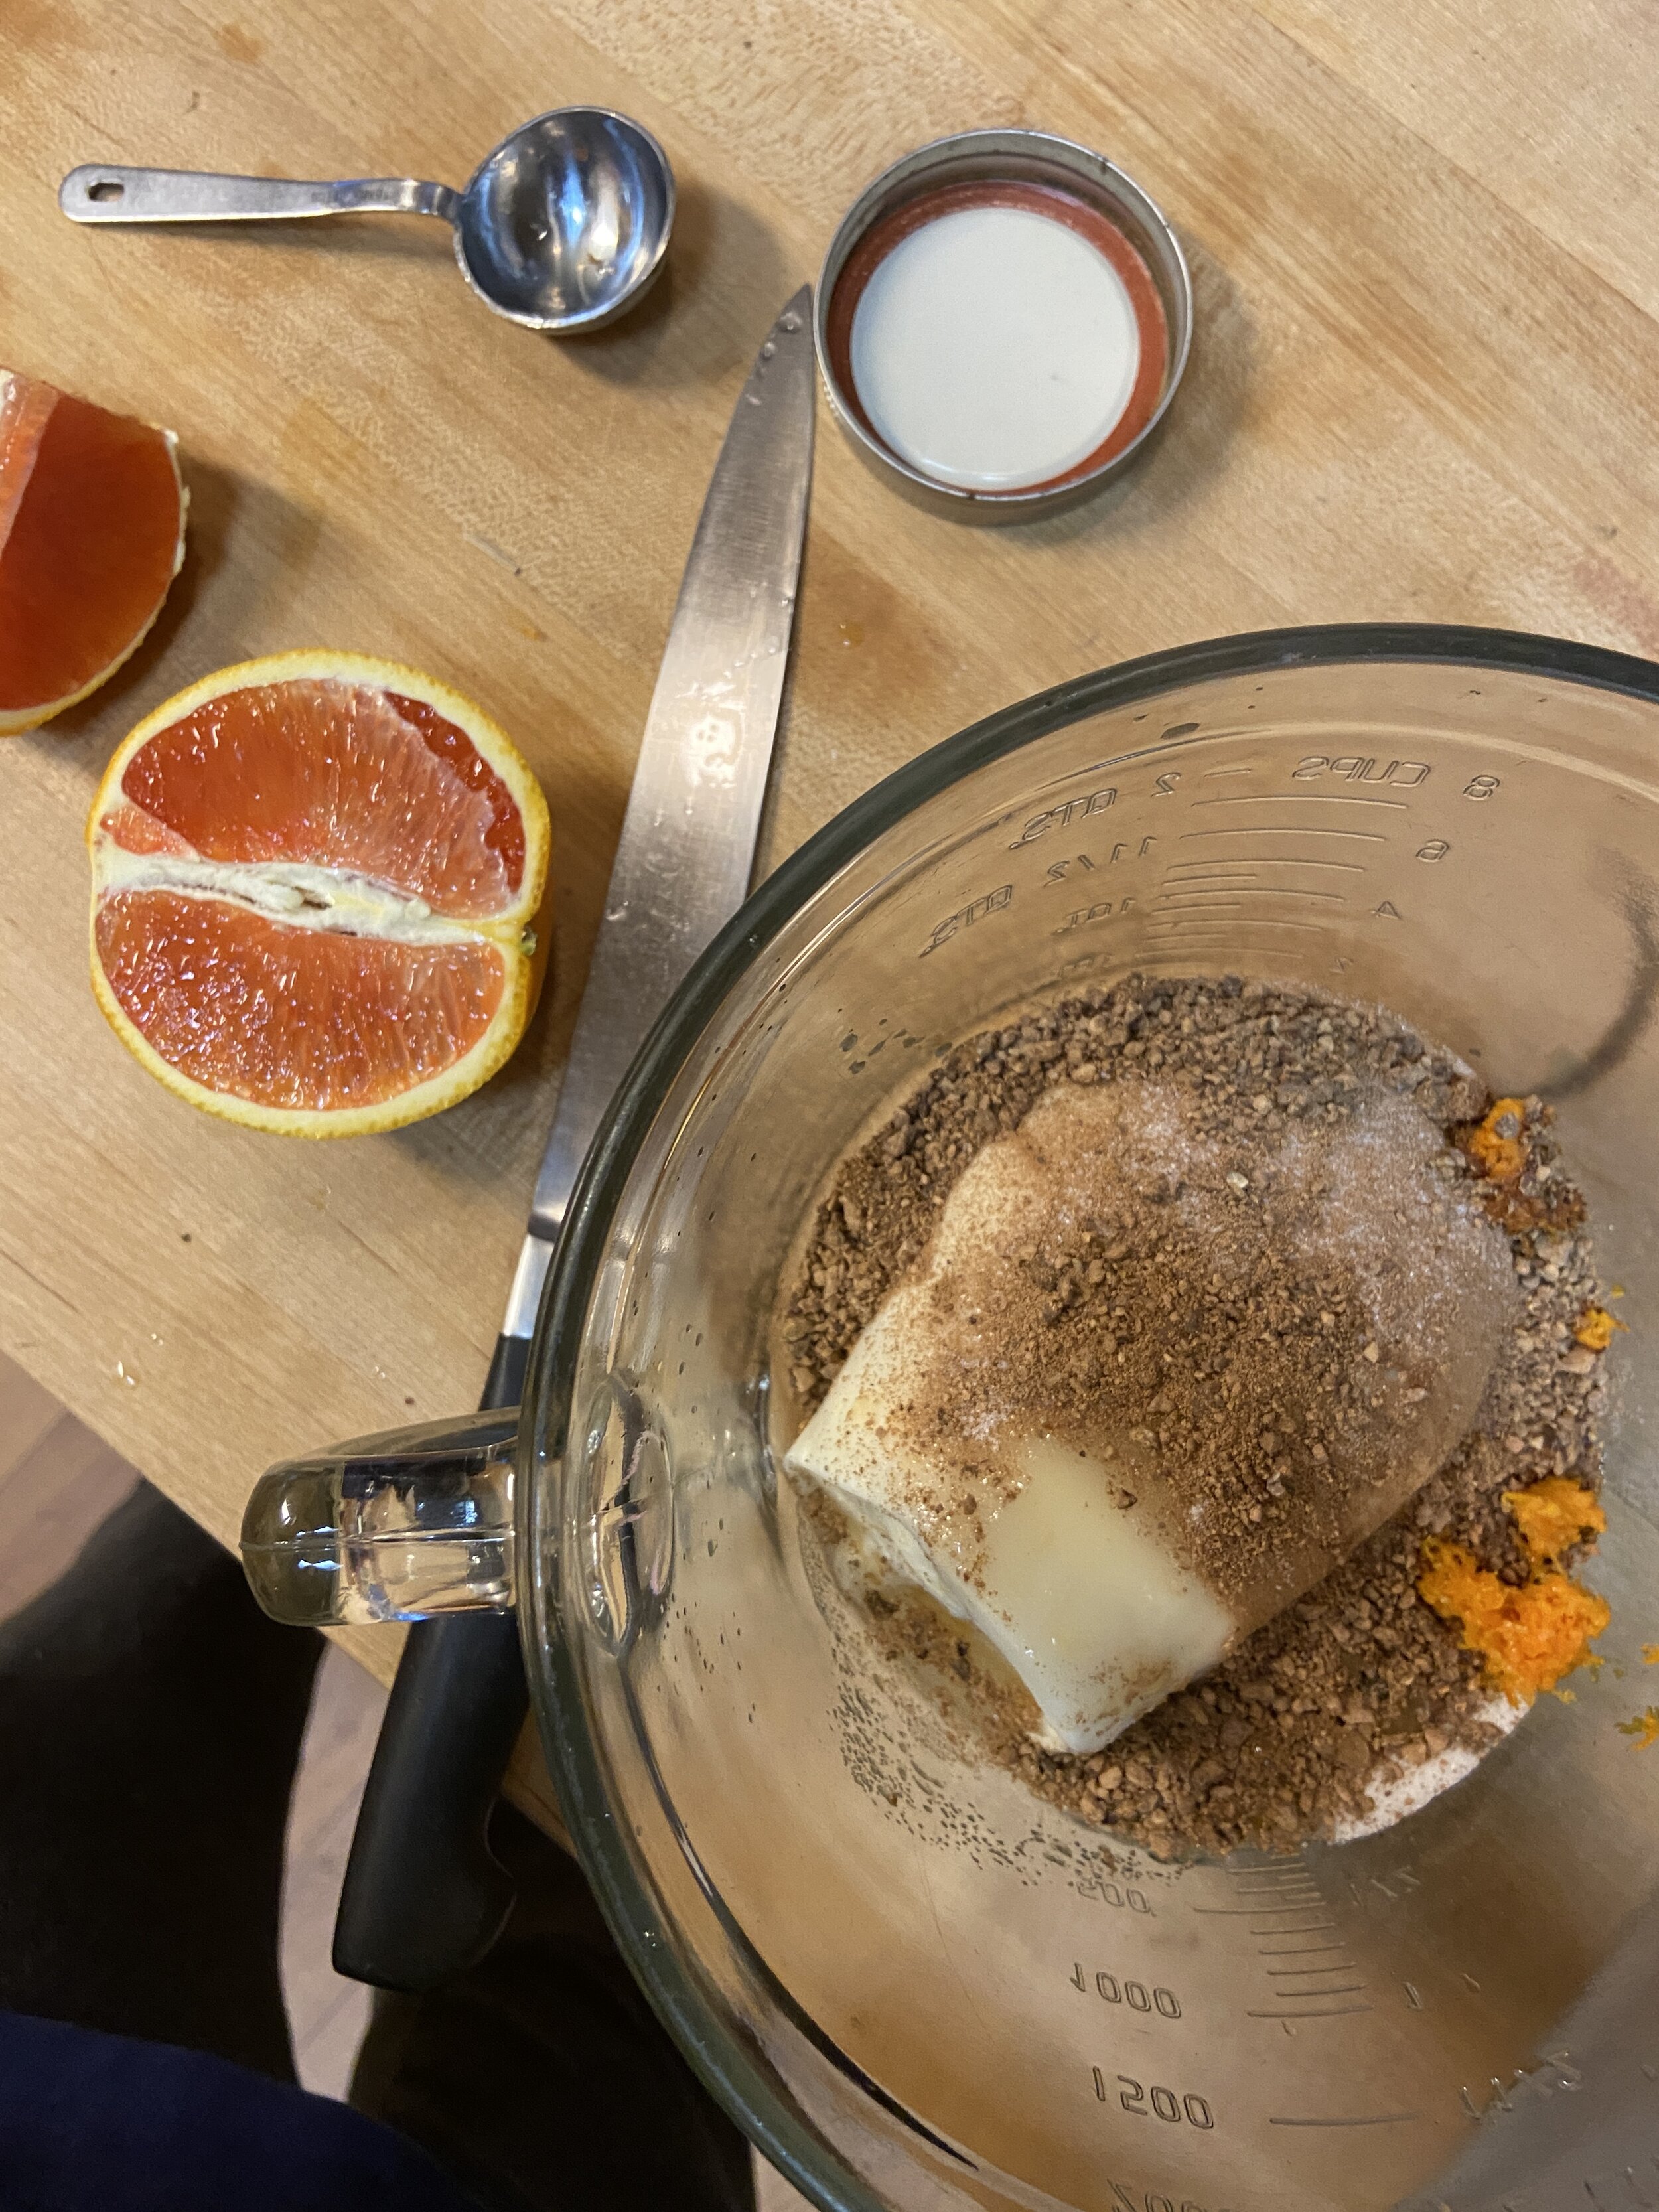
Filling Ingredients
16 ounces ricotta cheese
1/3 cup granulated sugar
1/4 cup roasted bay nuts, ground (medium grind, as you would for french press coffee). You can use a coffee or spice grinder or chop with a knife. Coarsely ground also works for more definition/larger chunks.
1 egg, lightly beaten
2 teaspoons juice from an orange (optional)
1 teaspoon orange zest (optional)
Topping Ingredients
8 oz. sour cream
3 tablespoons sugar
1 teaspoon vanilla extract
Preheat oven to 350 degrees F and grease a springform pan.
For crust: Mix 3 tablespoons bay nuts, flours, 1/3 cup sugar, and salt. Cut in butter with pastry blender, fork, or fingers and mix until pea-sized crumbs. Add water or milk until dough comes together when pressed, but is not too wet. Press into greased 9” springform pan and bake for 12-15 minutes until firm and lightly browned on edges. Remove from oven and cool completely.
For filling: Whisk filling ingredients until thoroughly mixed. Pour onto cooled shell, bake in oven for about 35-50 minutes, until cake is set and jiggles only slightly. You make need to cover with foil if the crust edges become too brown.
For topping/final step: Remove from oven and let stand for 15-20 minutes while you mix together the topping ingredients. Spread out topping mixture and put back in the oven for another 10 minutes. Remove and cool until served.
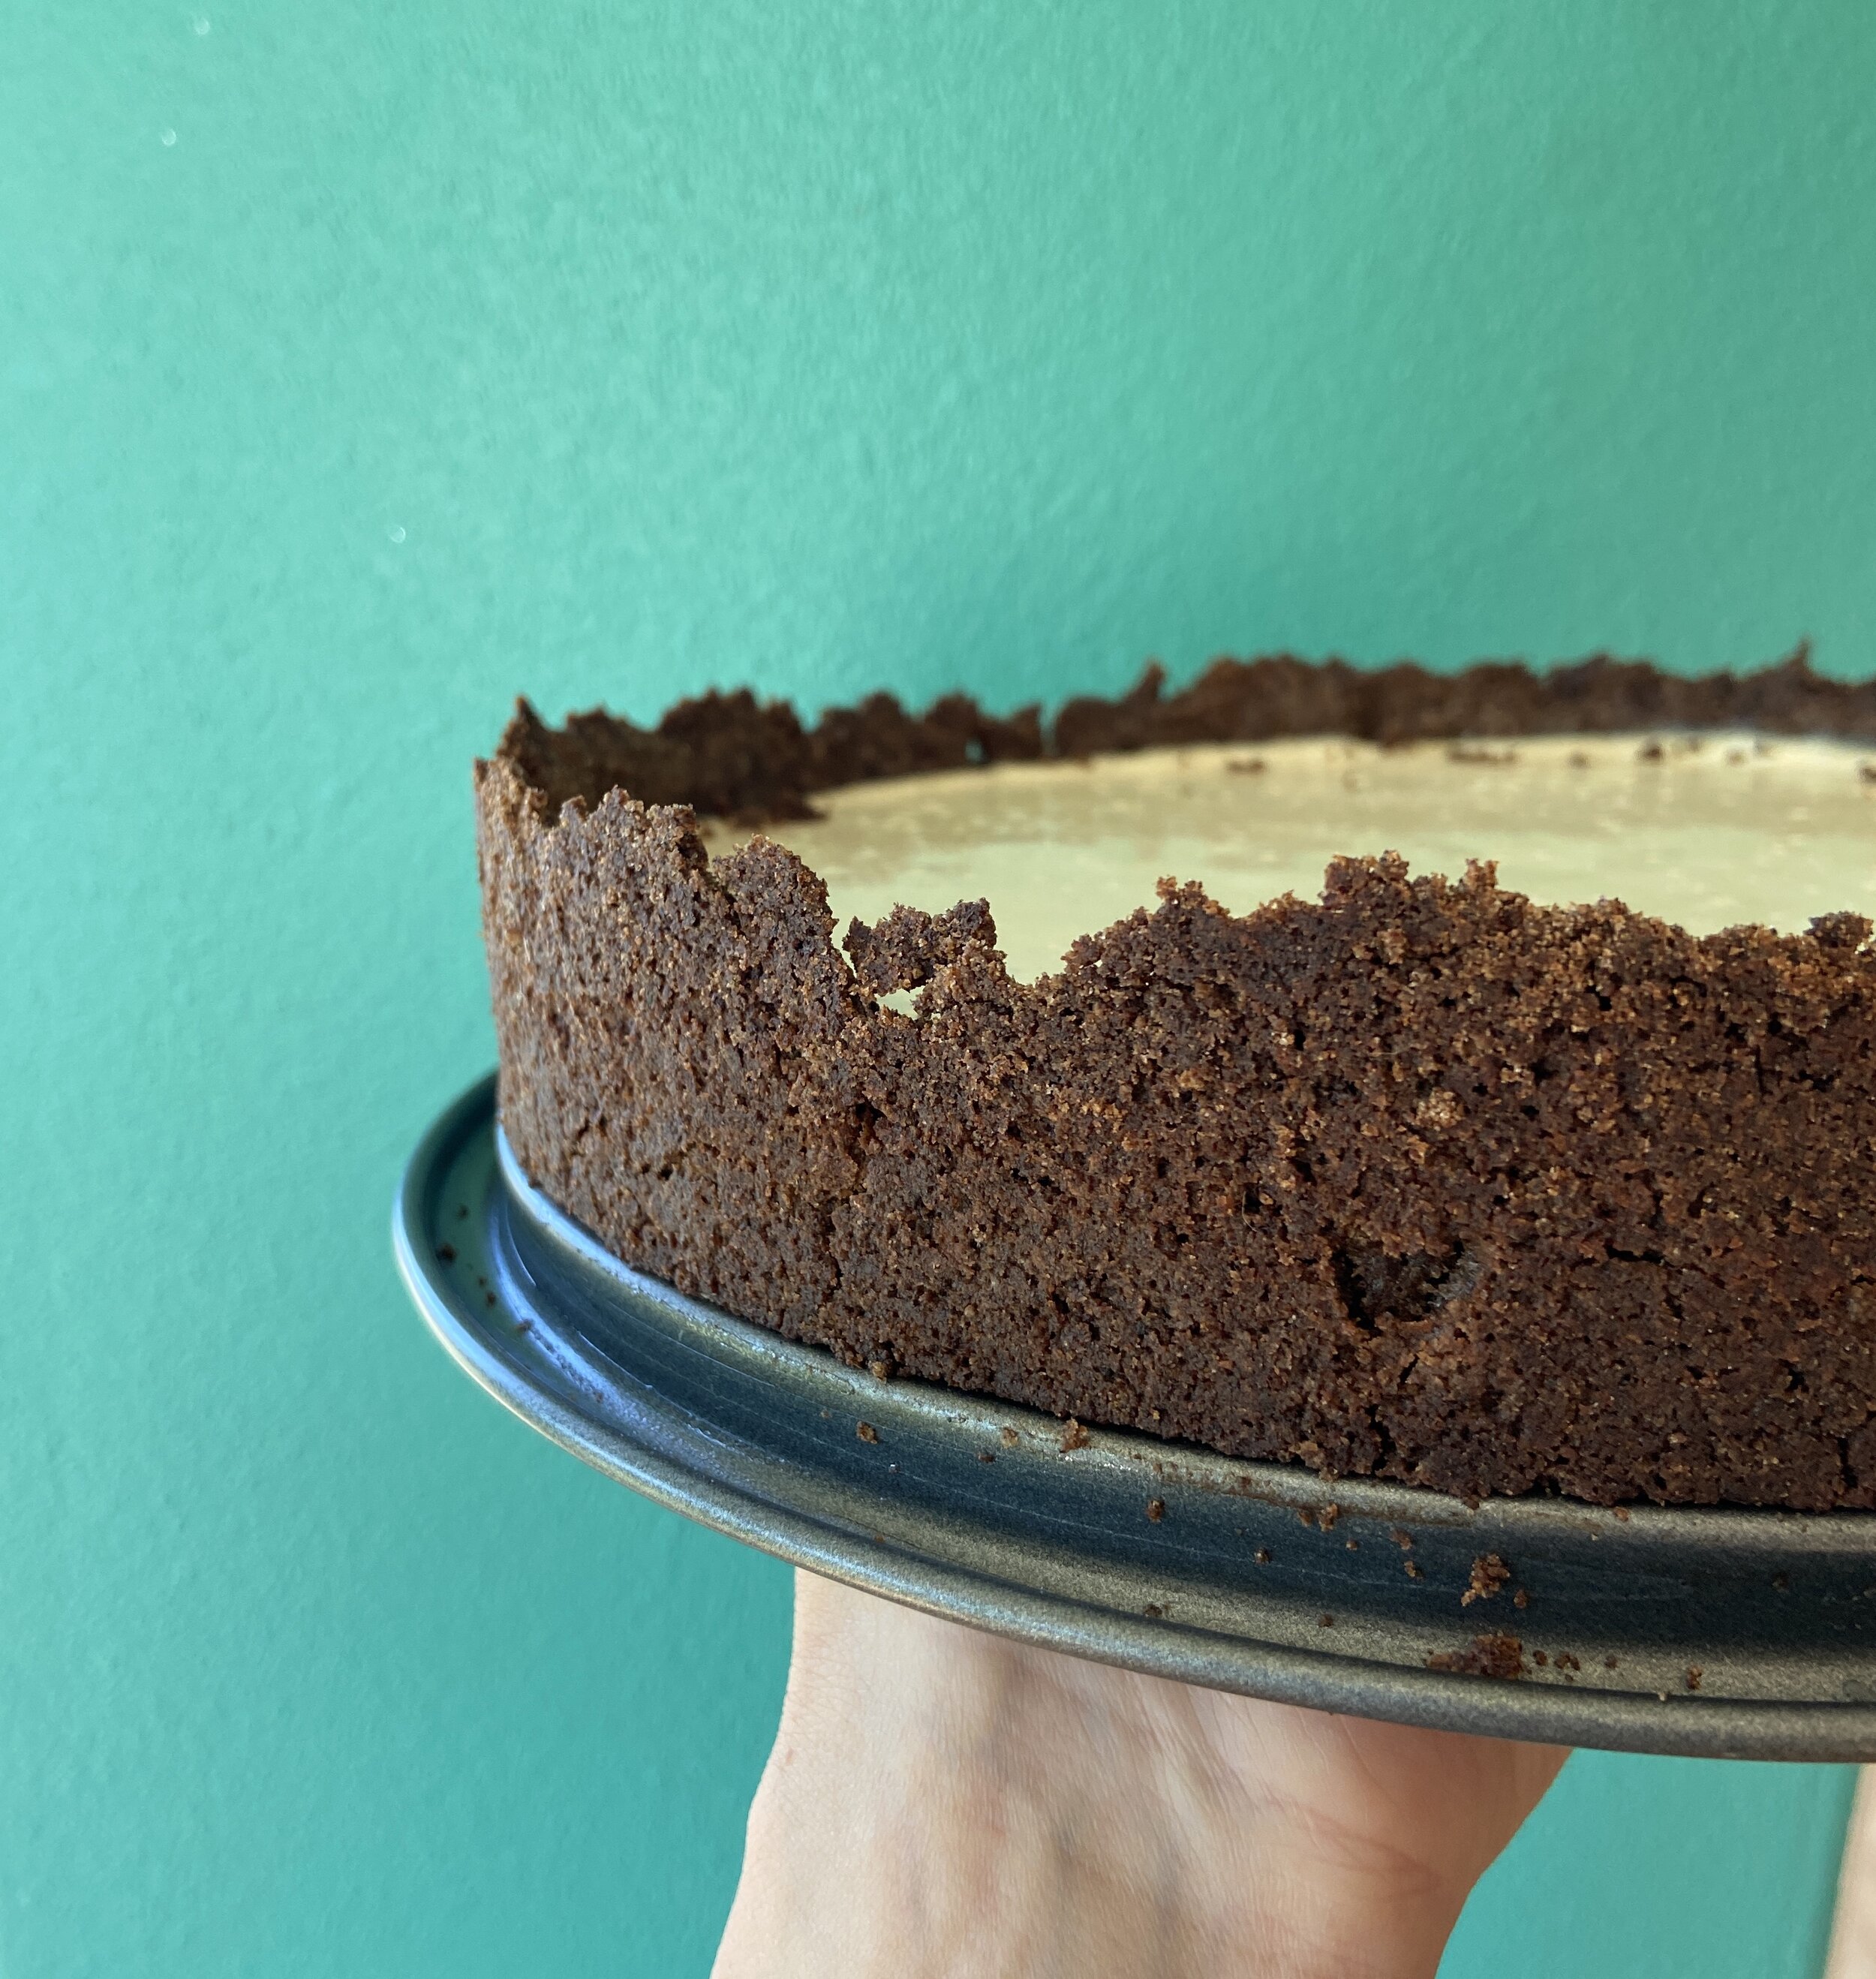
Crust me! I like to smash the crust up higher than the filling will be for a more dramatic rustic look.
Fried Mussels with Wild Greens
Armageddon shmarmageddon - I've got my mussels.

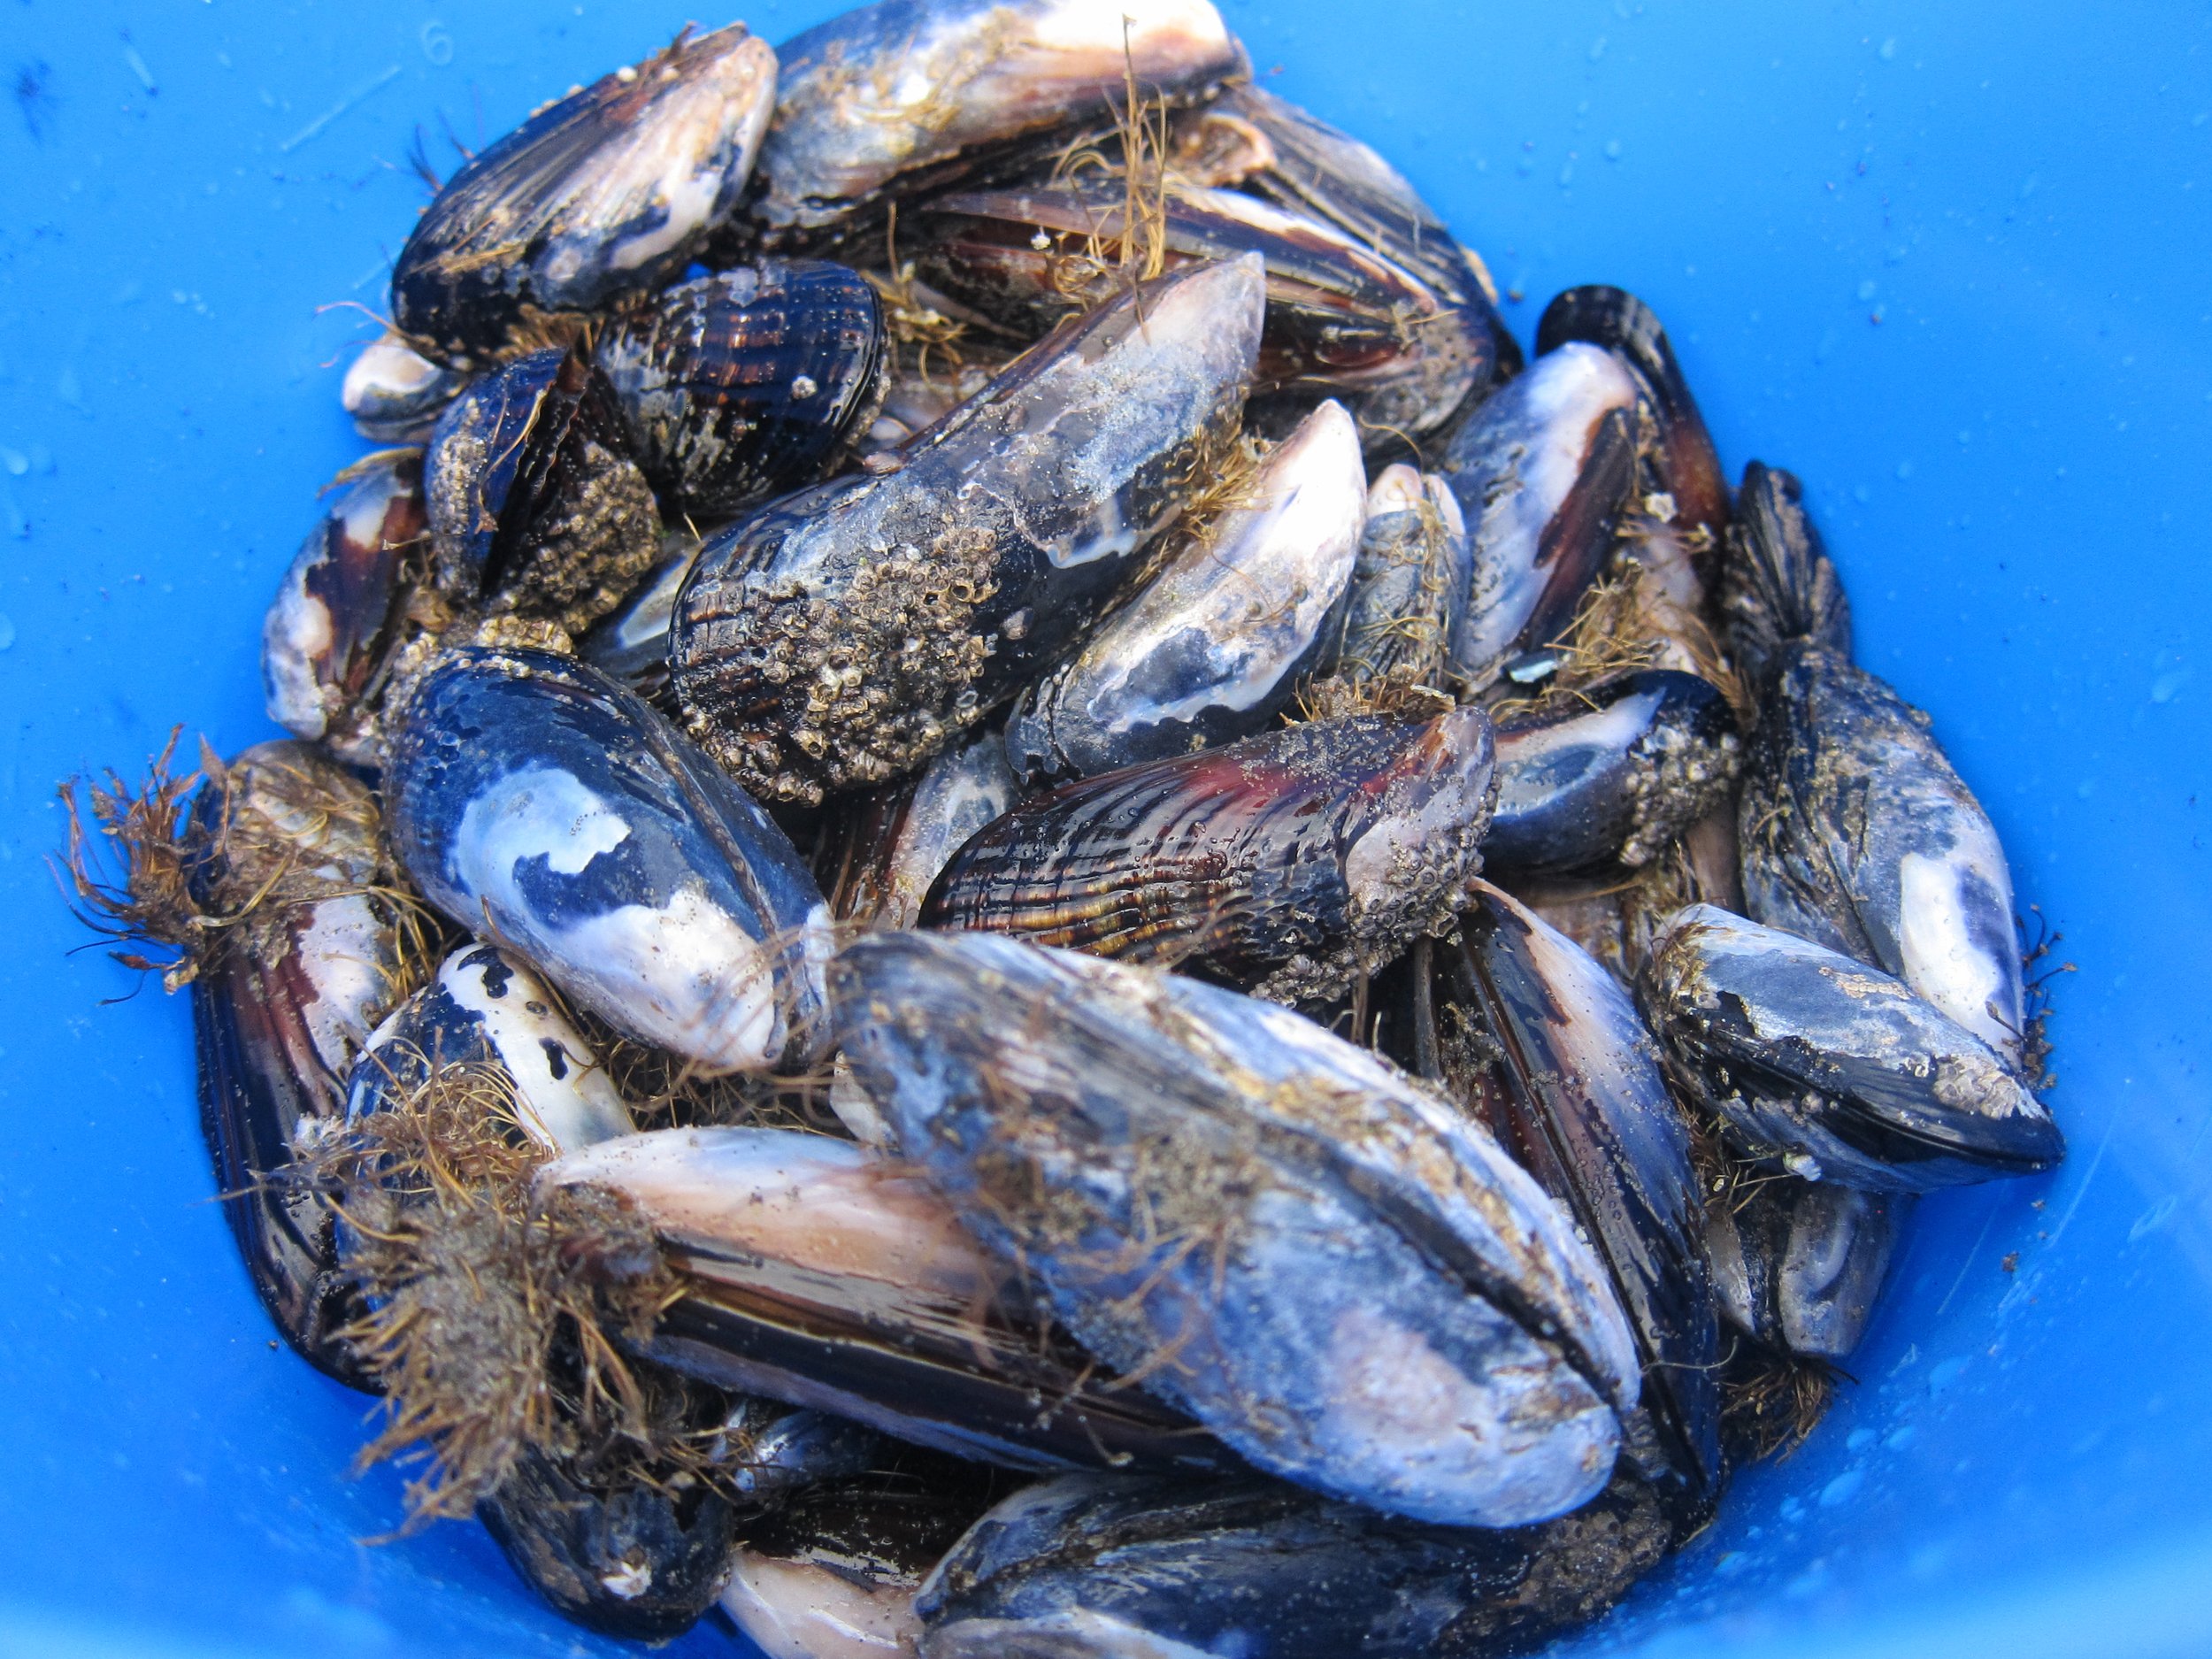
The primary ingredients to this dish are foraged (Baker Beach for mussels and Temescal for greens), so as long as I can rustle up the other ingredients and a burner, I’ll be sitting pretty post-apocalypse. The wild mussels were foragedand thus, quite “rustic” making it virtually impossible to clean them thoroughly and necessitating cooking and taking them out of the shell before consuming, so I decided to fry them. The below recipe serves 3-4 as an appetizer.

1 pound fresh mussels, rinsed and scrubbed as best you can
1 cup cornmeal, medium grind
1/2 teaspoon paprika
1 egg, beaten
1/2 teaspoon salt
2 tablespoons high heat oil, such as grapeseed or coconut
1 lemon wedge (can use a slice from dressing, below)
Foraged greens, such as dandelion and sow thistle tossed with lemon-olive oil dressing (Combination of juice from 1/2 lemon, 1 tablespoon olive oil, and 1/2 teaspoon of mustard for 1 cup greens) - I like a lot of greens, but whatever is best for your preference of fried mussel:green ratio

Boil mussels in a large pot of water (rolling boil) for about 7 minutes, or until mussels open. remove mussels from shell, drain any excess water, and set aside. Discard any mussels that do not open.
Meanwhile, mix cornmeal with paprika and salt on a plate. Dip mussels in beaten egg a few at a time, then toss in cornmeal mixture to coat.
Heat oil on medium-high. Once oil is hot, add mussels and brown on each side, about 3-5 minutes total. Remove from oil, place atop wild greens tossed with dressing, drizzle with squeeze of lemon, and sprinkle with paprika.
Serve with aioli, if desired.
Buckwheat Hazelnut Shortbread
Shortbread is called short bread because it is very high in fat, which gets in the way of gluten development, thus "shortening" the gluten strands. Gluten is a very strong and stretchy protein, so when a lot of fat gets in the way of its development, the tenderness and melt-in-your mouth effects increase. Food scientists wanted to capitalize on this so they created a fat product that shortens really well, in addition to being cheaper than butter and more solid and shelf-stable than vegetable oils. They call it shortening (naturally). However, in light of the fact that the trans fat in shortening is incredibly bad for your healthy and that butter tastes way better and is more sustainable, we will be using butter in our shortbread.
This twist on shortbread incorporates buckwheat flour and hazelnuts, producing a rustic, dark, and nutty cookie that is always a crowd-pleaser. Dough can be made in advance and frozen for later use. Makes 6 dozen cookies (recipe can be halved). “If you prefer a crispier crunch and more classic hazelnut shortbread, just replace the buckwheat flour with all-purpose flour, as buckwheat flour does absorb some moisture. ”
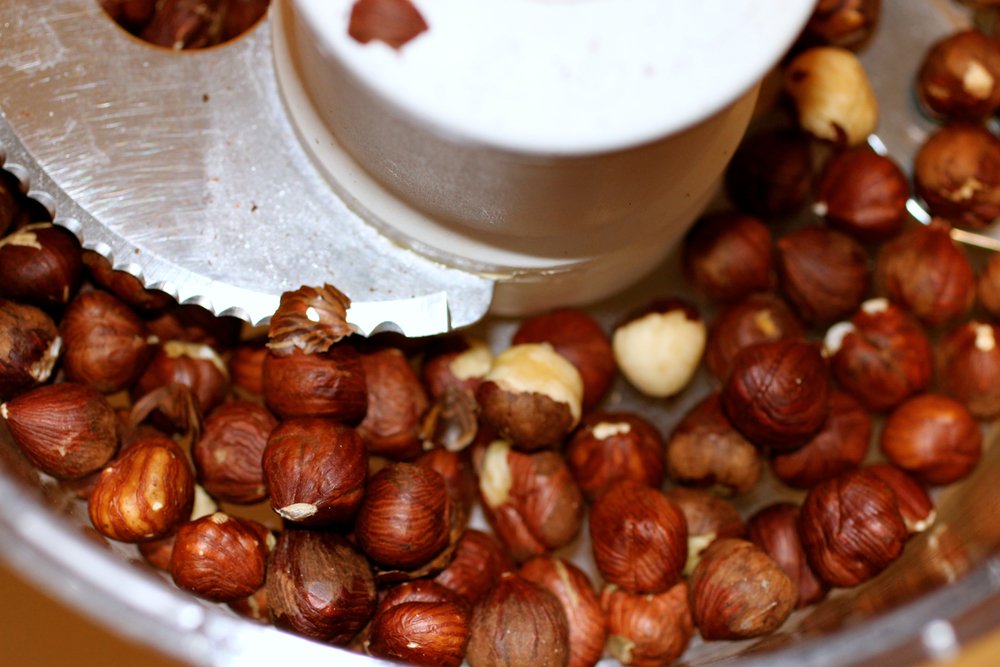
Blending hazelnuts in food processor.
1 cup hazelnuts (preferably raw, but I have done it with toasted - the shortbread is just…toastier!)
1-1/2 cup all-purpose flour
1/2 cup buckwheat flour
1 teaspoon baking powder
1 teaspoon sea salt
2/3 cup granulated sugar
16 tablespoons (2 sticks) unsalted butter, room temperature, diced
1 teaspoon vanilla
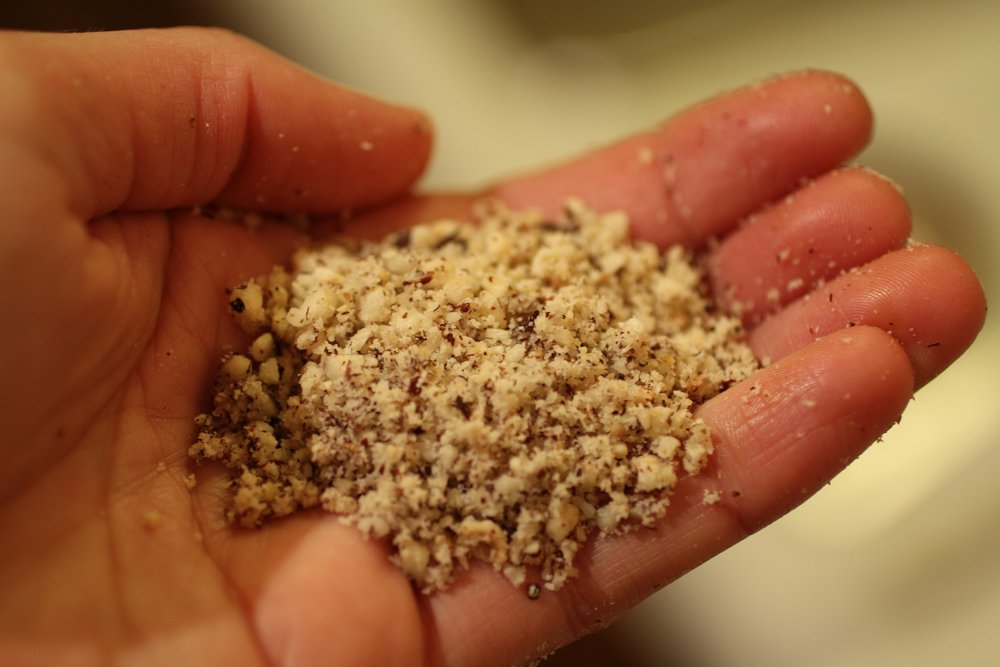
Hazelnuts post grinding.
Preheat oven to 350 degrees F.
Blend hazelnuts in food processor or with immersion blender until mostly fine, but with some medium-sizes coarse granules remaining, about 1 minute. Set aside.
Whisk all-purpose flour, buckwheat flour, baking powder, and salt in a medium bowl.
In large bowl, cut sugar into butter with fork, pastry blender, or hand blender until fluffy. Add vanilla and hazelnuts, mix to combine. Add flour mixture and blend until just incorporated.
Roll a ball, flatten, cover with plastic, and refrigerate 20 minutes. Remove from refrigerator and roll out onto lightly floured surface about 1/4” thick. Cut into rectangles about 1” x 2” and bake for 11-13 minutes until lightly toasted.
olive oil chocolate mousse
Bring out the rich chocolate flavor with olive oil and cardamom.
The first time I made this dairy-free chocolate mousse recipe adapted from What Einstein Told His Cook I had my doubts. Chocolate mousse without heavy whipping cream? Why bother. However, the final product did not disappoint - the whipped egg white proteins provided a delicate fluffy web that encased the rich egg yolk, chocolate, and olive oil. My twist was the addition of ground cardamom pods to put a Middle Eastern spin on a classically French dessert to help meld with the olive oil flavors and provide a bit more complexity and brightness. I also added a dollop of whipped cream (blerg, there goes the "dairy free" part, but you don't have to use it), a sprig of chocolate mint, grated dark chocolate, and a bit of coarse sea salt. The result was amazing - really, one of those desserts that people keep talking about. I will definitely be making this again. Serves 4 (servings aren't large, but are generous given how rich the dessert is).

4 oz very good dark chocolate (the darker the better), finely chopped
7-9 cardamom pods, seeds removed and ground with mortar and pestle or finely chopped (optional)
2 eggs, divided
1/2 cup powdered sugar
2 tablespoons very strong coffee at room temperature
1 tablespoon Cointreau (optional)
1/2 cup extra virgin olive oil
About 1/8 teaspoon sea salt
Whipped cream, fresh mint or chocolate mint, and grated chocolate, for garnish (optional)
Melt the chocolate in a double boiler, stirring occasionally. Mix in cardamom and set aside to cool while preparing the egg mixture.
In a large bowl, whisk the egg yolks and powdered sugar until pale yellow and fluffy (about 1 minute). Whisk in the coffee and Cointreau (optional) to combine then stir in the melted chocolate. Add olive oil and mix well.
In another medium bowl, beat the egg whites with an electric beater until stiff peaks have formed (stage III). Fold 1/3 of the egg whites into the chocolate mixture with a whisk until all patches of white disappear then fold in the remaining egg whites using a rubber spatula just until combined. Do not overmix.
Transfer mousse to individual serving cups and refrigerate until well-chilled, at least 1 hour or overnight. Serve with whipped cream and optional fresh mint leaves and grated chocolate.
Bay Nuts
The cacao-coffee bean of foraged finds.
Here’s the deal: everyone likes coffee and chocolate. Okay, so that may not be entirely true, but who are we kidding? I probably don’t want to associate with those individuals anyway.

For those of us with *good* taste, the knowledge that there is a local edible easily foraged that, when roasted, produces a flavor that can be likened to a combination of coffee and (bitter) chocolate is mind blowing.
Where to find them: From the West Coast/California bay laurel tree, Umbellularia californica. This may sound obvious, but the bay tree does not always have nuts - the nuts appear from October - December, or even as early as September in Central California or when it's an especially hot year. Also, some years are better than others and some produce only a small amount of nuts - just because you don't find nuts on a tree one year doesn't mean they won't be there the next!
The bay tree leaves can (and should? why buy?) be used as you would use bay leaves purchased from the grocery store, but are very strong, with a ratio of 3:1 (tree bay leaf: store bought bay leaf).


The nut itself is a close relative of the avocado (Lauraceae family) and it looks like an avocado pit with a thin layer of flesh. The flesh goes from a bright green (unripe) to purple (ripe) and is technically edible, but rots very quickly. You'll know it's rotten when the outside is a goopy, gross, mess “this-will-make-you-sick” texture. The real treat is when you roast the nut itself on the inside of the flesh. Before roasting, or if not roasted properly, the nut is extremely bitter and astringent, similar to acorns and olives before they are cured. You will NOT want to eat the nut before roasting.
To roast the nut:
Peel off that goopy exterior. Sometimes you can find the nuts by their lonesome, in which case, score! Less to do. Sometimes, you peel them and they look fine. Othertimes, you peel them and they look gross/moldy - throw these ones out.
Wash the nuts - remove any excess goop.
Dry the nuts. I have seen directions indicating that the nuts need to be dried then stored for 1-2 years, but I don't have the patience for that and in my experience it just takes a few weeks in the dry climate of the Bay Area to remove the moisture. To dry, lay them out to open air until the water evaporates then store in paper bags or other breathable containers (an open bowl or jar) in the dark.
Roast the nuts on a baking sheet in a single layer at 350 degrees F. This usually takes about 1 to 1.5 hours, but you’ll know they’re done when the insides look brown/black (some will crack open to reveal this). Some recipes call for 450 degrees F for 45 minutes - I previously said that either way works, but have heard that 450 makes them too toasty too fast. Up to you, but I would check them every 20 minutes or so.
Crack open the shells with a nut cracker (teeth also work, but everyone cringes when I do that) and eat the nuts as you choose. They have a slightly bitter taste, but for those that like super dark chocolate, it’s delicious. Note that bay nuts possess a mildly stimulating effect, similar to caffeine.
Suggested uses (so far, I’m still experimenting):

One their own (haven’t made them covered in chocolate yet, but I’m sure this would be decadent and plan to do so). Pairing with whiskey is awesome.
Bay nut mole - substitute chocolate for bay nuts. Don’t look back.
Bay nut ricotta cheesecake - I have done this twice now and the recipe is lovely.
Bay nut brittle
Bay nut hot cocoa?
Bay nut chocolate bars - working with the Culinary Institute to make this happen, but I know that Madre Chocolate has done it in the past!
Exploring Elderberry
Bright, bittersweet, alluring berry taste for a variety of uses.
Note: The below is also published in the Fall 2016 edition of Edible East Bay.

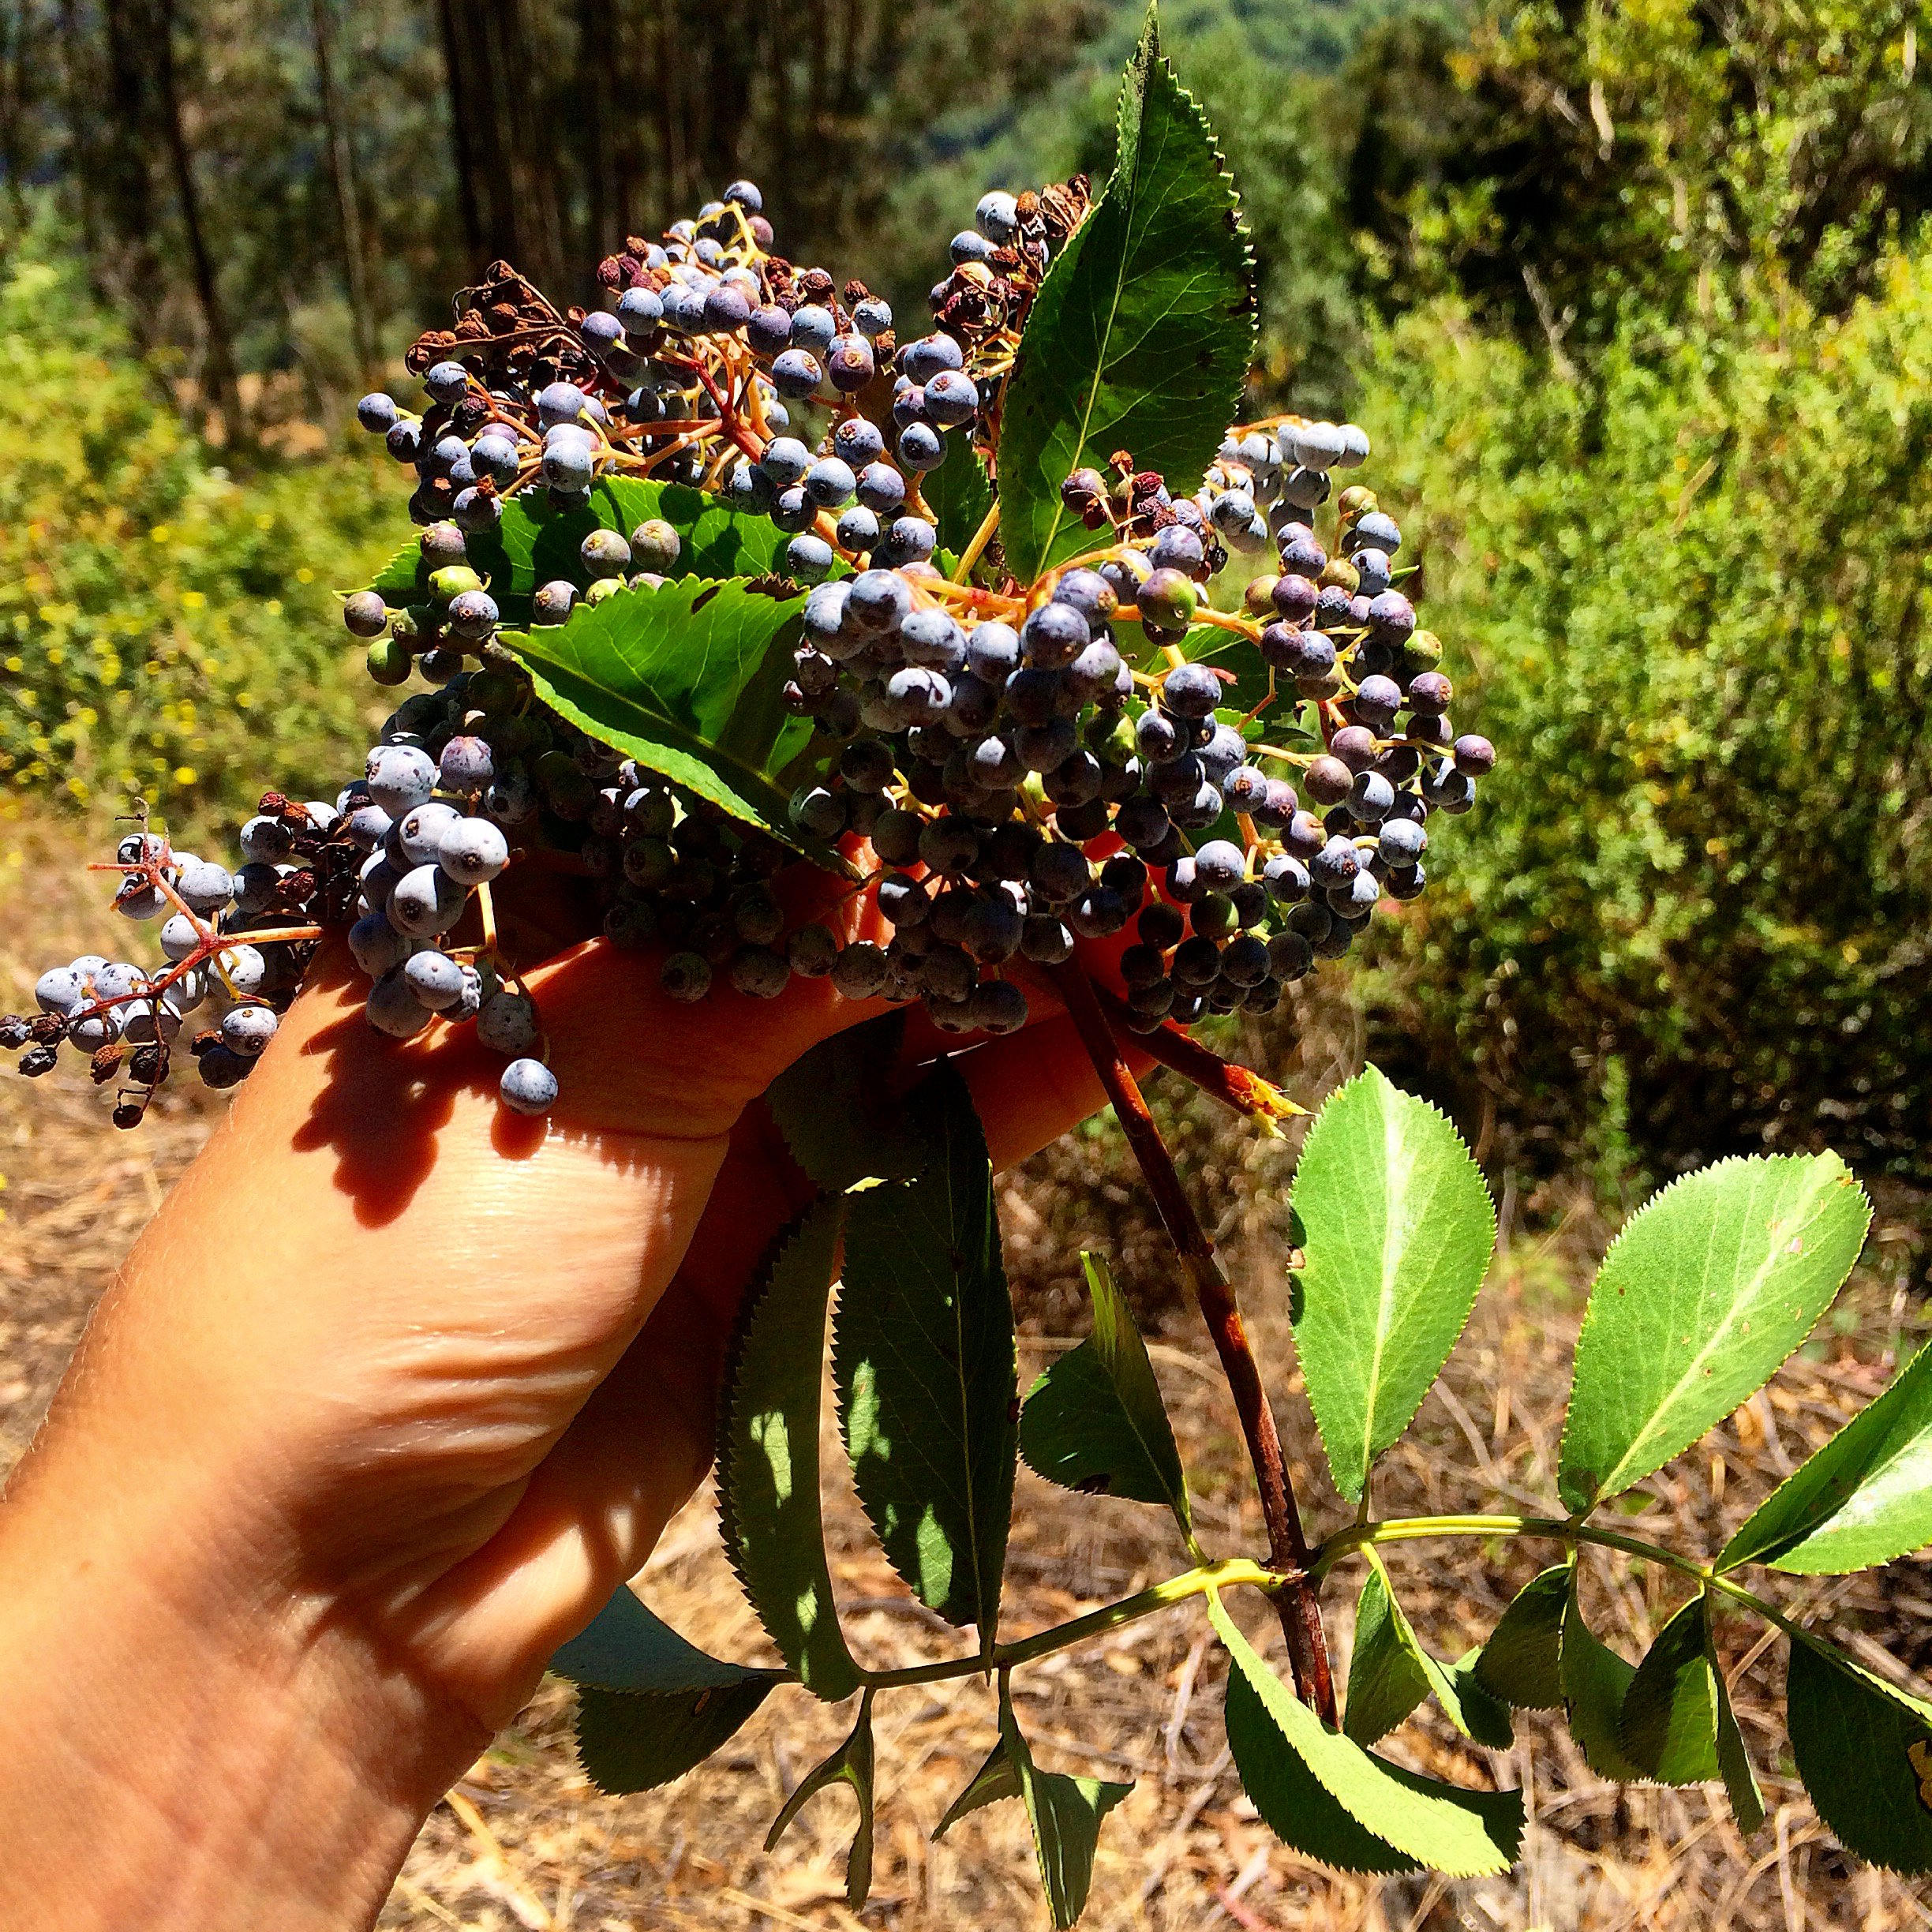
Harvesting elderberries.
The culinary and medical applications of both elderflowers and berries are many, which has led to the plant’s frequent appearance in world mythologies. Among pagan traditions, the elder tree is attributed with powers from protection and healing to vivid dreams and removal of negative spells. It is fun to use both harvests from the tree (flowers and berries) in a dish, such as elder almond pound cake. See previous post, the Regal Elderflower or Exploring Elderberry for more information about processing elderflower and the plant's uses in general.
Autumn’s elderberries—the dark and pungent counterpart to the sweetly fragrant blossoms—offer flavor that varies from tree to tree. At its best, the berry is juicy and bittersweet, similar to a blueberry, but smaller and more acerbic. At its worst, the bitter flavor shines through and the texture can be coarse and dry.
Processing the berries by cooking or drying will render them safe and improve the flavor. Elderberries are often cooked down into a cordial syrup, made into elderberry jam or wine, baked into pies and cakes, or dried and used as you would use dried currants. Dried berries can also be rehydrated by simmering with water and sugar for a more “stewed” flavor.
On Foraging: The elder plant found in Northern California (and most of the Western United States) is Sambucus cerulea, also known as blue elder for it's dark-blue berries. This shrub, which can grow to 30 feet high, has reddish bark and pinnate leaves that grow opposite each other. Like elder plants everywhere, it prefers warm, damp environments, so look near flowing water inland from the foggy coast. If you noted where you found elderflowers in early summer—you can return now through September (in our region) for the berries.
Some examples of using elderberries: Elderberry cordial, jam, elderberry buckwheat tart.

Dark blue elderberries with whitish bloom.


Prickly Pear Harvest and Processing
A few easier ways to take on the prickliest of pears.

By now one would think I should be a master prickly pear parer, but alas - I still acquire many little spikes in my hands and in other peculiar places (for example, I once found a few on my tongue over a week after processing) when I pick and process the fruit, just less than before.
The cactus plant in front of my cottage is such a large and active producer of prickly pear fruit (also known to Spanish-speakers as "tuna") that I’ve found during the late summer and fall, prickly pear harvesting and processing can be a part-time job. Luckily, I have some skills from my time in Arizona and have a few fine-tuned processes allowing for maximum production in minimal time with as few pricklies in fingers as possible.

Process 1: If you want to keep the whole fruit intact for smoothies and other recipes requiring the flesh. Note that this process is more difficult, but uses as much of the fruit as possible, preserving fiber and other beneficial nutrients found in the flesh. However, when you use the whole fruit there are black seeds that are very hard and difficult to remove or pulverize. I don't mind these seeds, but I've found that others do.

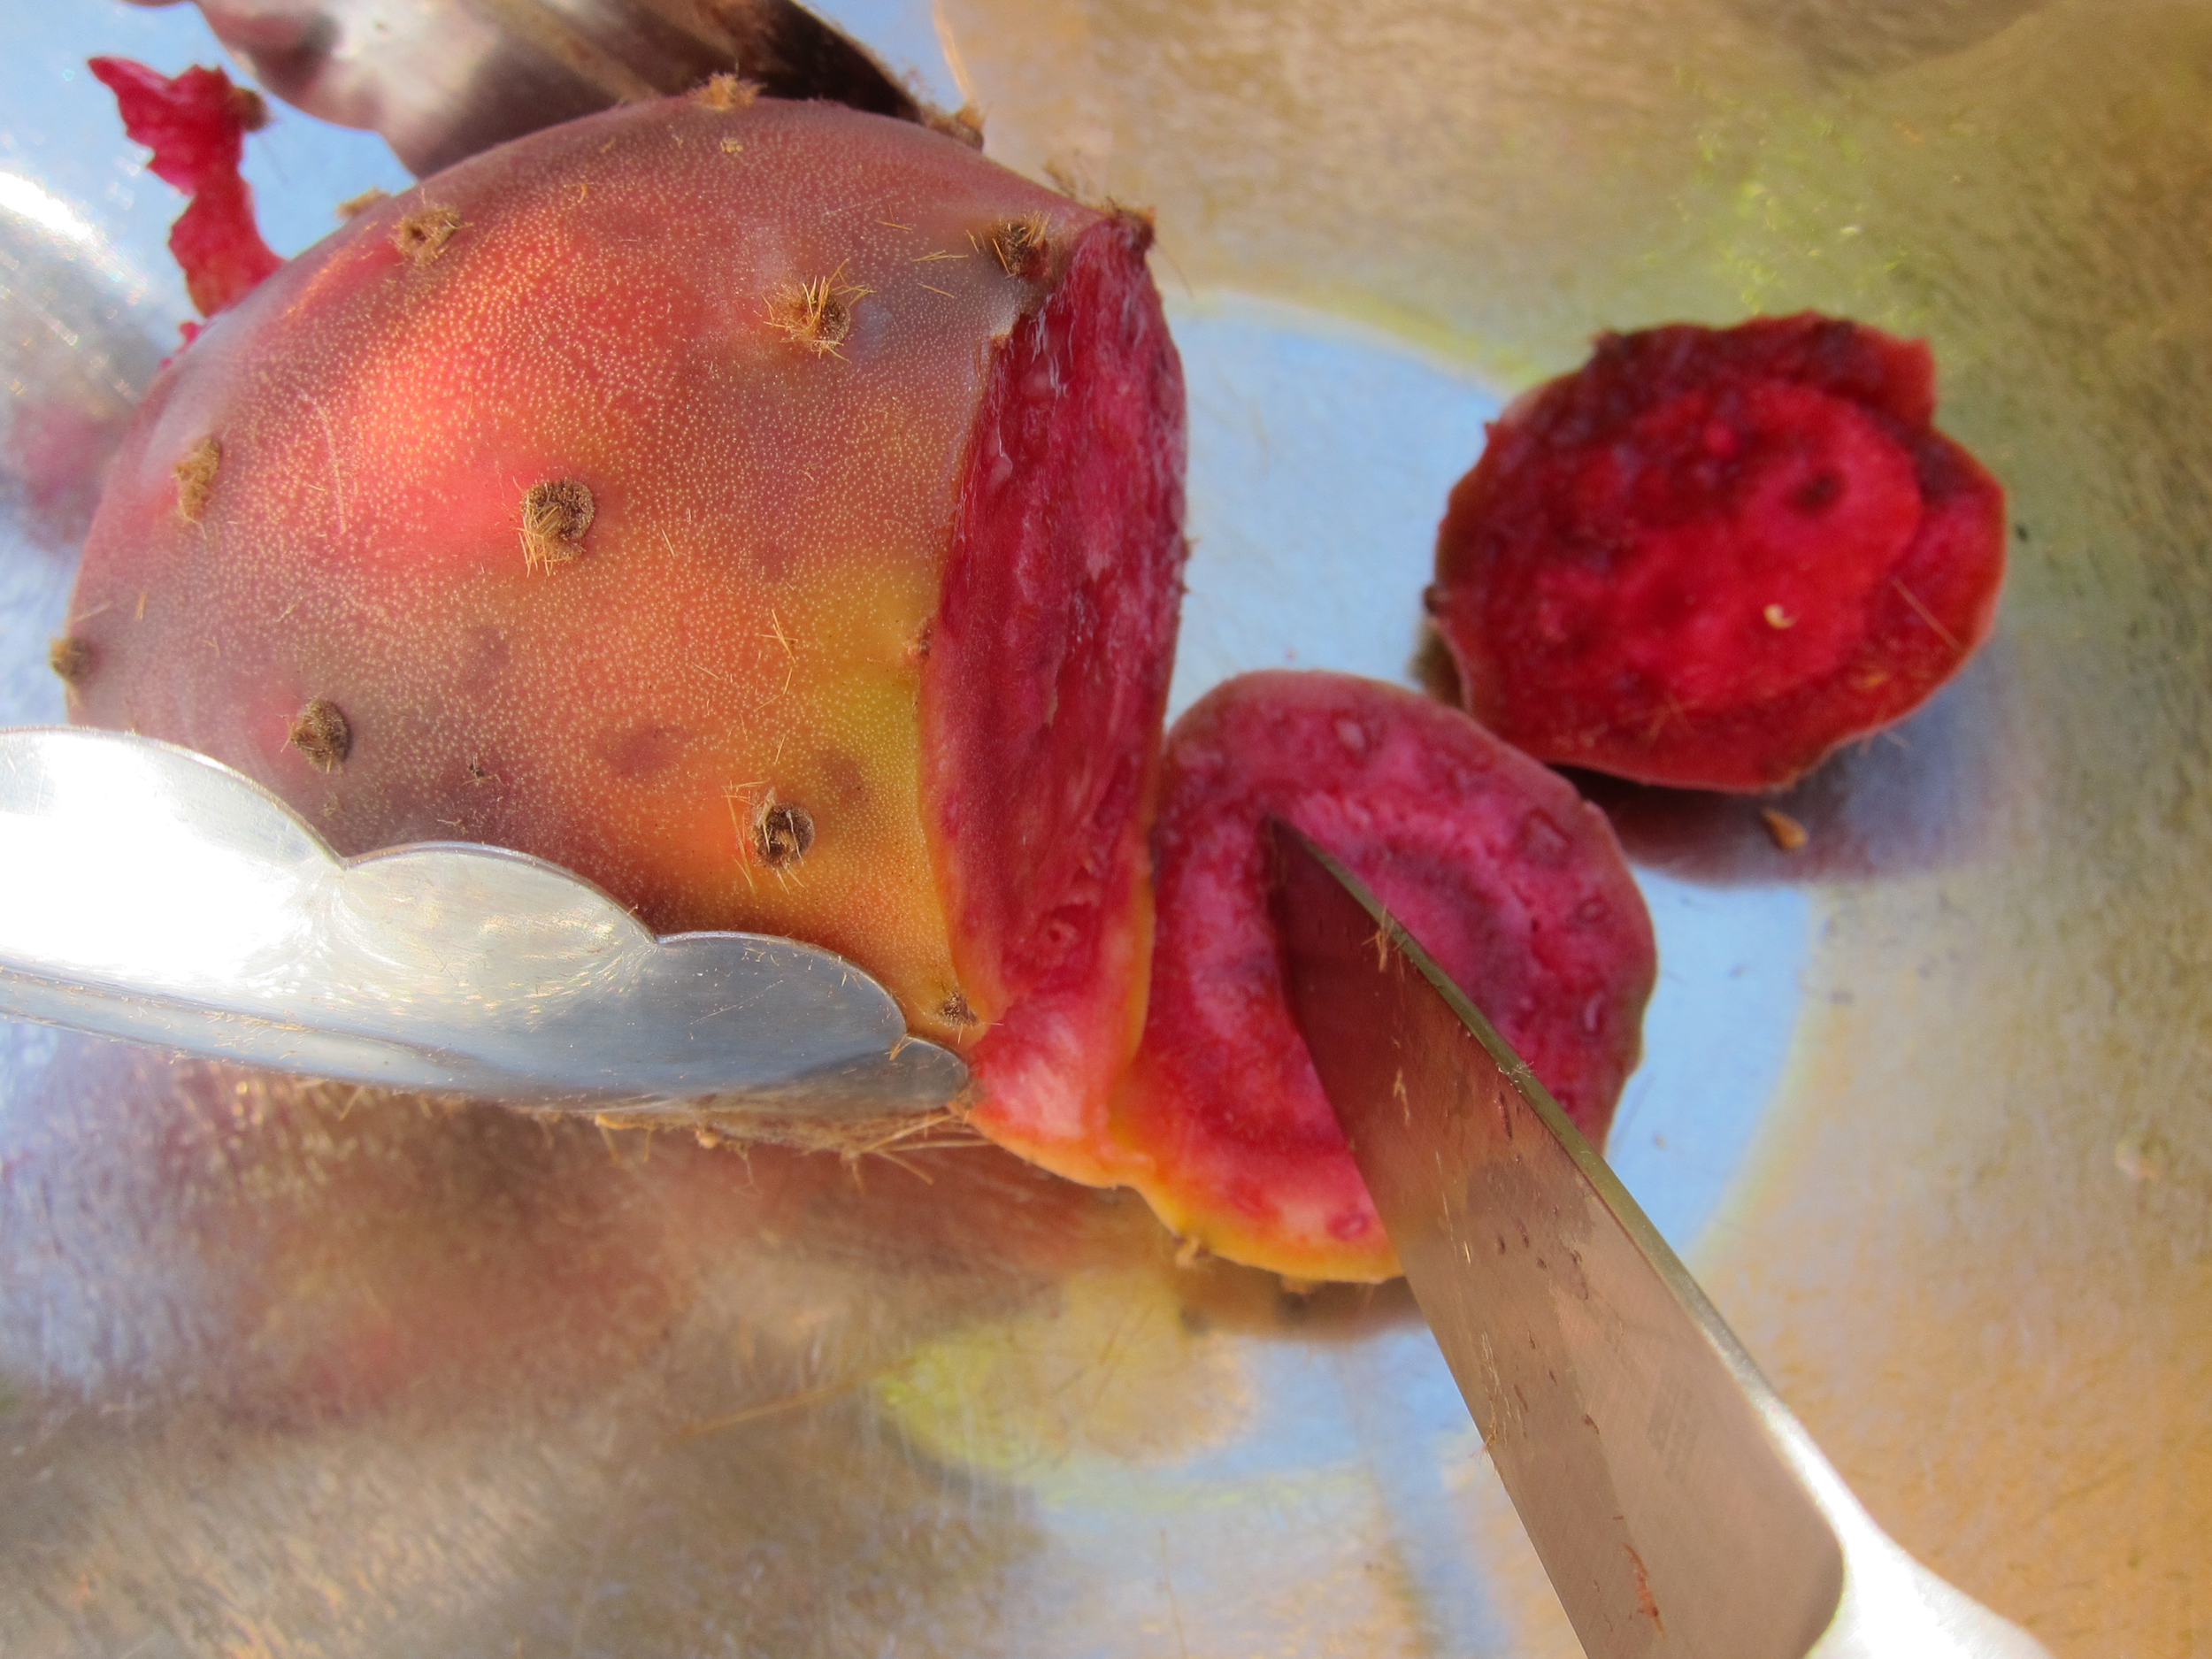
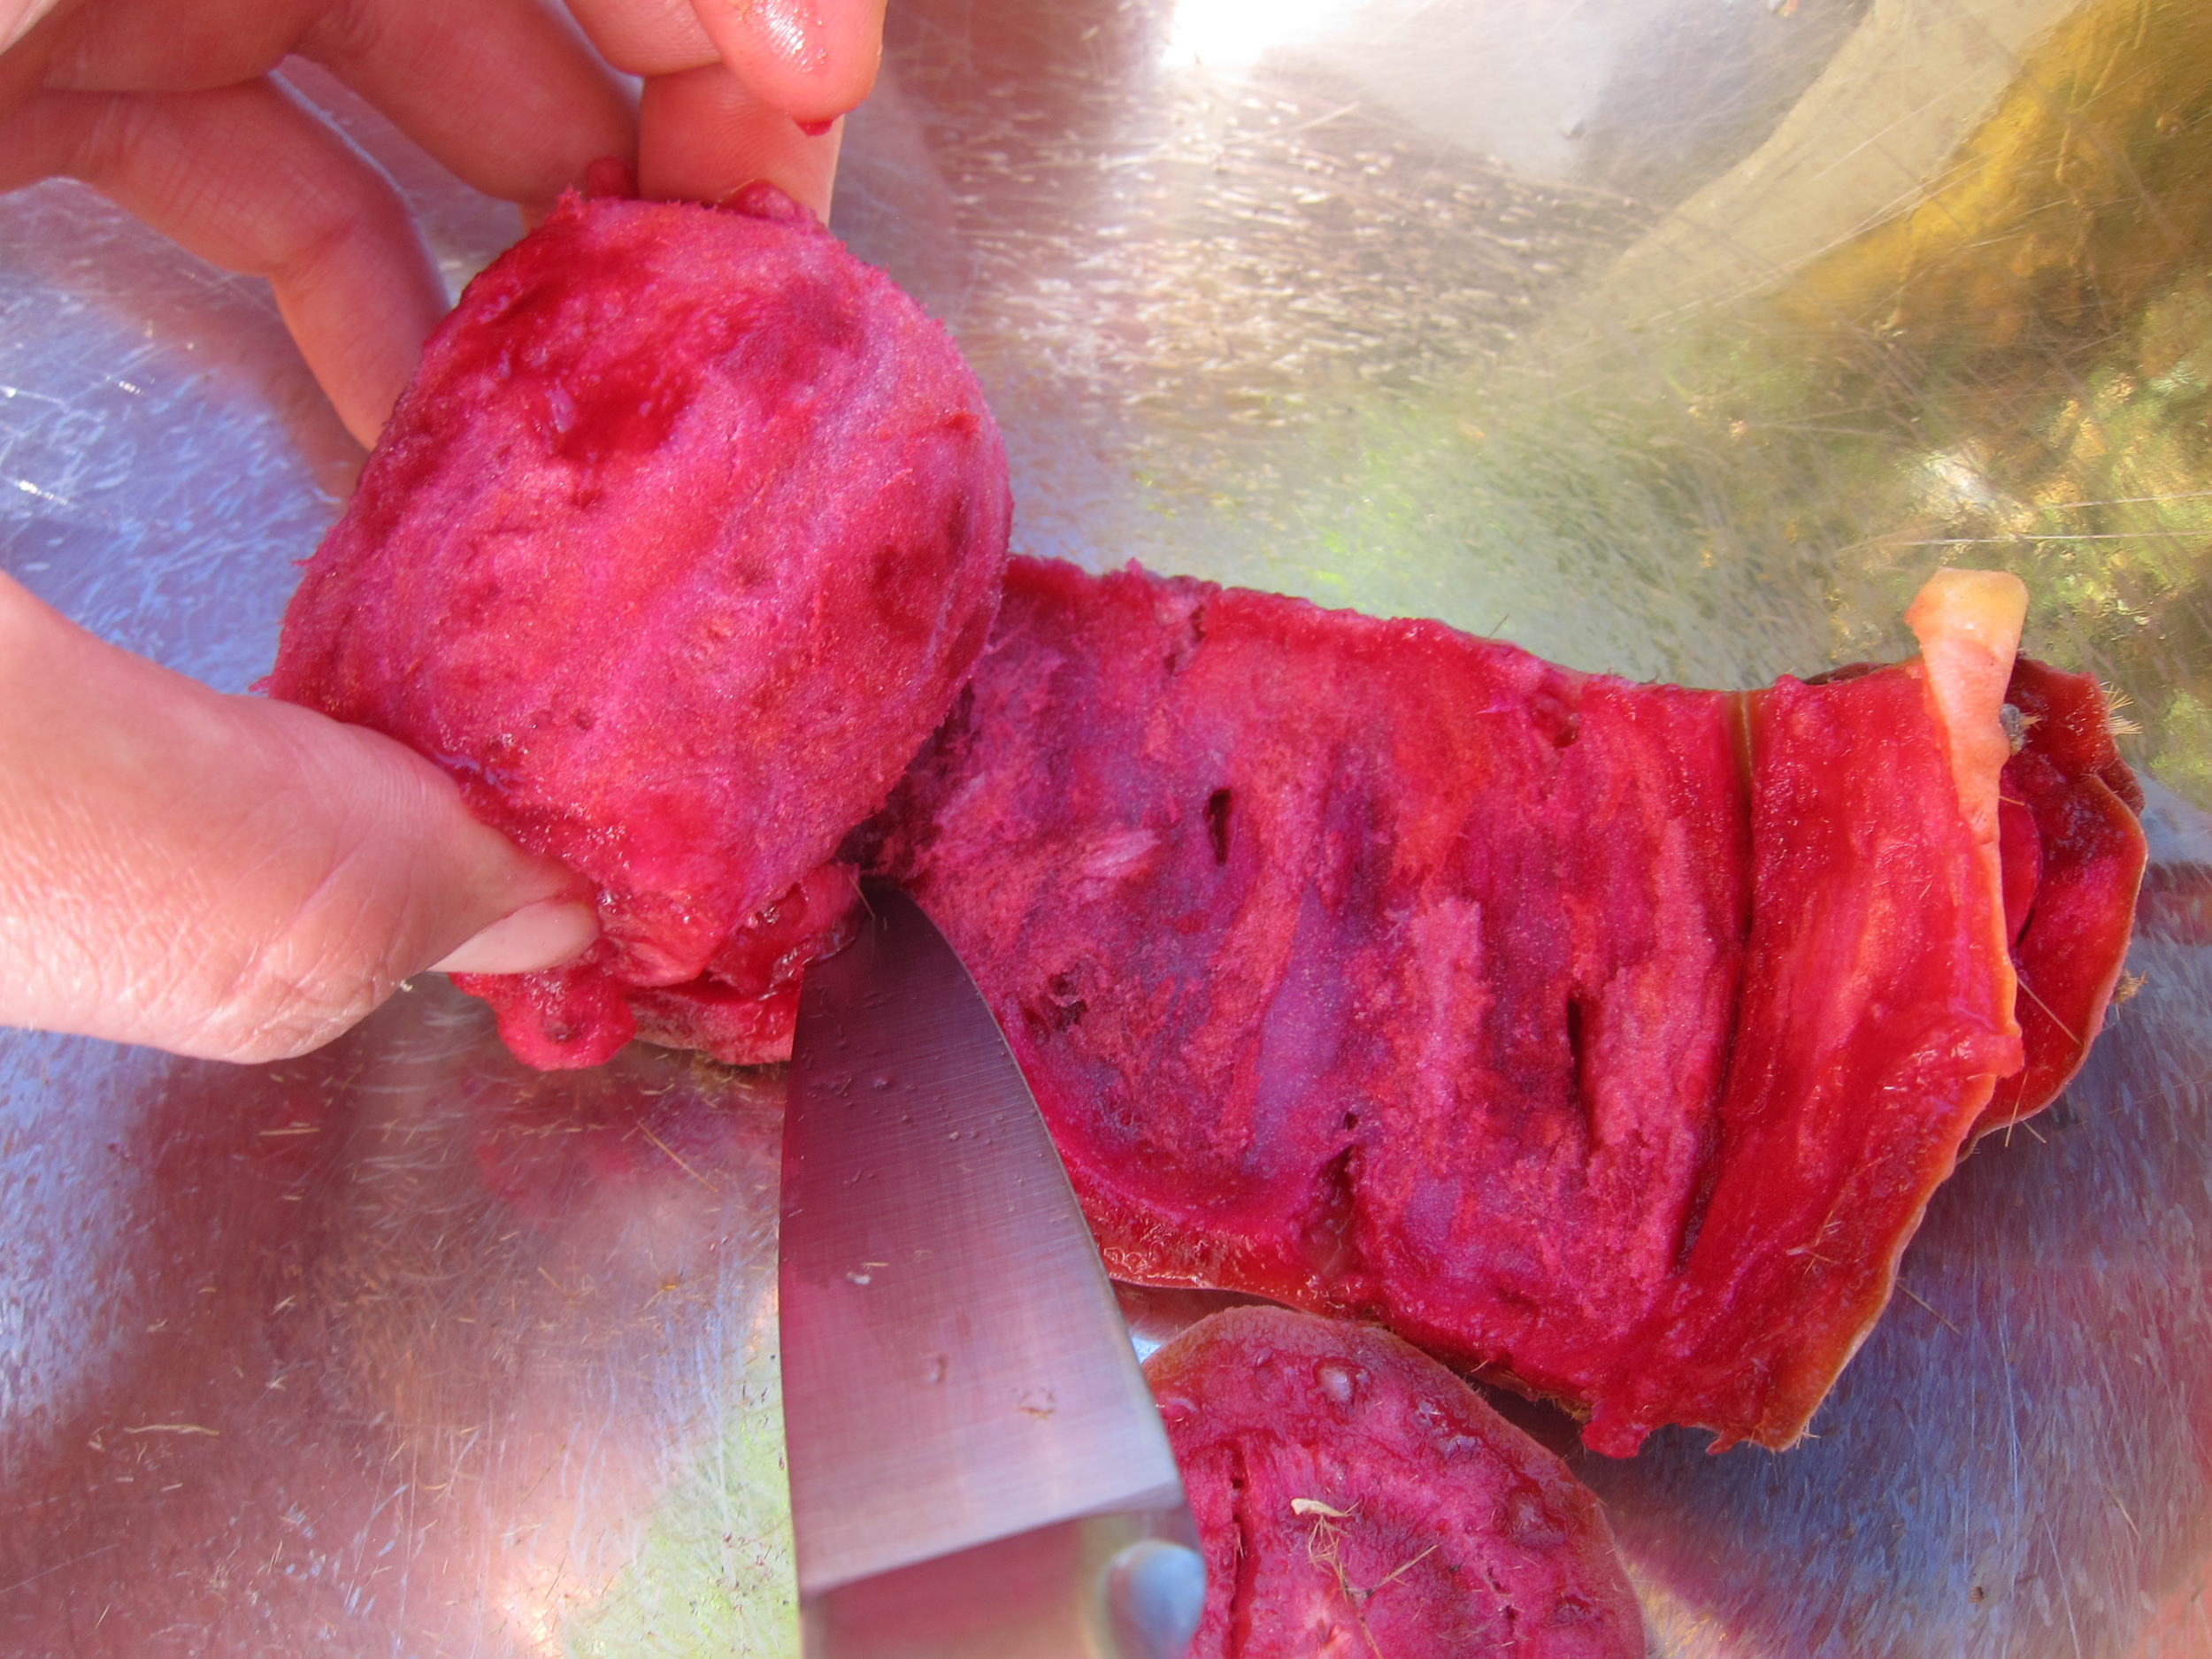
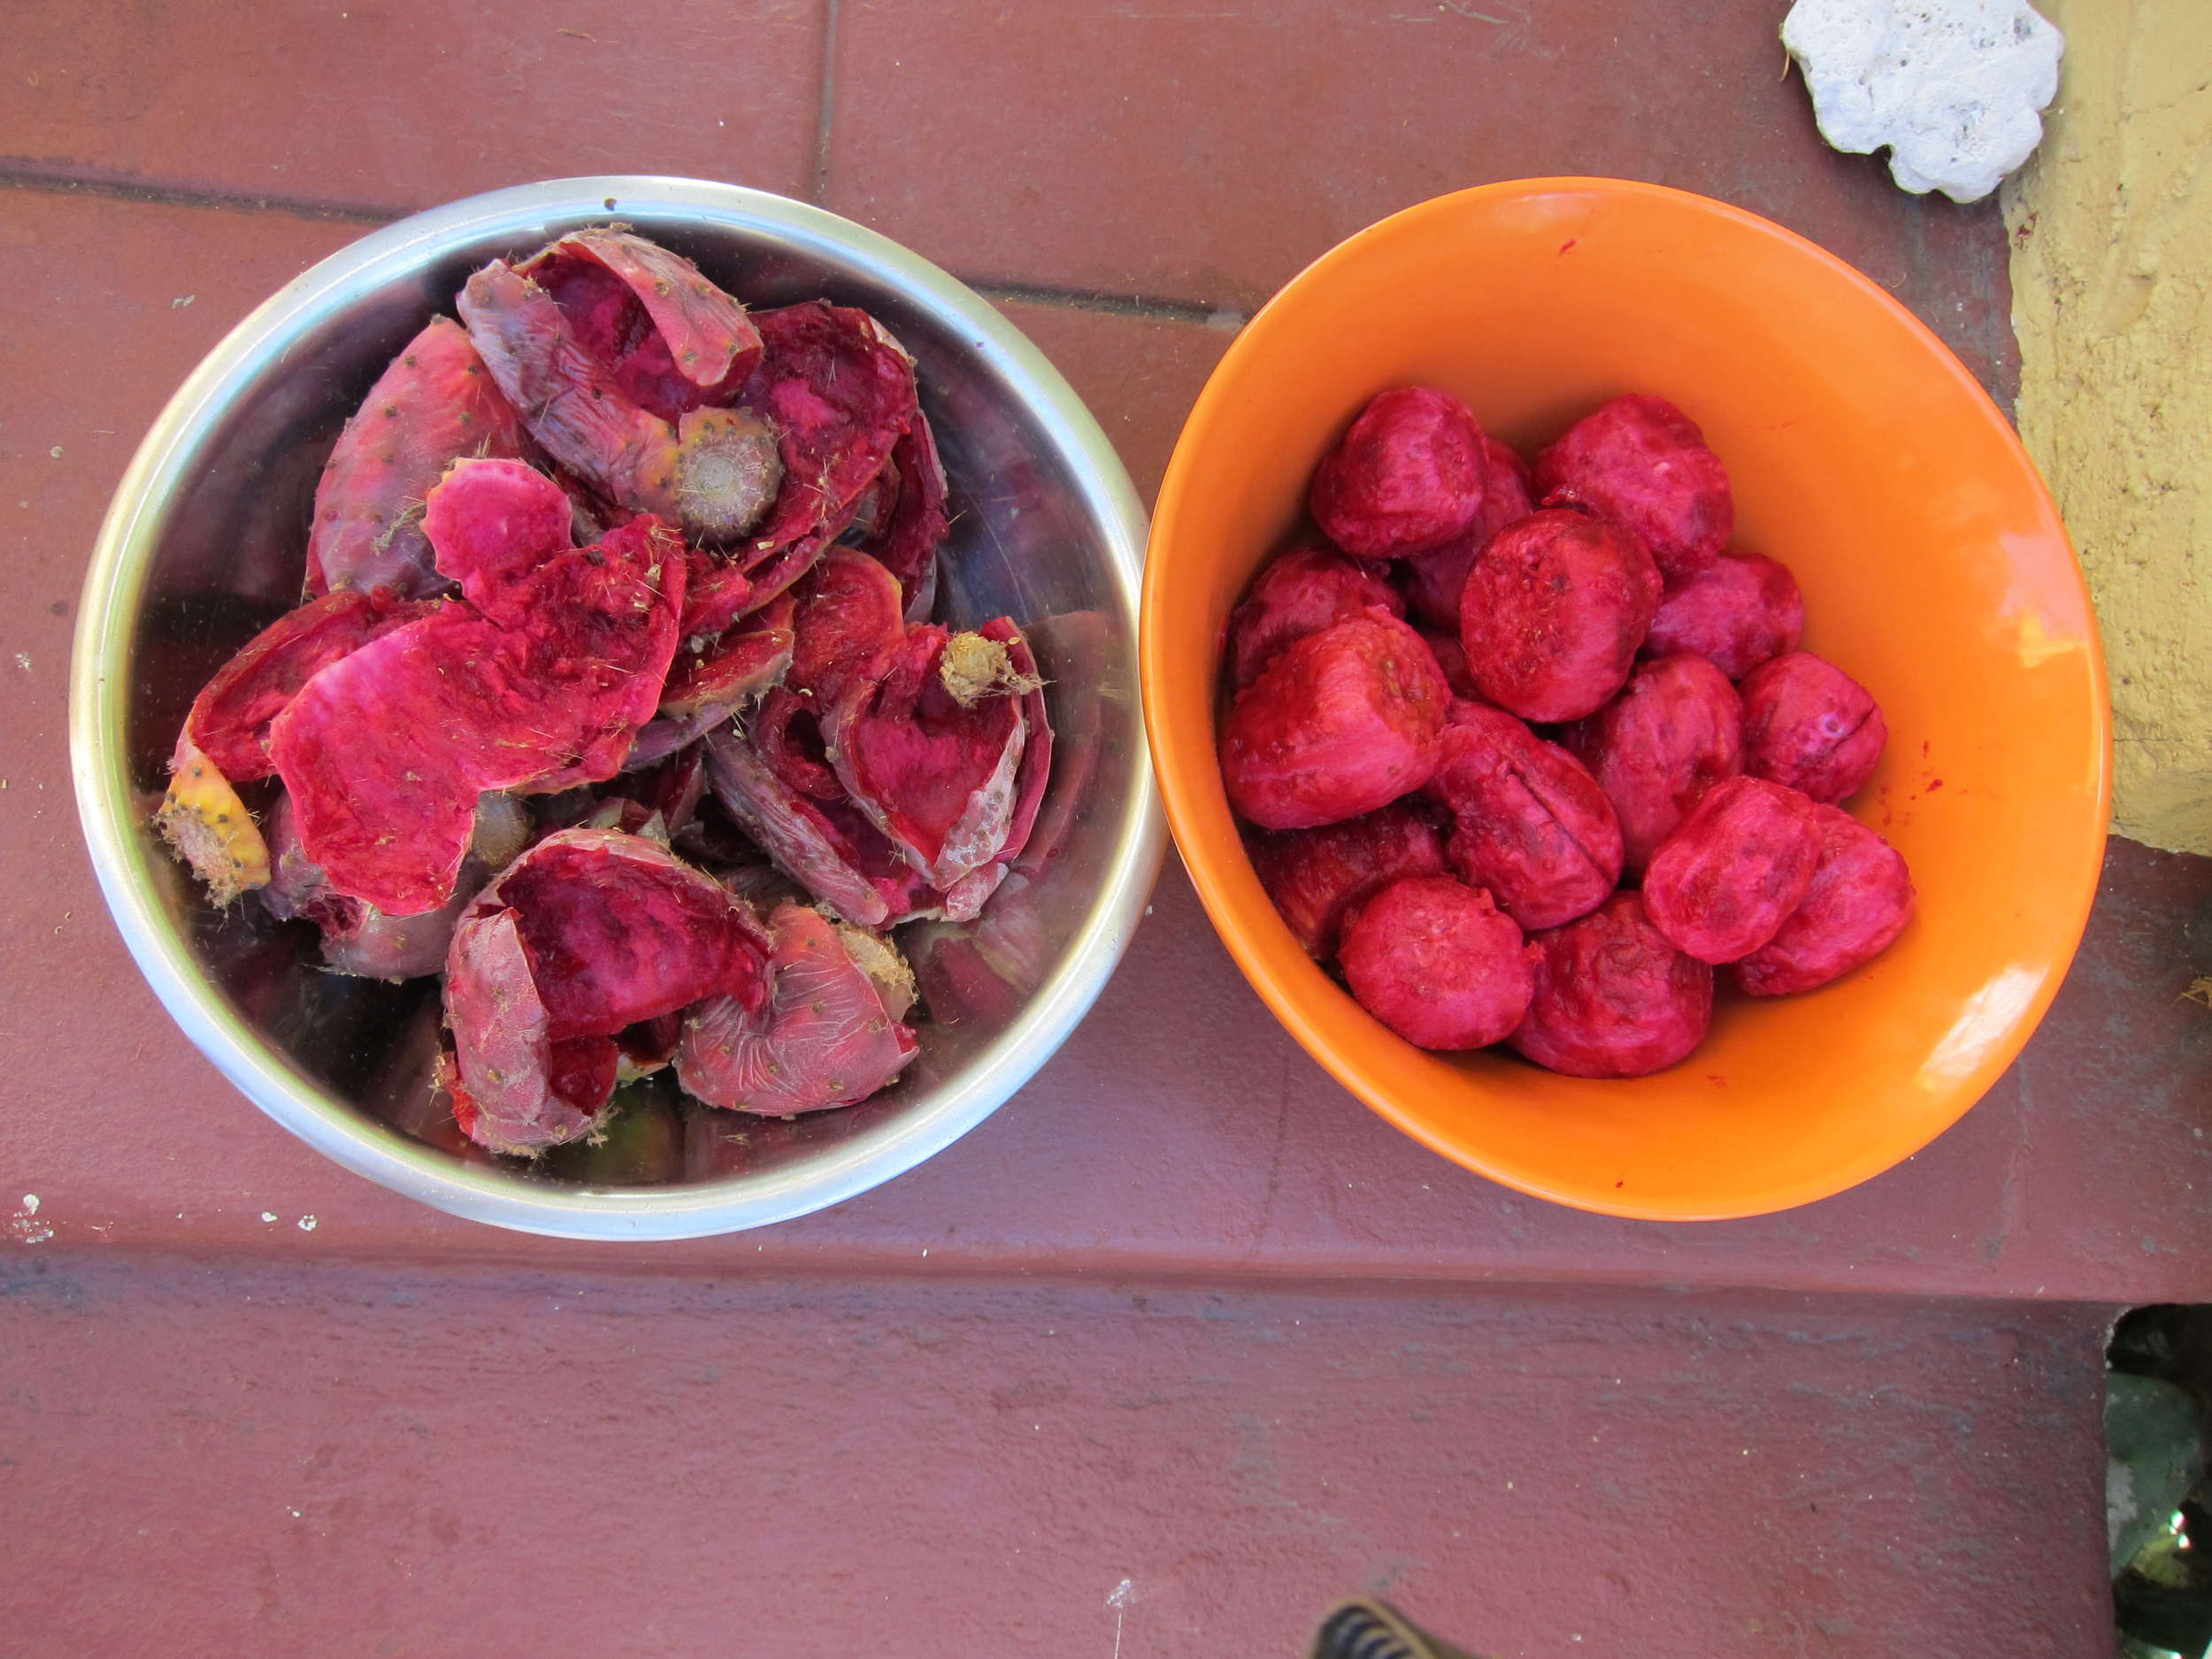

Step 1. Pluck the pears using tongs -in fact, use tongs throughout this whole operation wherever possible. Be very careful which way the wind is blowing - obviously, try to avoid standing downwind and close your eyes if you see danger.
Step 2. Set up your operation - place pears in a big bowl and get ready to peel them. I like to have 3 bowls for this - 1 for the unpeeled pairs, one “working bowl” where you slice them, and one for peels.
Step 3. Cut off each end of the pear.
Step 4. Make a slice down the middle and scoop out the fruit. This is a pretty cool step because the fruit comes away from the skin quite naturally. Toss skin in one bowl and fruit in another. This loses some of the fruit on the edge of the skin, but there’s really no other way unless you want to get stickers everywhere.
Step 5. Consume or freeze for later use.
Process 2: If you just want to use the juice. Note that it is not incredibly efficient and the flesh is discarded. However, I've started doing this process more often than not because of how productive my cactus plant is and for the following benefits: This process is way easier, less time consuming, and you'll have fewer spines (if any) in your hands at the end of it.

Step 1: Pluck the pears using tongs and put them into large ziplock bags. Again, be very careful which way the wind is blowing - obviously, try to avoid standing downwind and close your eyes if you see danger.
Step 2: Freeze the fruit overnight or for up to 1 year.
Step 3: Pour frozen fruit from bag into a colander and rinse. Place colander over a large pot or bowl and put something heavy on top of the fruit (I use a very large mason jar filled with water).
Step 4: Wait for 1-2 days (depends on temperature) as the juices come out of fruit, through the colander and into the bowl. You can press down on the heavy object and slice open the fruit as needed to encourage this process.
Step 5: Once as much juice is out of the fruit as possible, strain juice through a fine mesh colander or cheesecloth (to remove any remaining spines) and discard pulp.
Step 6: Use juice immediately, refrigerate for up to a month, or freeze for up to a year.

Prickly pear granita: Blend frozen pears with ice and lime. Add black pepper or cayenne for an optional spicky kick.
Prickly pear recipe suggestions: Prickly pear margarita, prickly pear manhattan, prickly pear granita, prickly pear cheesecake, prickly pear chutney/jam, prickly pear sorbet.
Nasturtium: So much more than a (pervasive) flower
Nasturtium mezcal margaritas: An impromptu preparation for an outdoor happy hour.
Nasturtium (Tropaeolum majus) grows everywhere - everywhere - in the Bay Area as well as many other parts of the country. It flourishes in parks, gardens, and along sidewalks pretty much year-round, except when it gets very cold or very dry. The plant is sprawling and iconic - even if you do not immediately know what I am talking about, you have probably seen nasturtium many times or perhaps tasted the flowers in a salad mix from the farmers' market or restaurant. The flowers are bright orange, yellow, or sometimes red with five petals on a single stem and leaves that look similar to lily pads, but thinner. The plant comes by way of South America and my guess is that it was transported here because it is so visually appealing, grows easily, and has a tasty, unique flavor.
What I love about the nasturtium plant is that with its mustard/radish/wasabi-like flavor and cheerfully spunky appearance, it is very approachable for even the biggest wild food skeptic (as long as said skeptic doesn't have an aversion to pungency). However, when you dig a little deeper, there are so many more possibilities than just using the fresh flower as a garnish or in salads. The leaves have a slightly thick, viscous quality to them, similar to okra, but I the sharp flavor cuts this a bit and the viscosity is helpful when you want to thicken a dish, such as a risotto or stew.
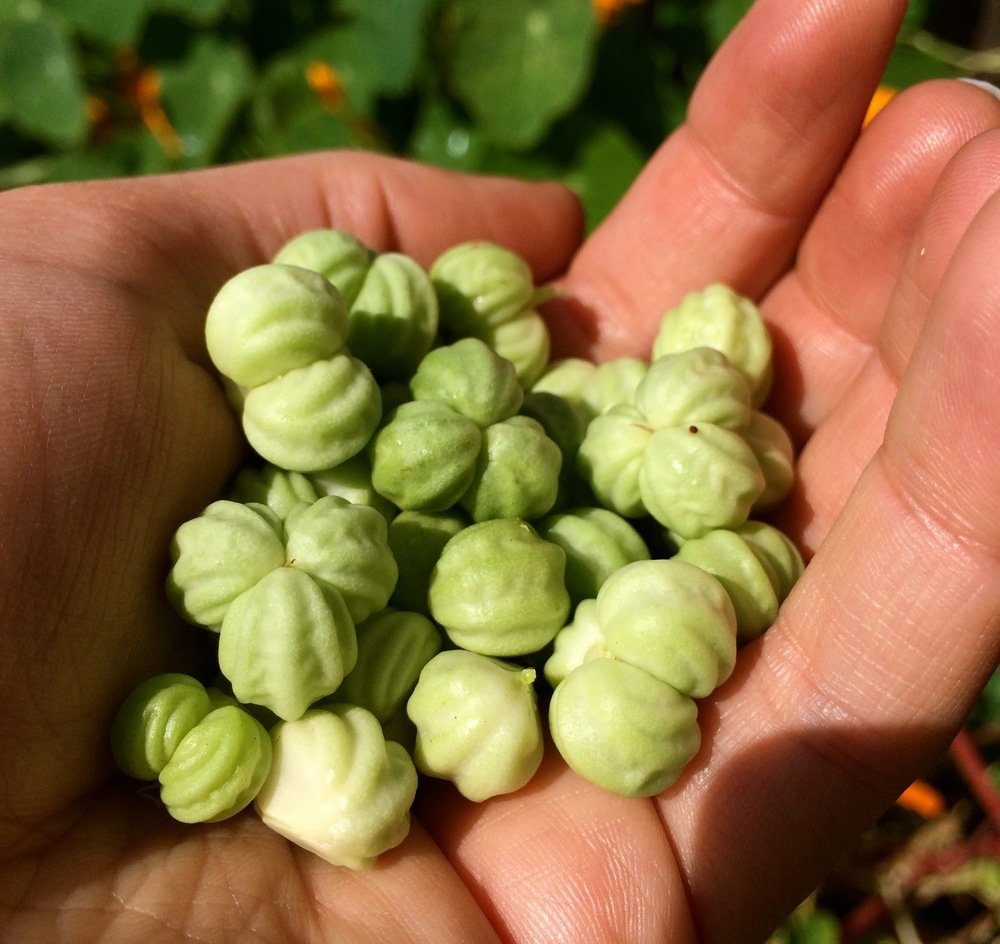
Freshly picked nasturtium seed pods
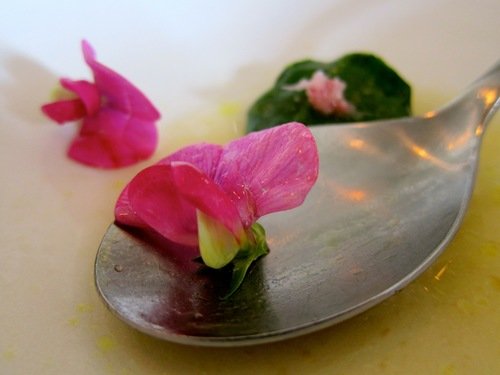
Sweet pea flowers in foreground, baby nasturtium leaves in background wrapping shrimp (wish I got a better photo of the nasturtium!), rhubarb broth.
My first close and consistent experience with nasturtium was when I worked in a restaurant that used the flower to garnish mezza platters (hummus, tapenade, etc.). Being me, I would often grab a bunch of the leftover stems and take a big bite for a peppery "jolt" to keep me going throughout the night. On the other (more calculated) end of the spectrum, in the past few years I have been using the flowers in cocktails and experimenting with the leaves (either fresh in a salad or lightly cooked) and seed pods (pickling them is amazing - check out this recipe for California capers) Baby nasturtium flowers even made their way to the Noma menu when I had the opportunity to eat there and nasturtium pesto is a regular staple on the ForageSF Wild Kitchen dinners, or at least it was the few times I helped out.
Dock: Come for the leaves, stay for the seeds
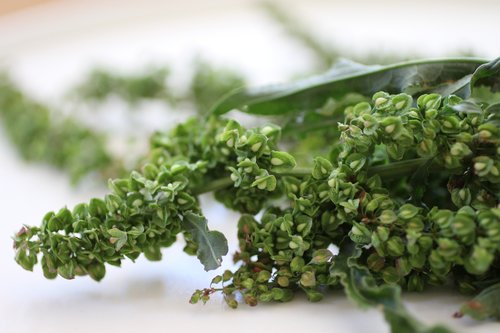
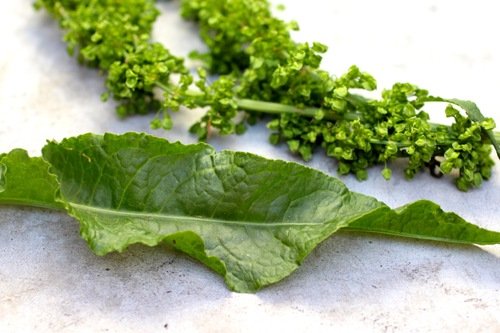
Rumex crispus, or "curly dock" leaf and seeds.
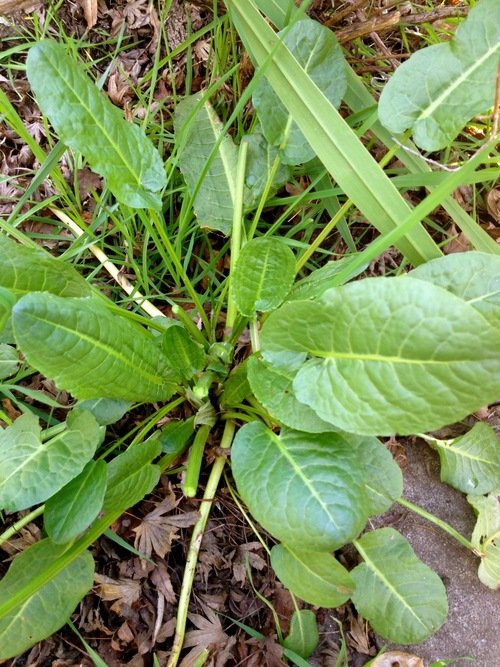
Young dock leaves.
Dock, or Rumex spp. is so ubiquitous on the West Coast in the spring and summer that even if you aren't looking for it, you have probably seen it. Dock has lance-shaped, elliptical leaves that start out small and tender, but can grow quite large and tough and begin to turn yellow and/or red as they age. The two most common varieties are curly dock, Rumex crispus (pictured in this post, also known as yellow dock), and broad-leafed dock, which have characteristics that befit their names.
The leaves have a lemony taste to them that works well in a salad when they're small and tender, but are better wilted or sautéed when older and tougher. Try topping a bed of dock leaves with warm gnocchi or freshly grilled meat or adding a handful of dock leaves to a soup. A member of the buckwheat family, Polygonacaae, the seeds are similar to buckwheat seeds but not as hard. When toasted, the seeds have a slightly tart-nutty flavor similar to rye, look kind of like ants (really), and can be used in everything from granola to crackers (what I like to call, Rumex crisps) to a more realistic "ants on a log".
Dock likes to grow in urban environments - think empty lots, next to sidewalks, etc. The leaves can be found in the spring and they start to go to seed in the early summer. Even if you find dock that has gone to seed, doesn't mean that there aren't young plants still out there - the seeds will appear earlier for plants that have more sun exposure. You can eat the seeds raw, but they're much better toasted (in my opinion). Here's a recipe for toasting the seeds.
Run fingers down stem to pull off seeds. You may need to run fingers down separate smaller stems if seeds do not come off immediately.
Heat cast iron to medium-high. Add seeds and, stirring frequently, toast until they brown and give off a nutty smell, about 10 minutes. Only add seeds so that they are less than 1/4-inch up the side of the cast iron pan or less.
You are now ready to eat the seeds as a snack or use them in a recipe, such as Rumex Crisps, dock seed crackers.
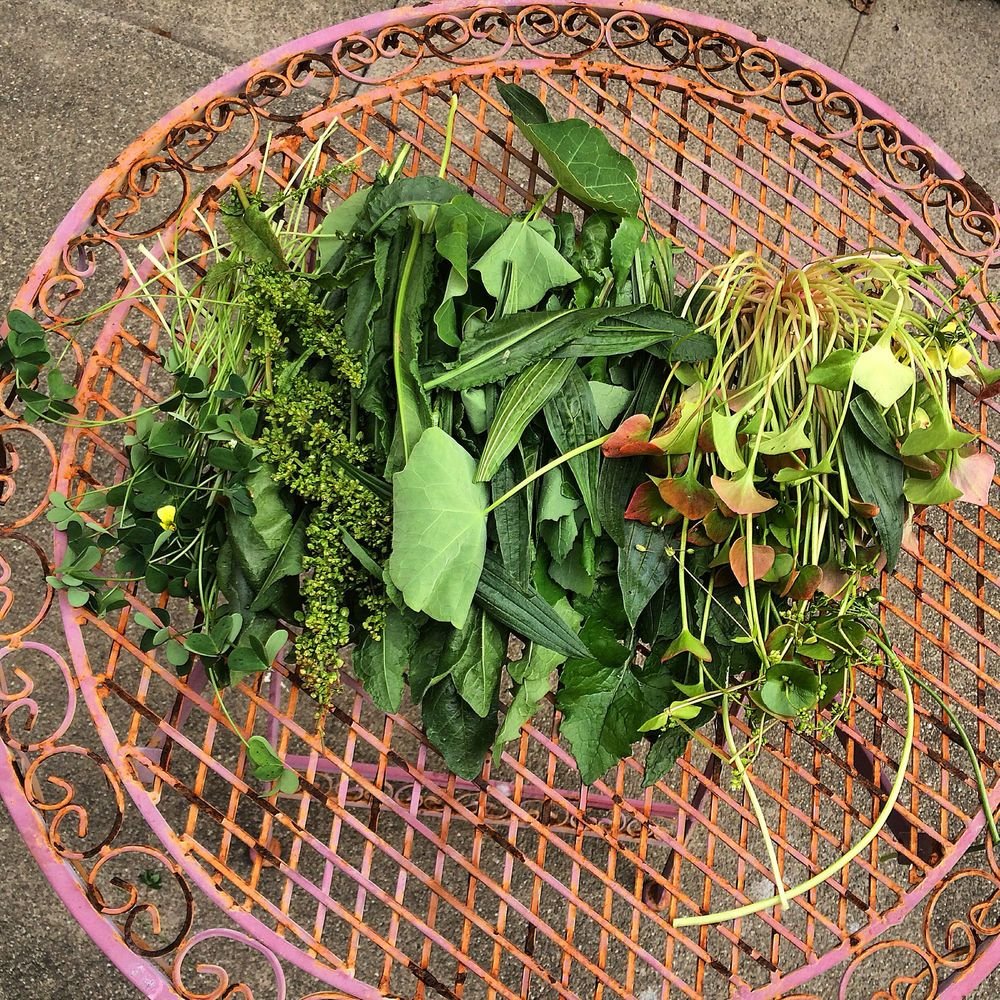
Dock leaves and seeds in an array of other wild edible plants - can you find the it?
Beet tartare with shallot, capers, and dijon mustard
Plant-based spin on a classic with or without faux egg.
Beet tartare served with baguette crisps, but you can use any edible vehicle for the tartare of your choosing.
There's something special about classic beef tartare done right. I'm kind of a sucker for tartare when I'm at a restaurant that I know has good meat and will prepare it properly. Usually, I'm with someone else and we'll share it in addition to a few salads or other things to help balance out the meal. BUT, in the interest of plant-forward innovation, I thought I'd try to replicate tartare using beets instead of beef and making the whole dish entirely from plant-based ingredients. Crazy? Maybe.
There were some challenges with mimicking the luscious quality of the raw beef, but the combination of miso and olive oil comes pretty close and the miso has the additional bonus of providing umami flavor that you get from meat in the beef version (double score!) If you do eat meat, another great option is to make a tartare with both beef and beet (I've done a 1:1 ratio and it was very successful) to keep some of the beef flavor and texture, but still make your tartare more plant-forward. Other classic ingredients are added to this recipe such as shallots, capers, parsley, and Dijon mustard, but you can play around with these as you like!
Traditionally, beef tartare is served with a runny egg yolk on top that is mixed in to the cubed steak before eating. You could top this with a real egg yolk and it would be delicious, but I was in an experimental mood and decided to try out making a faux egg from chickpea flour, flax, miso, water, and tumeric. The flax, chickpea, and water provide texture while the miso flavor, and the turmeric color. It's pretty fun, but, you know, not a real egg yolk. In my opinion, nothing you can make in a home kitchen comes close to an egg if you want all of the egg-like properties. Using flax and other substitutions works great for many baking or binding applications, but if you're looking for a runny egg yolk there's nothing like the real thing...eggs are just magical. However, you can serve this with or without an egg/faux egg and it's still delicious. Great appetizer for your vegan friends (or self) and can easily be gluten-free if served with GF crackers, endive, or the like. Recipe below serves 6 and can be stored in the refrigerator for a few days without diminishing (too much) in quality.
Finely mincing beets - it's not blood, it's beet juice! Be careful, it stains.
- 2 medium beets, about 6 ounces
- 2-3 teaspoons olive oil
- 2-3 teaspoons white miso
- 1 tablespoon minced capers (I used California capers)
- 2 teaspoons minced shallot
- 2 tablespoons minced parsley
- 1 tablespoon minced chives (optional)
- 2 teaspoons Dijon mustard
- Squeeze of lemon juice or dash of red wine vinegar
- Salt and cracked black pepper, to taste
- 1 egg yolk or faux egg, for serving - recipe below (optional)
- Baguette crisps (I used this recipe), crackers, cucumber, or endive, for serving
To Prepare
- Mince beet into fine cubes using knife and add to medium bowl.
- Mix in 2 teaspoons olive oil, 2 teaspoons miso, capers, shallot, 1.5 tablespoons parsley, chives (optional), mustard, and squeeze of lemon. Stir in salt/pepper to taste and more olive oil and/or miso to desired flavor and texture.
- Mound onto serving plate and top with egg yolk/faux egg yolk (optional). Sprinkle with salt and reserved parsley and serve with baguette crisps or crackers.
Beet tartare with faux egg. Not perfect, but kinda works!
Faux egg yolk - makes 1 faux egg yolk (if using for above recipe, you may want to double the below to allow for creation of a larger "yolk" if needed)
- ½ tablespoon chickpea flour
- ½ tablespoon ground flaxseed
- 1 teaspoon white miso
- 1 tablespoon water
- ¼-½ teaspoon turmeric
- To prepare: Whisk all ingredients except turmeric then whisk in turmeric to create desired color.
Spreading beet tartare on baguette crisps. The above is 1/2 of the recipe.
First Course
An exciting collaboration between a Nordic inspired porridge pop up and art.
If you know me, you know that I love porridge. During my time in Copenhagen, I was inspired by the restaurant Grød, where porridge was is not a pasty gruel that you eat just to be able to slog through your day (though grød does mean gruel in Danish), but rather a cozy bowl of deliciousness. With ingredients like heirloom rye, pea shoots, fermented rhubarb, toasted hazelnuts, and wild greens, I had a hunch that porridge could be a hit in many U.S. cities. Porridge is the epitome of hygge food, a danish word that means something along the lines of "beyond cozy" and is pronounced something along the lines of "hoo-gah". The concept of hygge has been popularized over the last year (it was shortlisted on the Oxford English dictionary's word of the year in 2016), but several years ago I returned with a new appreciation for hygge and all that goes with it, including porridge and, of course, candles. We may be approaching the first day of spring, but the weather is still ripe for hygge and, really, hygge (and porridge) can be embraced in any season if done right!


Gorgeous Koik Ceramics bowl that is similar to the one you'll take home at this event.
Since this danish epiphany, the porridge shop idea has been just a fun daydream until a few months ago when I finally put on a porridge pop up at Pizzaiolo restaurant in Oakland. I'm hoping to put on a few more at Pizzaiolo (so grateful to them for letting me crash their wonderful and cozy restaurant!), but meanwhile, I'm trying out a new concept. A few badass women maker friends and I are putting together First Course - a pop up featuring not only delicious porridge, but also limited edition art - including a hand-thrown bowl by my friend Sarah Koik (that you both eat out of and get to take home). This eat-your-porridge-keep-your-bowl idea has been a fantasy of mine, so I am ecstatic to see it come to fruition!
Other participating makers include beeswax candles made by amazing artist (and dear friend) Lauren DiCioccio, custom brass cast spoons by jeweler Christy Natsumi, and a set of cloth napkins/tea-towels hand embroidered by Nadia Lachance.
To reserve your spot at First Course, visit Sarah Owen Studios. Here's the porridge menu, just in case you need a bit more culinary enticement. Most produce is sourced from Top Leaf Farms, an urban farm less than 2 miles from the event, or it is foraged by yours truly, and millet was grown locally by Farmer Mai.
Millet and chicken tamari: Seared radish, crackling, and wood sorrel sauce.
Buckwheat, wild greens, and goat gouda: Soft-cooked egg, crispy shallots, and pea shoots.
Heirloom mixed-grain and rhubarb-apple crisp: Cardamom, yogurt, molasses, and bay nut.
I'll be sure to post a few recipes later on, but meanwhile get your tickets and see you there!
Kransekage: Danish almond (wedding) ring cake
Cardamom-flavored chewy rings traditional at weddings and New Year's Eve parties.
Beautifully stacked kransekage tower.

Like many Americans, I can trace my ancestry back to many, many different countries. However, whether because my last name is Rasmussen, a classic Danish last name, (and my great-grandfather was Rasmus Rasmussen) or because I just love the culture so much, I feel the biggest connection to my Scandinavian-Danish heritage. So when I was betrothed and started diving into the (very wide) world of weddings, I immediately began looking up Scandinavian and Danish wedding traditions. There were a few traditions that jumped out at me, including one that involves cutting the groom's tie to symbolize his imminent wife's good sewing skills, which we decided to forego, but just one that stuck. Naturally, the one that stuck was the traditional wedding cake, called Kransekage.
More cookie than cake, kransekage is typically served at weddings and New Year's Eve parties and our wedding just happened to be on December 31st. The cake rings symbolize wedding rings and I suppose for NYE they are symbolic of the year going 'round and 'round, but I'm just hypothesizing. Apart from the serendipity, I was also drawn to kransekage because it's flavored with cardamom, probably my favorite dessert flavoring, and made with almond meal, egg white, and sugar, which is a recipe for success in my book. Lemon zest is the final ingredient that provides a welcome brightness. That's right, just a total of five ingredients and if you're into the world of gluten free (I eat everything, but just sayin'), then this dessert is for you. On a romantic note, serving this cake at our wedding made sense because my now husband visited me in Denmark (I was on a research stint there for a summer) way back when we first started dating. I've told him numerous times that if he hadn't visited it probably wouldn't have worked out because, I mean, come on - live a little! Luckily, he did.


I originally intended to purchase a kransekage cake from a baker for the wedding, but being the crazy person that I am, I ended up making it. I'm not saying this to brag (okay, maybe I am just a little), but really - the cake is that easy that a bride can make it for her own wedding! I made my other friend's more classic American wedding cake and I would never put that pressure on myself as a bride. Also, I did have some delicious back-up truffles made by a local baker just in case. The great thing about this cake is that, in addition to being super simple and forgiving, you are supposed to make it a few days in advance to let the rings reach their optimal chewiness. Truly! Don't let the fact that you need special pans turn you away, as you can buy them on Amazon for twenty bucks. That being sad, I am absolutely willing to sell this cake to anyone who's interested in my making it for their wedding!

My wedding cake test-run.

Almond-cardamom cake rings fresh from the oven.
I've been meaning to post this recipe for some time, but now that it's been nearly a year since our wedding(!) and I plan on making it again for our anniversary/NYE, I thought it was the appropriate time. Below I have the recipe to make about one (set of) pan's worth as well as 3x that, which is what I used for the wedding that served about 80 adults (though it went fast!) The preparation method is same for both. The measurements are in metric weight and U.S. volume, which I know is strange, but that's what worked the best for me!
Krasnsekage A Ingredients*: Makes enough dough for one set of these pans (~25 servings)
410 grams almond flour or finely ground almond meal (125g/cup), Bob's Red Mill's normal bag is 450g almond flour
410 grams powdered sugar
Up to 40 grams gluten-free, rice, or all-purpose flour (about 9g/Tbs, I ended up adding 3 Tbs at first, then 4 more Tbs)
3 tsp freshly grated lemon zest
3 tsp ground cardamom
1/2 tsp salt
3 large egg whites (= 90g)
Extra flour and grapeseed oil or cooking oil spray for greasing the molds
1 set of kransekage ring molds (18 rings)
Krasnsekage B Ingredients*: Makes enough dough for 3x one set of these pans (~80 servings)
1,100 grams (1¼ lbs) almond flour, or finely ground almond meal (125g/cup), Bob’s Red Mill normal bag is 450g almond flour
1,100 grams (1¼lbs) powdered sugar
Up to 100 grams (about 3/4 cup) gluten-free, rice, or all-purpose flour (about 9g/Tbs, I ended up adding 1/4 cup at first, then 6 more tablespoons)
2 tablespoons plus 2 teaspoons freshly grated lemon zest
2 tablespoons plus 2 teaspoons ground cardamom
1-1/2 teaspoons salt
8 large egg whites
Extra flour and grapeseed oil or cooking oil spray for greasing the molds
1 set of kransekage ring molds (18 rings)
Preparation: Same for both versions, but you'll prepare and bake 3 batches for Kransekage B.
Preheat the oven to 400°F. Spray the ring molds with cooking oil spray or lightly brush them with grapeseed oil. Lightly dust them with flour. Set them onto cookie sheets.
In a large bowl or bowl of electric mixer, combine the ground almonds, icing sugar, one-half of the flour, lemon zest, cardamom, and salt. Mix on low speed using hand mixer or Cuisinart to combine. Add egg whites one at time and beating well after each addition.
The dough should be starting to come together and come away from the sides of the bowl. You can tell if the dough is moist and pliable enough by pinching some of it between your fingers. It should stick nicely together. If it is too moist, add more flour by tablespoon. You are aiming for the texture of soft ‘playdough’.
Scrape the dough onto your work surface and pat it into a large ball. Cut the ball into quarters and roll each chunk into a smaller ball. Work with one ball at a time and keep the rest covered with plastic wrap to prevent them from drying out.
Roll each ball into a long, even rope. I found it handy to use a ruler to keep the ropes uniform. For my 18-ring set of molds, 1/2 inch thick. Lay a piece of rope into one ring at a time, pinching off the excess length and smoothing the ends together to seamlessly join them. The dough is very forgiving, and it`s easy to re-roll a few rings if you don`t have enough dough to make the last ones.
Bake in the preheated oven, in batches, for 8-12 minutes, until the rings are a golden caramel color. The smaller ring pans tend to cook faster, so check on them at 8 minutes.
Leave the cakes to cool in the pans, then carefully remove them. You may have to insert a knife tip underneath the rings to help them pop out of the pans. For Kransekage B, cool the cakes before removing, then wash, dry, and re-grease the pans for the next batch. Store cakse at room temperature for a 1-3 days, preferably 48 hours to give the perfect amount of chewiness. I found that it was better to leave to open air than putting in plastic bags.
Icing Recipe: Make below x1 for Kransekage A and x3 for Kransekage B
1 small egg white
1.5 cups (225 gms or ¼lb) icing sugar
1 teaspoons fresh lemon juice
Icing Preparation: Whisk together the egg white(s) and icing sugar. Add enough lemon juice to make it a good drizzling consistency. Spoon the icing into a piping bag with a small round tip, a squeezable plastic piping bottle made for icing, or a heavy duty plastic bag and snip off a tiny bit of one corner to make a round hole.
To assemble the cake, lay out your rings in order of size. Start with the largest ring and attach it to your base or plate with a ring of icing. Pipe zig-zags of icing loosely over the top of the ring. I added an extra squeeze of icing all the way around the ring, as added insurance since this wedding cake was so tall. If you are making a regular height cake, you won`t need the extra ring of icing -the zig-zags will be enough to hold the rings together. Place the next smallest ring on top and repeat. Continue until you reach the smallest ring at the top.
<img src="https://images.squarespace-cdn.com/content/v1/53df581ae4b0461efc5879aa/1481141410783-4NQ94ALIT65IOCK998HM/image-asset.jpeg" alt="The cake worked!" />

The cake worked!


