The New Rider cocktail
Sage, ginger, and rye help make this cocktail bright-yet-warm.
When I lived in the lower Mission in San Francisco, I had a friend several blocks away and our halfway point happened to be Beretta. This busy Cal-Ital establishment is frequented for pizza, but we usually just went for the cocktails and my favorite standby was the The New Rider. There's just something about this drink - somehow, it manages to be classic, yet still unique, bright, but cozy and it always seemed to be exactly what I wanted. In light of that, I set about making it at home. With some help from the Beretta bartender and using what we had available we came up with something that if not exactly like The New Rider at Beretta, it definitely is good enough!

3 parts rye
1 part fresh lemon juice
1 part Grand Classico or maraschino
1 part ginger syrup
2 dashes Angostura bitters per cocktail
1 large sage leaf per cocktail
Shake all ingredients except sage with ice. Serve up with a large sage leaf that has been slapped between your palms (this part is very important - get into it!)
Buttermilk Cornbread
A slice of rustic homespun heaven.

Show me a person who doesn't like cornbread and I'll show you someone that can't be trusted.
Cornbread is really a quickbread, in the same category as your banana and zucchini breads, as it is leavened with baking soda rather than yeast. The use of cornmeal in addition to all-purpose flour gives it the pleasantly grainy quality that we all associate with cornbread. This recipe uses buttermilk or yogurt to give it a delicious tart quality that melds well with the rustic corn.
One of the aspects of cornbread that I personally appreciate is that it can be enjoyed as a savory side dish or a sweet snack, with the addition of butter and honey. Pro-tip: Leftover cornbread + honey + butter + coffee the next morning = a great way to wake up. Makes 9-12 pieces.
“Fun recipe adaptations include adding chopped onions, herbs such as parsley or cilantro, and/or fresh corn kernels off of the cob in the summer time.”
1-1/2 cup yellow cornmeal (medium grind preferred)
1 cup all-purpose flour
1 teaspoon baking soda
1 teaspoon salt
2eggs
2 tablespoons brown sugar
1-1/2 cup buttermilk or plain yogurt
8 tablespoons unsalted butter, melted
Preheat oven to 400, butter an 8-inch square baking dish (or loaf, cake pan, or muffin tins).
In a medium bowl, whisk together cornmeal, flour, baking soda, and salt. In a large bowl, mix together the eggs, brown sugar, and yogurt
Add the dry ingredients to the egg mixture and stir to combine. Stir in melted butter. Pour batter into prepared baking dish
Bake on the middle rack of the oven for 20-25 minutes, or until golden-brown and cooked through.
Cool in pan for 10 minutes before cutting into squares to serve.
Almond Olive Oil Cake with Blood Orange
I am a sucker for olive oil in desserts. There's something about the nutty/spiciness that imparts a savory quality I think balances really well with sweet foods. Why not have your cake and eat your healthy fats too with this moist and nutty dessert? Serves 8-12.
- 1 cup almond meal or almond flour
- 1/2 cup all-purpose flour
- 1/4 teaspoon salt
- 1-1/2 teaspoons baking powder
- 2 large eggs
- 3/4 cup granulated sugar
- 1/2 cup olive oil
- 3/4 teaspoon vanilla extract
- 1/4 teaspoon almond extract
- Grated zest of 1/2 a blood orange
- 2 tablespoons blood orange juice
Preheat oven to 350 degrees F. Grease and flour a 9-inch cake pan or springform pan.
Whisk together almond meal, flour, baking powder, and salt.
In another bowl, whisk eggs with sugar. Add olive oil and continue to mix until mixture has thickened, about 1 minute. Incorporate vanilla and almond extracts, zest, and orange juice and whisk to combine.
Add dry ingredients to mixture and whisk to combine.
Pour batter into prepared pan and bake for 25-30 minutes, or until cake is cooked thoroughly and begins to pull away from the sides of the pan.
Remove cake from oven and allow to cool for about 10 minutes before removing from pan. Serve cake on its own; topped with blood orange and creme fraiche or whipped cream; or with coffee or tea.
Harvest Moon cocktail
Not too sweet, apple brandy can't be beat
It's apple season and nothing says happiness like a seasonal beverage to warm you up. I knew I wanted something with apple brandy tonight since a friend recently gave me some bottles made with local Gravensteins so I turned to the PDT Cocktail book and started scanning. Few resources have been so consistently reliable; it has a lot of spirit forward options and the sweetest drinks are never too sweet (I save my candy for dessert). Then I flipped the page to the Harvest Moon. Eureka.
I'm a big fan of Manhattans and Neil Young so this drink did the trick.
Ingredients
1.5 oz. rye whiskey
1 oz. Lillet Blanc
1/2 oz. Green Chartreuse
1/2 oz. apple brandy
3 dashes of Angostura bitters
Stir ingredients with ice and strain into a chilled coupe. Garnish with an orange twist.
Nine Ways to Angel Food
Investigating eggs the cake way.
I teach the food science application lecture and laboratory at UC Berkeley and one of my favorite weeks is the week where we investigate eggs using angel food cake. Not only because I absolutely love angel food and honestly, even the cakes with recipes that are intentionally messed up still taste good to me, but because I think eggs are amazing. They are amazing for their incredible nutrient density (what other food gives you so much protein, vitamins, and minerals in 75 calories?), but also because they perform such a diverse array of culinary tasks, from aroma to structure. Also, I love the fact that, once out of the shell, they are so fragile and sensitive - just a few degrees can create a completely different product. Unfortunately, not everyone shares this fascination with eggs, be it because of the way they smell or unfounded worries about saturated fat (an average of 1 egg per day is completely fine, the benefits outweigh the saturated fat content). Oh well - more for me!
Angel food cake is the perfect vehicle for evaluating the properties of egg white foams. In lab, we conduct this evaluation with nine different variations in addition to the classic “gold standard” recipe.


Variations include (beginning with arrow and moving counter clockwise). Some worked as they were supposed to and others did not. See below for descriptions of what would theoretically happen to the cake, given the variation:
Cake 1, Classic: Gold Standard
Cake 2, Beat a longer time, until Stage IV: Proteins are overcoagulated, leaving cake "brittle" and stiff.
Cake 3, Beat foam a shorter time, until Stage I: Proteins not denatured/coagulated enough, no structure, does not rise.
Cake 4, Increased manipulation/folding of batter: Collapsed air cells that were created in beating the foam. Cake is dense and flat.
Cake 5, baked at a lower temperature for a longer period of time: Does not rise as high because no initial hot air.
Cake 6, cream of tartar omitted: COT is an acid that helps stabilize the proteins and bleaches anthocyanin, a yellow pigment. Cake without COT has a poorer structure, coarser crumb, and yellower color.
Cake 7, use of hand beaters in place of electric: Totally depends on the skill of the chef! May actually lead to a better, more delicate product because hand blenders often have more blades.
Cake 8, only 1/2 the amount of sugar used: Sugar helps prevent the eggs proteins from denaturing, making it take longer to create a foam and leading to finer air cells and a stronger structure. Without sugar, structure is weak and may not be high in volume, crumb is coarser, and cake is bbviously not as sweet. The lack of sugar also leads to more developed gluten because there's no sugar to draw the water away from the gluten to develop it, which means a tougher cake with less sugar.
Cake 9, lemon juice used in place of cream of tartar: Lemony tasting and structure is weaker, less consistent.
Chilled Cucumber and Avocado Soup with Grape Salsa
Richly refreshing.

If you're not familiar with cold soups, this recipe is a great place to get started, as it's incredibly easy and contains crowd-pleasing ingredients. Also, most of us are used to eating cucumber and avocado cold, so it's not too out there to have them in soup form (as opposed to say, vichyssoise, a cold potato soup). The avocado brings a delicious silkiness that's balanced by the cucumber and grape salsa, leaving you satisfied and refreshed on a hot day. Serves 4.
“Soup can be made up to 24 hours in advance - a great way to compliment a dinner party without having to prepare everything last minute. ”
3 medium cucumbers, peeled
1 cup seedless grapes, halved
1 small yellow onion, finely diced
1/4 cup diced parsley
1/4 teaspoon black pepper
2 tablespoons white wine vinegar
1 medium avocado, diced
2 cloves garlic, minced
1/2 cup plain yogurt
1 jalapeño chili, seeded and diced
3/4 teaspoon salt
2 teaspoons olive oil
Remove seeds and pulp from one cucumber. Dice all three cucumbers and set aside.
Toss grapes with onion, parsley, black pepper, and vinegar and refrigerate.
Blend cucumbers, avocado, garlic, yogurt, jalapeño, and salt in food processor or blender until smooth. Chill for at least 20 minutes before serving in chilled bowls topped with a spoonful of grape mixture and drizzle of olive oil. Serve cold.
Suggested pairings: Lamb meatballs and polenta squares, panzanella and grilled salmon
The Makings of a Good Picnic
Complexity is not necessary.

A picnic can take on many forms. It doesn’t require anything complex to make a good picnic, but it does necessitate good food. Here are some of my picnic favorites along with a recipe for pistachio pesto - this is something you can make a batch of, take some for a picnic, and freeze the rest for later. It’s a very refreshing and light pesto recipe (if that’s possible), as there’s no cheese or garlic and is great with radishes as pictured, spread on a sandwich or crostini with goat cheese, topping grilled chicken, tossed into pasta or chopped tomato and fresh corn kernels…there are many possibilities to explore (as always when it comes to food).
Some necessities of a good picnic options (feel free to mix-n-match, throw together into a sandwich, etc.):

Baguette
Cheese(s)
Dried sausage, prosciutto, or smoked salmon
Pickles
Crudité: Radishes, cucumber, carrot, etc.
Dip for crudité such as pistachio pesto or hummus
Deconstructed caprese salad (bring tomato, mozzarella, olive oil/vinegar, basil and put together when you arrive)
Fresh fruit
Potato salad
Curried chicken salad (the curry-ing is not necessary, but it’s my favorite way to have it)
Rose wine, white wine, or beer
Cutting board
Knife
Mason jars for wine
A few napkins or paper towels
Forks if needed
Picnic blanket
A pleasant environment (doesn’t have to be perfect, just pleasant)
Pistachio Pesto (unintentionally vegan)

1 cup raw pistachios, chopped
1 bunch basil, chopped (I’ve also made it with sage and it turned out well)
1/3 cup olive oil
Juice from 1/2 lemon
1 teaspoon salt
To Prepare:
In a food processor, blend the pistachio with basil until coarsely ground. Add olive oil until a paste is formed, then blend in lemon juice and salt. Water, olive oil, or lemon juice (depending on which direction you want to take the flavor) may be added until your desired texture is reached.
House Brandied Cherries
What life can be like.

Brandied Cherries - If life is a bowl of cherries, I hope I have the opportunity to brandy some of mine. Every year around June or July, I can't help but make a jar or two of these preserved morsels. Although fresh cherries are hard to pass up, it's worth it a few months later when you have a rich taste of summer for your cocktails.
Once brandied, the cherries are good for 6 months in the refrigerator, but don't expect them to last that long. After all, there’s always a manhattan to make for someone or ice cream that needs a unique and boozy topping. Below recipe makes about 2 pint jars.
About 1lb fresh cherries, washed, stems removed (you can also remove pits, but I find they have better texture/flavor with pits intact)
1/2 cup water
1/2 cup sugar
2 tsp fresh lemon juice
1/2 vanilla bean pod
1 to 1-1/2 cups brandy
Peppercorn or other spices (optional)

Heat water, sugar, lemon juice and vanilla bean (scrapings and pod) until simmering. Add cherries and simmer 3 minutes.
Remove from heat, add 1 cup brandy and allow to cool for 5 minutes.
Transfer to clean jars, top with remaining brandy to cover cherries (if needed), and place in refrigerator uncovered until completely cool. Once cool, top with jar lids. Cherries may be eaten after 24 hours and will keep about 4-6 months refrigerated.
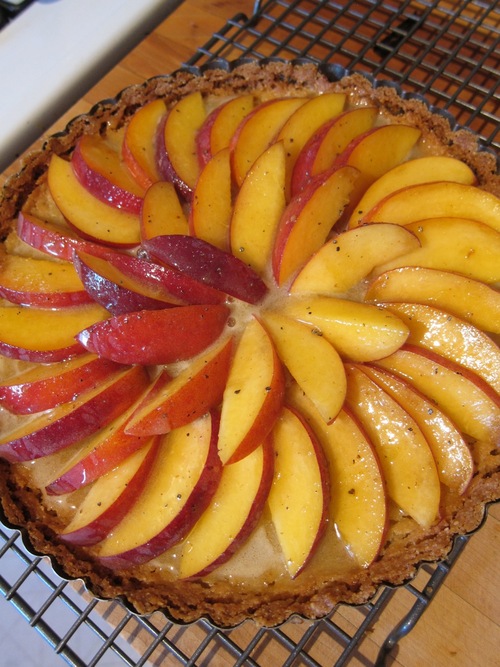
Cardamom and Brown Butter Nectarine Tart
Worth it for the smell alone.
“Caution: Production of this dessert may lead to a decrease in productivity related to ridiculously delicious kitchen smells as evidenced by inability to focus on anything else.”
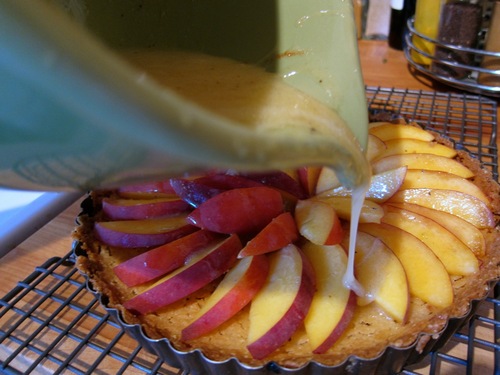
I’m a sucker for cardamom, browned butter, and stone fruit, so it’s no surprise that this dessert really does it for me. Usually I make crusts with cold diced butter for better flakiness, but the melted butter in this tart crust makes for a very crunchy, more caramelized flavor and texture that’s great with the fruit filling. Using half almond meal in the crust produces great flavor and texture, but the crust falls apart a bit more easily. Amp up the cardamom amount for more intensely cardamommy flavor if you desire.
“Try making the crust with 1/2 cup almond meal and 1/2 cup plus 1 tablespoon all purpose flour for a deliciously nutty twist. ”
7 tablespoons unsalted butter, melted plus 1/4 cup (1/2 stick) unsalted butter, diced
1/3 cup plus 1/4 cup sugar
1/4 teaspoon vanilla extract
1 cup plus 3 tablespoons all purpose flour
1/8 teaspoon plus one pinch salt
1 large egg
10 cardamom pods, seeds removed and ground with mortar and pestle (green pods are the freshest and most flavorful)
3 large nectarines, sliced
Preheat oven to 375 degrees F.
Mix melted butter, 1/3 cup sugar, and vanilla. Add 1 cup plus 1 tablespoon flour and 1/8 teaspoon salt and stir until incorporated.
Transfer dough to a 9” tart pan (preferably with removable bottom). Using fingertips, press dough evenly onto sides and bottom of pan. (I use a 1/3 cup measurer to smooth the crust out)
Bake crust until golden, about 18 minutes (crust will puff slightly while baking). Transfer crust to rack and cool in pan.
Whisk together remaining 1/4 cup sugar, egg, and pinch of salt. Add 2 tablespoons flour and whisk until smooth.
Cook remaining 1/4 cup butter and ground cardamom in heavy small saucepan over medium heat until deep nutty brown (do not burn), stirring often, about 6 minutes.
Immediately pour browned butter into glass measuring cup.
Gradually whisk browned butter into sugar-egg mixture, until well blended.
Arrange fruit in concentric circles in bottom of cooled crust. Carefully pour browned butter mixture evenly over the top and bake until filling is golden and tester inserted into center comes out clean, about 30-40 minutes.
Serve at room temperature or cold, with or without a creamy side such as ice cream, creme fraîche, or whipped cream.
Foraged Herbes de Provence
Sometimes, a blend of herbs is used so often that it is considered its own flavor. Herbes de Provence is such a mixture, typically including dried rosemary, lavender, and thyme, but it may also have other herbs common in the south of France such as oregano or marjoram.

What was the impetus for this combination and why do the flavors combine so well? Likely, not much thought went into what is now classic, but rather it was a “use what you have” scenario. One theory for successfully combining ingredients is that if ingredients share flavor compounds, which the Herbes de Provence ingredients, they will compliment each other. Although this hypothesis makes sense and is somewhat calming, as it gives us a succinct way to understand flavor combinations, it only really works in Western cuisine. In Eastern Asian cuisine on the other hand, recipes frequently avoid overlapping flavor compounds. The scientist in my wishes the theory was consistent for all foods, but the artist in me is inspired by the fact that opposites can attract.
This is more of a guide than a recipe, as it can be adapted to suit your needs and ingredient availability. We foraged our herbs on a hike in France, but that doesn’t mean you can't forage or purchase the same herbs from the U.S.! I highly recommended drying the herbs yourself, as dried herbs are often sitting on the shelf for very long periods of time and can be flavorless.
3 parts fresh rosemary, on the stem
3 parts fresh thyme, on the stem
1 part lavender, on the stem
Other Provençal herbs, as desired (marjoram, oregano, savory, etc.)
Allow herbs to dry by setting them apart from each other near sunlight and/or fresh air for 2-3 days. This may take longer if in a humid and/or cold climate.
Once herbs are completely dry, remove leaves from stems by running finger down spine into a bowl.

Crush herbs using a food processor or mortar and pestle to desired texture. I prefer herbs to be well, but not finely, crushed. Enjoy for up to a year.
Suggested uses: Herb-rolled chèvre (fresh or hot as in Chèvre Chaud salad), meat-rub, in olive oil for bread dipping, topping grilled vegetables.
Homemade Nocino
Italian green walnut liqueur.
Nocino is an Italian liqueur made from fresh green walnuts that are cured in a sugar and alcohol solution. I first discovered this "black gold" while dining at Flour + Water in San Francisco and have been making it each season for the past three years since. The amazing think about nocino is by adding incredibly tannic walnuts, clear sugary alcohol is magically transformed into a thick, luscious, nearly black liqueur.
Making nocino requires a few steps and a lot of patience, but the results are worth it! I love it on it's own after dinner, but have also used it in in cocktails and to top ice cream (with crushed toasted walnuts as well, of course).

The green walnuts you're looking for are only available in May/June (traditionally harvested on June 24th, the day of St.John the Baptist, by virgins) and quite hard to come by. The first time that I made nocino I was able to find some through the Capay Valley Farms CSA I started up at work, but the last two years I went ahead and foraged them.
The most recent batch that we made was using walnuts picked in September, which is much later than desired (oops - too many food projects!) The walnuts were very hard to cut through because the shell had begun to harden and we're not sure how this is going to affect the flavor of the nocino, but we went ahead and made it anyway. We'll see in 6 months - if it's anything like the last couple of batches, it will be more than drinkable! As the recipe is written it makes about 2 liters of nocino, but the recipe can be multiplied as necessary for the amount of walnuts that you have on hand. Remember that green walnuts stain - if you're concerned with having inky looking fingers for a week, be sure to wear gloves.
“Walnut trees grow in hot, dry climates. Look for them if you’re camping in the South Bay - that’s where we found them, but we’re not going to reveal our source!”
“I like to keep my nocino pure, in order to be able to taste the walnutty goodness, but have tried vanilla bean and it was a nice addition, especially if you’re planning on using nocino for ice cream topping.”
4-1/4 cups granulate sugar
1.75 liters of Everclear (Vodka also works, but not as well)
50 green walnuts
Other ingredients- citrus peel, cinnamon sticks, pepper, vanilla bean, etc.
Wash 4 half-gallon mason jars well with hot soapy water, rinse, and air dry.
While jars are drying, quarter walnuts then divide into jars with 1/4 each of the Everclear and sugar. Screw the lids tightly onto jars and shake vigorously. Over time the nocino liquid will darken. It happens quite fast and it's pretty impressive! Allow jars to sit for 6 weeks in a cool dark place, shaking occasionally to dissolve sugar.
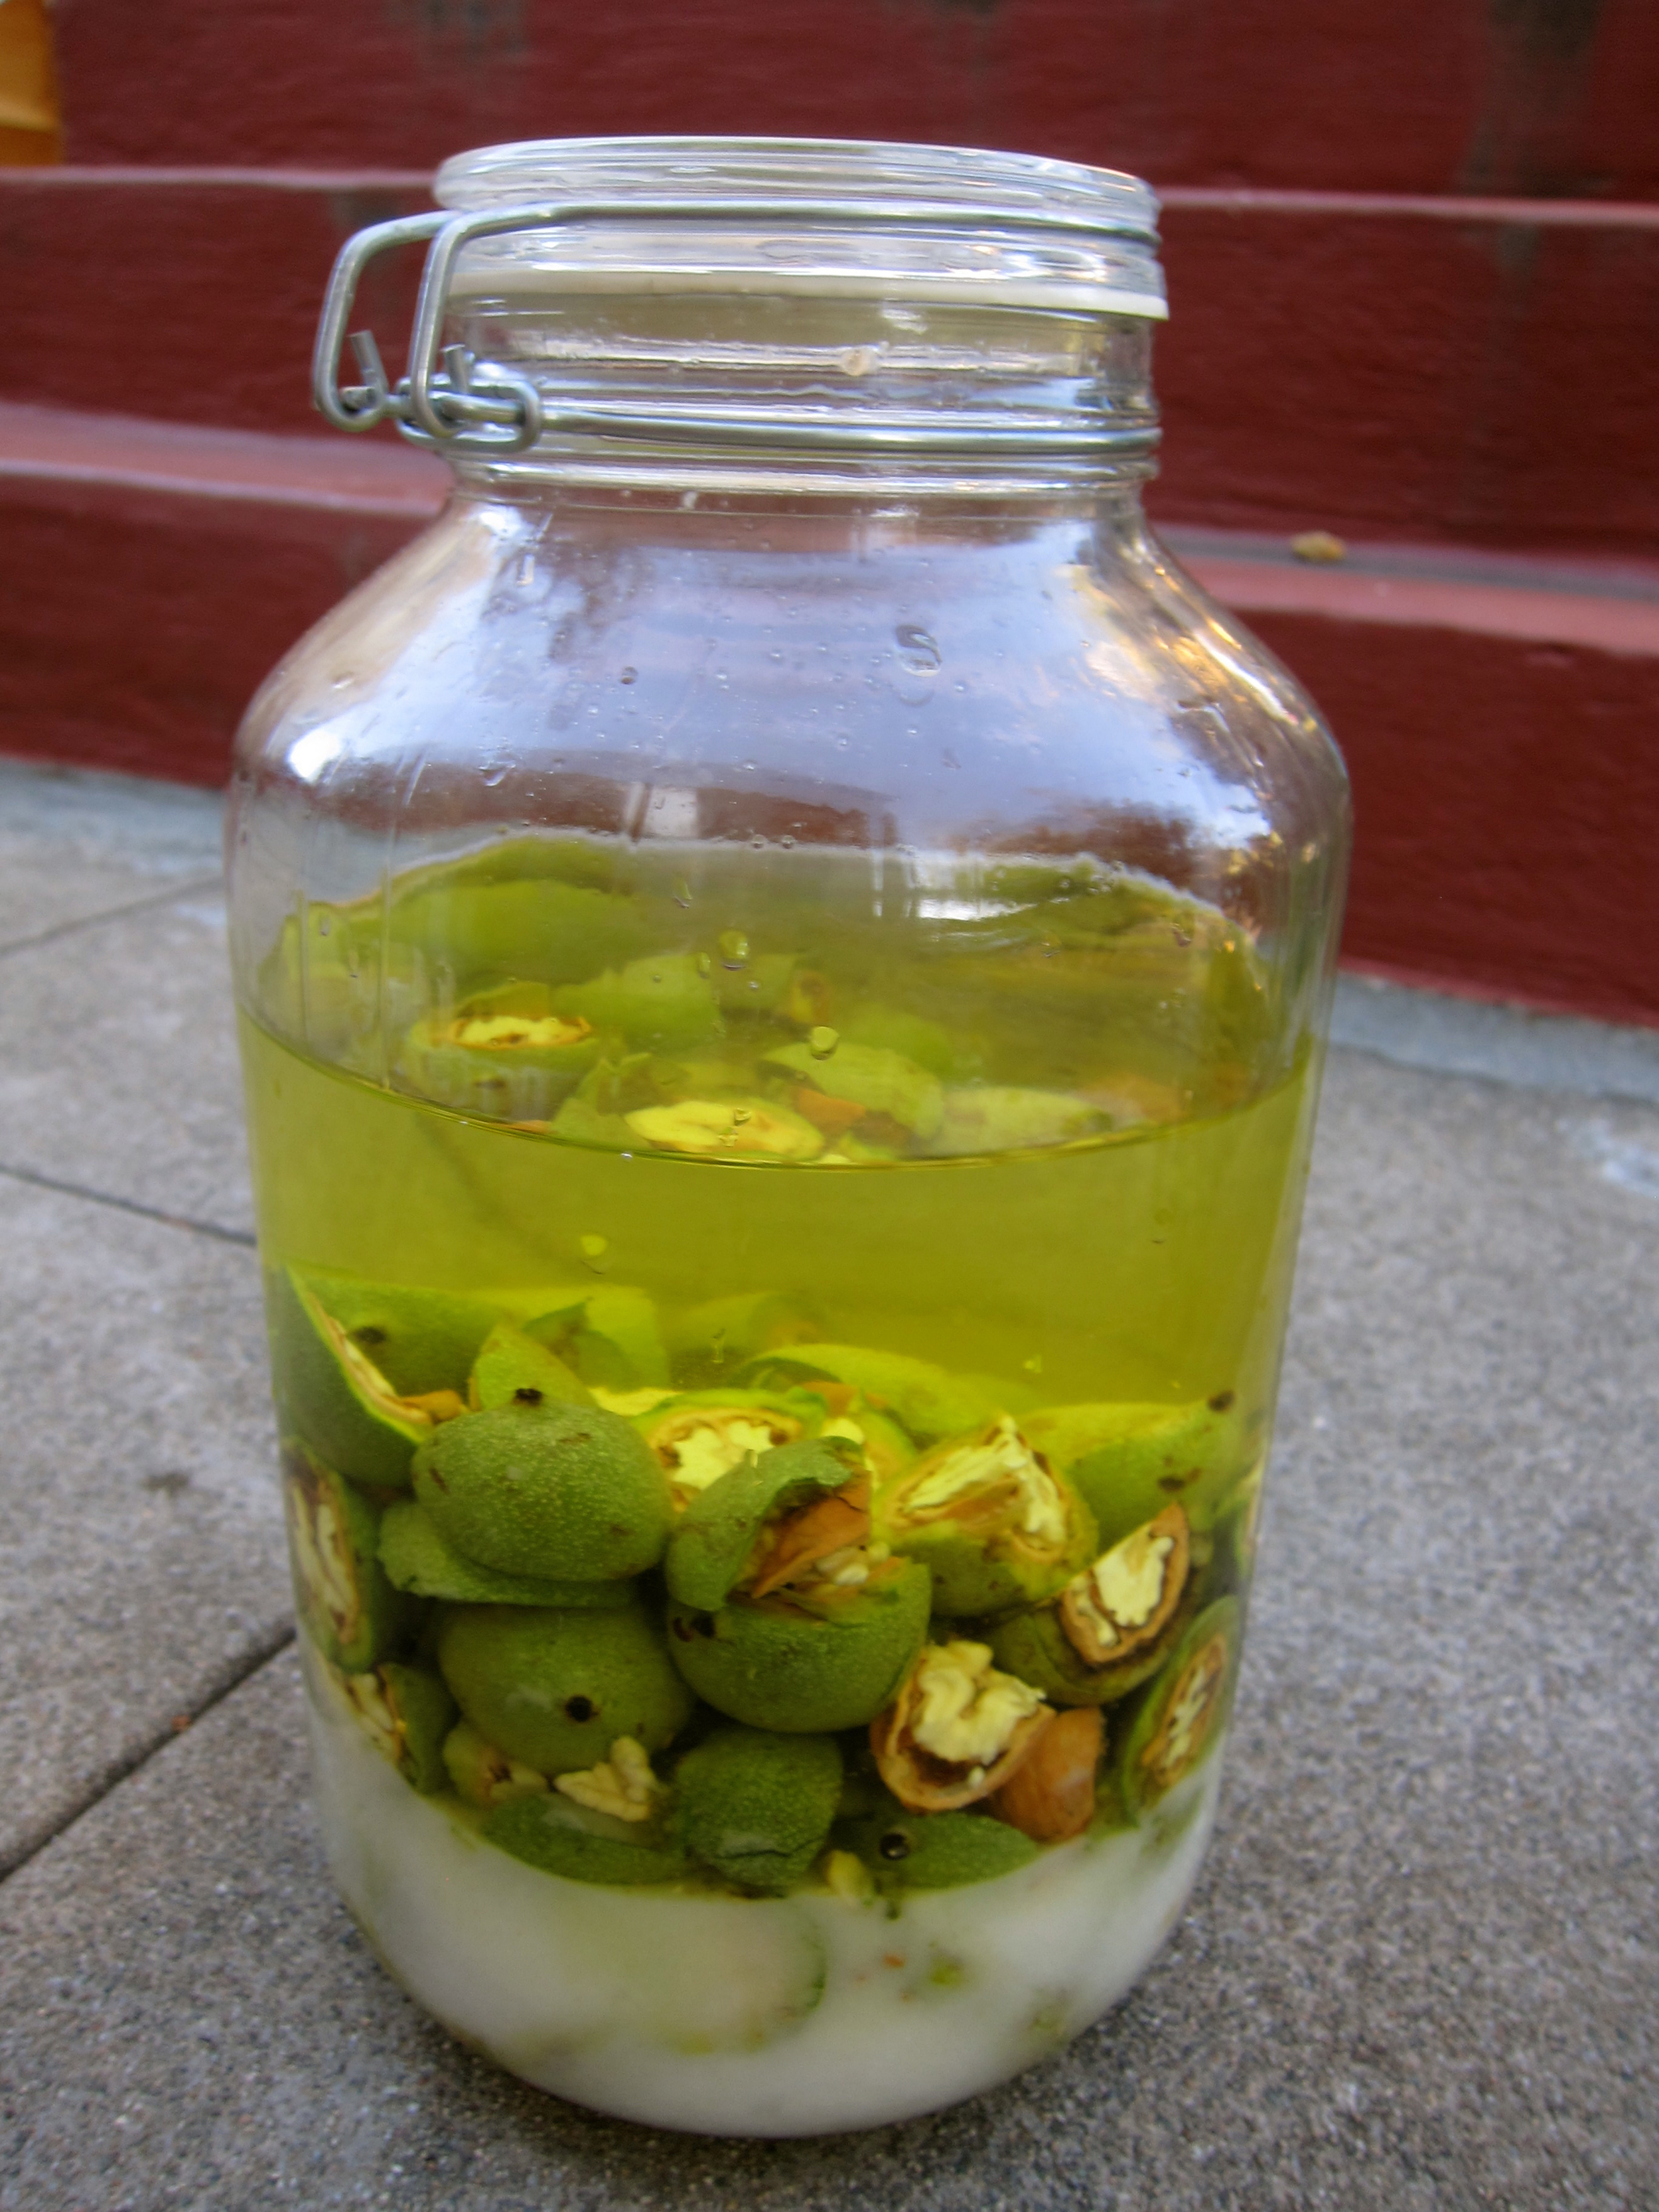
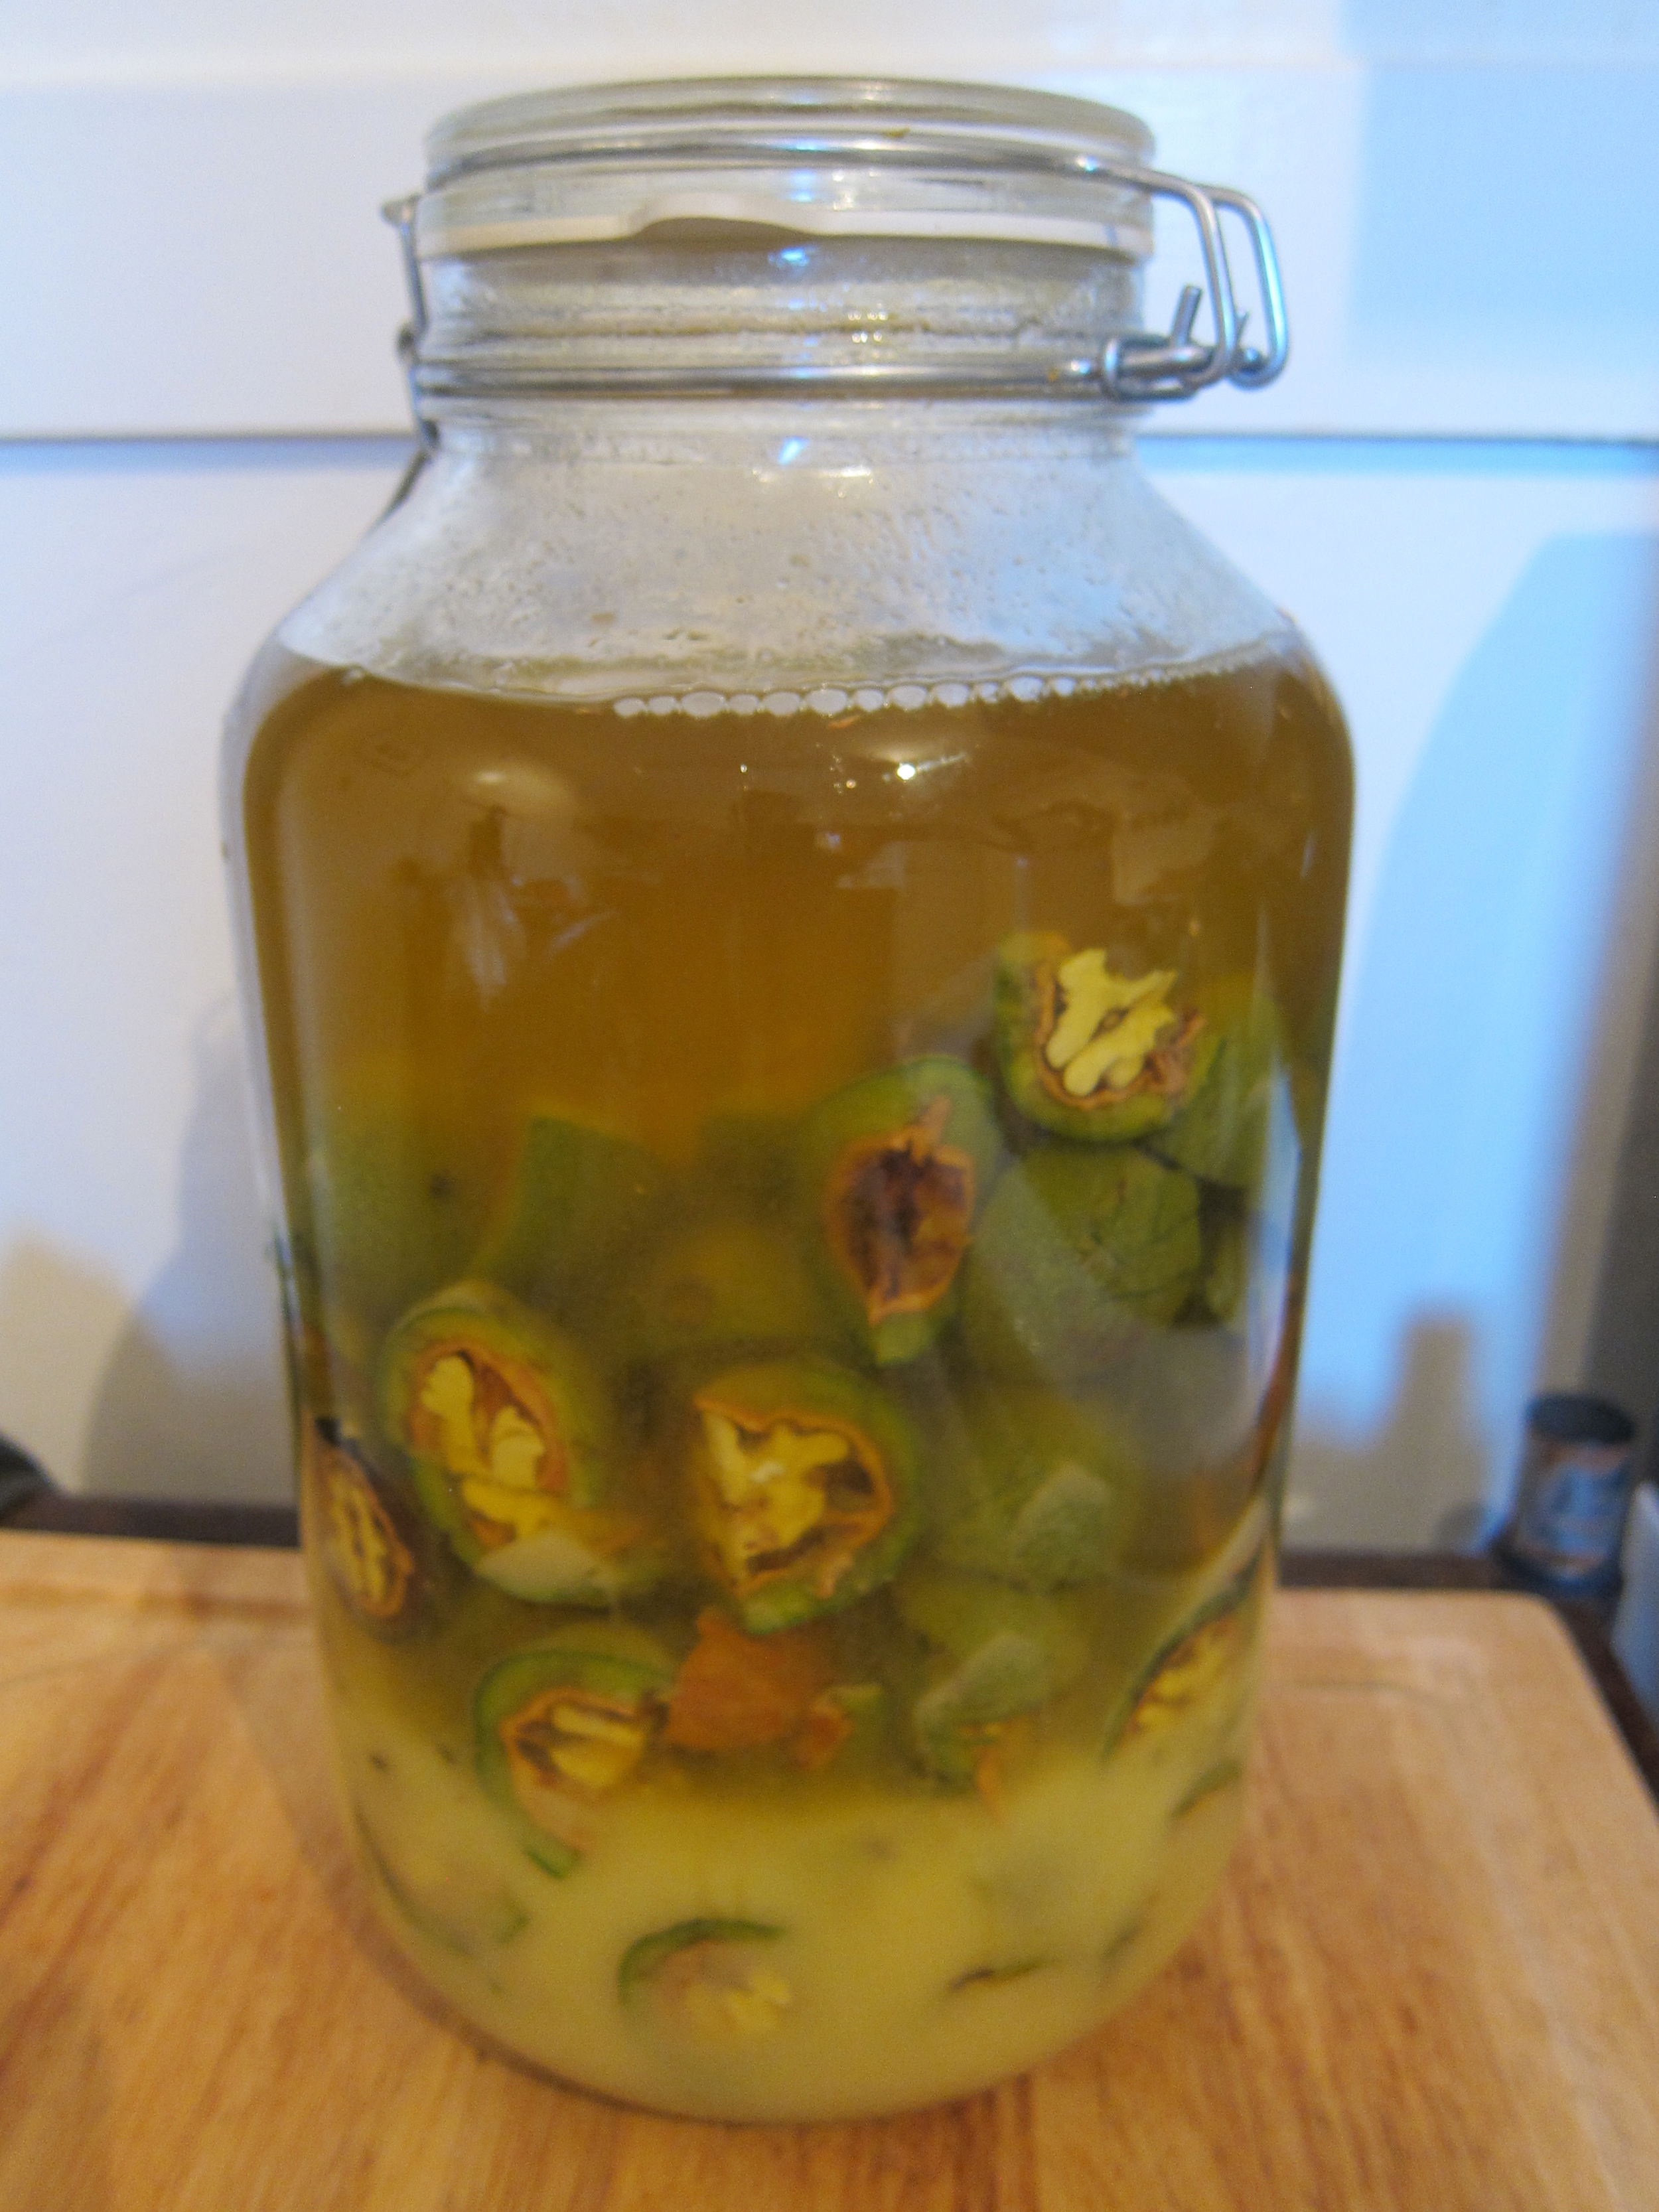
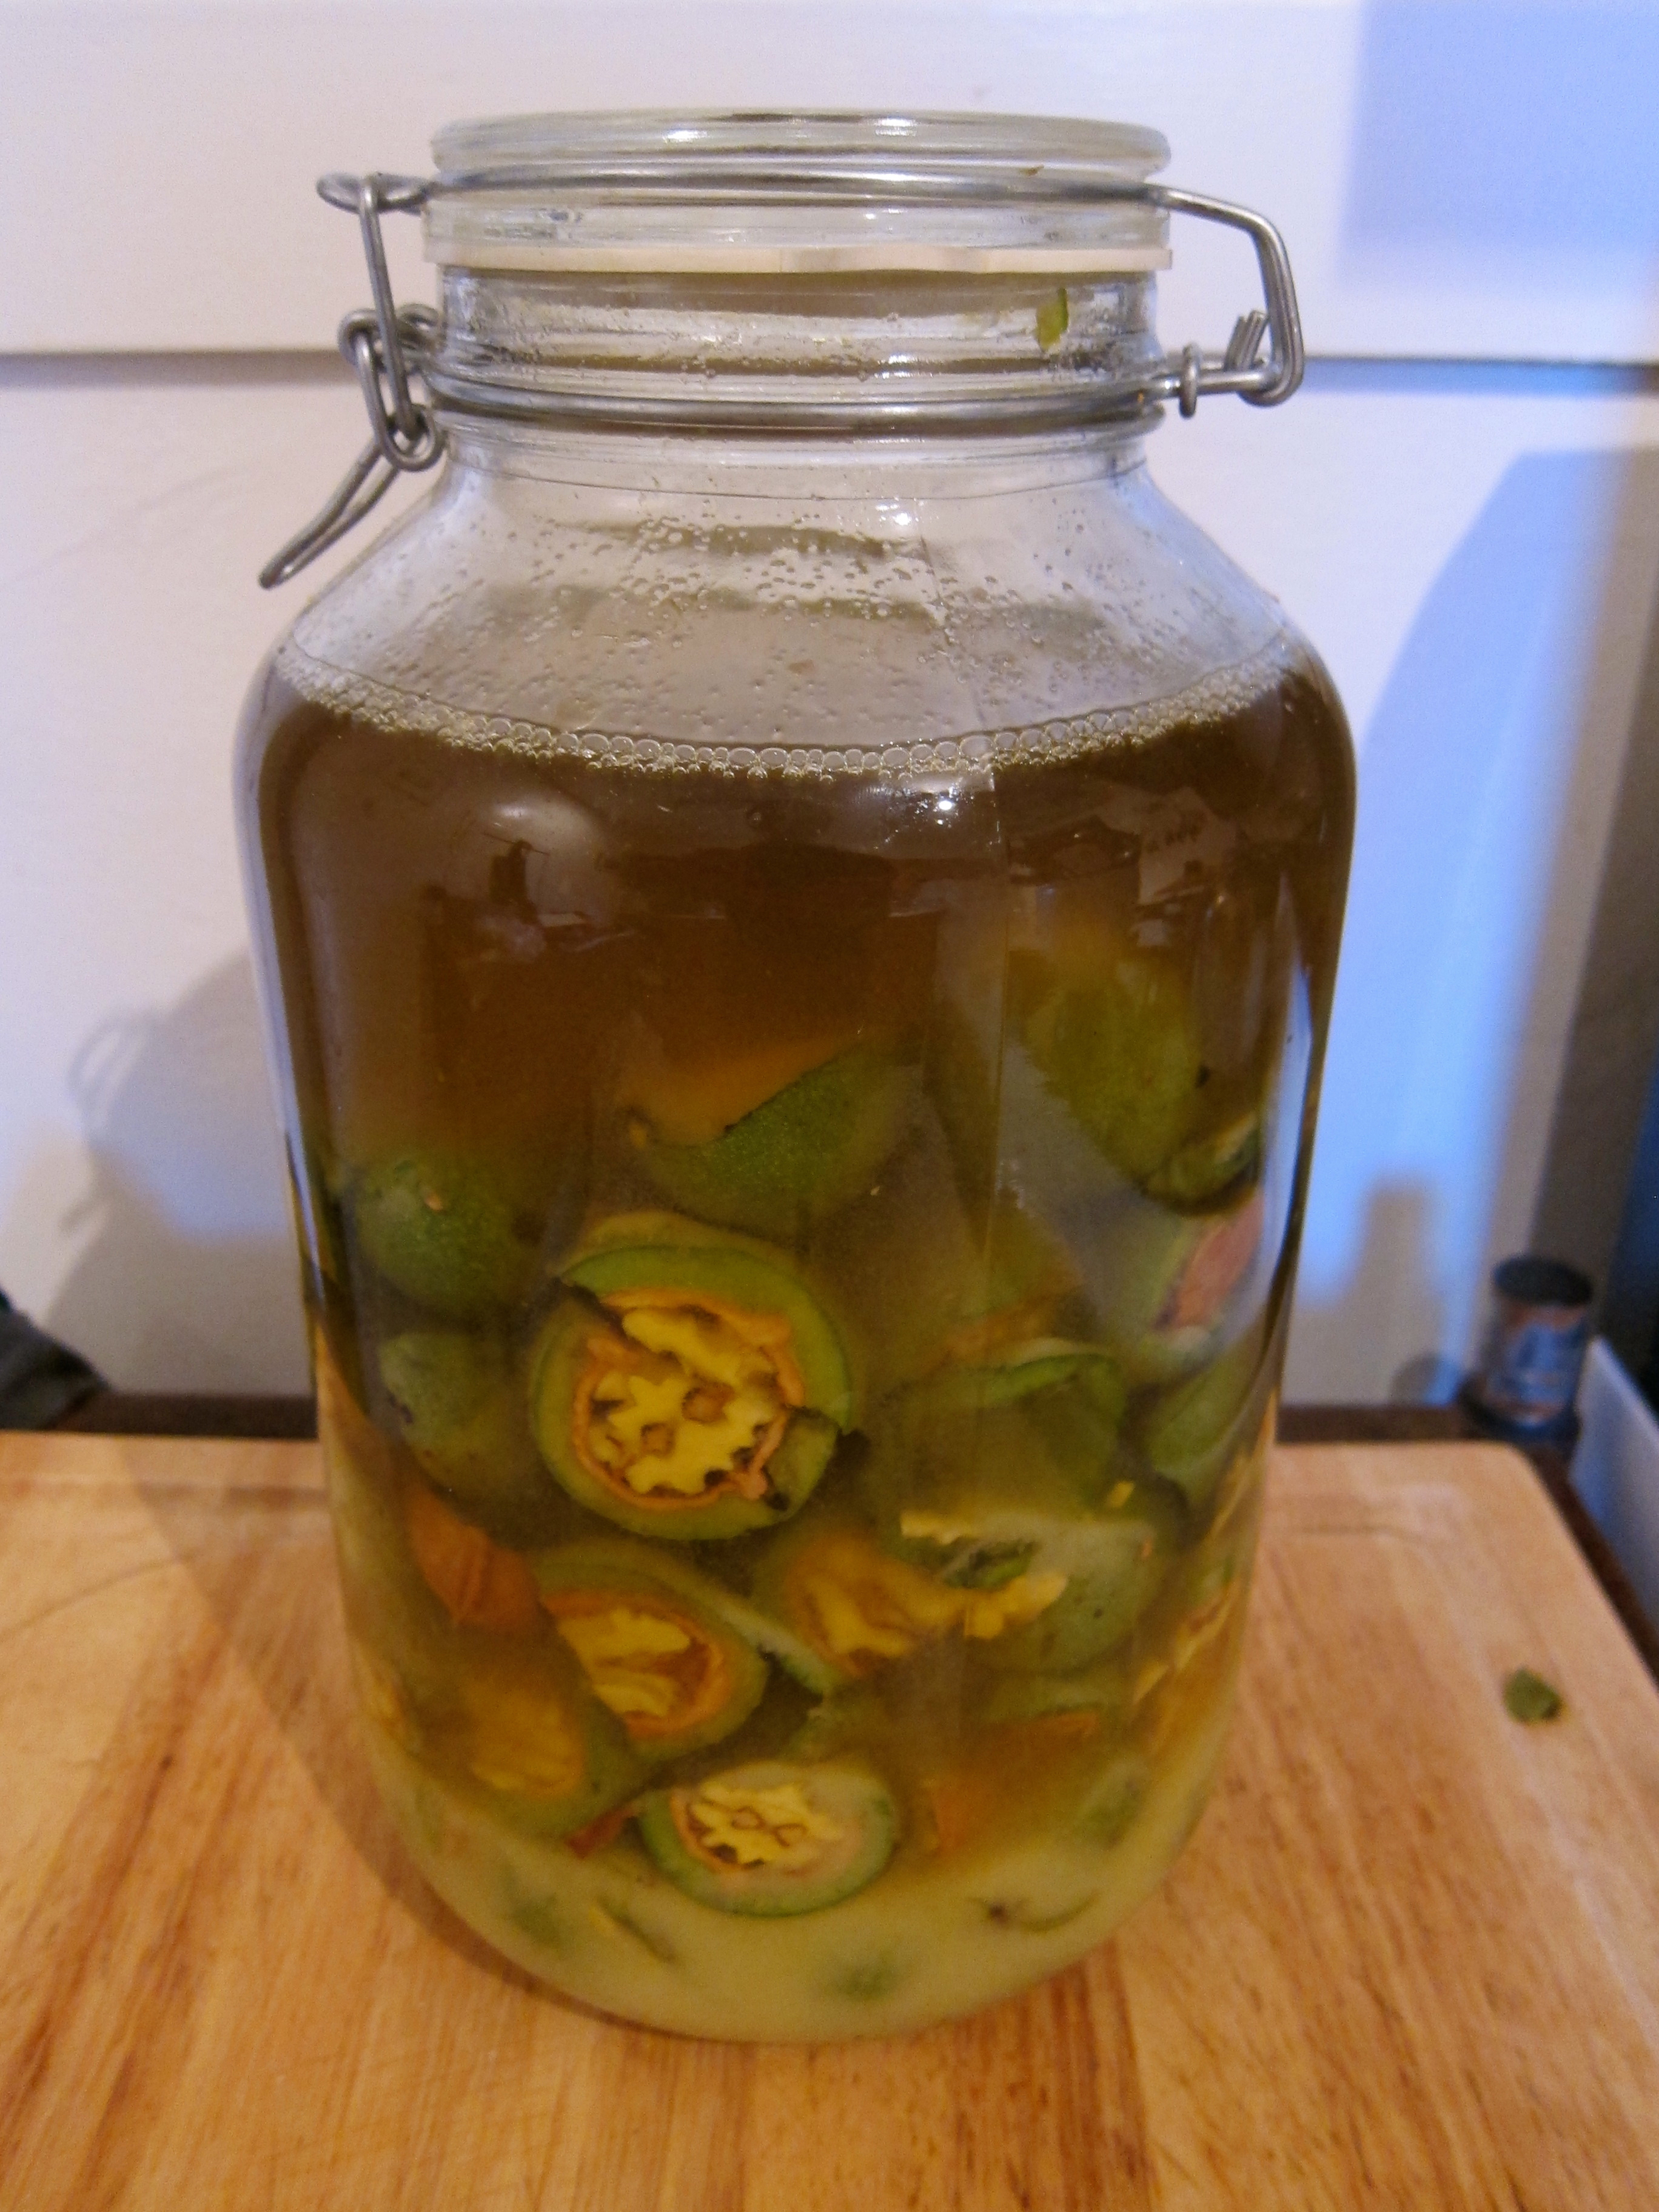
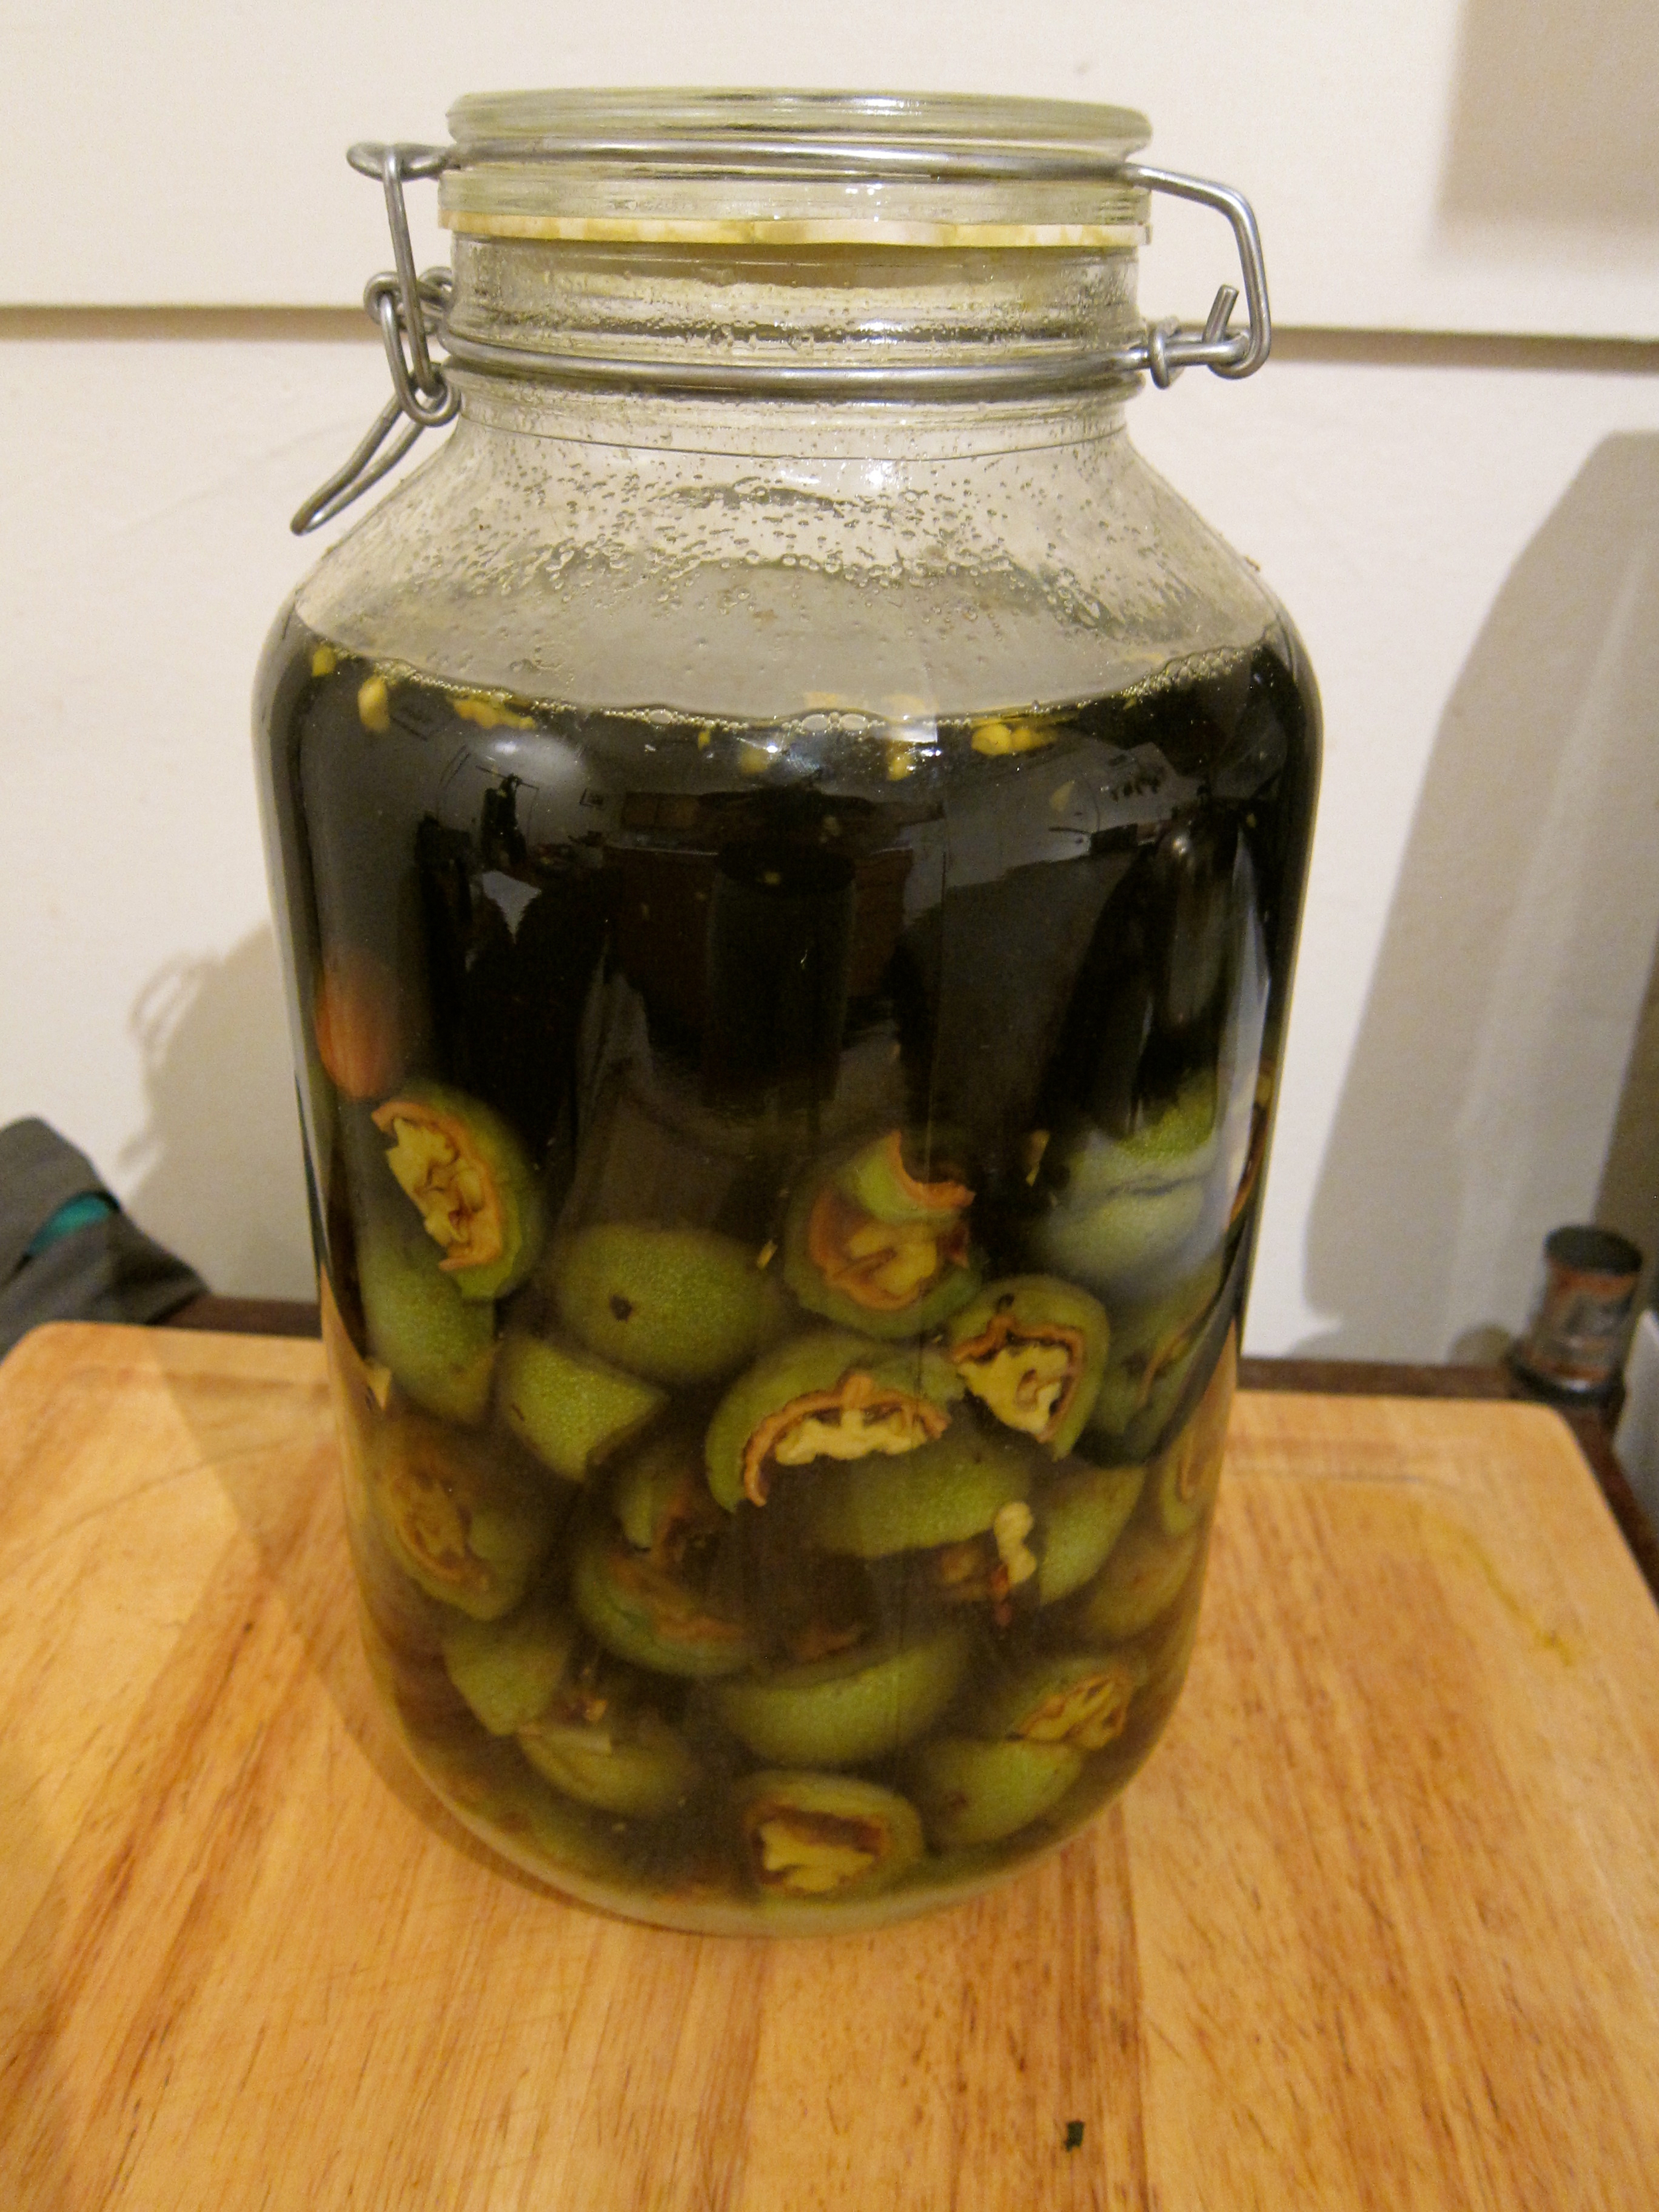
Using a cheesecloth or fine mesh strainer, strain the liquid and discard the walnuts. Add any other ingredients of your choosing (vanilla bean, orange peel, etc.) and pour nocino from the jars into smaller bottles. Close bottles and let the liqueur marinate for another 6 months to 1 year. You can taste the nocino as it rests to learn about the flavor changes and begin drinking once it's to your liking.

If walnuts are harvested too late in the season, the shells will have started to harden.
Forage Heist: Copenhagen Style
Unfortunately, I was not able to venture out on the original adventure, but I did get to appreciate some of the plunder and I learned what to look for, so that I was able to forage these goods myself on another day.

Lepidium latifolium/Dittander: Also known as “pepperwort” or peppergrass, the leaves are very spicy in a deliciously wasabi, make-the-upper-nasal-tract-sting kind of way. Very strong - a little goes a long way and I like to use it to give brightness to richer fare, such as silky cured salmon or egg salad smørrebrod.

Clove root/wood Aven: The roots of the Geum urbanum plant with a musky, clove aroma and flavor. I would love to find this one in the Bay Area!

Rosa rugosa: Common name “beach rose”, very strong rose water smell as opposed to the softer, perfumey and often too ladylike smell of conventional roses. This vibrant flower can be found on most coastlines (including Northern California!) and adds a beautiful floral aroma to foods and beverages, such as the Danish Summer Cocktail.
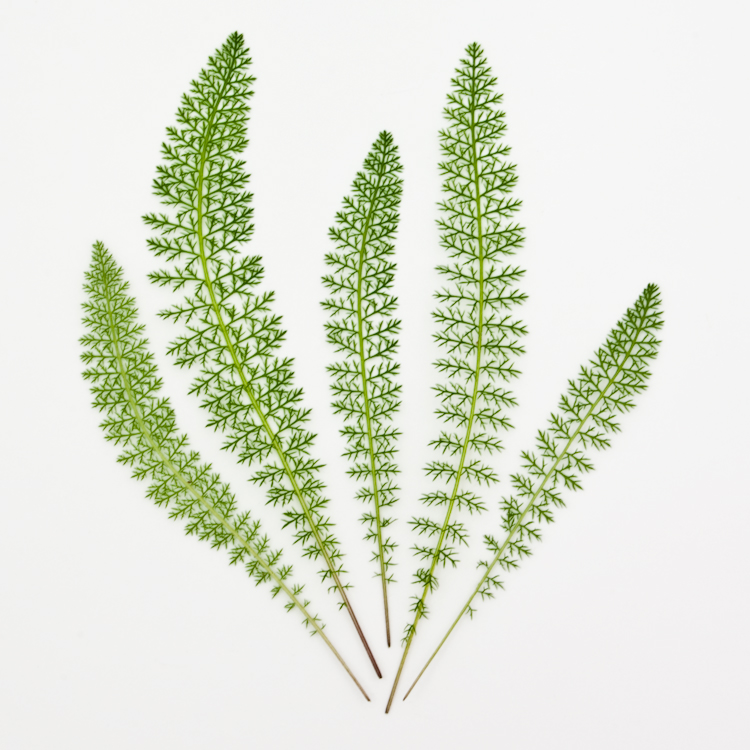
Image courtesy of http://www.christinecotephoto.com/Images/Yarrow.html
Achillea millefolium: Common name “yarrow”, this lacey looking plant is more commonly used for medicinal purposes, such as bug bites and wound healing, but also has a nice subtle vegetal taste and is good as you’d use most greens. Can be eaten fresh (preferably when smaller, cut up small and use in salads) or cooked.
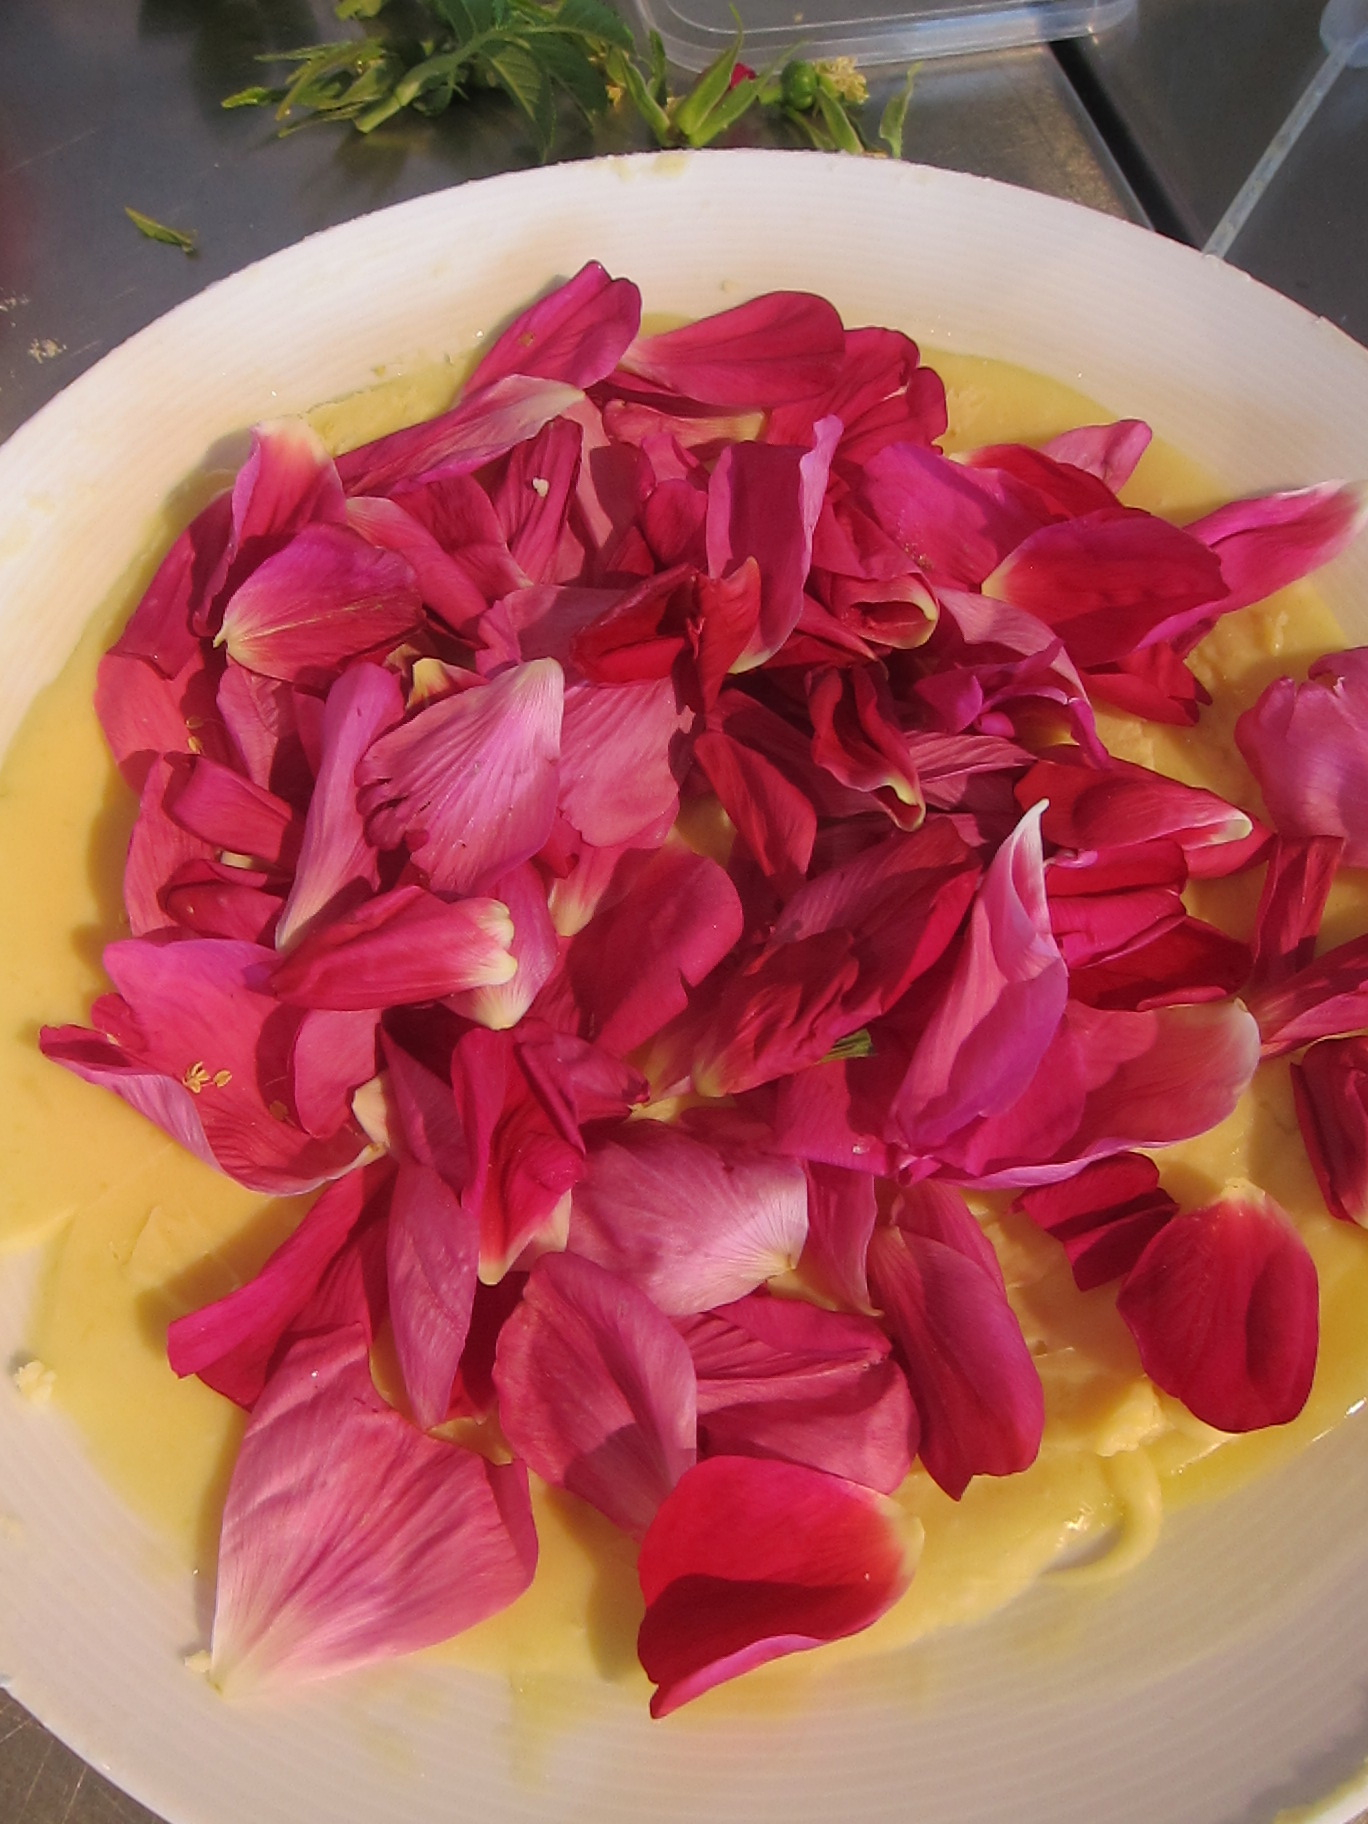
Beach rose enfleurage: Solid, odorless fat used to capture the floral fragrance.
Processing Nopales
Cacti can be sticky business.
Nopales can be sticky - it’s true. But, when your front yard hands them to you, what choice do you have but to work with them?

The same succulent plant in my yard provides a plethora of prickly pear (tuna) that I have experimented with many times, but this was my first foray into the flat leaved nopales. The processing was leagues easier than their prickly fruit counterpart, which was refreshing and less painful, but they did have a pretty distinct sliminess that you have to get used to. We also tried pickling them, which helped with the sliminess a bit and both the grilled or pickled nopales were great in tacos and on chili. Also delicious in fried in cornmeal batter with smoked paprika!

To Process:
Find the youngest, most soft and plump nopale, as it will make your life easier and be much tastier.
Remove spines with a knife.
Grill on high heat until blistering on both sides.
Slice and eat with tacos or atop other such dishes.


Fava bean, pickled fennel bulb, and goat cheese crostini
Fresh, silky representations of springtime
I am always pleasantly surprised when fava beans pop up at the farmers’ market each spring - not only because they’re even more delicious at the beginning of the season, but because it proves that California actually has seasons (go us!)
“Alternatively, you can actually skip the entire process of shelling by roasting the whole pod with some olive oil and sea salt, and eat every bit of the beans and surrounding pod. This is also quite delicious, but a different, richer flavor with less of the springtime freshness in just the beans. ”
Fava beans are fresh, silky representations of springtime, but they can be a pain to process. Not only do most recipes call for removing the beans from the larger pod, but also for removing the beans from their thin surrounding shell. One of those tasks that’s fun at first, but increasingly painful as time moves on and pod after pod is processed.
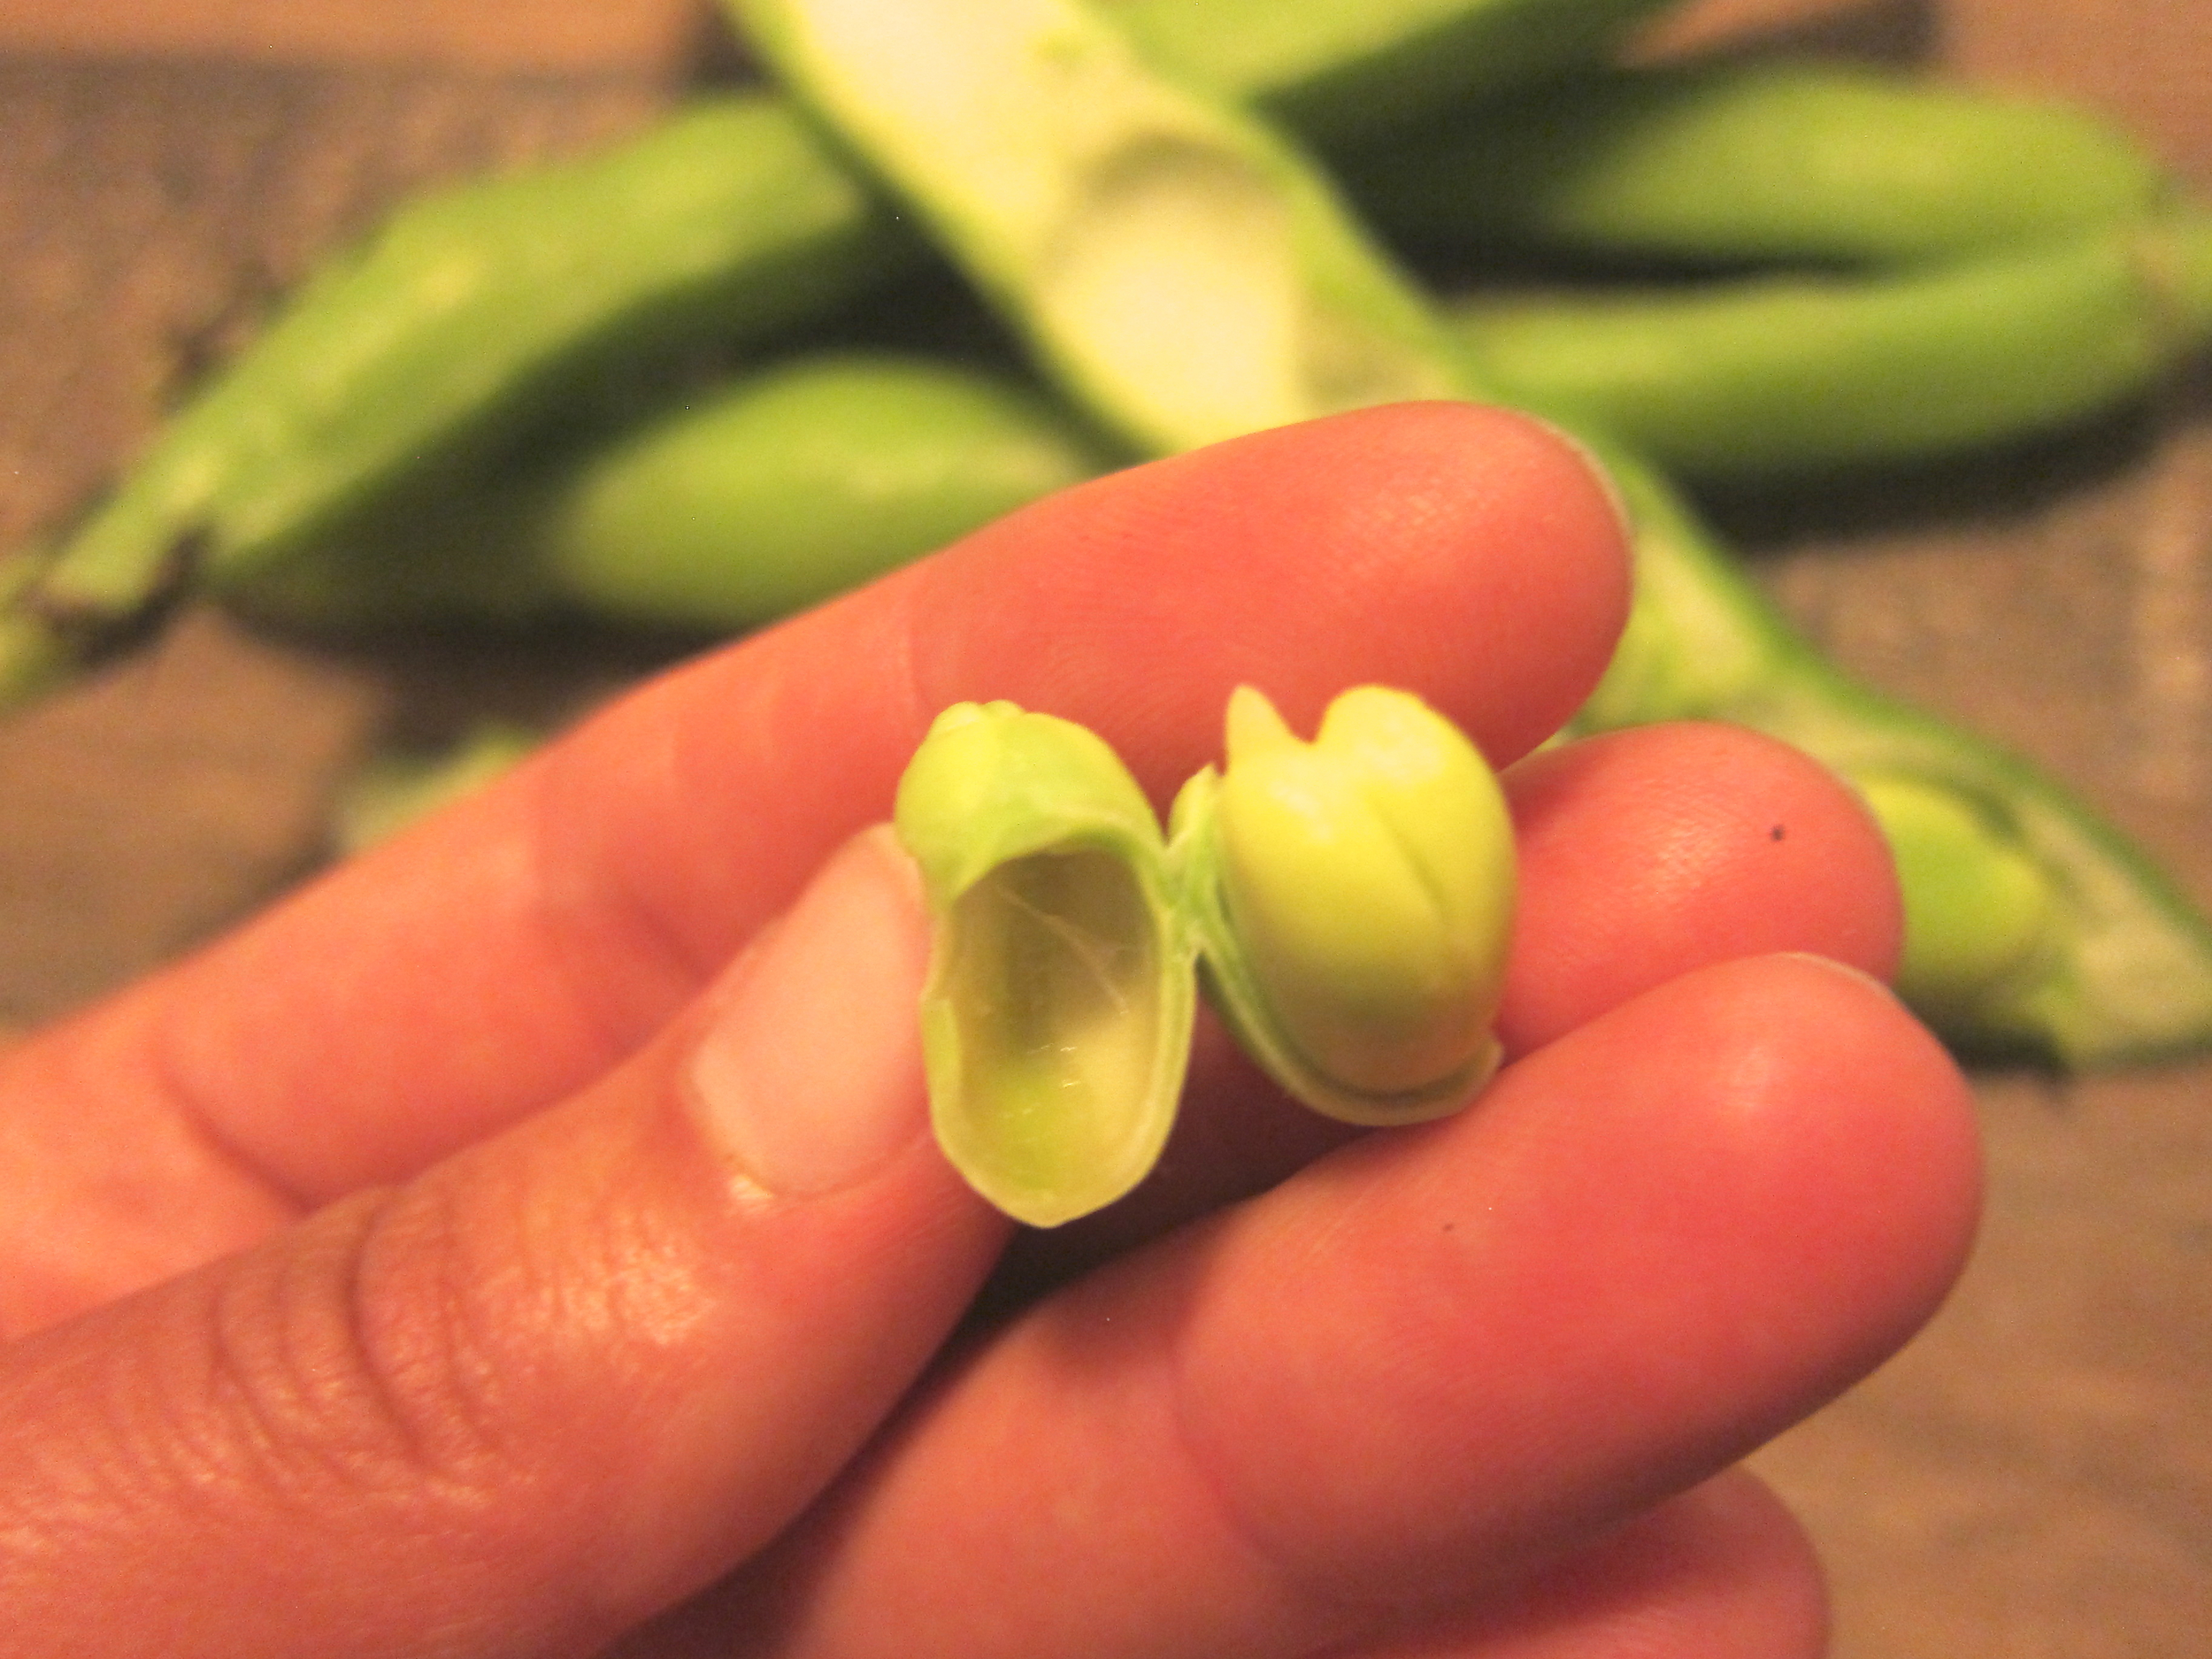
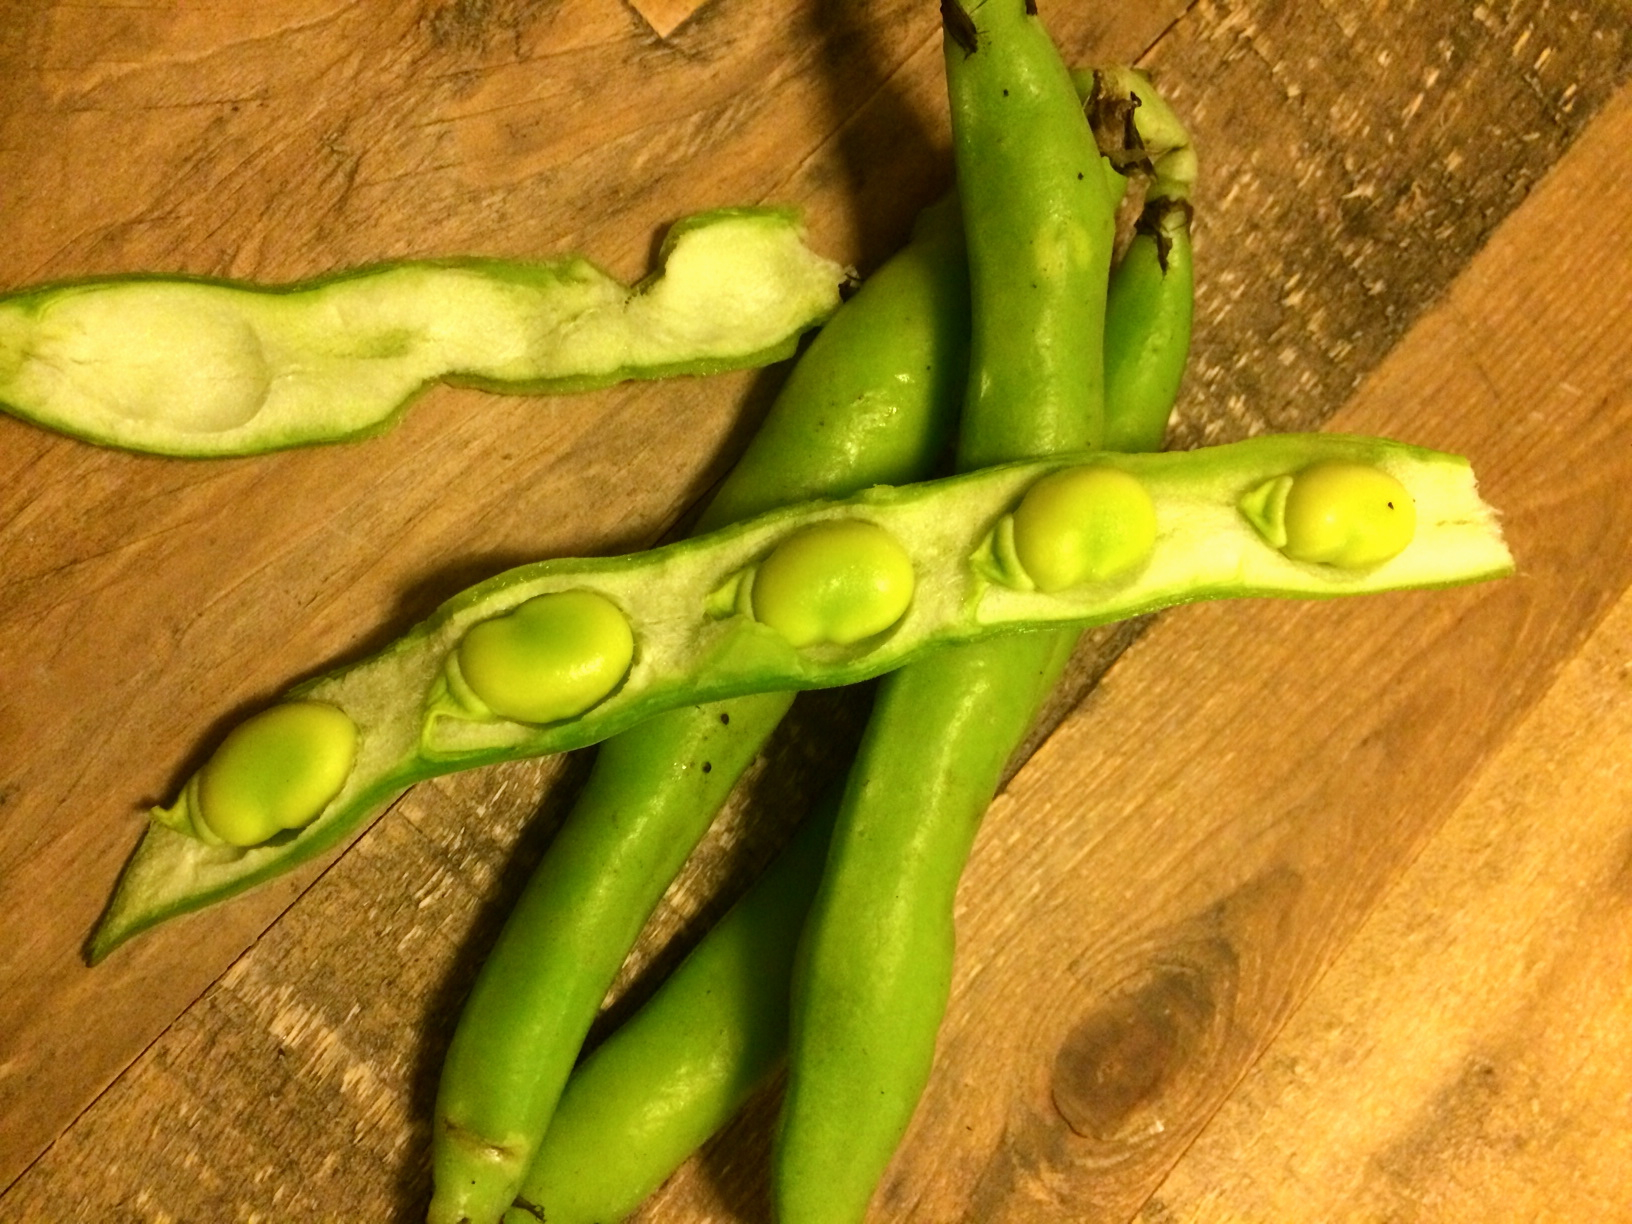
“You don’t know fava - or maybe you do?”
Fortunately, the favas at the beginning of the season are so tender that you don’t have to cook the beans after removing them from the shell and they’re still oh-so-tender, which is what is called for in this recipe.
Fava beans, removed from pod and surrounding shells peeled away
Pickled* or fresh, thinly sliced fennel bulb
Lemon zest
Cumin powder
Olive oil
Toasted, thinly sliced baguette
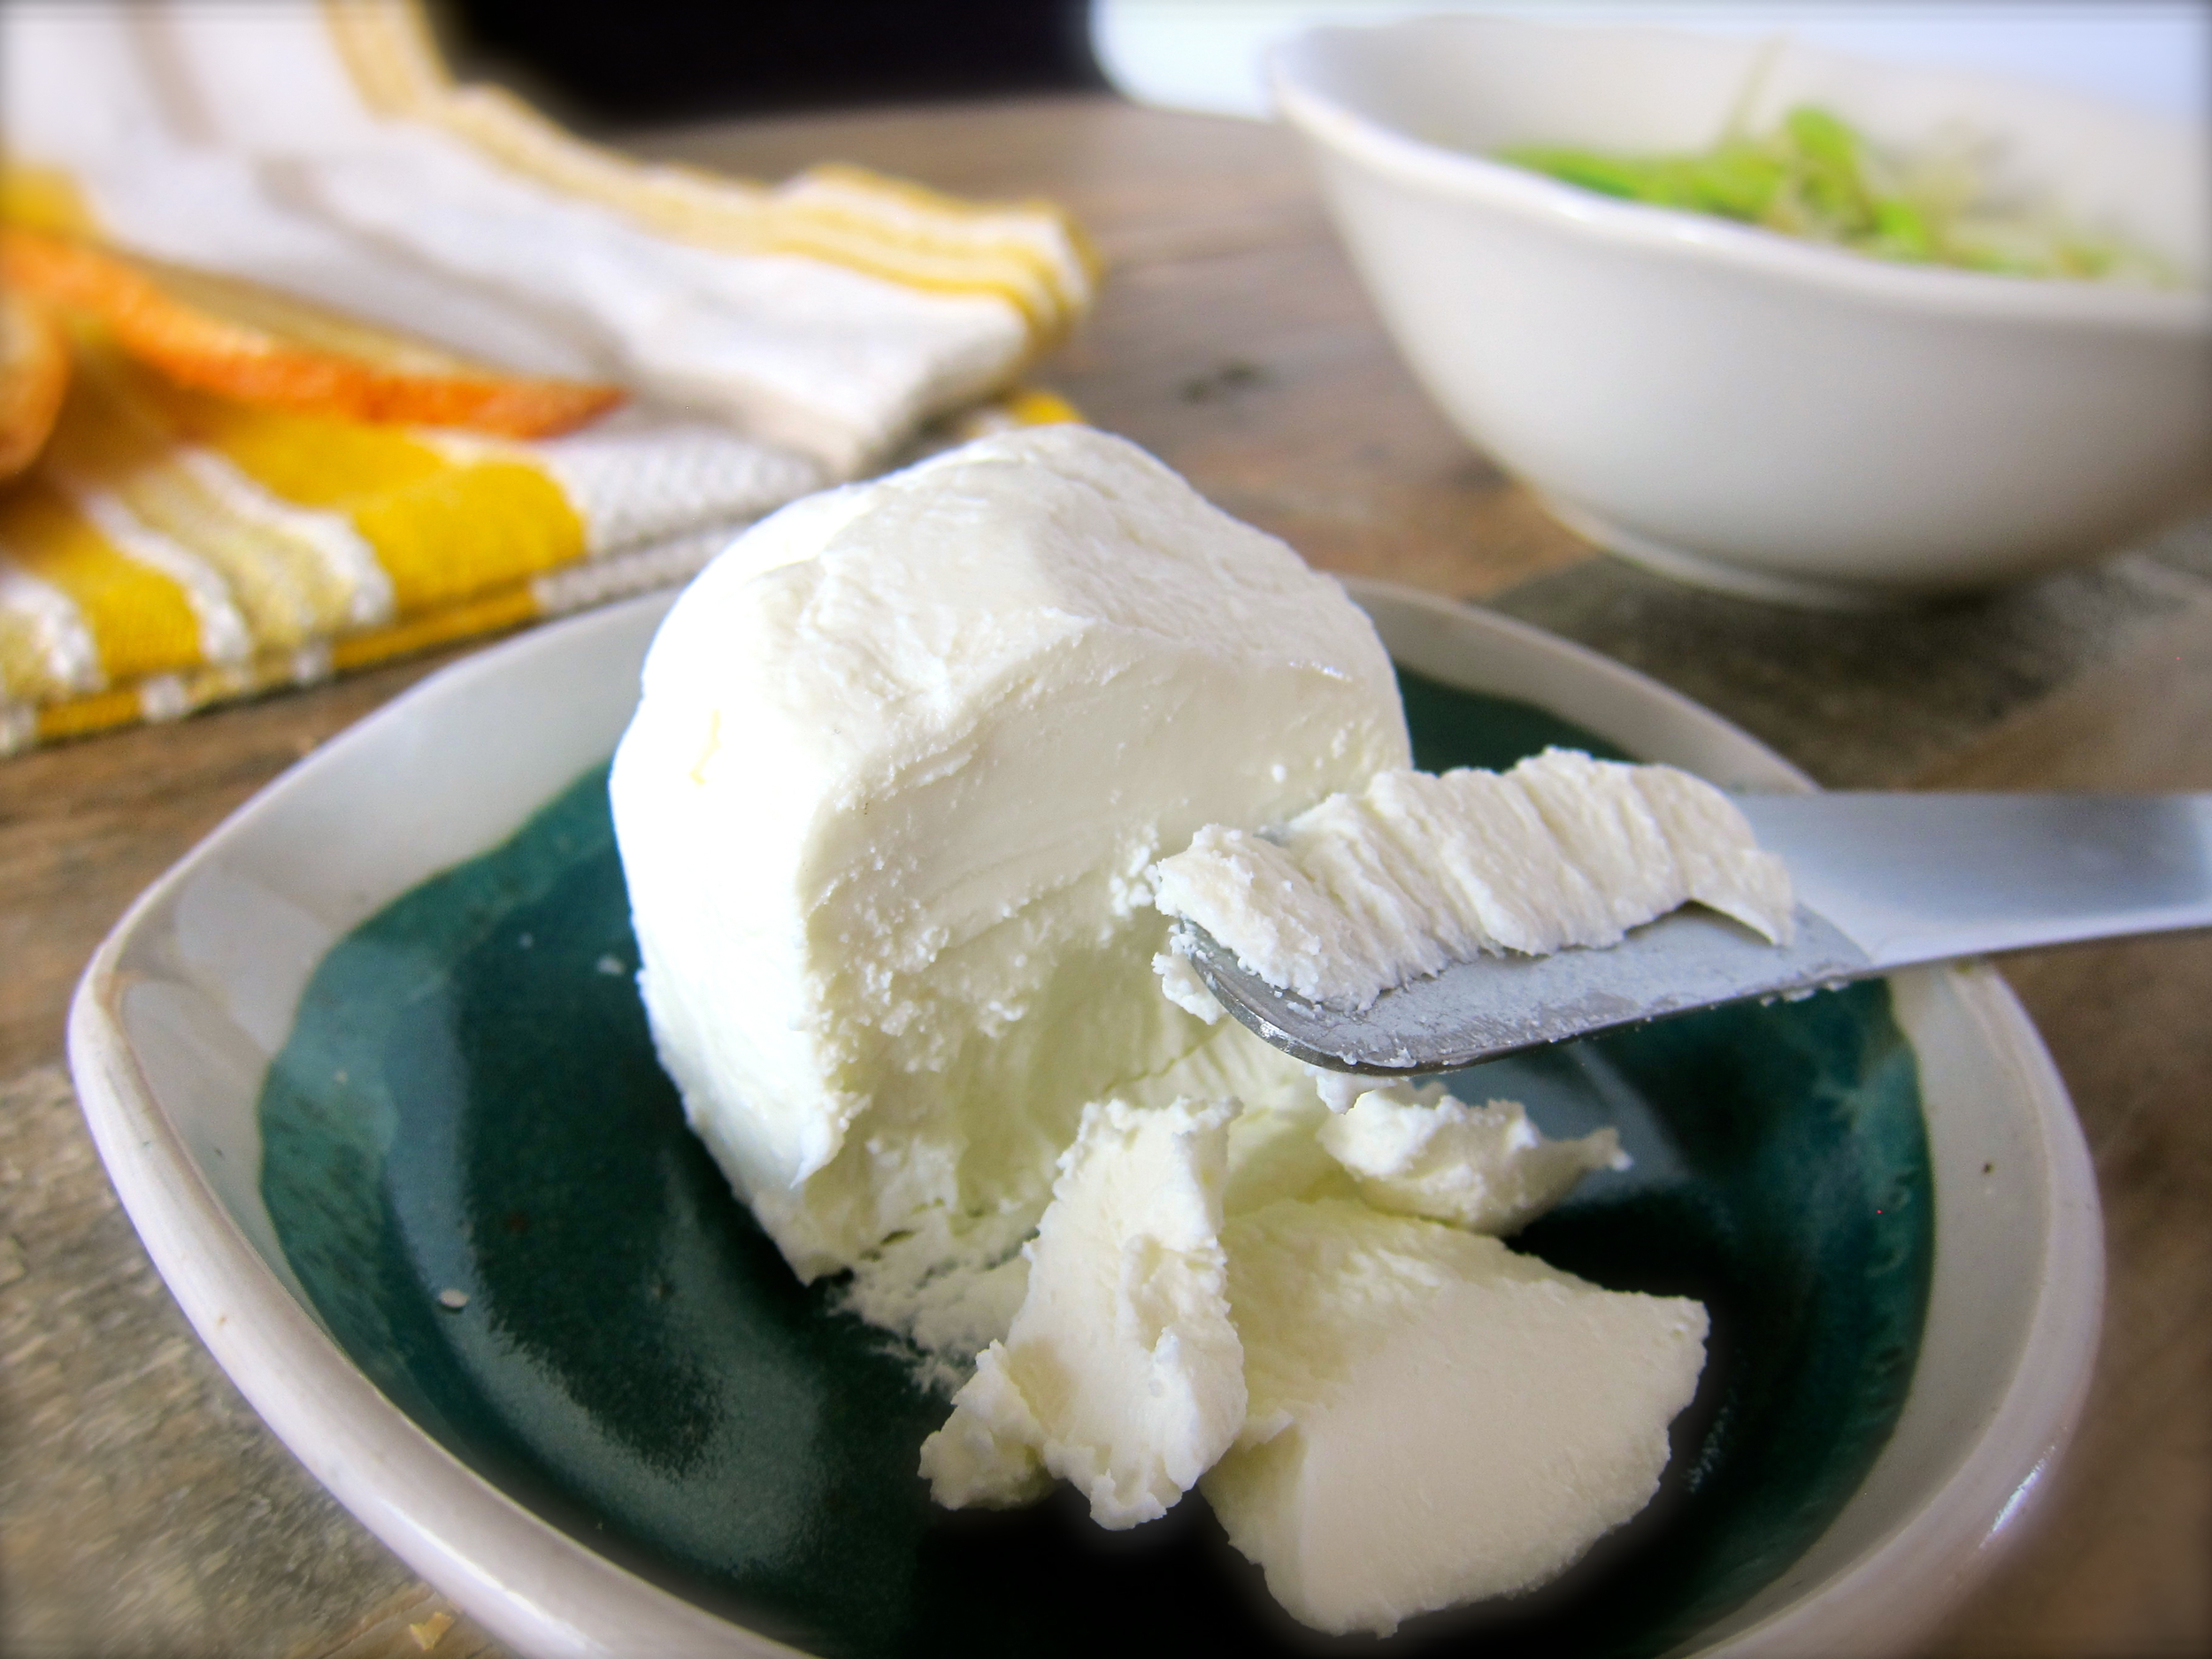
Chèvre
Good quality sea salt
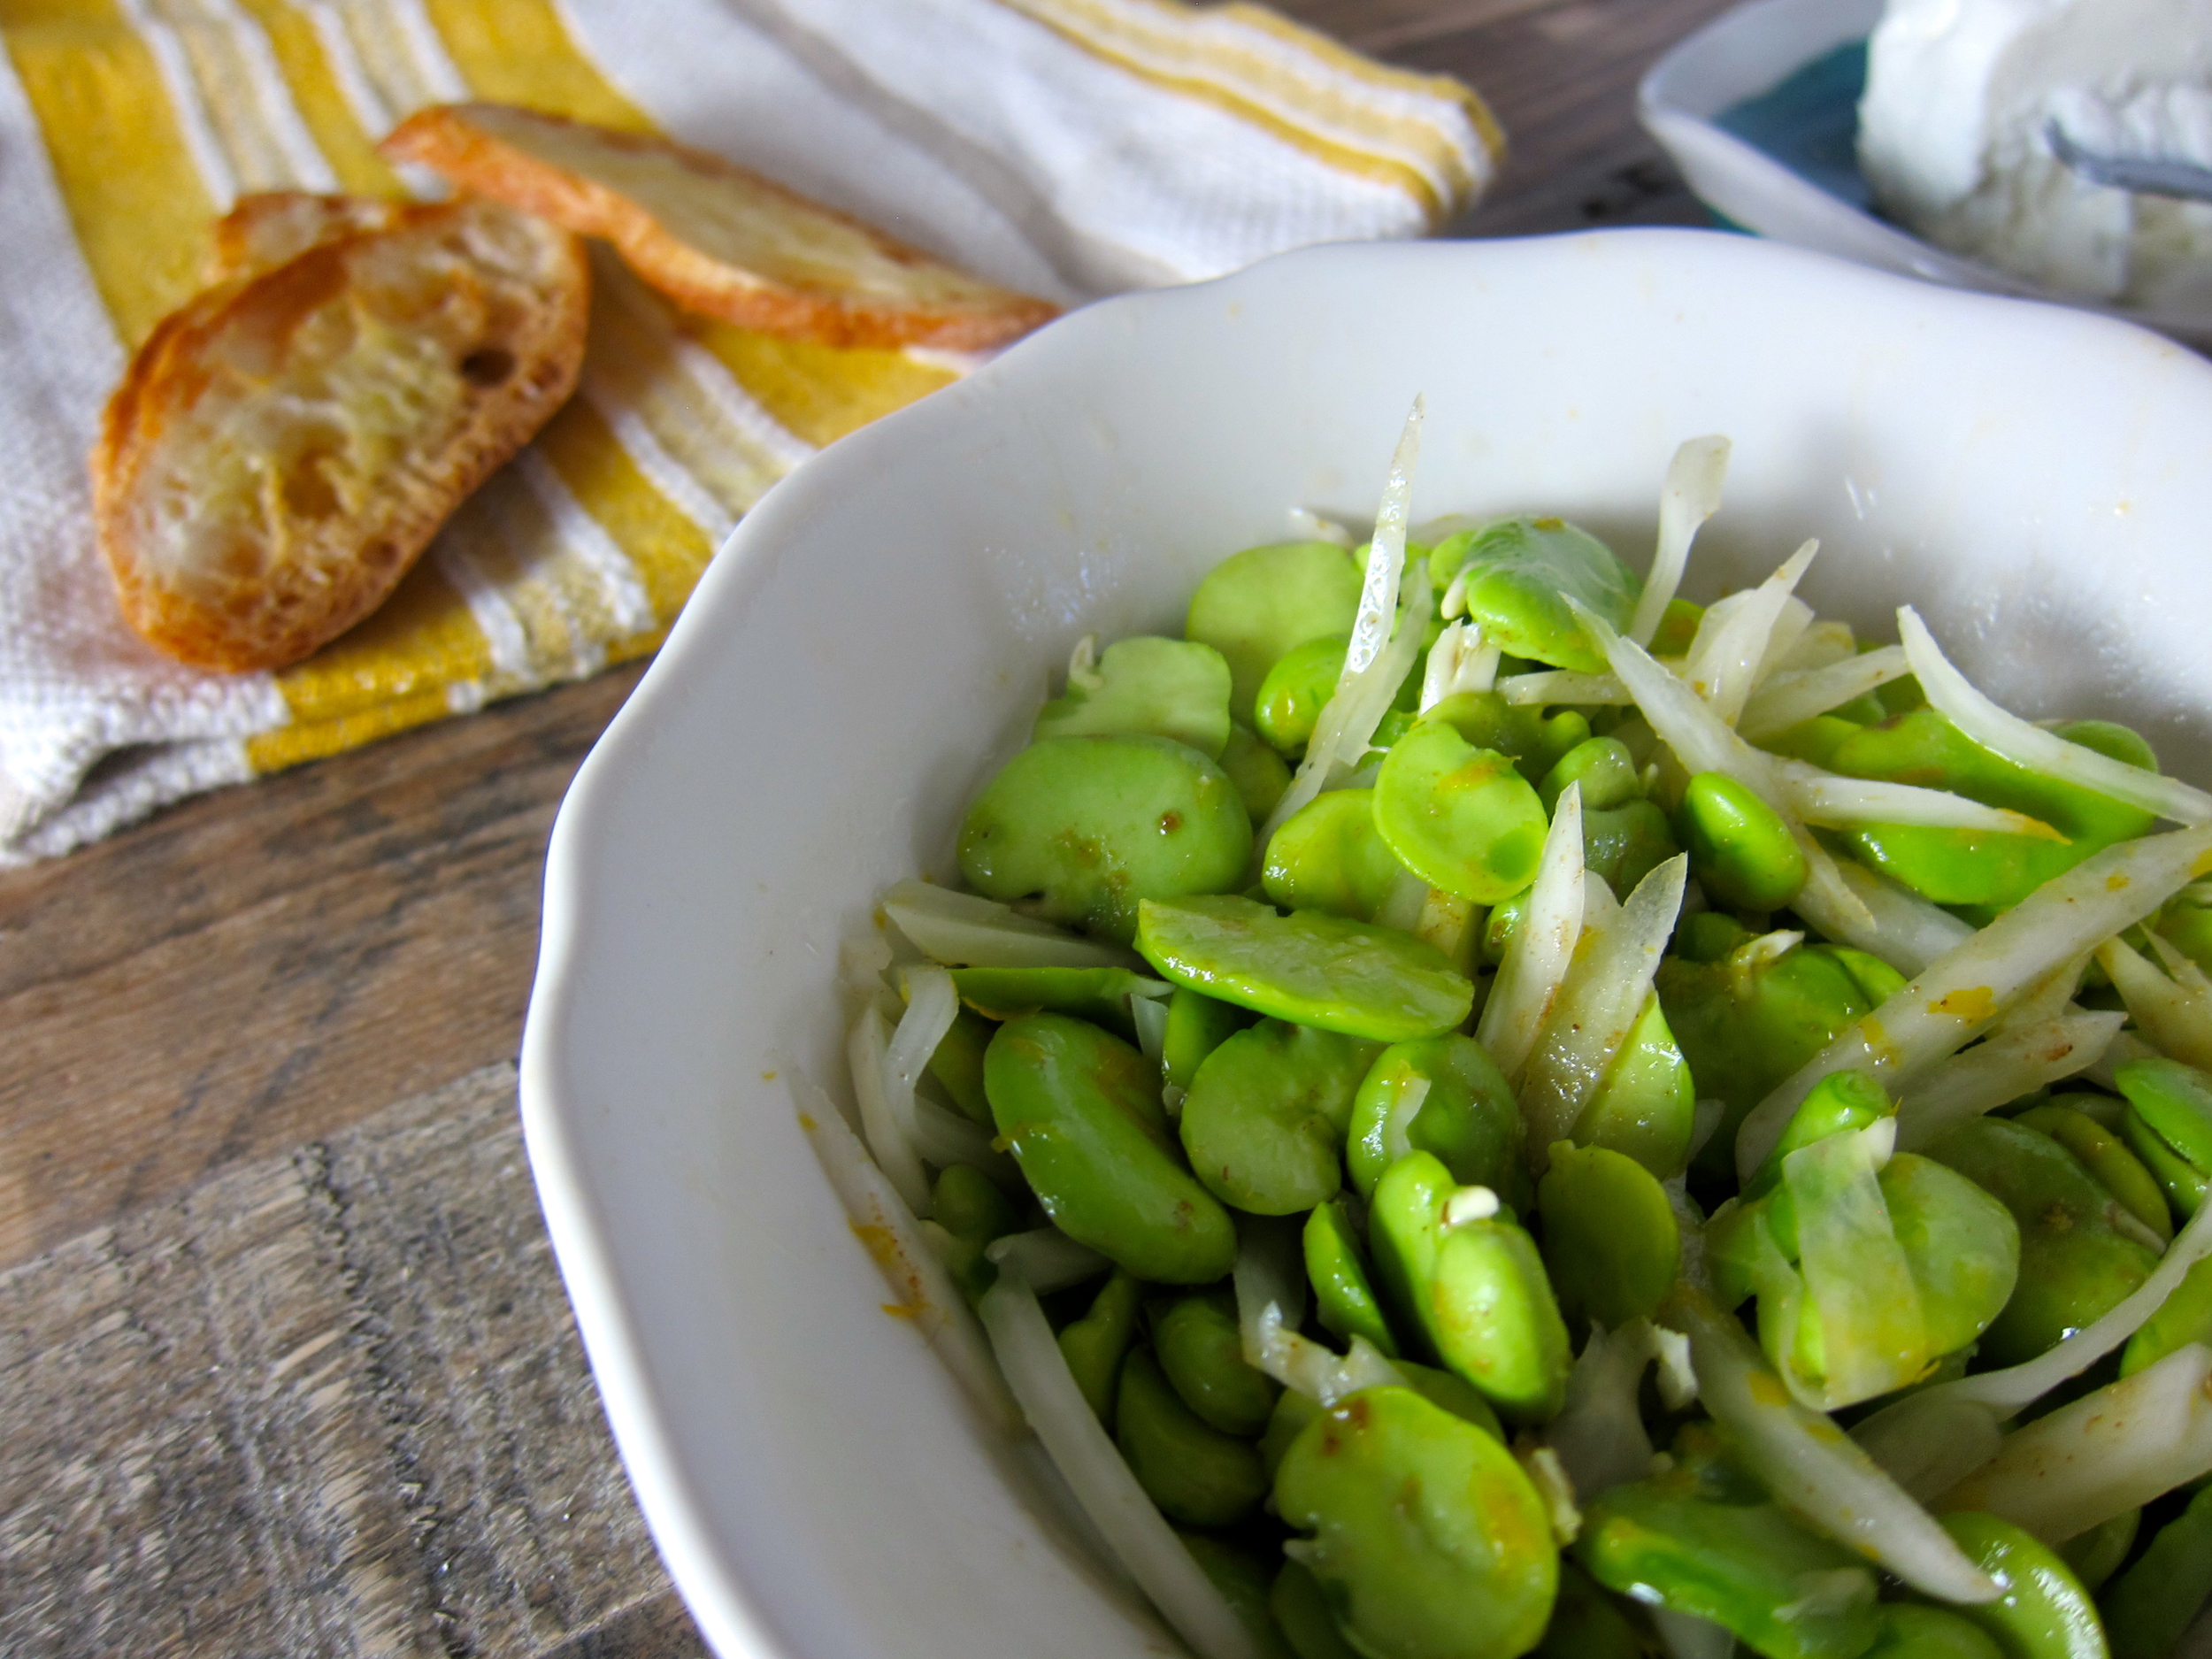
Toss 2 parts fava beans with 1 part fennel and lemon zest, and cumin to taste. Drizzle in enough olive oil to make glossy, but not too oily.
Spread chèvre on baguette slices, top with fava mixture, and sprinkle with sea salt.
* To Pickle Fennel:
Slice 1 fennel bulb into thin slivers and pack tightly into a pint jar.
Heat 1 cup white wine vinegar with 1/2 cup water, 2 tablespoons sugar, 1 teaspoon of sea salt, and herbs or spices of choosing (such as caraway and orange zest) and bring to a boil.
Allow brine to cool for 2 minutes, then pour into jar with fennel to cover completely. Cool to room temperature, seal with lid, and store in the refrigerator. Fennel can be eaten immediately and will keep well for up to 2 weeks.
Dandelion Greens Pesto
Put some wild in your pesto spread.
Put some wild in your pesto spread. The added dandelion greens make a lighter, bitterer tasting version of a classic cheese-free pesto. Up the ratio of greens to other ingredients if you desire an even lighter, less rich pesto. Makes about 3/4 cup.
1/2 cup raw pine nuts
1 bunch fresh basil leaves, plucked and chopped
3-4 tablespoons olive oil
1/4 - 1/2 teaspoon salt
2-3 cups chopped dandelion greens
Juice from 1/2 lemon
Combine pine nuts with basil, 3 tablespoons of olive oil, and 1/4 teaspoon salt in a food processor.
Once blended, incorporate dandelion greens and more oil and salt as needed to create desired texture and flavor. Blend in juice from 1/2 lemon.
Pesto may be frozen for up to 1 year, refrigerated for up to 1 week, or used immediately.
Dandelion Greens
Nature's bitter bounty.
Foraged dandelion is the “bread and butter” of wild greens. I am not exaggerating when I say any time I walk farther than a block in my neighborhood (and beyond) I come across delicious tufts of dandelion. Oh yes, people stare, but it’s worth coming home with the makings of a salad or ingredients to sauté with some garlic.
They’re rather bitter, which some don’t like but others, such as myself, greatly appreciate. If the bitterness is too much for you, try drizzling with lemon or vinegar.
Suggested uses: Any time you use greens such as in soups and savory porridge, salads, pesto, stir-frys, etc.
Dandelion Wine: Aged 6 months
Tasting summer.
Last June I made wine from foraged dandelion flowers that would otherwise be considered weeds. I read that in the darkest days of winter, some cultures will pull out the aged dandelion wine, usually on winter solstice, for a taste of summer. This idea intrigued me a sparked the impetus for a winter solstice party.
After 6 months, the wine had a beautiful golden color, lovely vegetal/pollen aroma and taste, and slight effervescence. Although it could use another few months of aging for a more balanced flavor, it’s definitely off to a great start. Until then!
Update in June 2014: I believe we waiting too long and the dandelion wine is now more of a vinegar! Noted for next time I make dandelion wine, at 6 months it tastes pretty good and should be tasted every month thereafter to determine when it's at its peak.
Full dandelion wine making process can be found here.
Homemade Kimchi
Kimchi state of mind.

Spicy and effervescent, there are many ways to make this naughty cousin to sauerkraut. I looked at a wide variety of recipes, took bits and pieces from all of them, and then kind of abandoned ship to do my own thing. Below is my basic proportion of ingredients, but I ended up making more chili paste than was needed to coat the kimchi, which is nice because I’ll save it for something else. As long as you keep things clean, soak cabbage in salt/use salt or salty substance (like fish sauce) in paste, and don’t leave it at room temp for too long, you’ll make a safe kimchi. So taste as you go and have fun with it. I can’t wait to use mine in stir-fried rice, with greens and eggs, and to attempt a kimchi pancake!
1 head of napa cabbage, chopped into 1-2” pieces (depends on how coarse you like your kimchi
2 large carrots, grated
1/2 cup grated daikon or radish
1 bunch green onion, chopped (all but very coarse dark green ends)
1/4 cup fresh chopped ginger, about 3” piece
1 small head garlic, peeled and chopped
1/4 cup + 1 tablespoon sea salt
3 tablespoons fish sauce
3 tablespoon chili powder (Korean preferred)
1 tablespoon cayenne
1/4 cup chopped fresh or about 7-11 small dried peppers/chilis, chopped (I had dried chinese peppers and used 9 of them)
1 tablespoons unrefined sugar
Put cabbage in large bowl and sprinkle with 1/4 cup salt. Cover with water, stir until dissolved and let sit 20 minutes. Remove and pat dry.
While cabbage is salting, blend all other ingredients but carrots, daikon, and green onion in food processor or blender until you form a paste.
Toss cabbage with carrots, daikon, green onion, and enough paste to coat (taste until of desired heat strength, recognizing that fermentation will bring out more complex flavors).
Place into large glass or ceramic vessel. Press down with (CLEAN) hands to allow juices to escape and if water does not completely cover cabbage, then use a clean stone or plastic bag filled with water to ensure it stays until water.
Seal jar/vessel and let ferment for 2-3 days, depending on weather (hotter temps will make for faster fermentation) and desired strength.
Move to refrigerator and enjoy for up to 5 weeks.


Cauliflower Flatbread
Herbal cruciferous goodness.
Trade in refined carbohydrates for a boost of antioxidants and fiber with this versatile side dish that can also be used as a pizza crust. Serves 4 as an appetizer.
3 cups cauliflower (about 1 medium head)
2 teaspoons olive oil, plus more for greasing baking sheet
1/2 cup shallot, minced (about 2 bulbs)
2 eggs
3/4 cup grated soft cheese, such as mozzarella or gouda
Herbs: 1 teaspoon dried herbs or 1/2 cup fresh minced herbs (or a combination of fresh and dried herbs such as thyme, rosemary, tarragon, chervil, basil, oregano)
1/8 teaspoon salt
1/4 teaspoon black pepper

Fresh basil is the perfect accompaniment.
Preheat oven to 375 degrees F. Steam cauliflower until soft (about 5 minutes) and drain completely. By hand or Using a fork, food processor or immersion blender, mince cauliflower until you have achieved a crumbly texture.
Cook shallot in 2 teaspoons of olive oil over medium heat until soft, about 3-4 minutes. Add shallot to cauliflower mix.
Stir 1/2 cup of the cheese and all of the herbs, salt, and pepper into the cauliflower mixture. Add eggs and mix in until a batter has formed.
Spread dough into a rectangle, about 1/4- to 1/2-inch thick, on top of a greased baking sheet and bake for 10-12 minutes or until set.
Turn oven to broil, scatter remaining cheese over top of cooked cauliflower bread and broil another 1-2 minutes, until golden brown. Allow bread to cool slightly, slice, and serve. Goes well with a dipping sauce such as romesco, marinara, or pesto.
The Danish Summer cocktail
Not just for old Scandinavian men - but they'll drink it too.

Yes - Denmark does have a summer. It's similar to June in the Bay Area, but with about 4 hours of darkness and even more revelry on a warm, sunny day. This cocktail was created during my time at the Nordic Food Lab for a staff get-together (complete with amazing food, of course, including fire roasted mussels and pan au tomaquet with ample garlic) and was well-received. Most importantly, I received major cred from the native Danes of the house for using "old man alcohol", aquavit. Who knew? Guess it just runs in my blood!
“Rosa Rugosa, or beach roses, can be found on most coastlines. They have a vibrant pink color and a beautiful floral aroma.”
2 parts aquavit (I had Aalborg)
1 part cranberry juice (good quality, but the kind with added sugar, as this cocktail does require some sweetness)
1 part cold water
Cracked black pepper (okay, maybe that part's not Scandinavian)
Foraged beach rose (or other edible flower garnish)
Stir or shake aquavit, cranberry, and water and pour over ice. Grate black pepper over each drink and garnish with beach rose.


